
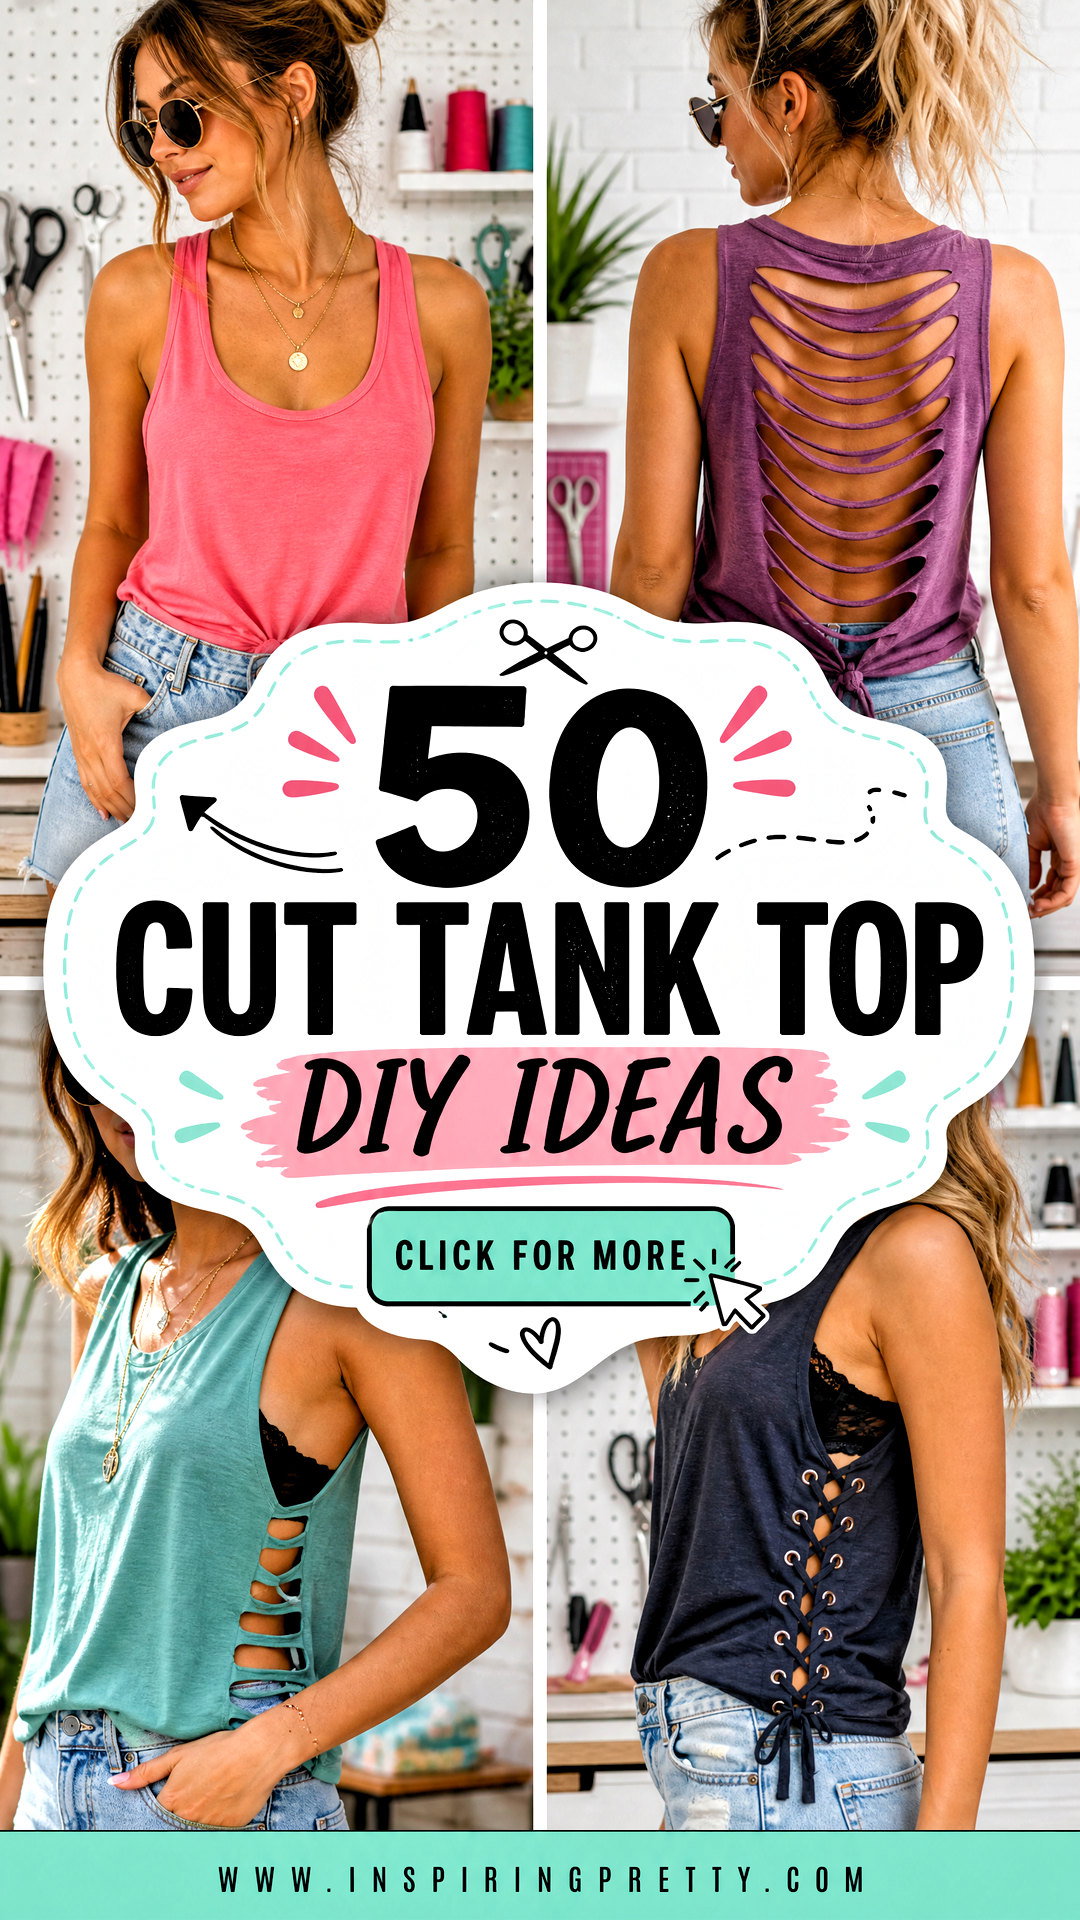
Old tanks and oversized T-shirts can become fresh wardrobe favorites with a few careful cuts. These 50 cut tank top diy ideas cover simple crops, open backs, braided details, fringe, lace-up panels, and bold geometric designs. Start with clean, prewashed knit fabric, sharp fabric scissors, washable chalk, a ruler, and a tank that already fits well as an optional template. Mark every line before cutting, work on a flat surface, and remove less fabric than you think you need. You can always trim more after trying the top on. These practical preparation steps help prevent uneven armholes, crooked necklines, and an overly revealing fit. () Pair each finished tank with comfortable bottoms, supportive layers, and simple accessories using these 50 cut tank top diy ideas.
1. Classic Scoop Neck DIY Tank Top
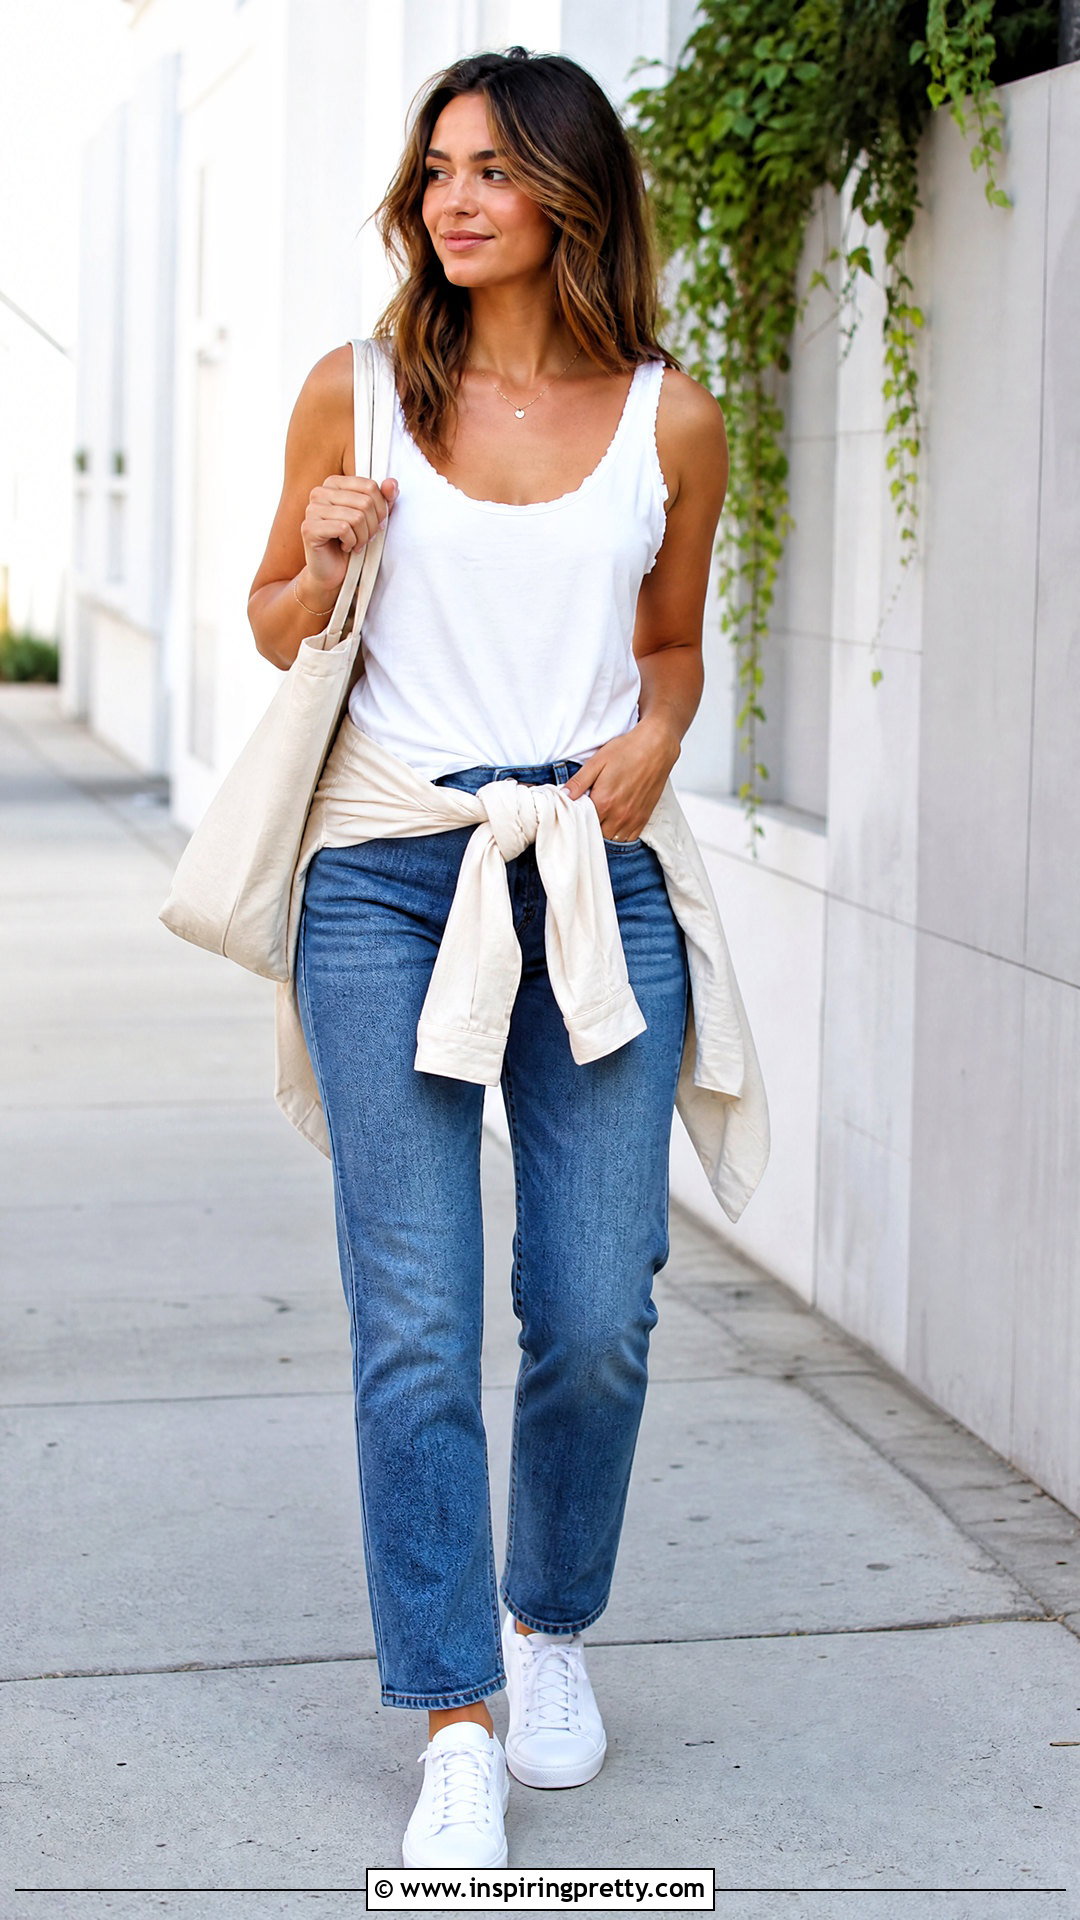
A classic scoop-neck tank is one of the easiest transformations for a plain T-shirt. Lay the shirt flat and cut away both sleeves just inside their seams. Next, sketch a shallow curved neckline with washable chalk, keeping the back neckline higher than the front. Cut through the front layer separately so you do not accidentally deepen the back. Gently stretch the raw edges to encourage the jersey fabric to roll inward. Style the finished tank with straight-leg jeans, clean white sneakers, a canvas shoulder bag, and a lightweight button-down tied around the waist. This balanced outfit works for casual errands, relaxed weekends, or outdoor gatherings. For more coverage, keep the armholes close to the original sleeve seams and wear a fitted camisole underneath.
2. Cropped Raw Hem DIY Tank Top
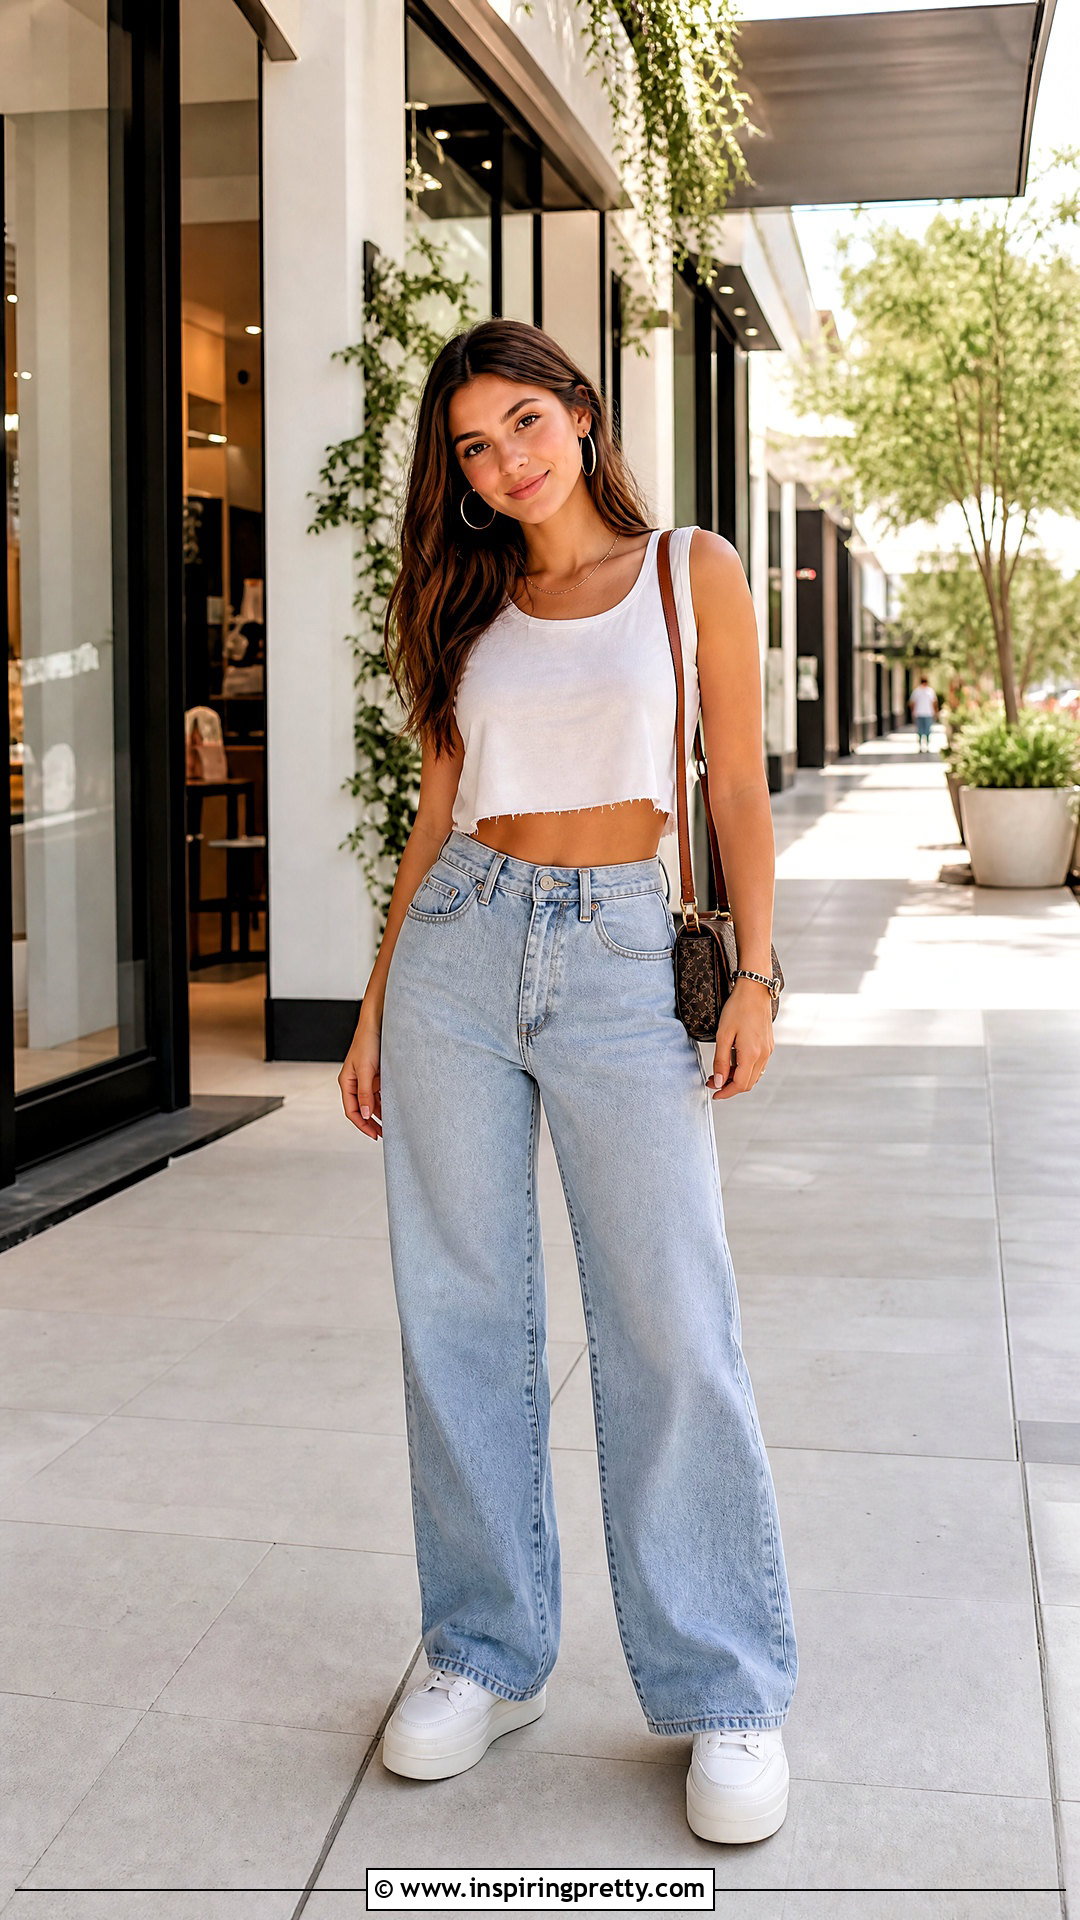
Want to update a long tank without changing its neckline? A raw cropped hem creates an easy, modern silhouette while preserving the original upper fit. Try the tank on and mark the desired length, remembering that the fabric may roll upward after cutting. Remove the tank, measure evenly from the bottom, and draw a straight guideline across the front and back. Cut slowly through both layers, then stretch the new edge gently for a soft rolled finish. Pair this DIY crop tank with high-waisted wide-leg jeans, platform sneakers, a compact crossbody bag, and simple hoop earrings. The higher waistband balances the shorter hem and makes the outfit comfortable for everyday wear. Save the removed fabric for ties, wraps, or braided details on another project.
3. Deep Armhole DIY Muscle Tank
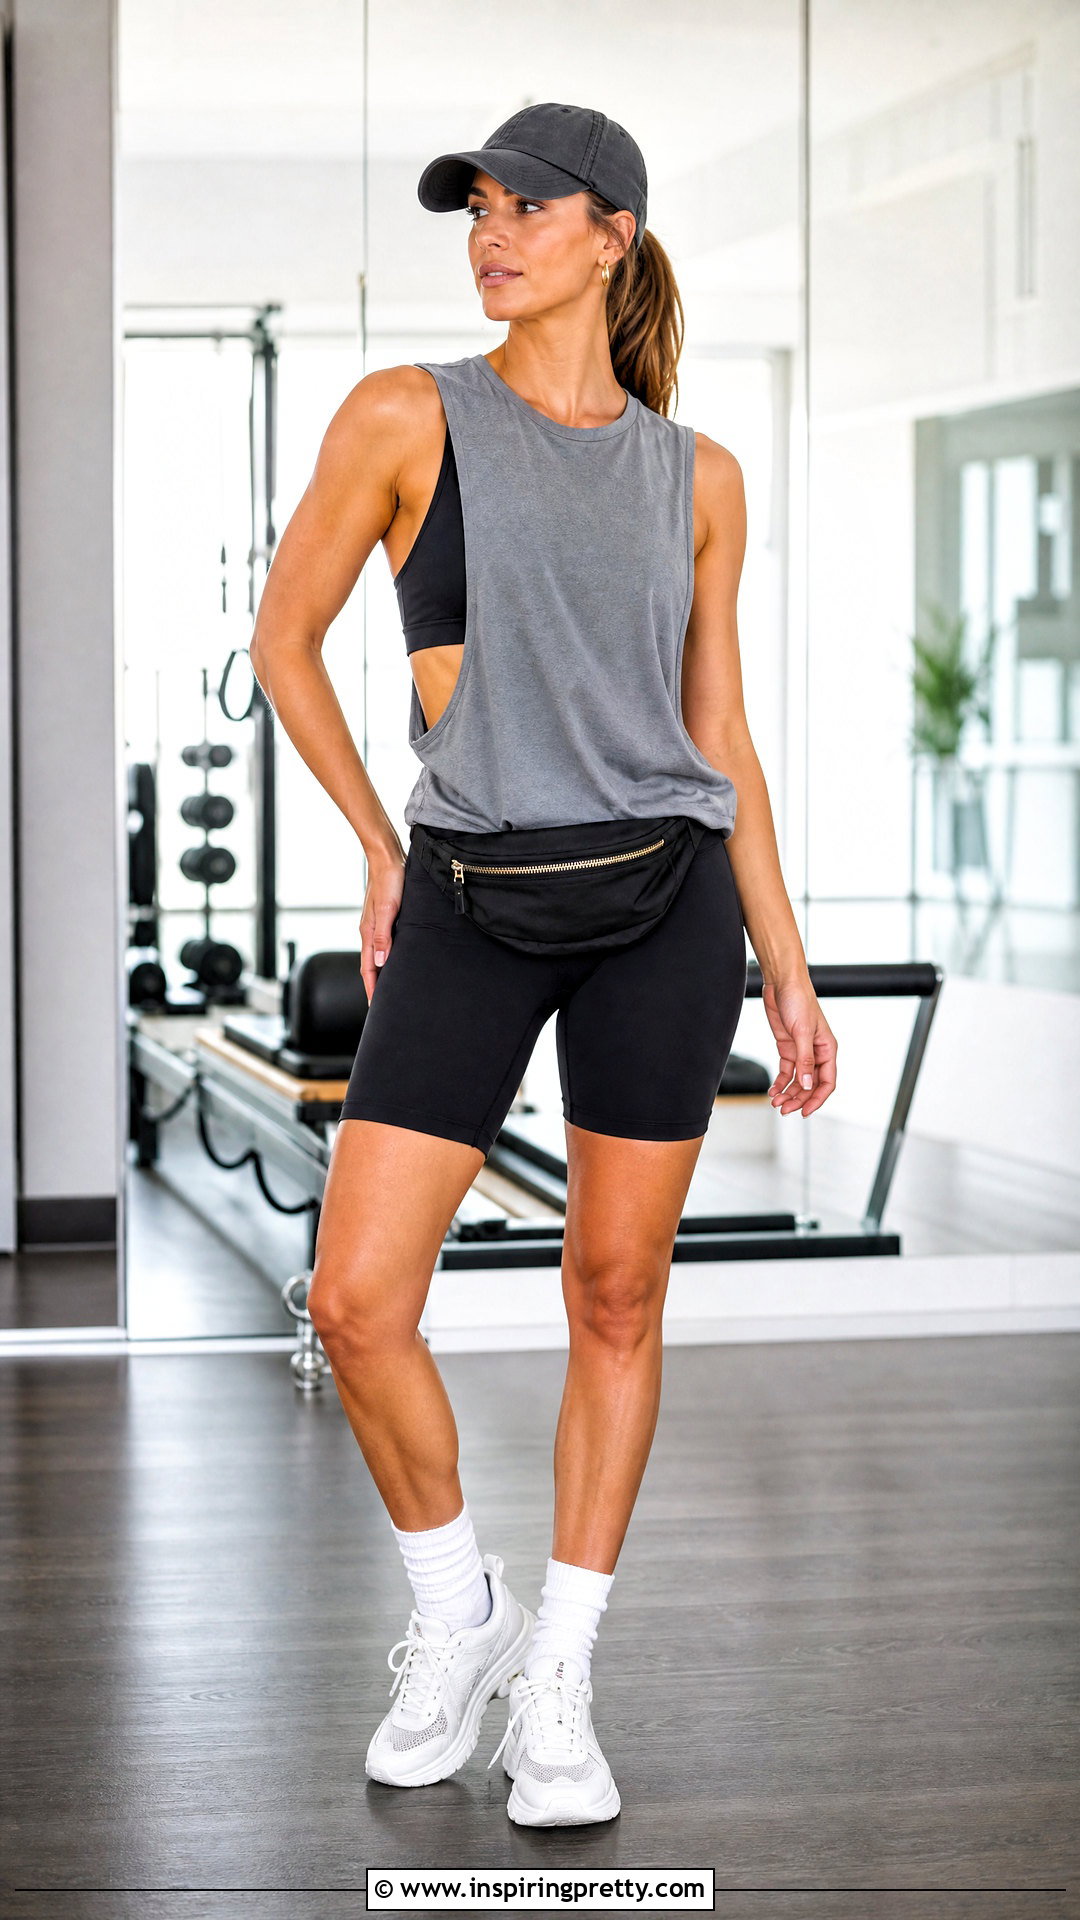
A deep-armhole muscle tank gives an oversized T-shirt a relaxed, sporty shape. Begin by removing the sleeves, cutting from just below each underarm toward the shoulder. Keep the shoulder panels wide enough to support the shirt and avoid cutting too close to the neckline. Fold the shirt vertically after completing one side, then use that opening as a guide for the second armhole. This helps both sides look balanced. Wear the finished tank over a fitted contrast sports top and pair it with bike shorts, crew socks, chunky sneakers, and a zippered belt bag. The layered outfit is practical for light workouts, walks, or casual summer plans. Test the depth frequently because the armholes will appear larger once the fabric edges curl.
4. Racerback DIY Tank Top
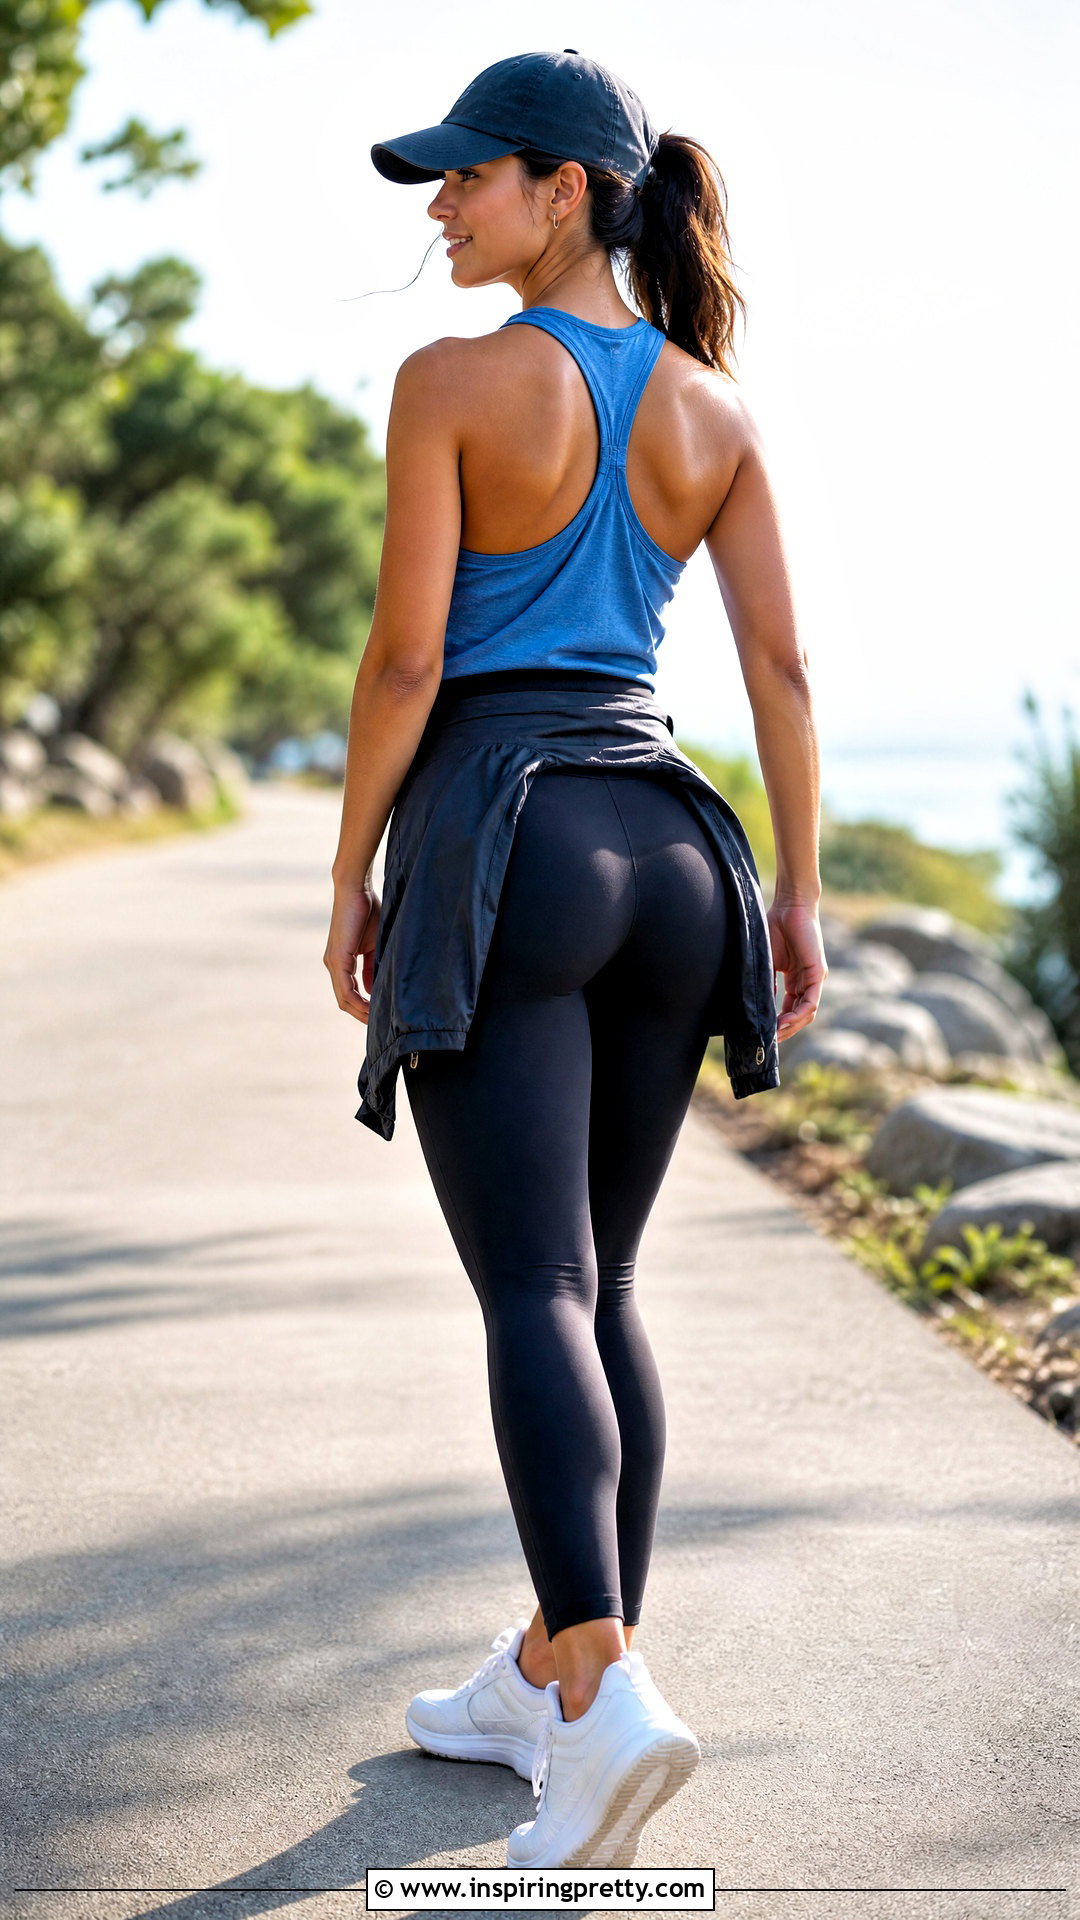
The racerback cut is a practical choice for exercise shirts and hot-weather outfits. First, remove the sleeves and shape the front armholes. Turn the shirt over, then draw curved lines that angle inward from the lower armholes toward the center of the upper back. Cut one side, fold the tank in half, and trace it to create a symmetrical second side. Leave a sturdy strip of fabric between the shoulder blades. Complete the outfit with high-rise leggings, supportive athletic sneakers, a baseball cap, and a lightweight jacket carried at the waist. A fitted sports layer underneath keeps the open back comfortable and secure. If you are new to cutting, begin with conservative curves and deepen them only after checking the tank in a mirror.
5. T-Back DIY Tank Top
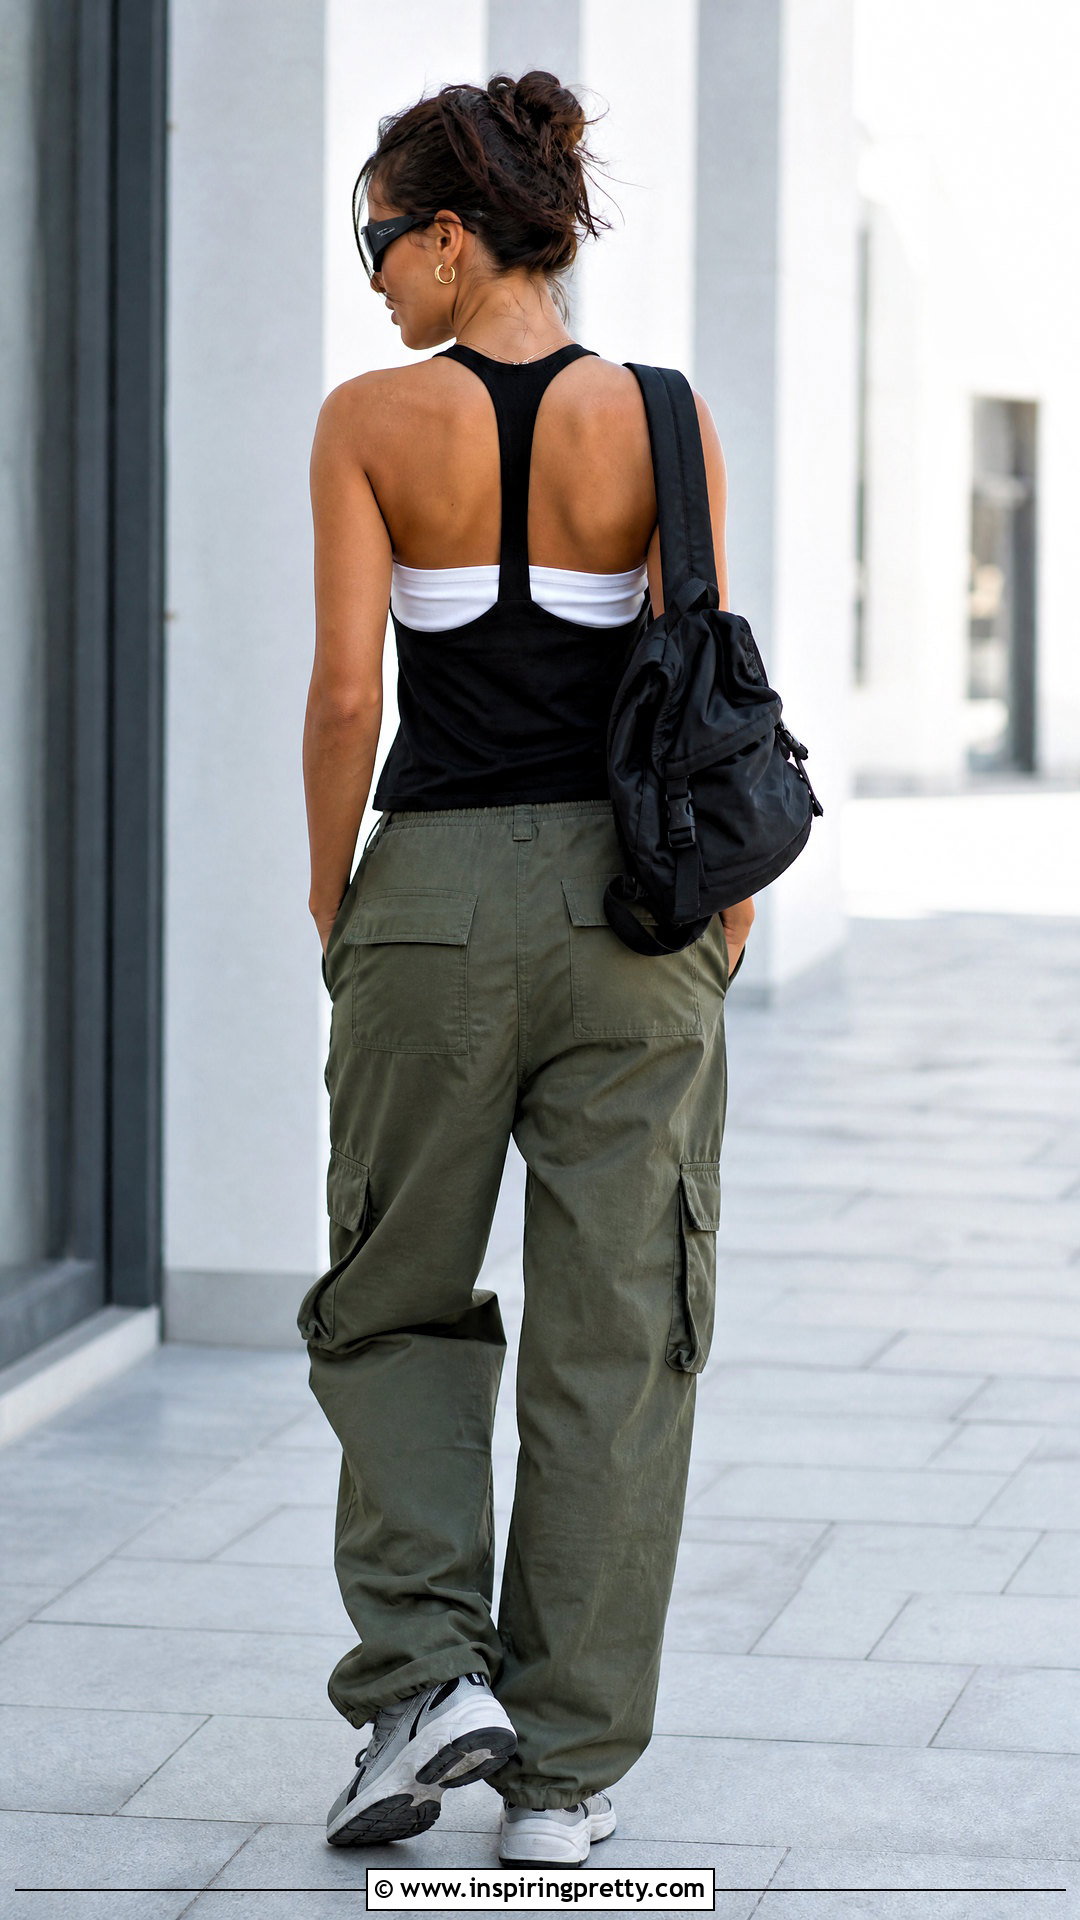
A T-back design creates a narrower back than a traditional racerback while keeping the front simple. Remove the sleeves and widen the armholes gradually. On the back, mark two long curved lines that travel toward a narrow vertical strip beneath the collar. Cut outside your markings so you can refine the shape later. The remaining fabric should resemble a clear T without feeling thin or fragile. Style this tank with relaxed cargo pants, retro sneakers, a small nylon backpack, and sporty sunglasses. Wear a close-fitting layer underneath if the back or sides expose more than expected. This transformation works especially well with oversized graphic shirts because the front artwork remains visible. Reinforce the narrow center strip with a few stitches if the knit fabric feels lightweight.
6. Halter Neck DIY Tank Top
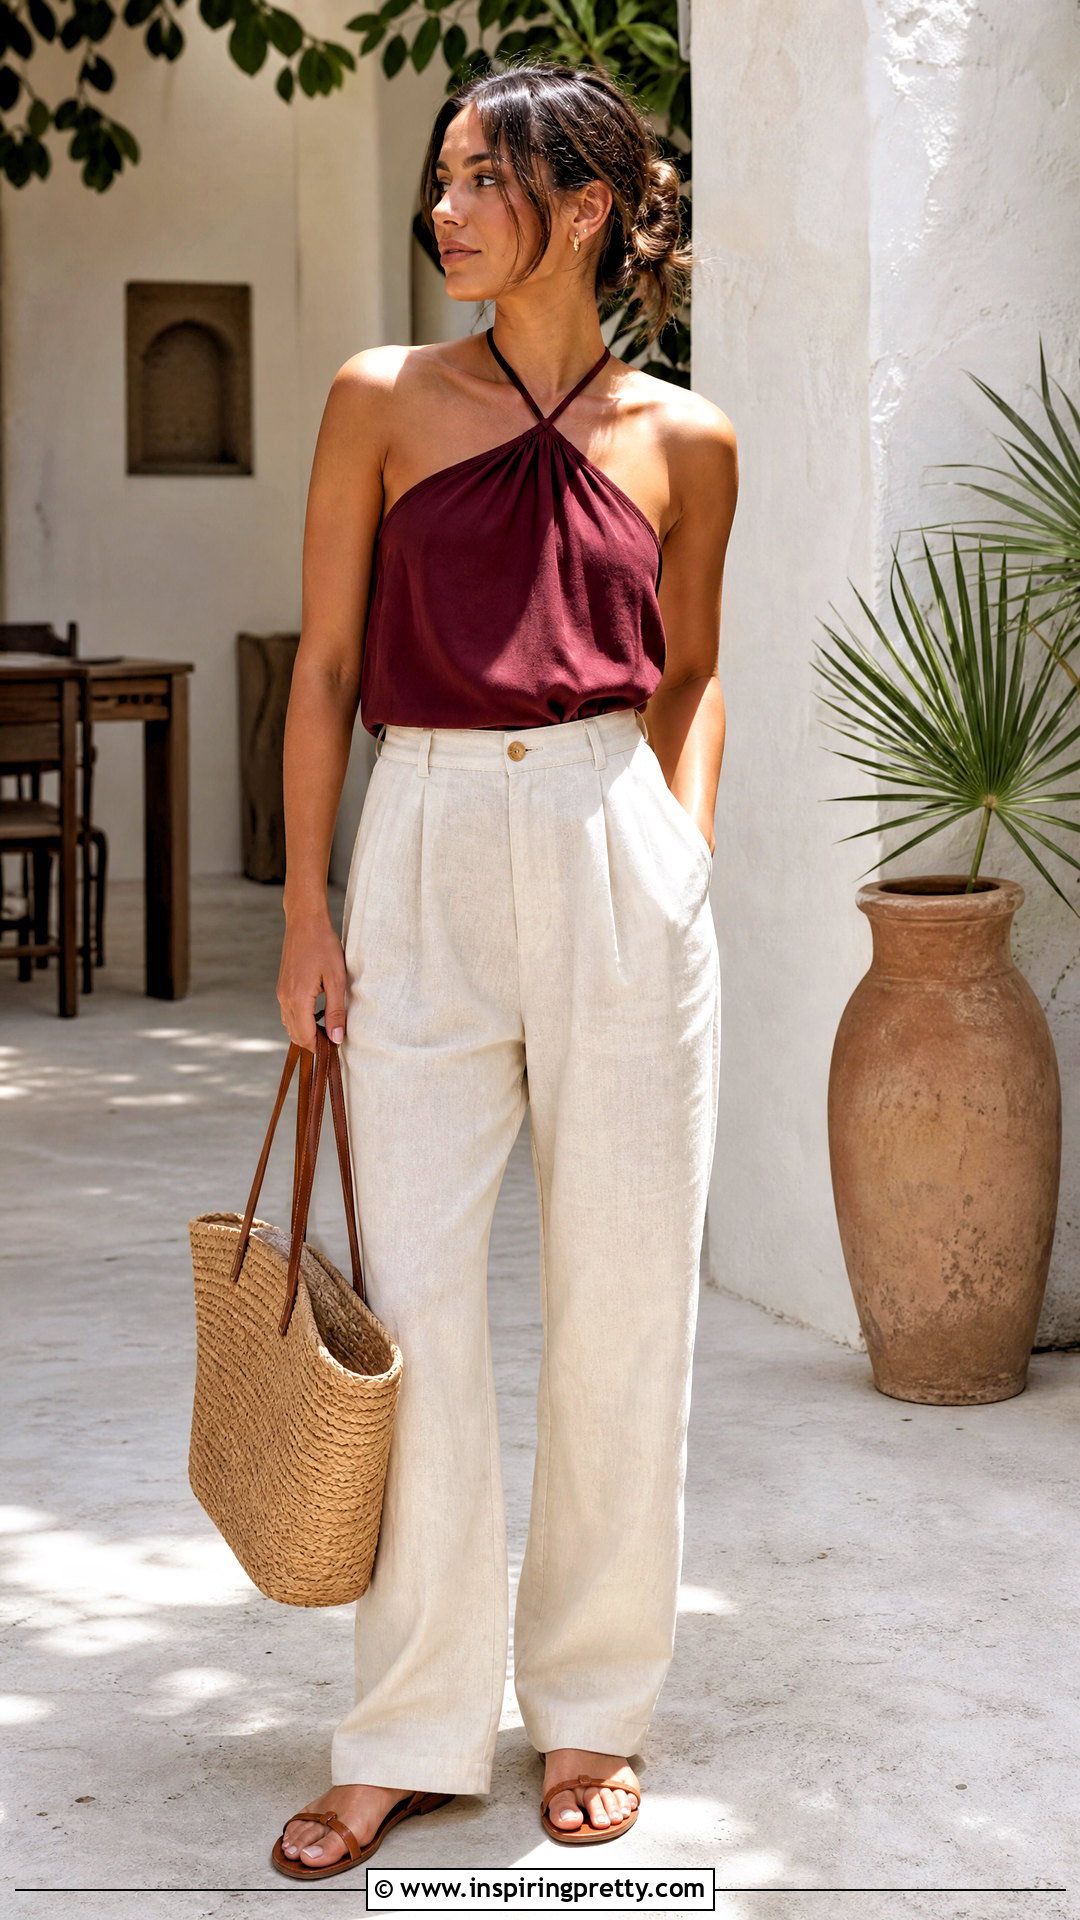
Transform a basic tank into a halter silhouette by reshaping the shoulders and upper back. Mark diagonal lines from the front underarms toward the neckline, leaving enough fabric around the neck for comfortable support. On the back, cut horizontally below the shoulder blades, but preserve two upper straps that can wrap or tie securely. Test the neckline before trimming the straps shorter. Build a polished summer outfit with high-waisted linen pants, flat leather sandals, a woven tote, and small stud earrings. A fitted layering tank can provide extra coverage beneath open sides or a low back. Avoid making thin ties from weak, worn fabric because they may stretch. If necessary, fold and stitch the strap edges or reinforce them with saved fabric strips.
7. One Shoulder DIY Tank Top
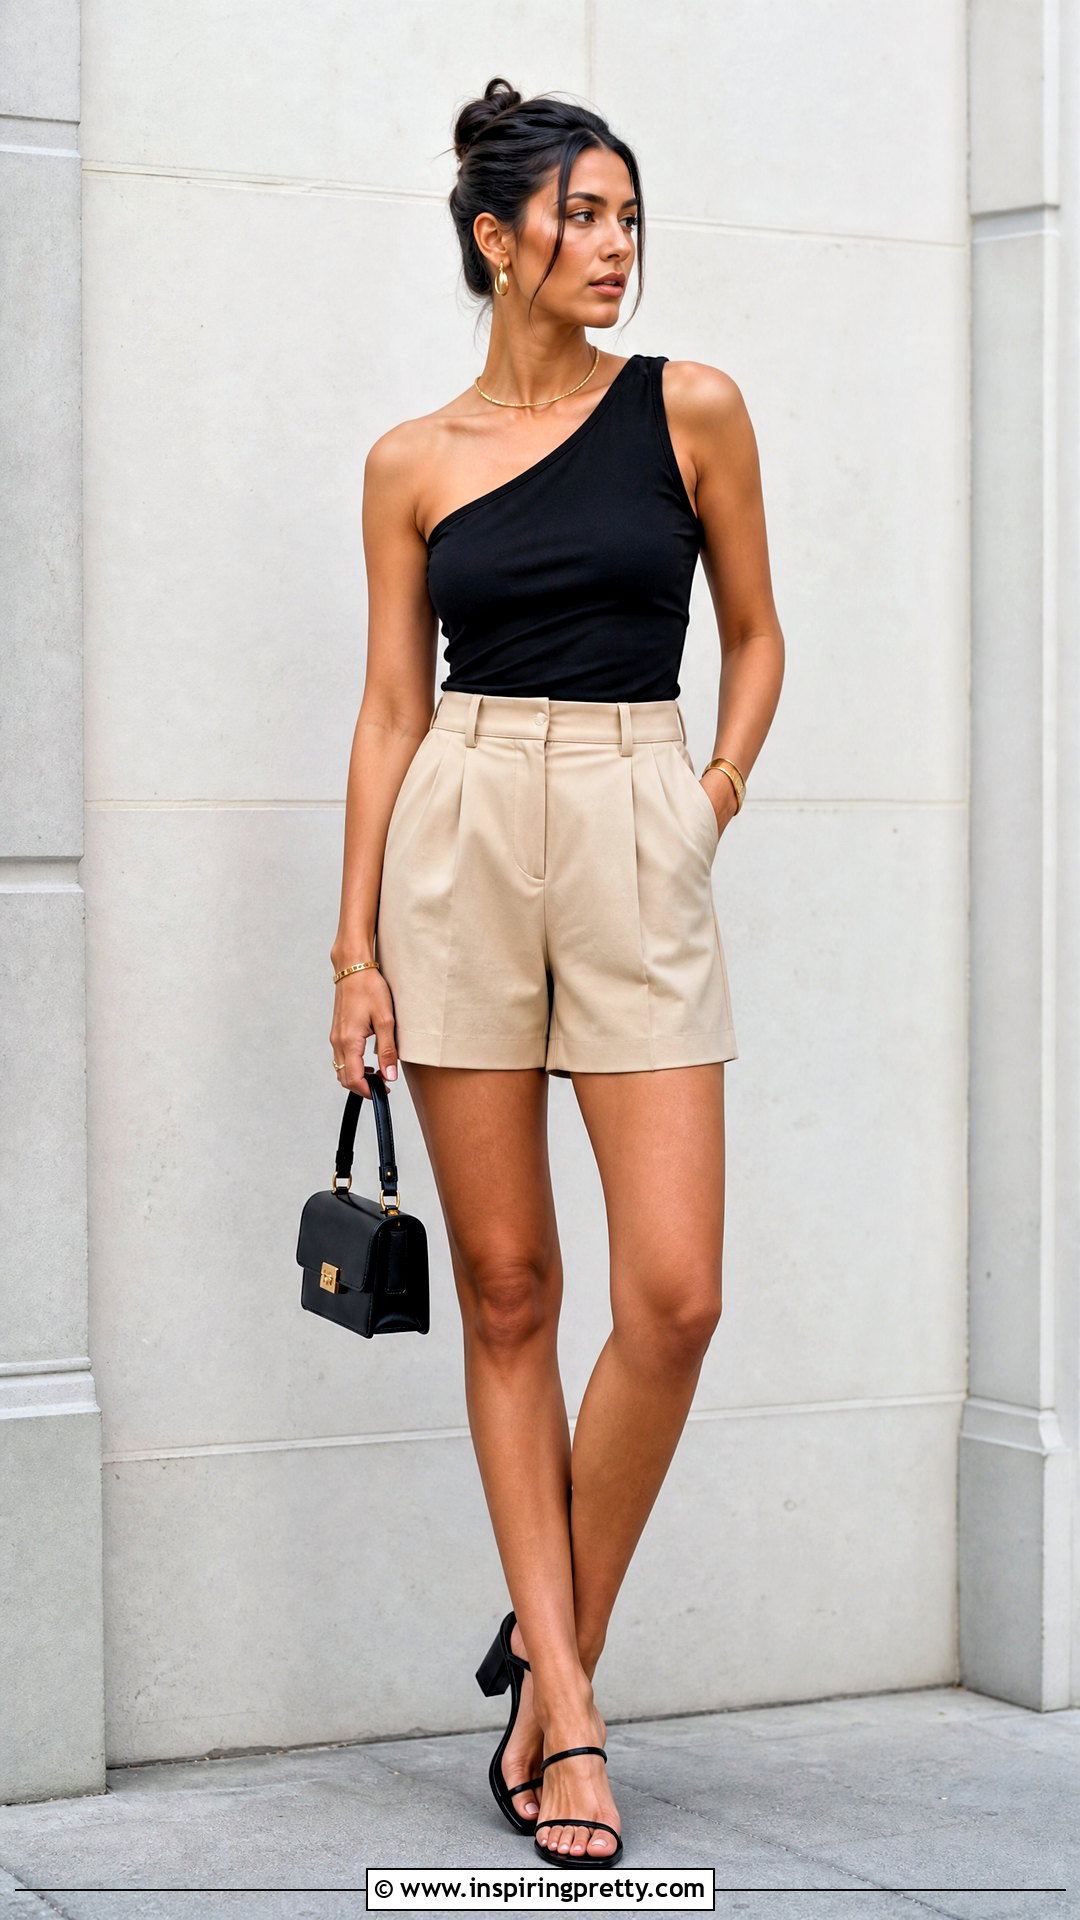
A one-shoulder cut turns a simple fitted tank into an asymmetrical statement piece. Put the tank on and mark where the diagonal neckline should begin and end. After removing it, lay it flat and draw a smooth line from one side of the neckline to the opposite underarm area. Cut through the front and back carefully, keeping the remaining shoulder strap wide enough to stay secure. A narrow stitched hem can make the neckline more polished, although a raw edge suits casual jersey. Pair the top with tailored high-waisted shorts, low block-heel sandals, a structured mini bag, and understated metallic jewelry. The streamlined bottoms let the angled neckline stand out. Before making the final cut, move your arms to ensure the planned opening will still provide comfortable coverage.
8. V-Neck DIY Tank Top
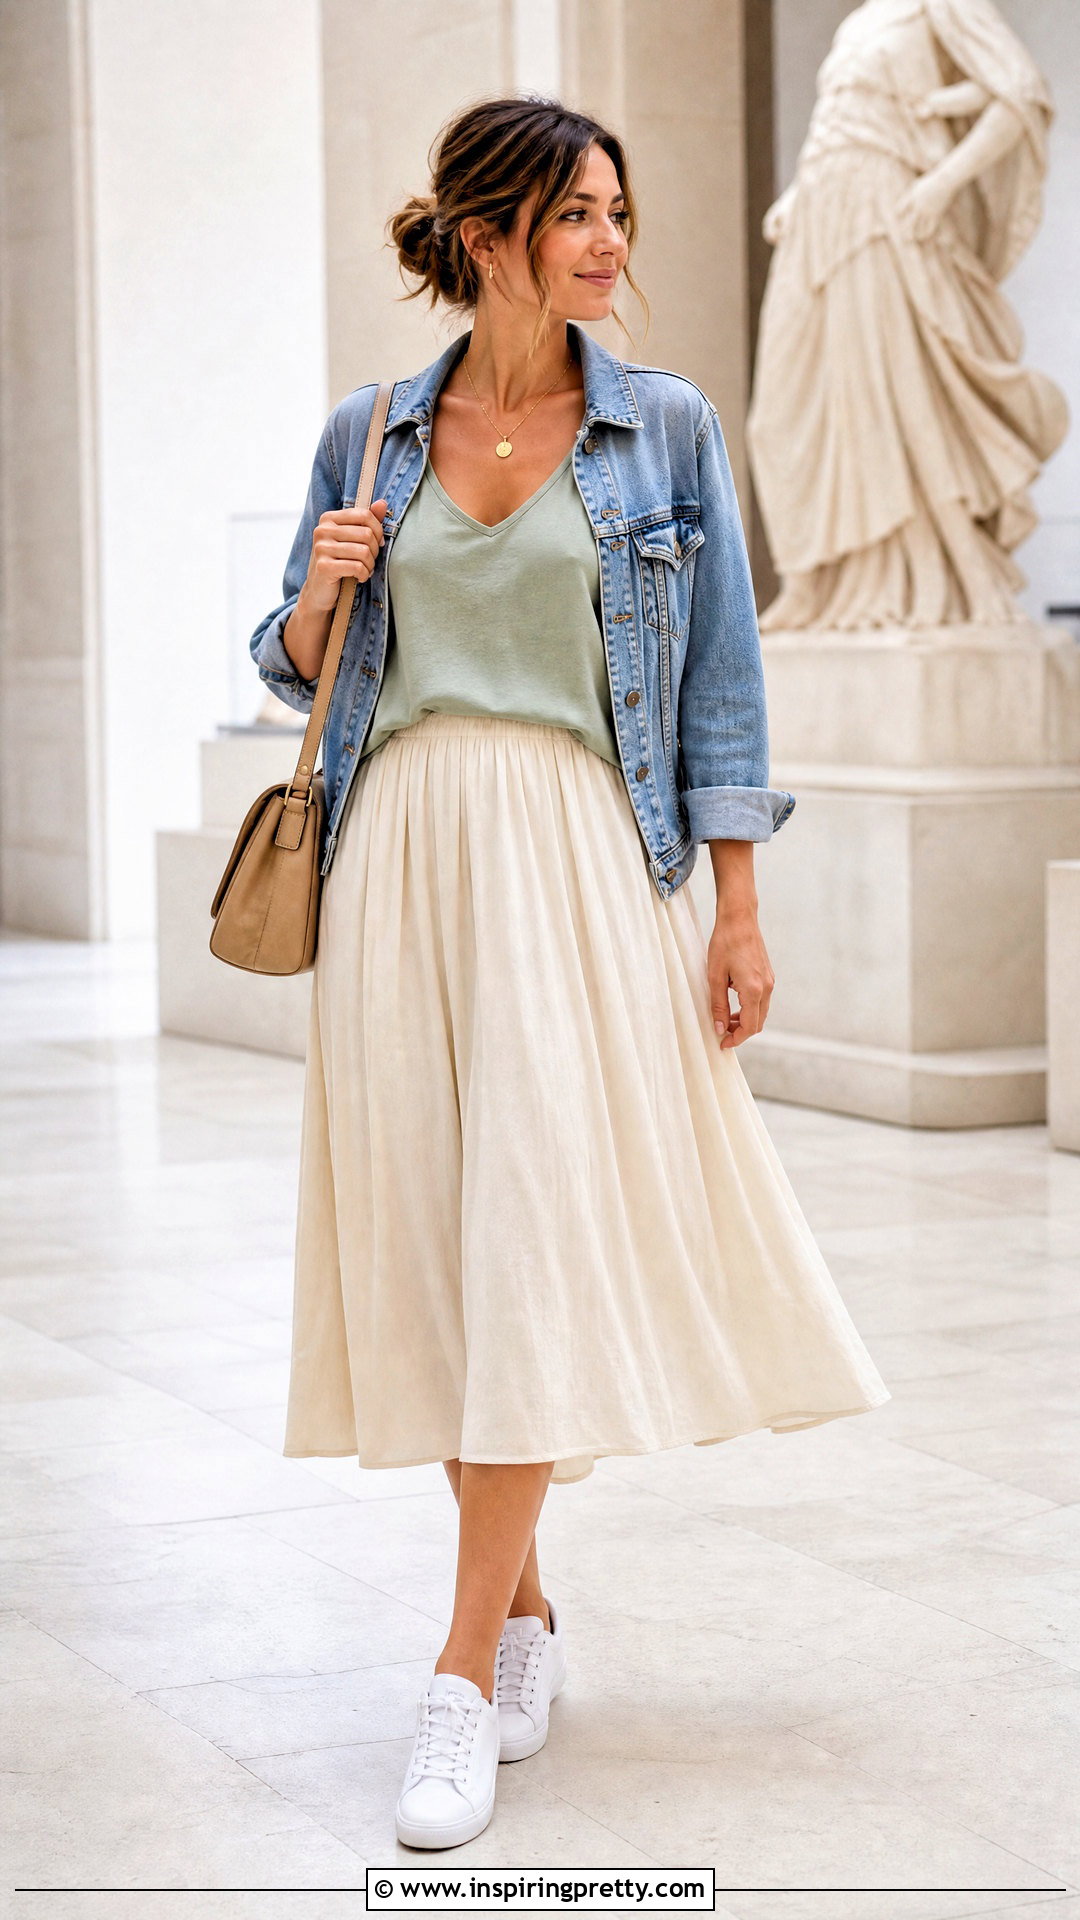
A clean V-neck can make a crew-neck tank feel lighter and more open. Fold the front of the tank vertically and mark the desired V depth at the center. Draw a diagonal line from that point to the neckline near each shoulder, making sure you do not cut the back layer. Open the tank and refine the two sides until they meet evenly. Keep the V shallow for everyday coverage or wear a fitted camisole underneath a deeper version. Complete the look with a flowing midi skirt, white low-top sneakers, a denim jacket, and a simple pendant necklace. The long necklace can echo the neckline without overwhelming it. Stretch the cut edge lightly, but do not pull the V point aggressively because that area can weaken or distort.
9. Square Neck DIY Tank Top
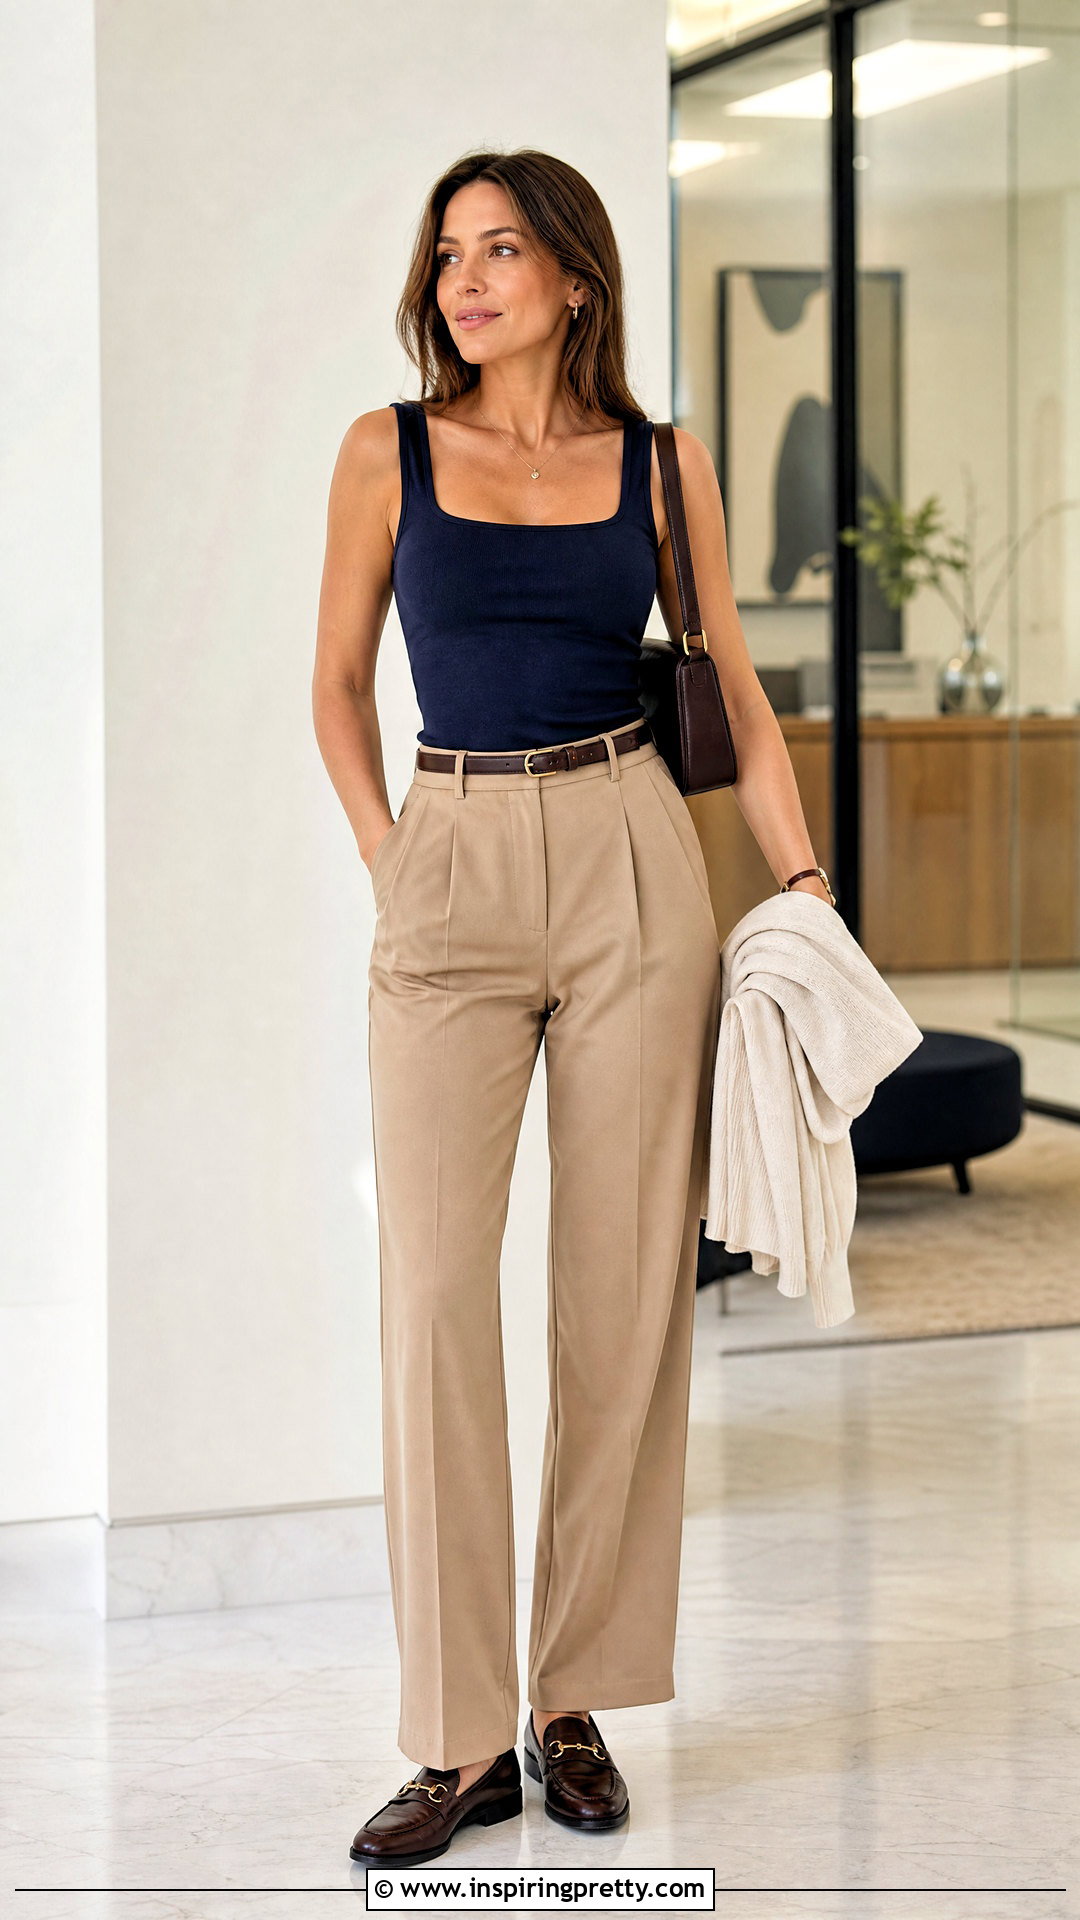
A square neckline offers a structured alternative to rounded cuts. Use a ruler and washable chalk to mark a horizontal line across the upper chest, then add two short vertical lines toward the existing neckline. Round the inside corners slightly because sharp corners can stretch or tear. Cut only the front layer and check the depth before making adjustments. For a neat outfit, wear the square-neck tank with pleated trousers, loafers, a slim belt, and a structured shoulder bag. A lightweight cardigan adds coverage without hiding the neckline. This shape works best on a fitted or medium-weight tank that can hold a defined edge. If the fabric curls excessively, turn the raw edge inward and secure it with a narrow stretch stitch or fabric-safe fusible tape.
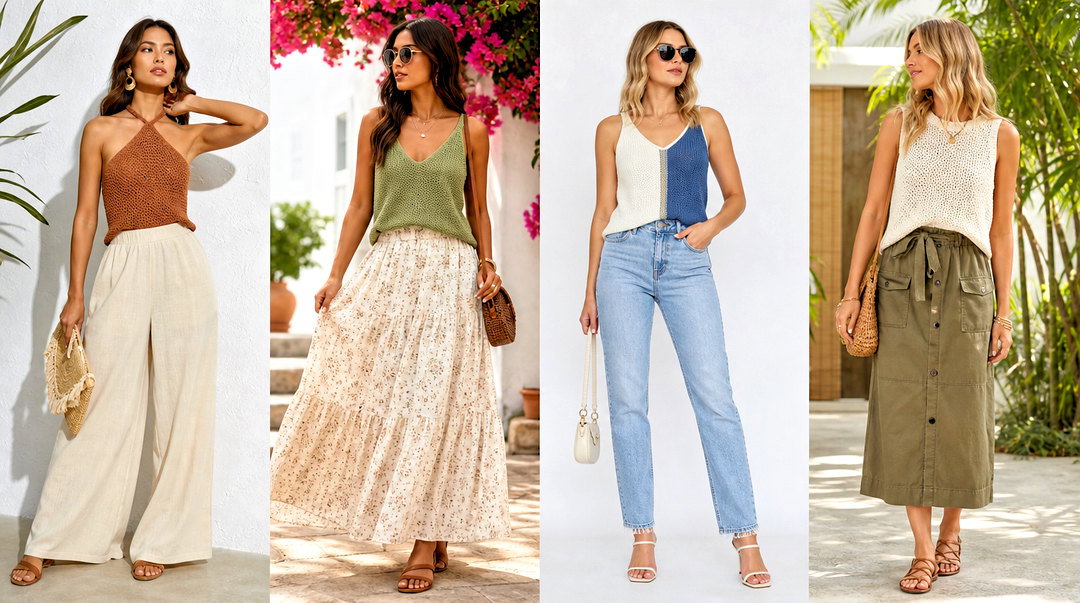
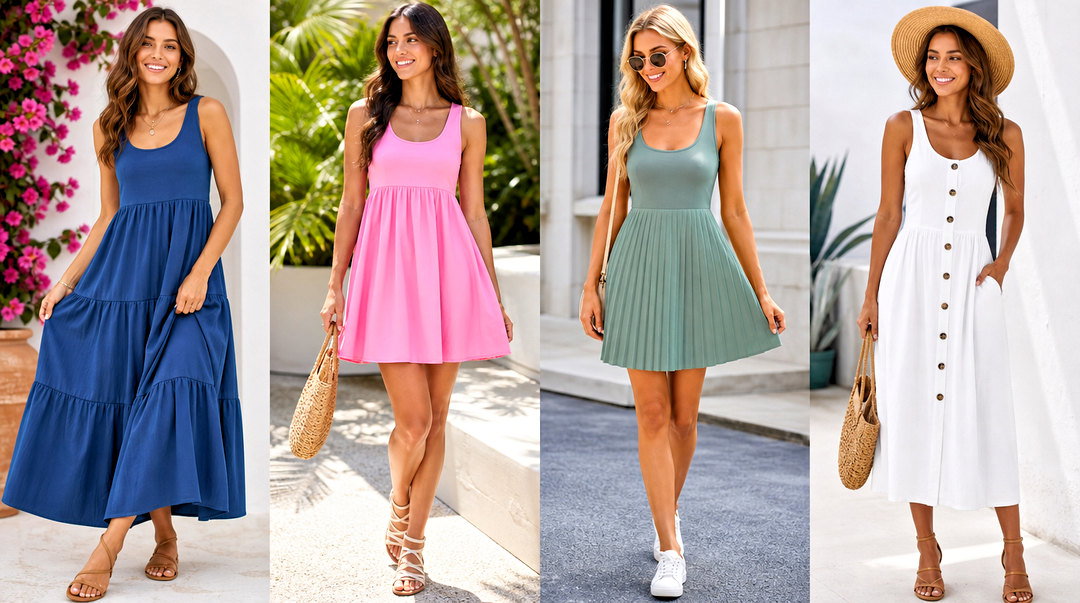
10. High Neck DIY Tank Top
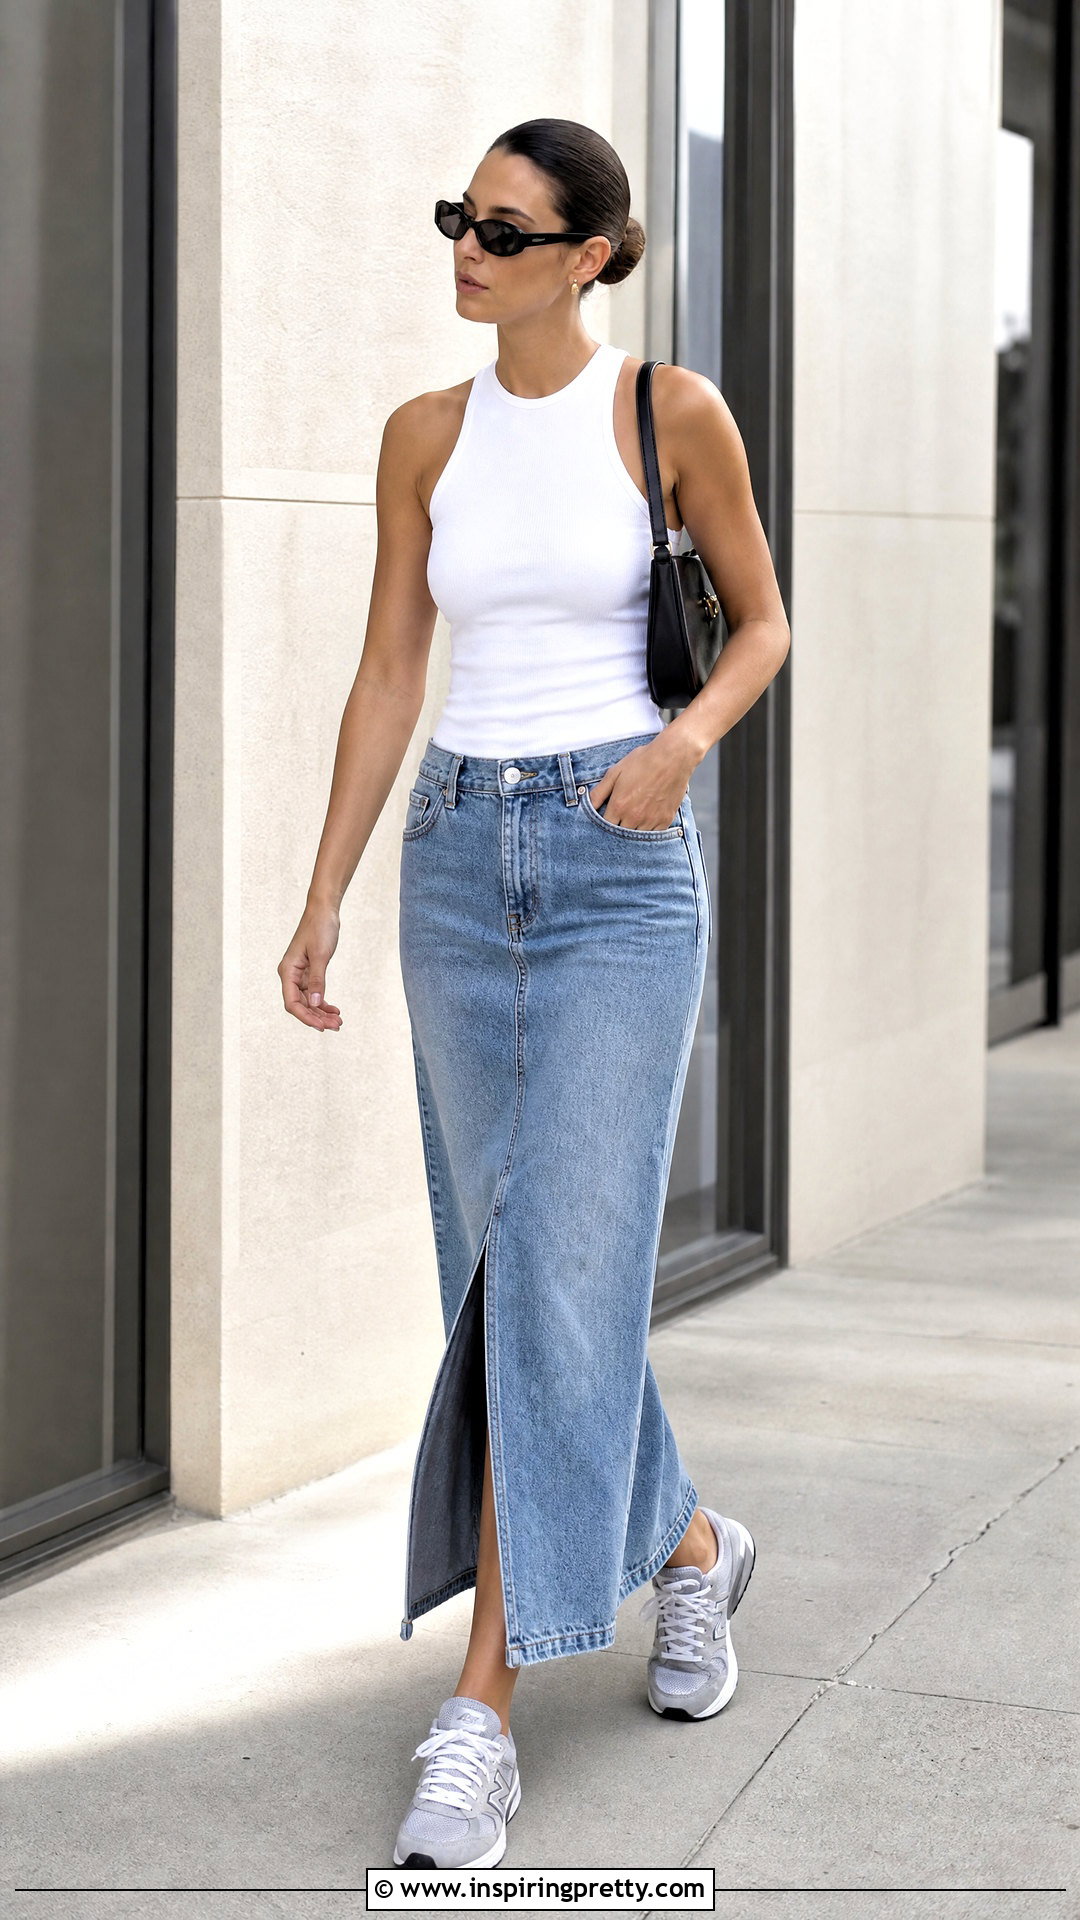
An old crew-neck T-shirt can become a sleek high-neck tank by changing only the sleeves and shoulders. Leave the original collar intact, then cut away the sleeves along smooth inward curves. Angle each armhole slightly toward the neckline to create a narrow shoulder line without removing the high front coverage. Fold the shirt in half to compare both sides before completing the second cut. Style the finished tank with a long denim skirt, streamlined sneakers, a shoulder bag, and simple sunglasses. The covered neckline and open shoulders create a balanced shape that works well for casual city outfits. Avoid cutting directly against the collar stitching, since this can weaken the neckline. A small amount of fabric between the collar and armhole will help the shoulders lie flat.
11. Front Keyhole DIY Tank Top
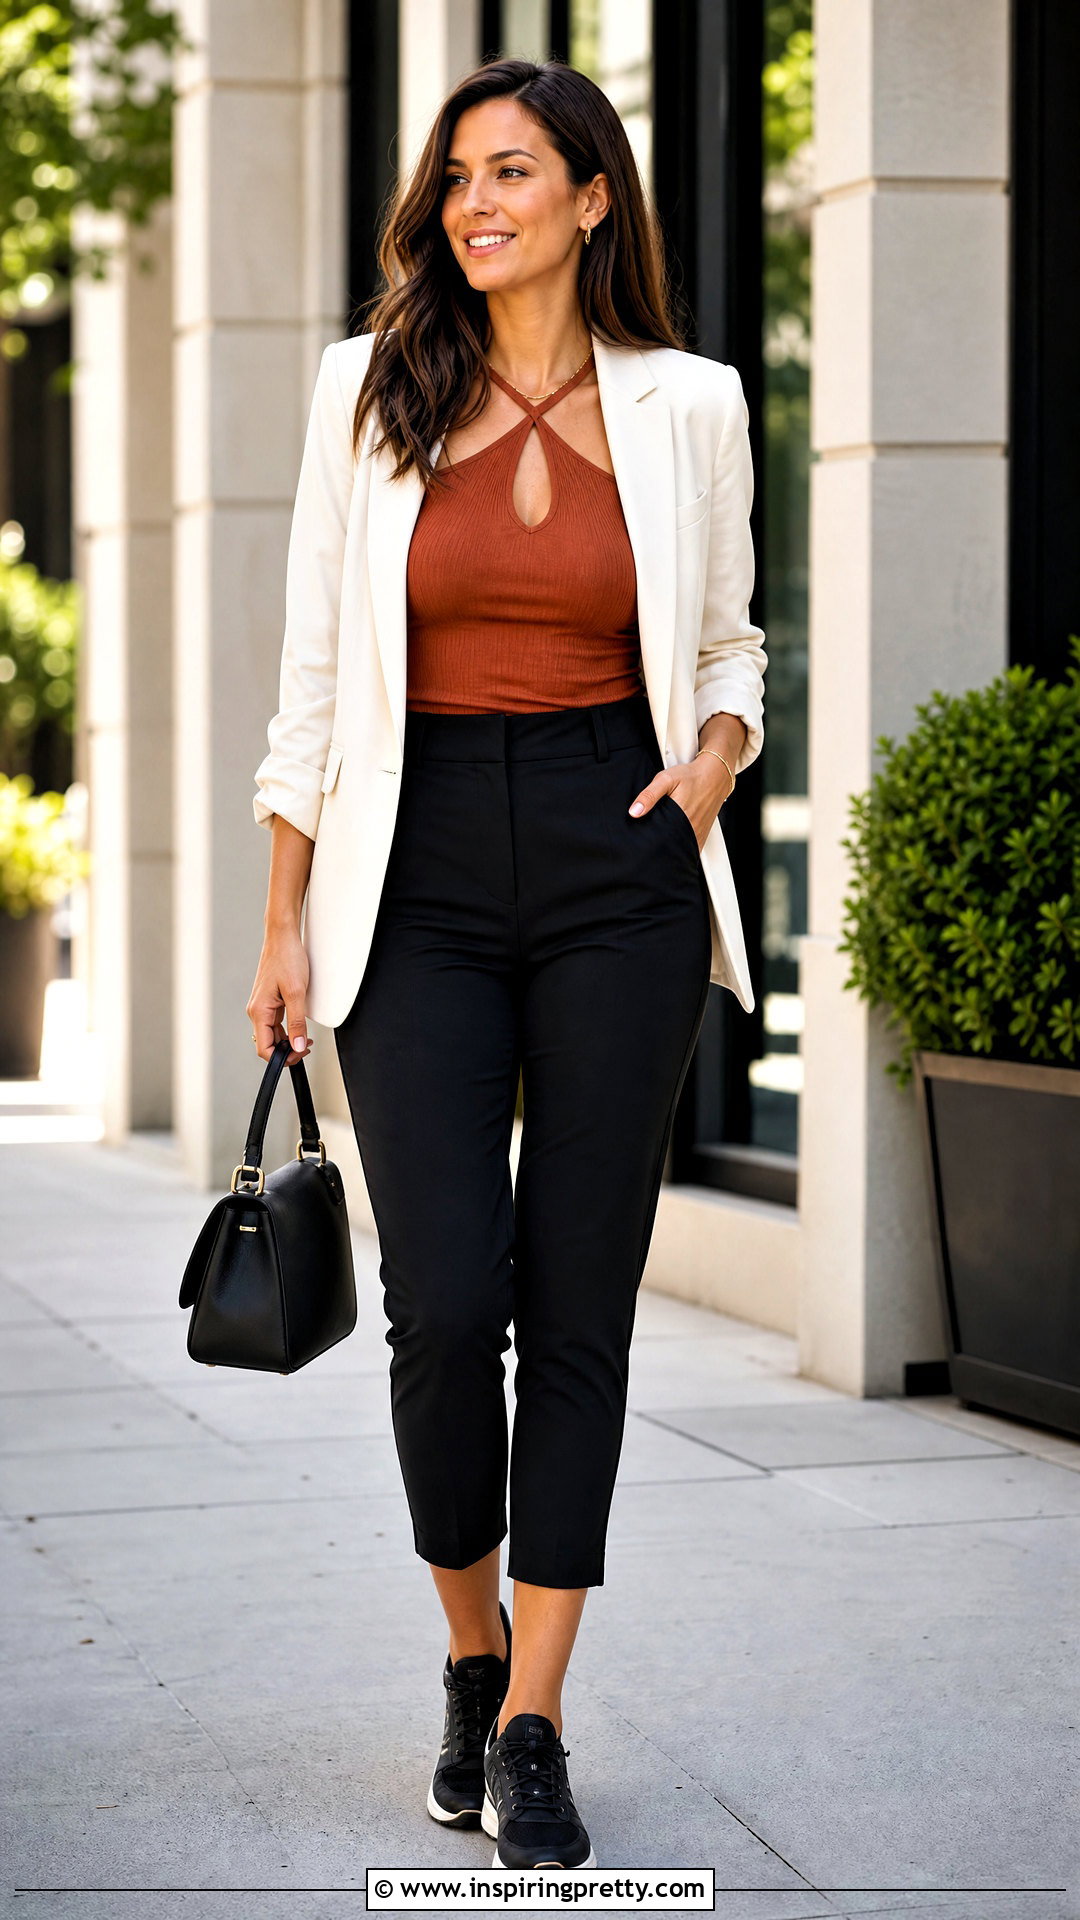
A small front keyhole adds detail without requiring a dramatic neckline change. Put the tank on and mark the center point where the opening should sit. Remove the top and draw a narrow oval, teardrop, or vertical diamond below the neckline. Cut a tiny opening first, then enlarge it gradually while checking the placement. Keep generous space between the keyhole and collar so the fabric remains stable. Pair the customized tank with high-waisted cropped pants, sleek sneakers, a lightweight blazer, and a top-handle bag. The polished layers make the cutout look intentional rather than unfinished. If the knit stretches easily, reinforce the opening with hand stitching. A small metal ring or fabric tie can also connect the keyhole edges for added structure.
12. Back Keyhole DIY Tank Top
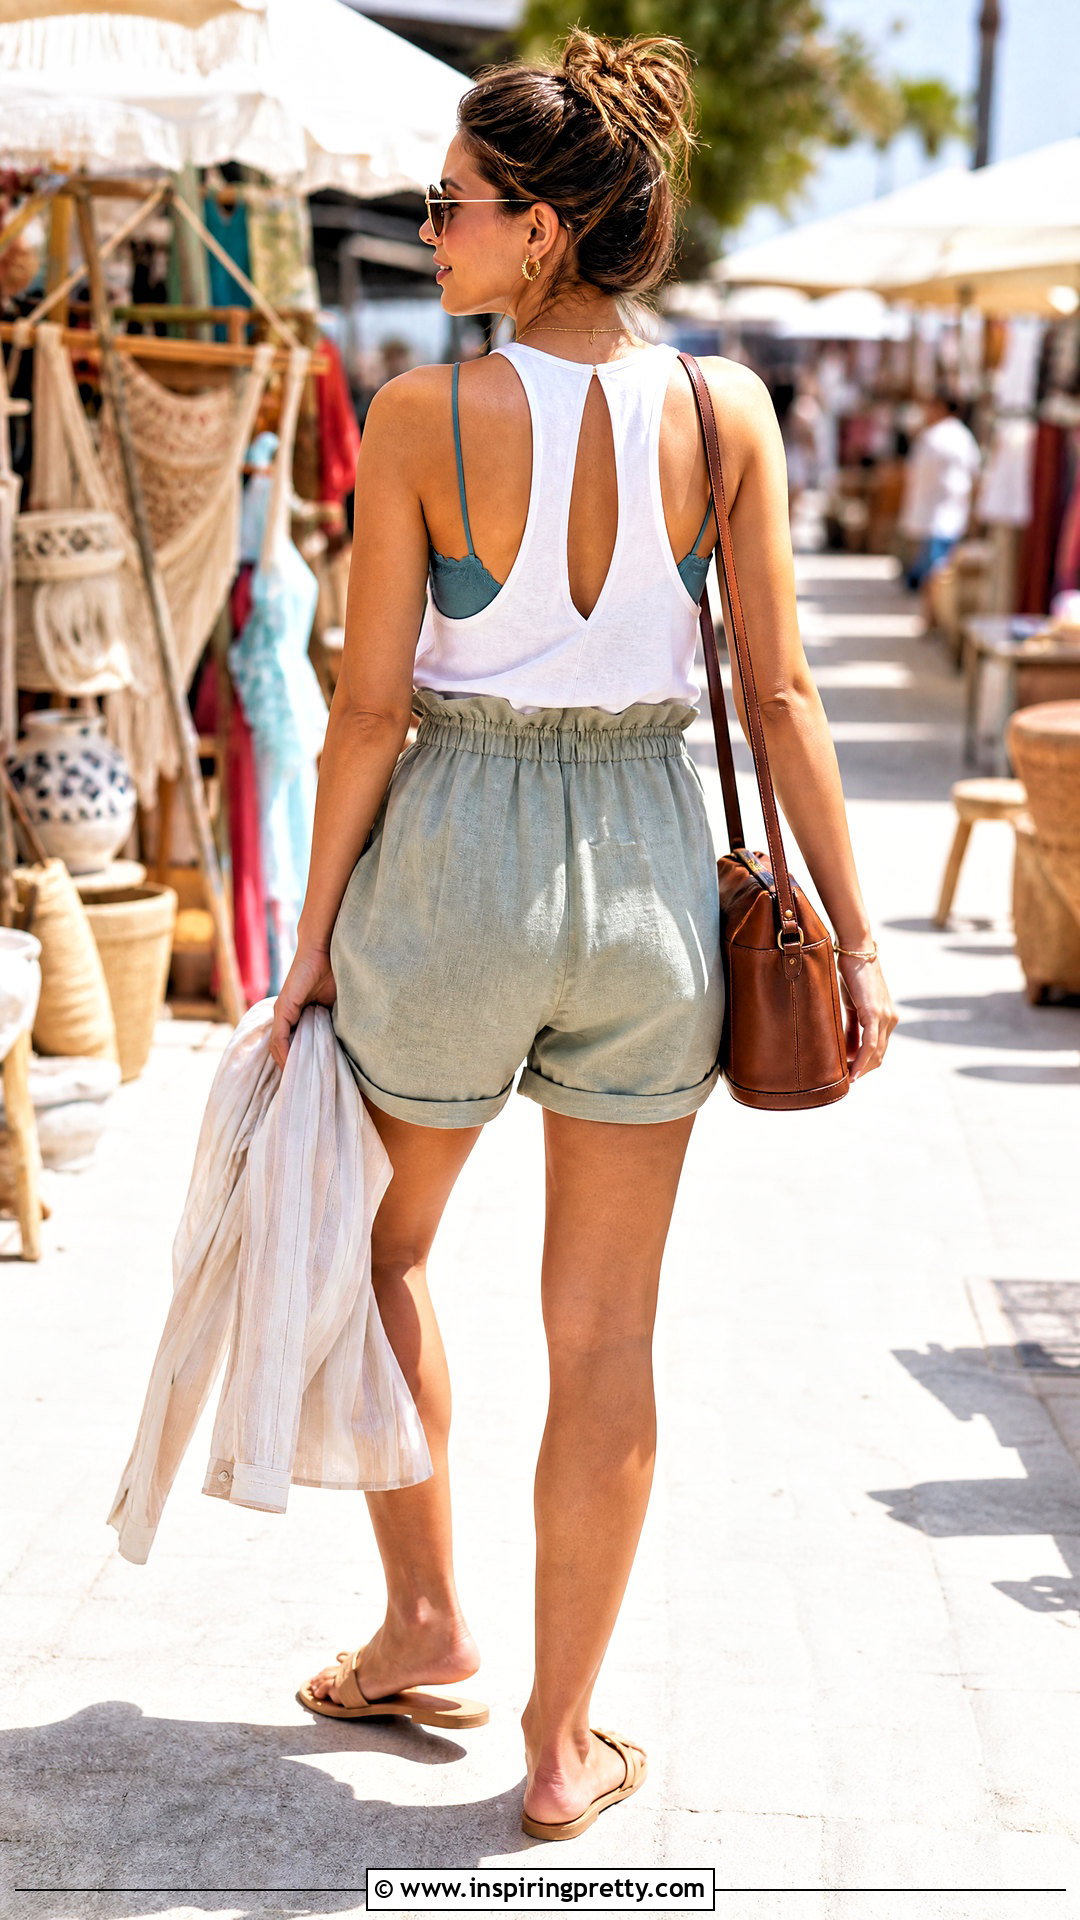
Turn around a plain tank and give it an unexpected back detail with a simple keyhole. Draw a centered oval or teardrop between the shoulder blades, staying clear of the neckline and side seams. Pin the front layer away from the marked area before cutting. Begin with a small slit, insert the scissors, and follow the outline slowly. Wear the finished tank with paper-bag-waist shorts, flat sandals, a crossbody bucket bag, and a light overshirt that can be removed when desired. A contrast camisole underneath can highlight the opening while providing coverage. To keep the keyhole from stretching, avoid making it too wide. You can also tie a narrow scrap strip across the top of the opening to create a decorative closure.
13. Ladder Back DIY Tank Top
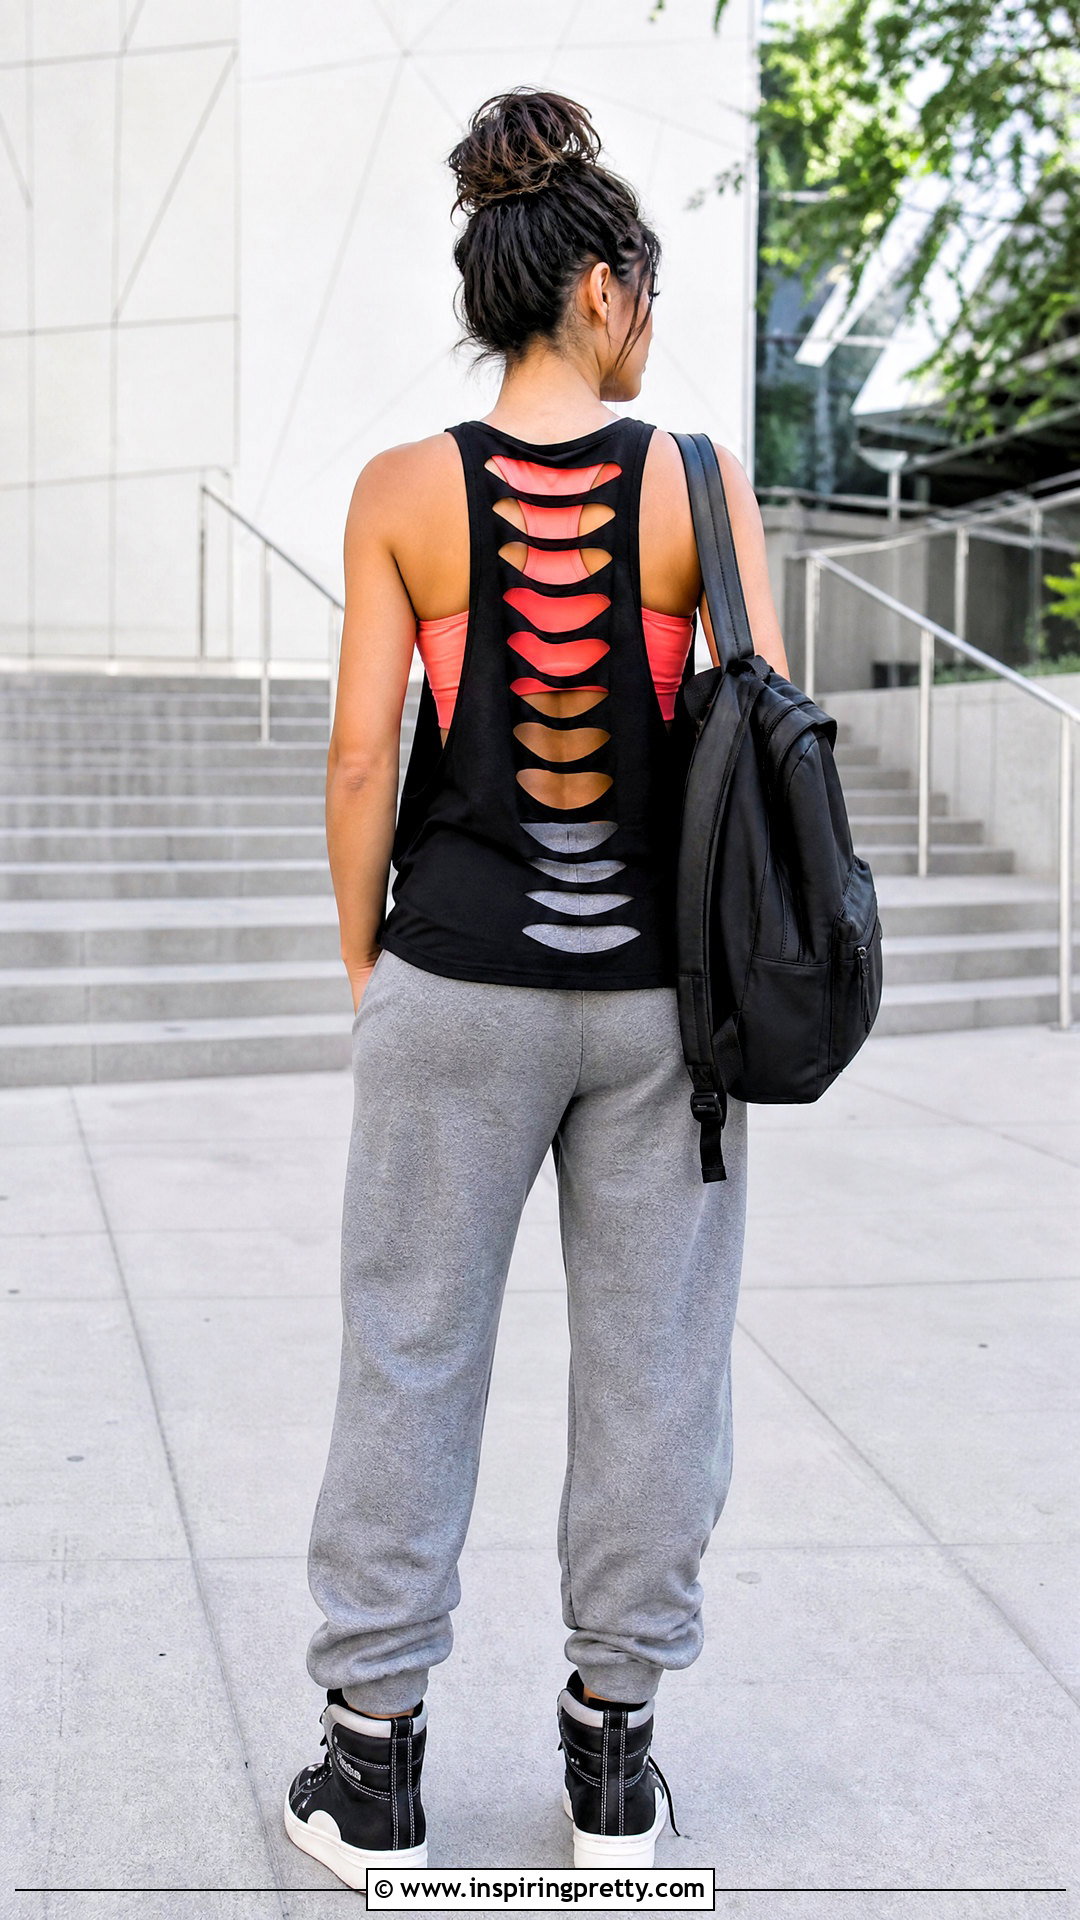
Parallel slits can transform the back of a basic tank into a flexible ladder pattern. Place cardboard inside the shirt so the scissors cannot reach the front. Mark several horizontal lines across the back, leaving equal spaces between them and stopping well before the side seams. Cut each line separately, starting with shorter openings near the top. Stretch the strips gently to make the jersey curl into narrow cords. Pair the tank with loose joggers, high-top sneakers, a fitted contrast underlayer, and a simple backpack. The solid underlayer makes the ladder pattern easier to see and keeps the outfit wearable. Leave wider fabric sections between the lowest cuts because that area experiences movement. Fewer, evenly spaced slits often look cleaner than numerous tightly packed cuts.
14. Slashed Back DIY Tank Top
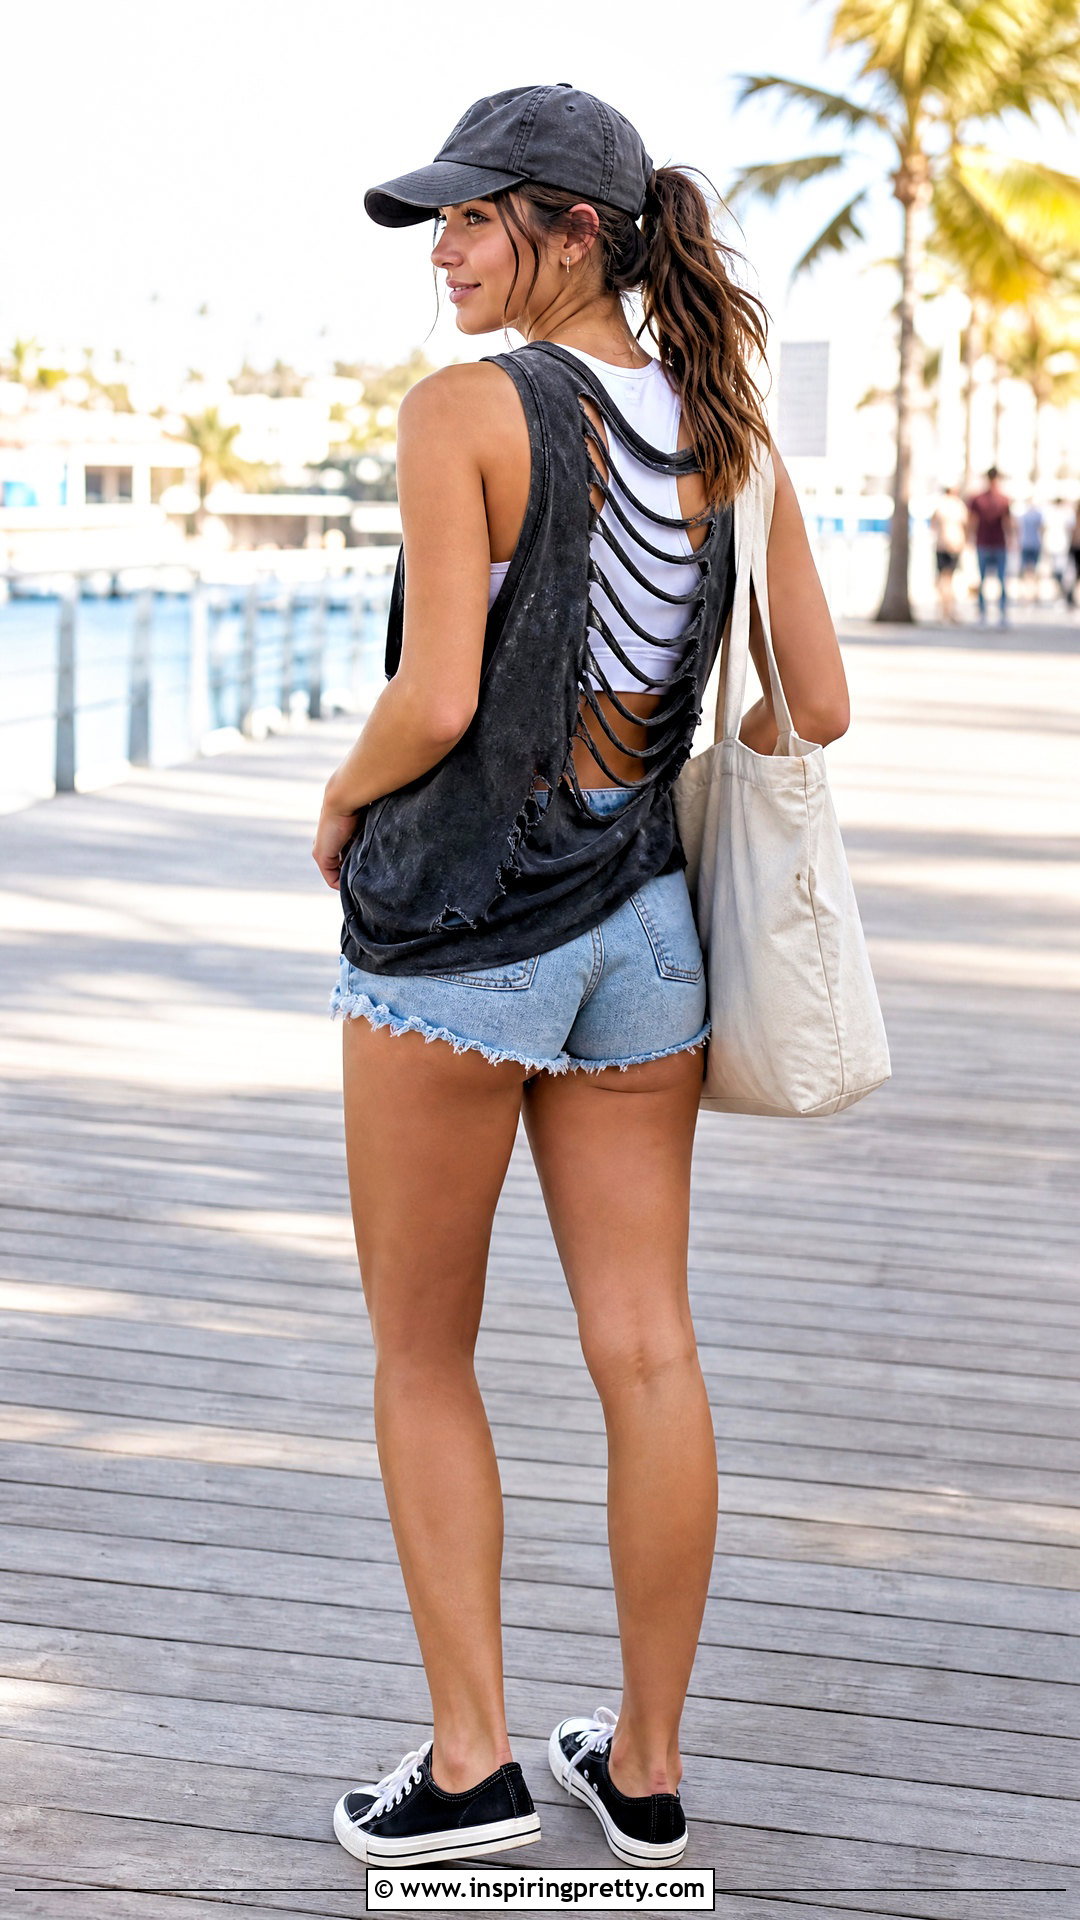
A slashed-back tank has irregular openings that create a relaxed distressed effect. Instead of cutting perfectly even lines, sketch a series of angled slashes that vary slightly in length. Place a cutting mat or cardboard inside the tank and keep every line away from the side seams. Cut carefully, then stretch each opening so the raw edges roll. Style the finished piece over a fitted sports tank with denim cutoffs, canvas sneakers, a baseball cap, and a practical tote. The simple outfit complements the textured back without competing with it. Avoid placing cuts across areas that feel tight when you bend or reach. If you want a subtler result, concentrate a few short slashes between the shoulder blades rather than covering the entire back panel.
15. Heart Back Cutout DIY Tank Top
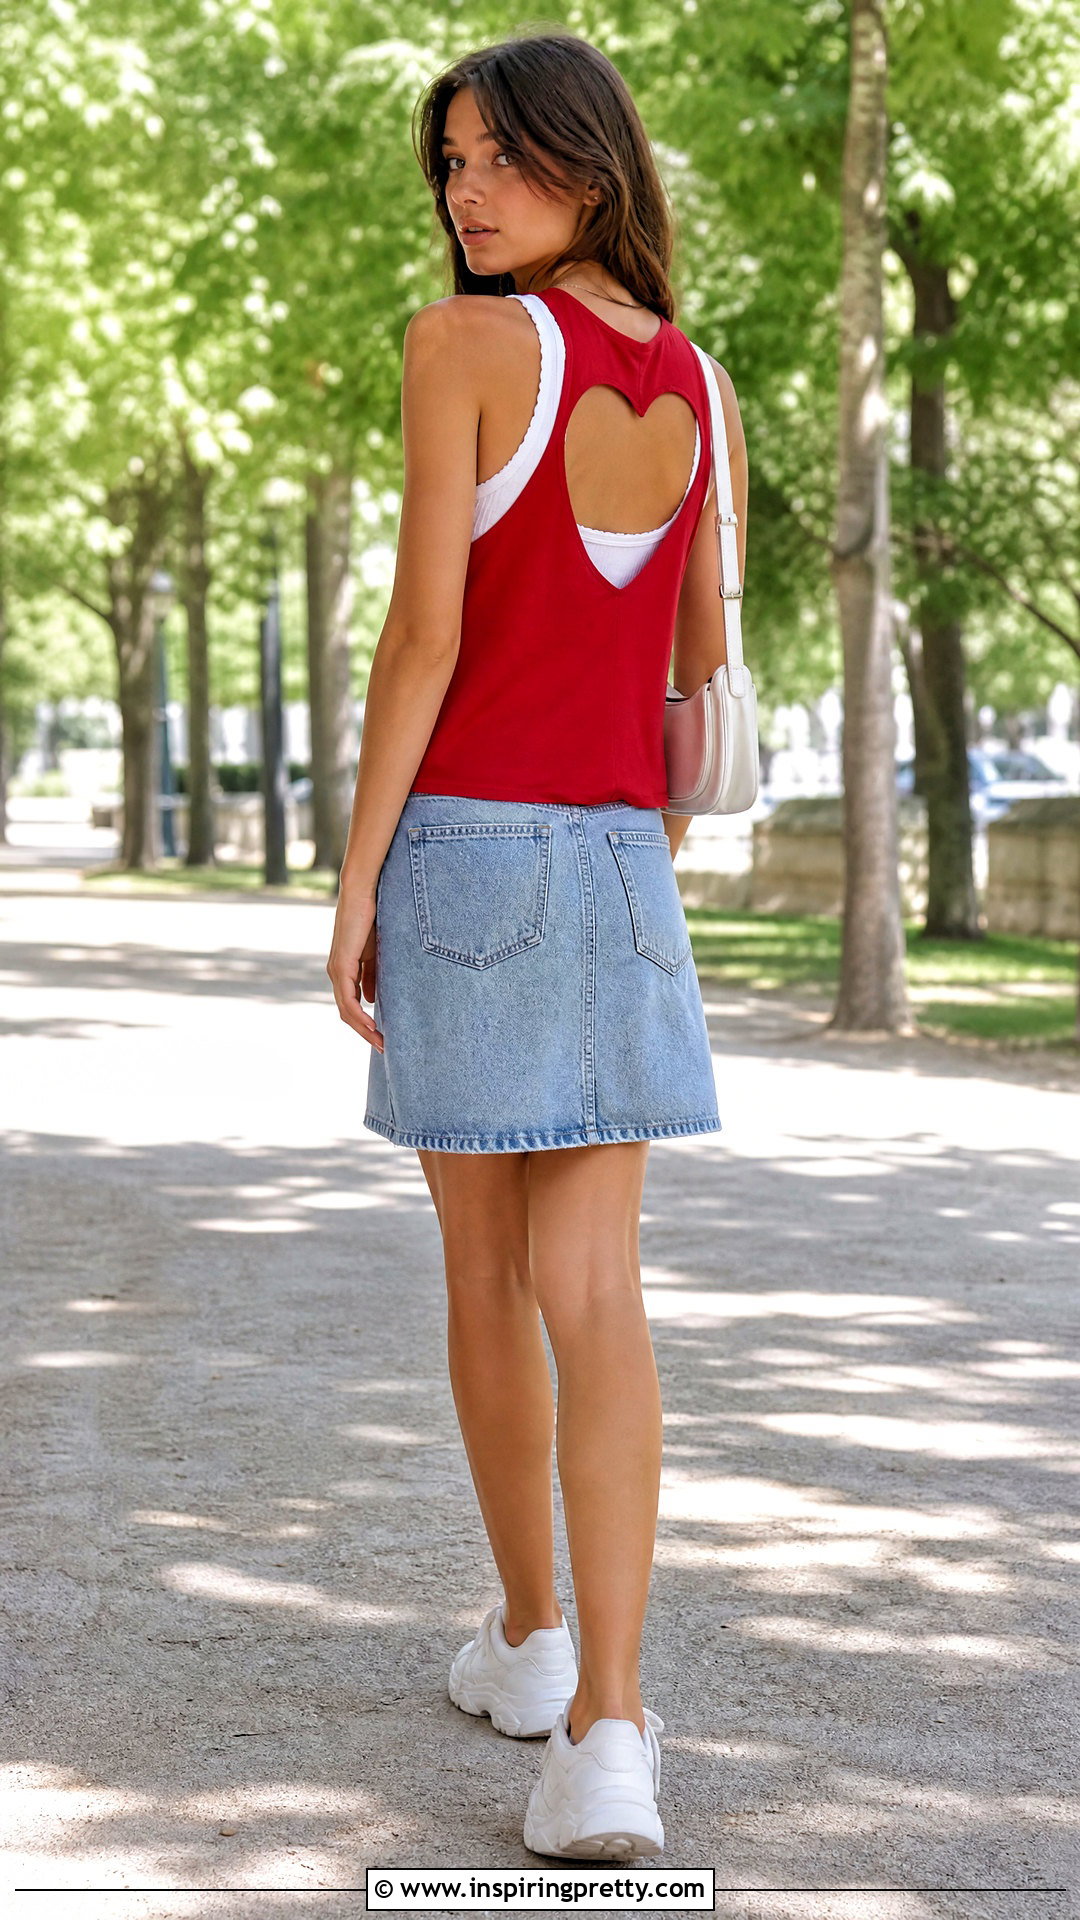
A heart-shaped back cutout gives a plain tank a recognizable focal point. Draw or print a symmetrical heart template, then position it high enough to avoid the lower back and side seams. Slide cardboard inside the tank, trace the template with washable chalk, and cut slowly around the outline. Rounded curves are easier to control when you use short snips. Complete the outfit with a casual A-line denim skirt, clean sneakers, a compact shoulder bag, and a fitted colored camisole beneath the tank. The contrasting layer makes the heart visible while keeping the look comfortable. Choose a medium-sized shape rather than cutting across most of the back. Larger cutouts may sag, especially when made in lightweight or heavily worn jersey fabric.
16. Diamond Back Cutout DIY Tank Top
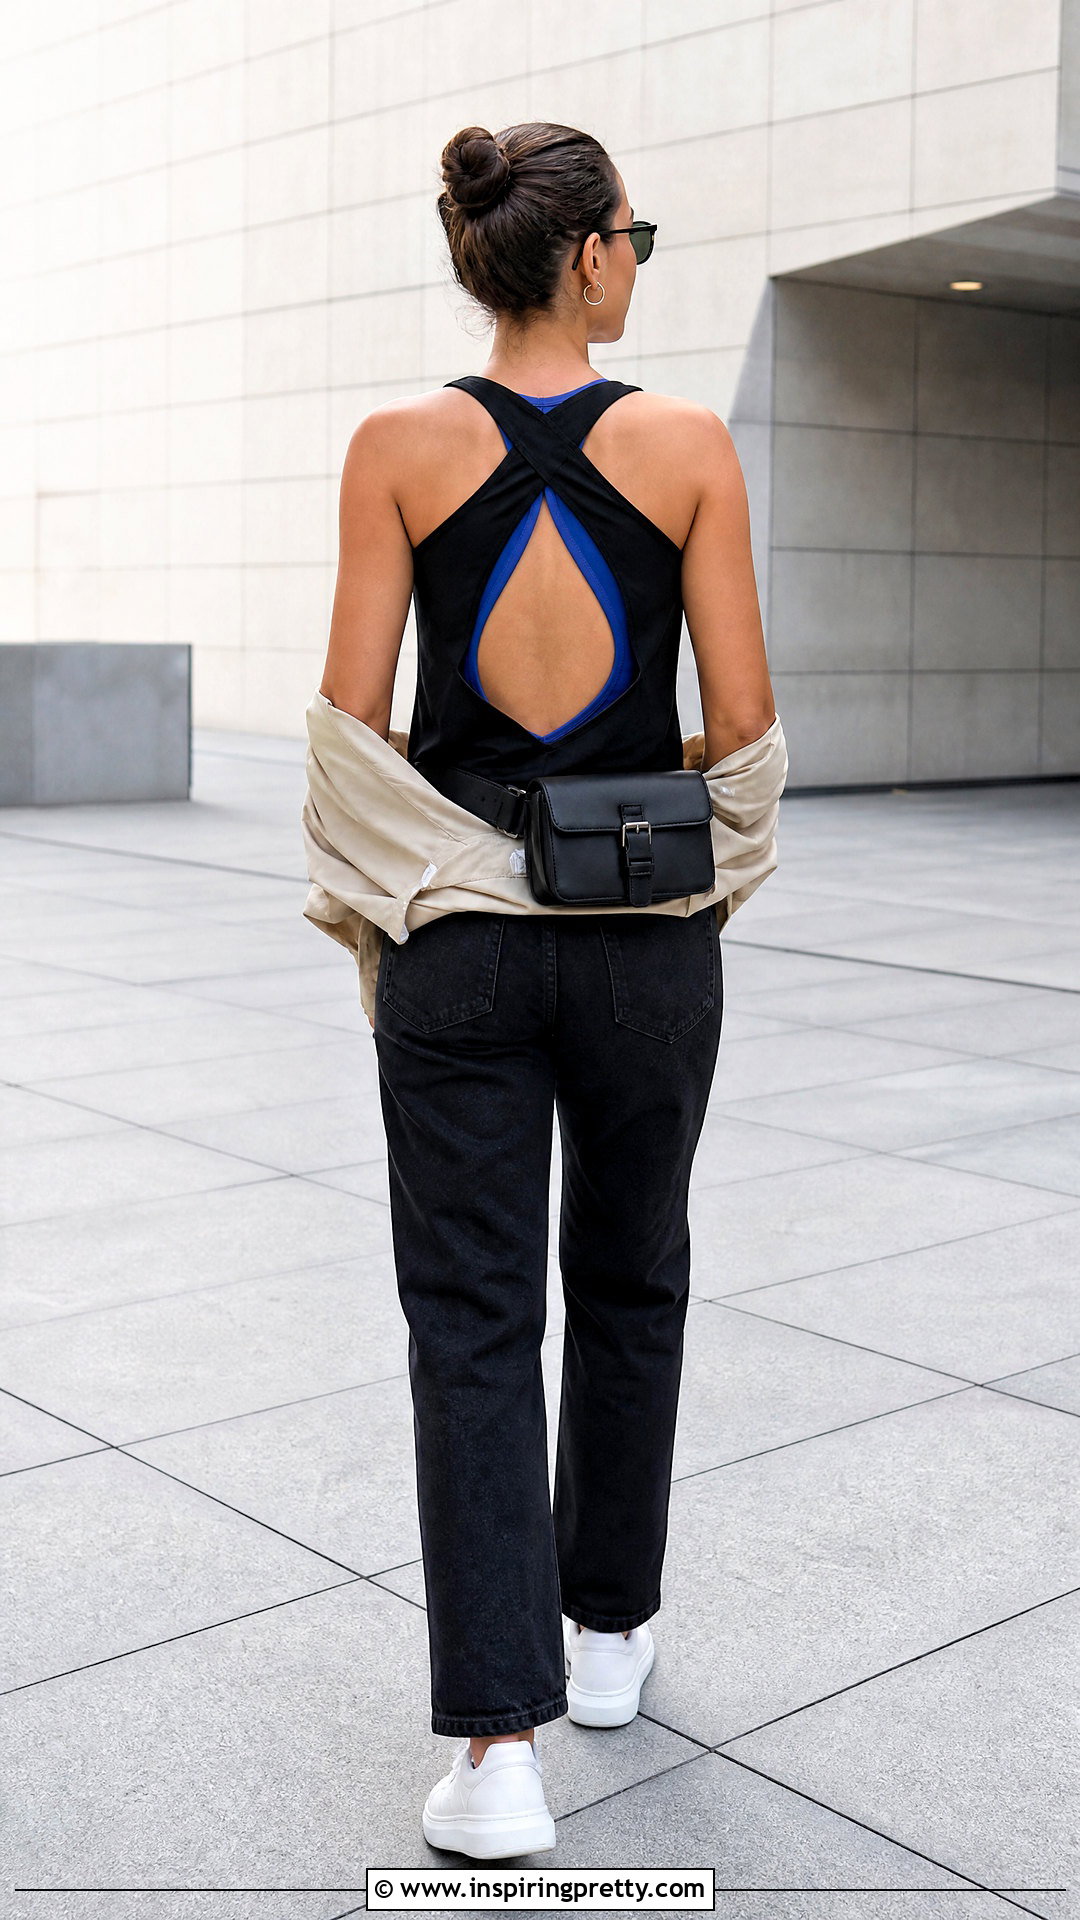
A centered diamond cutout creates a crisp geometric finish that suits minimalist outfits. Fold a paper square diagonally to make a balanced template, then trace it onto the upper back of the tank. Position the top point below the collar and keep the side points away from the armholes. Insert cardboard before cutting, and use small controlled snips at each corner. Style the tank with black straight-leg jeans, white sneakers, a structured belt bag, and a lightweight neutral jacket. A bright underlayer can make the diamond more noticeable, while a matching layer creates a subtle effect. Slightly round the four corners when cutting because severe points can stretch. If needed, add tiny reinforcing stitches at each corner to help the opening maintain its shape.
17. Star Cutout DIY Tank Top
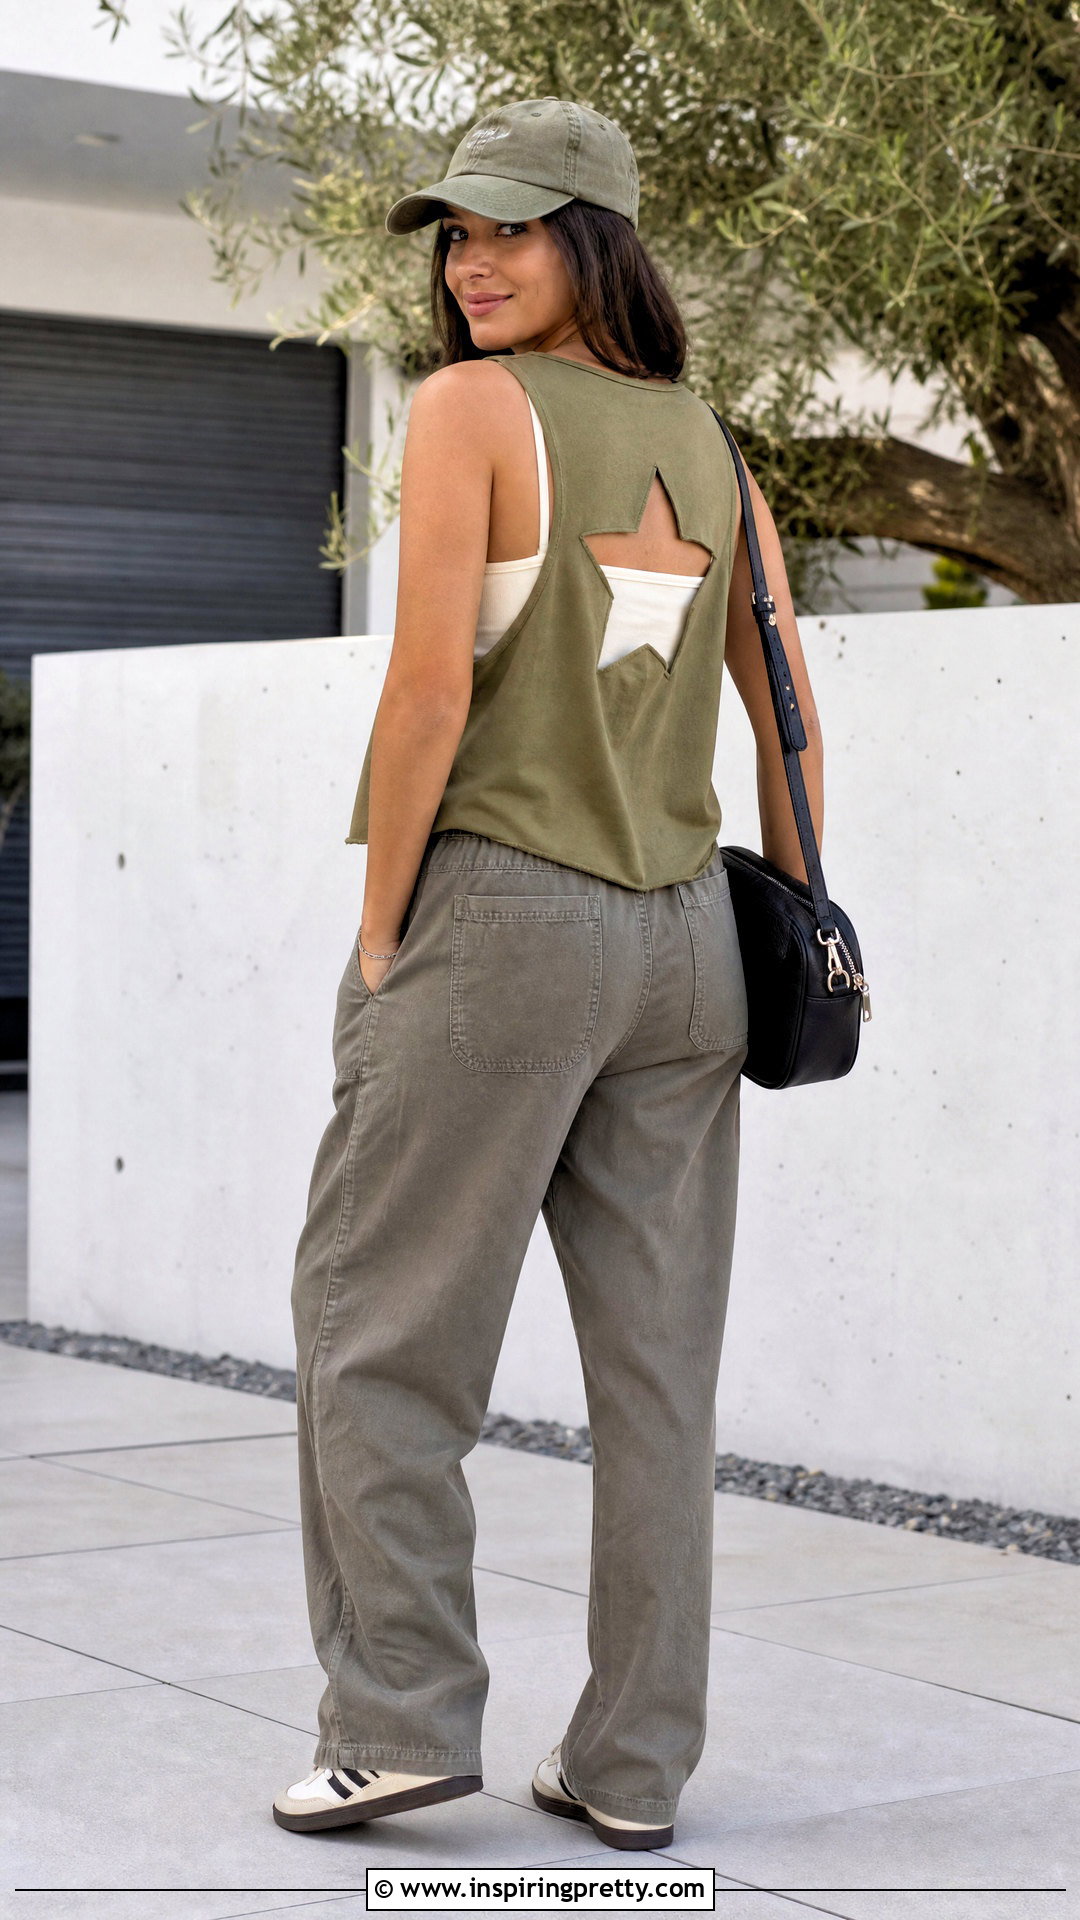
A star cutout adds graphic detail to the back or lower side of a solid tank. Use a simple five-point paper template rather than drawing directly on the fabric. Trace it, insert cardboard between the layers, and cut from the center toward each point. Stop just before the chalk lines, then refine the edges slowly. Pair the finished tank with relaxed utility pants, lace-up sneakers, a crossbody bag, and a lightweight cap. Choose a contrast camisole if you want the star to appear clearly. Since narrow star points can tear, keep the design compact and avoid placing it on very thin fabric. Reinforce each inner corner with a few small stitches. One carefully positioned star usually looks cleaner and lasts longer than multiple closely spaced cutouts.
18. Crescent Back Cutout DIY Tank Top
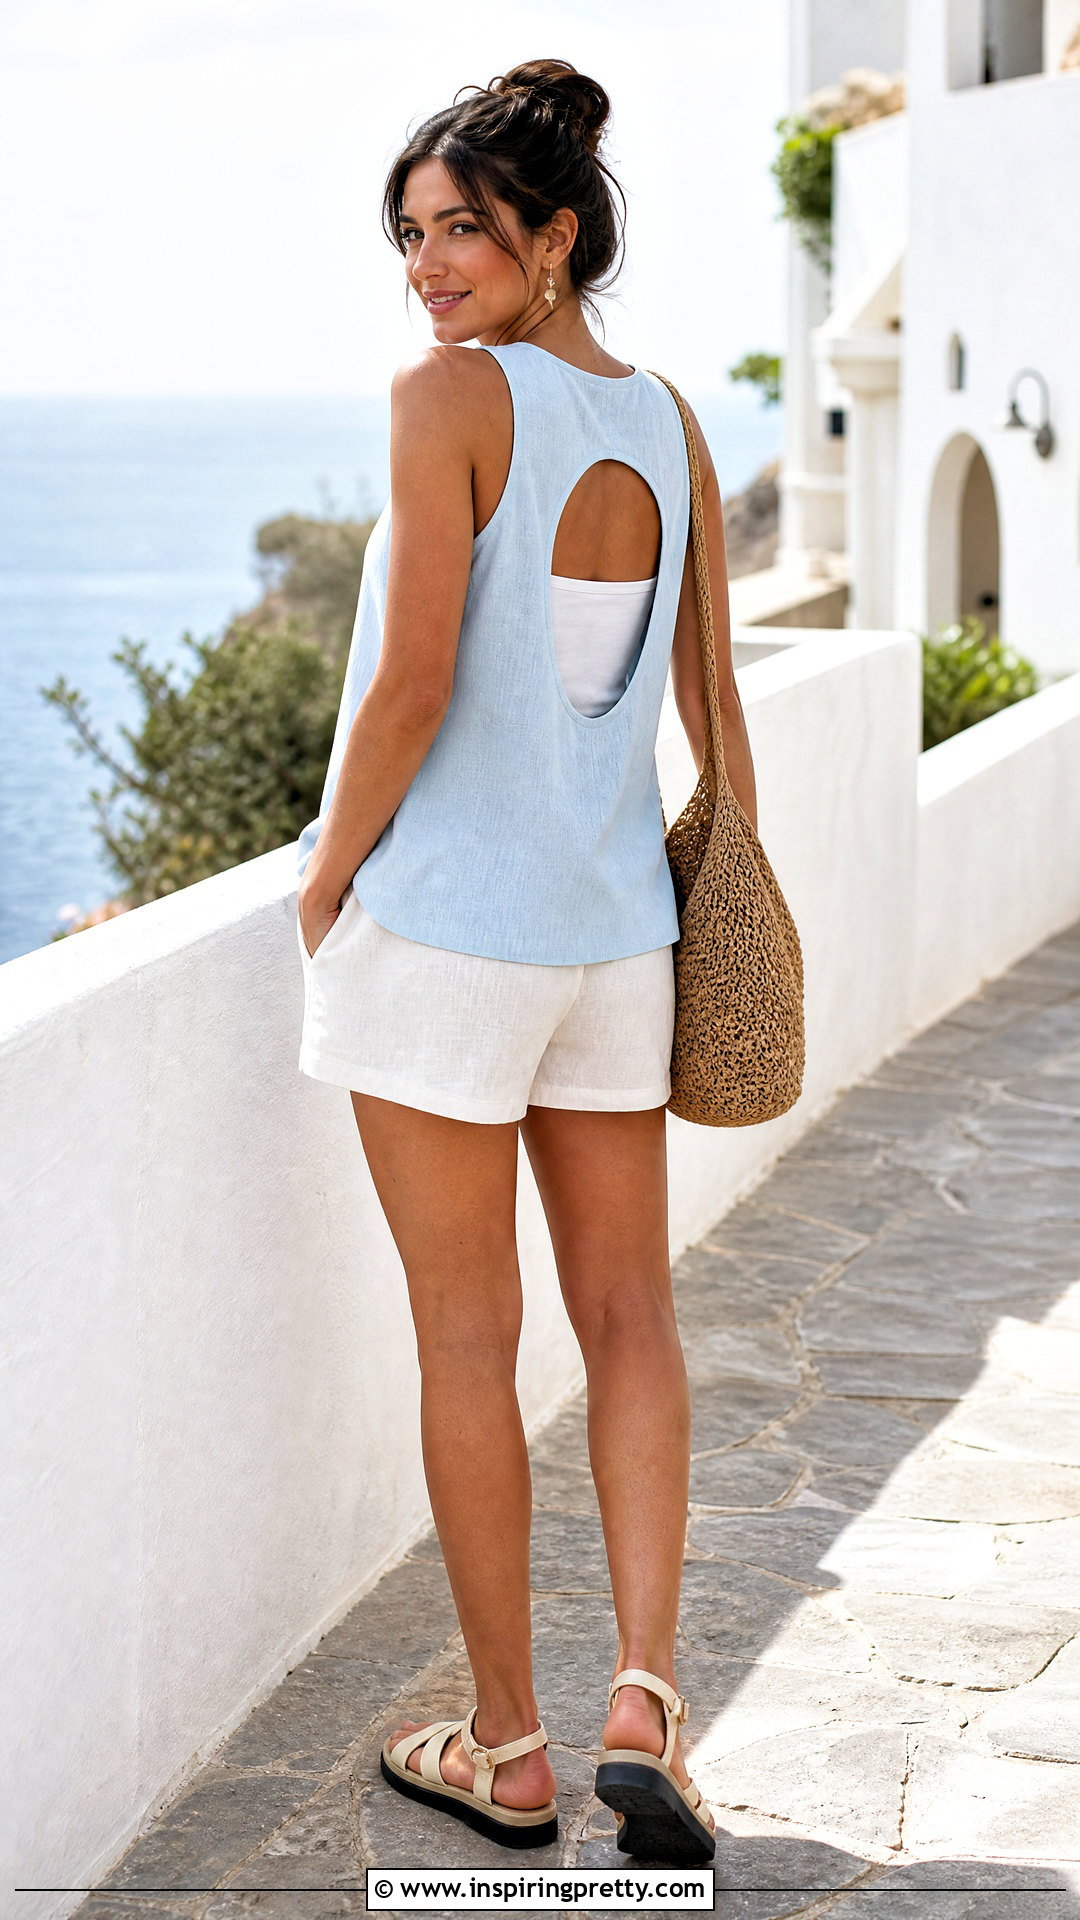
A crescent-shaped cutout creates a soft curved feature across the upper back. Make a template by tracing two overlapping circles on paper, then cut out the curved shape. Position it horizontally beneath the neckline and check that both ends remain far from the armholes. Use cardboard to protect the front while you cut. Build an easy warm-weather outfit with pull-on linen shorts, flat sporty sandals, a woven shoulder bag, and a pale contrast camisole. The understated pieces allow the crescent to remain the main detail. Make the inner curve gradually because removing too much fabric can create a thin, unstable strip above the opening. Finish by stretching the edge lightly or adding close hand stitches if the fabric appears likely to lose its shape.
19. Side Cutout DIY Tank Top
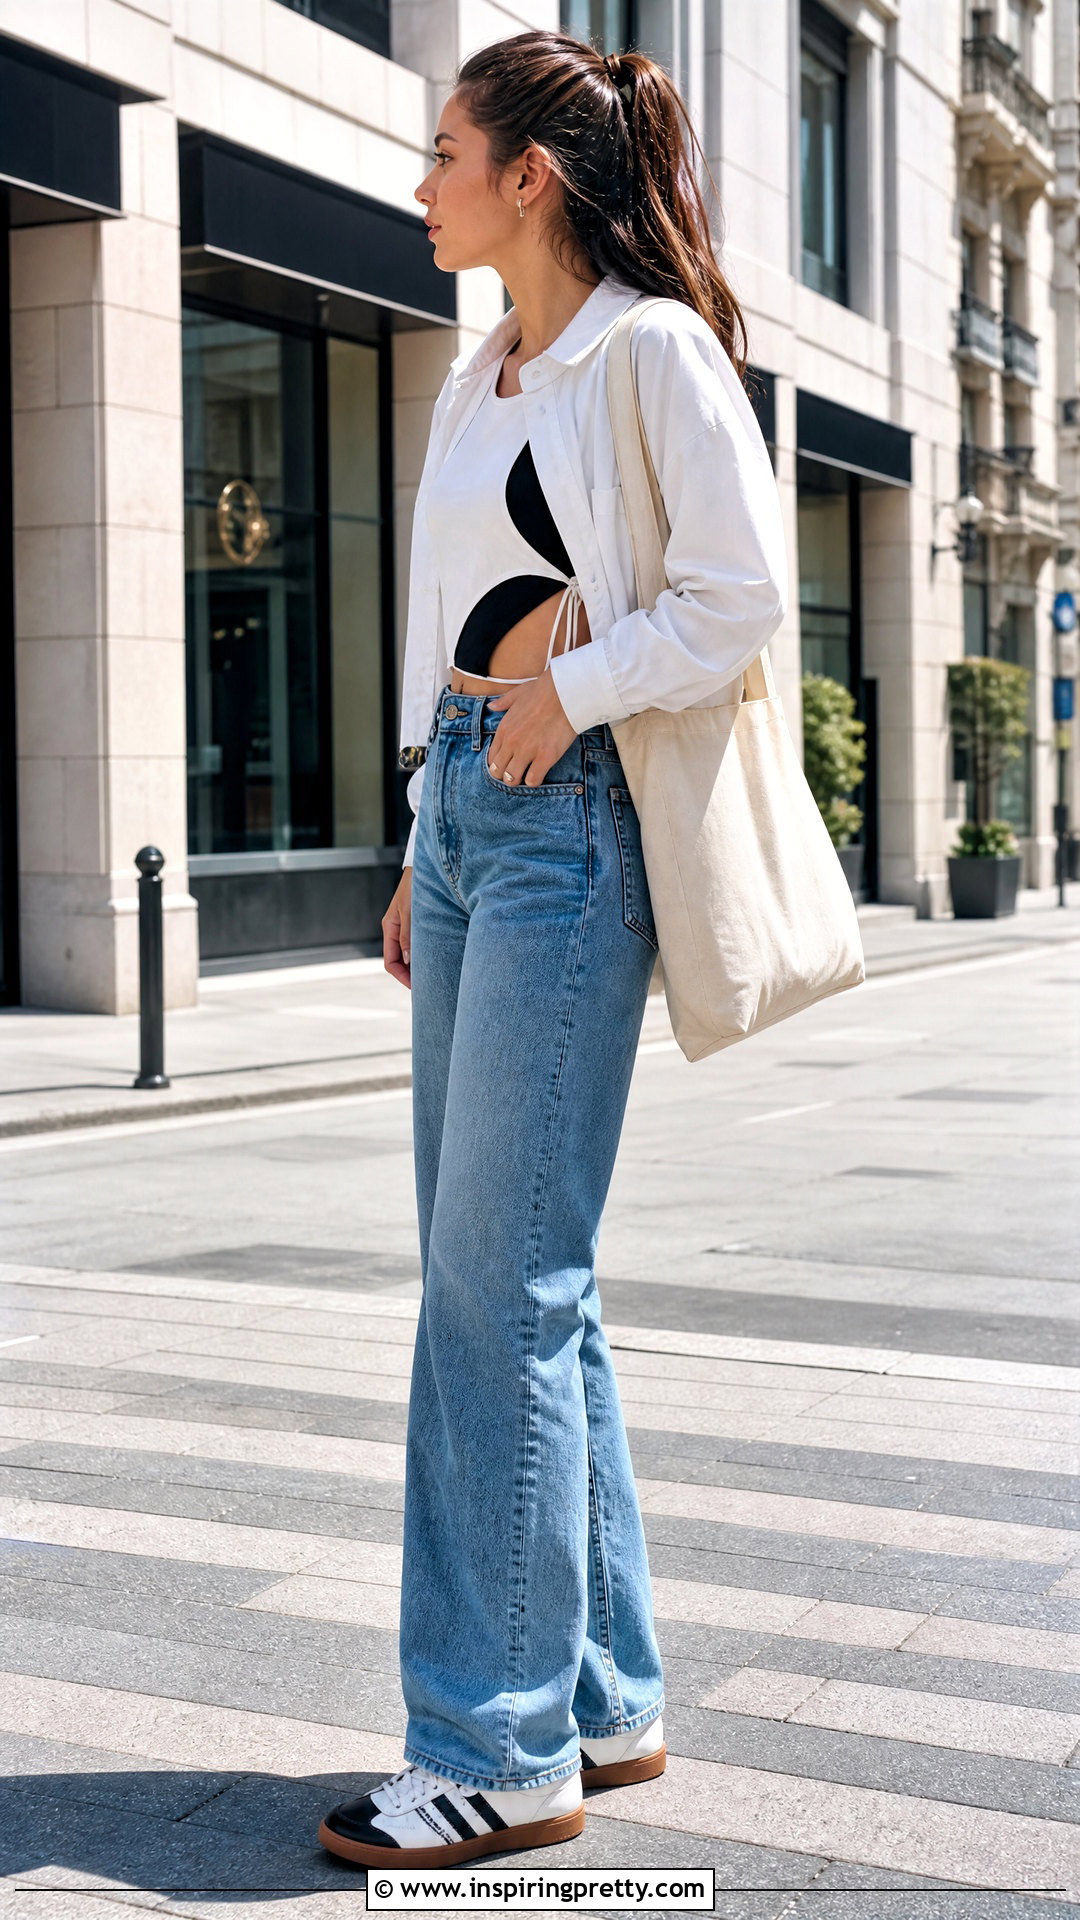
Small side cutouts can reshape a boxy tank and create more visual definition around the waist. Try on the tank and mark the upper and lower limits of each opening. Once the shirt is flat, draw matching curved or triangular shapes along both side seams. Cut one side first, fold the tank vertically, and transfer the shape to the opposite side. Wear the finished top over a fitted layering tank with high-rise jeans, low-profile sneakers, a canvas tote, and a cropped overshirt. High-waisted bottoms provide useful coverage beneath the openings. Keep the cutouts above the waistband and avoid removing too much of the side seam. For greater stability, stop the cuts just before the seam or secure the upper and lower points with hand stitching.
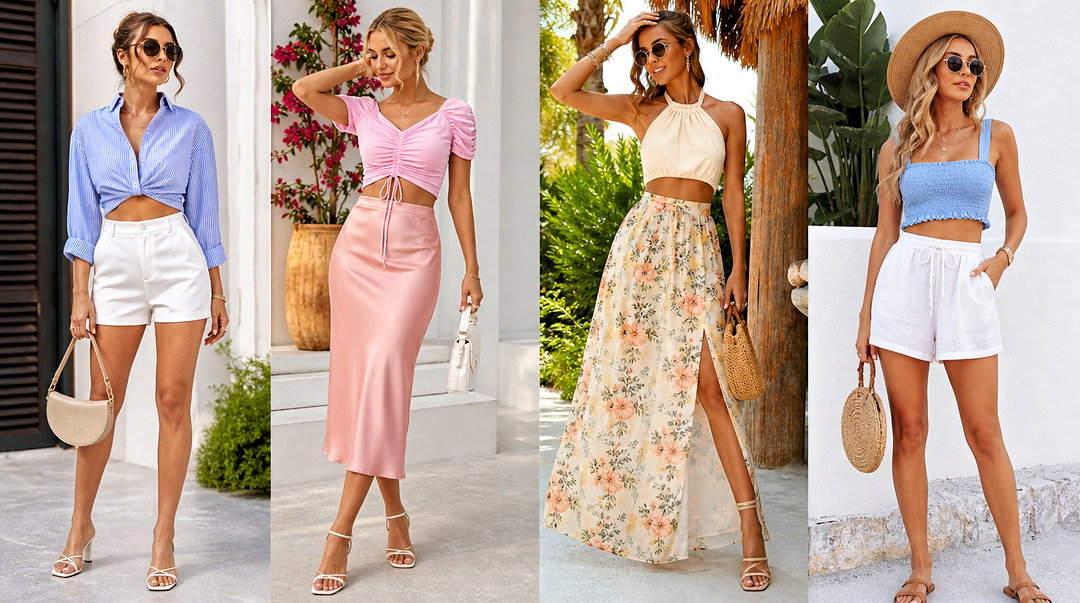
20. Lace Up Side DIY Tank Top
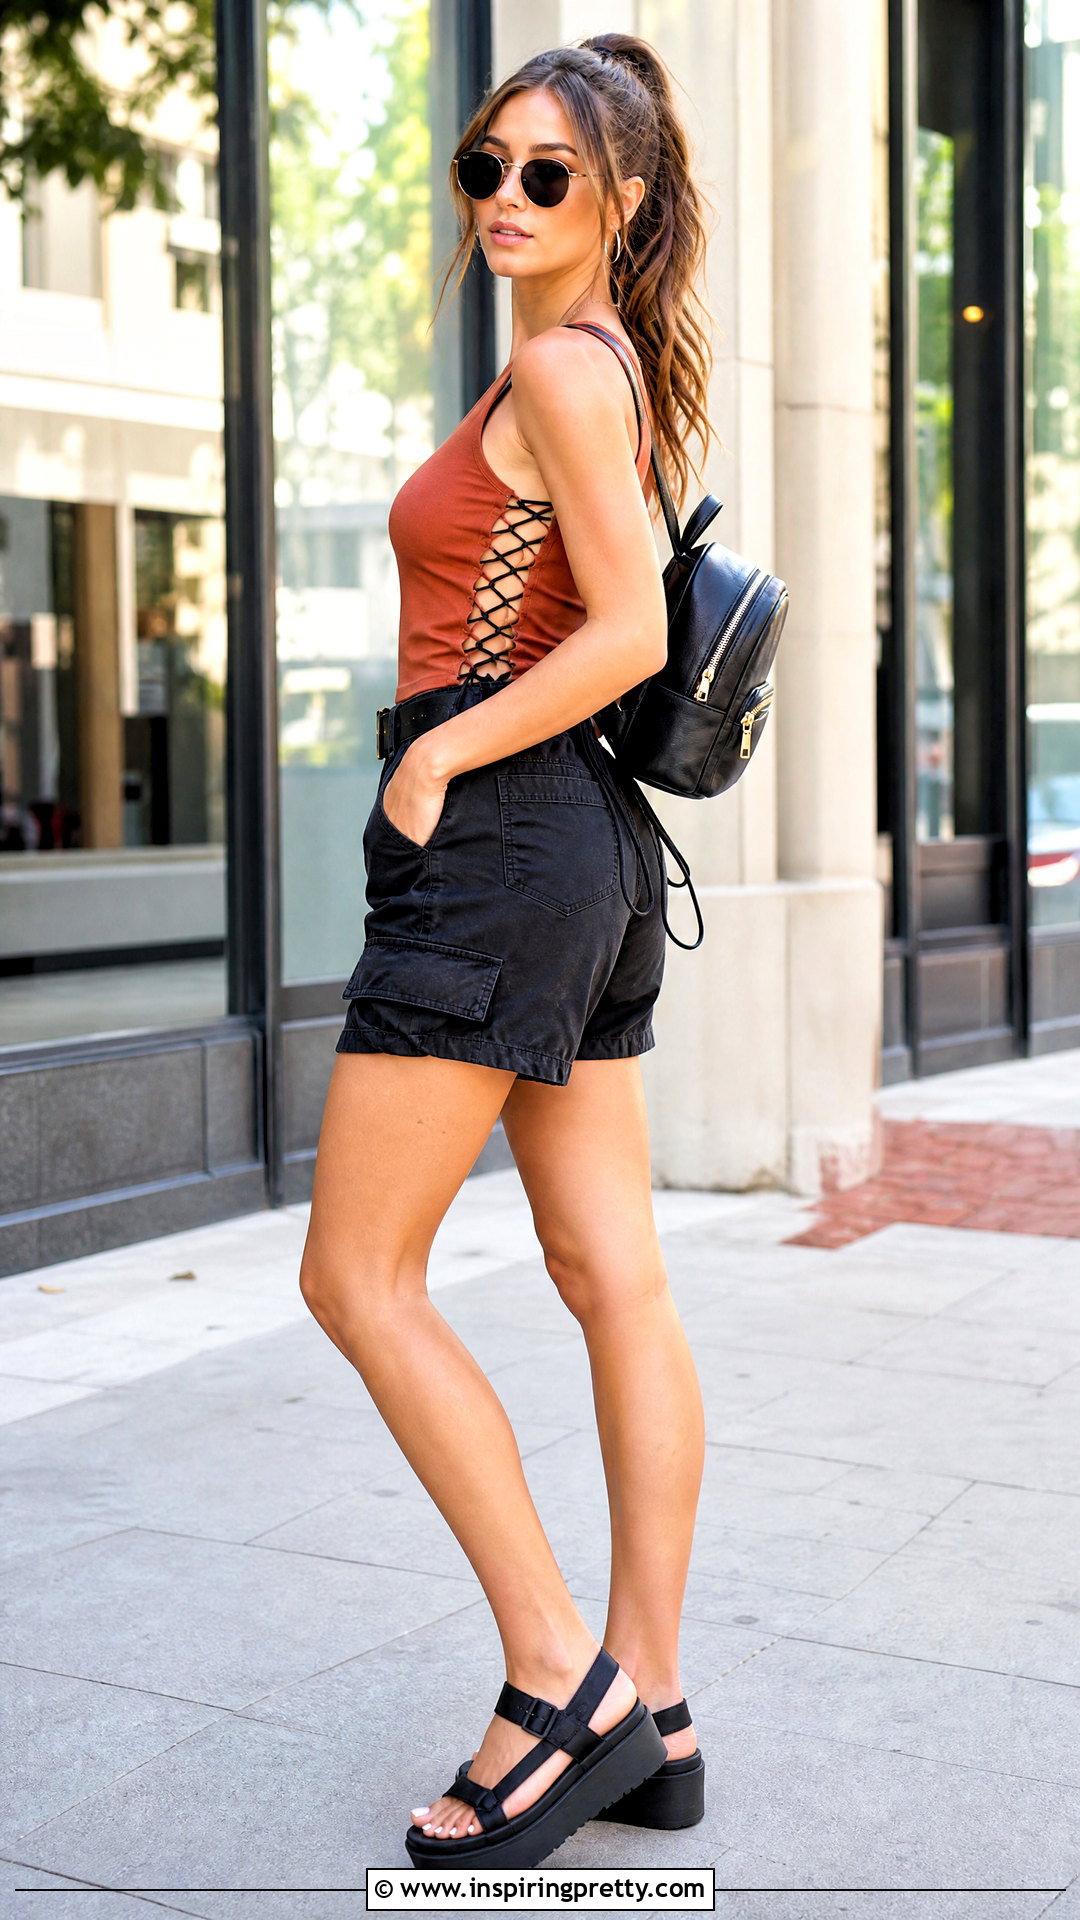
A lace-up side tank combines cutout details with adjustable ties. Cut a narrow section from each side seam, starting below the armhole and ending above the hem. Make evenly spaced holes along both edges of each opening. Thread a long strip of jersey, ribbon, or soft cord through the holes in a crisscross pattern, then knot the ends securely. Style the top with high-waisted cargo shorts, platform sandals, a mini backpack, and simple sunglasses. A fitted camisole beneath the lacing keeps the outfit practical. Do not place the holes too close to the raw edges, since they may stretch into larger openings. If the tank is thin, reinforce each hole with small stitches before lacing. Adjust both sides evenly to maintain a balanced fit.
21. Side Tie DIY Tank Top
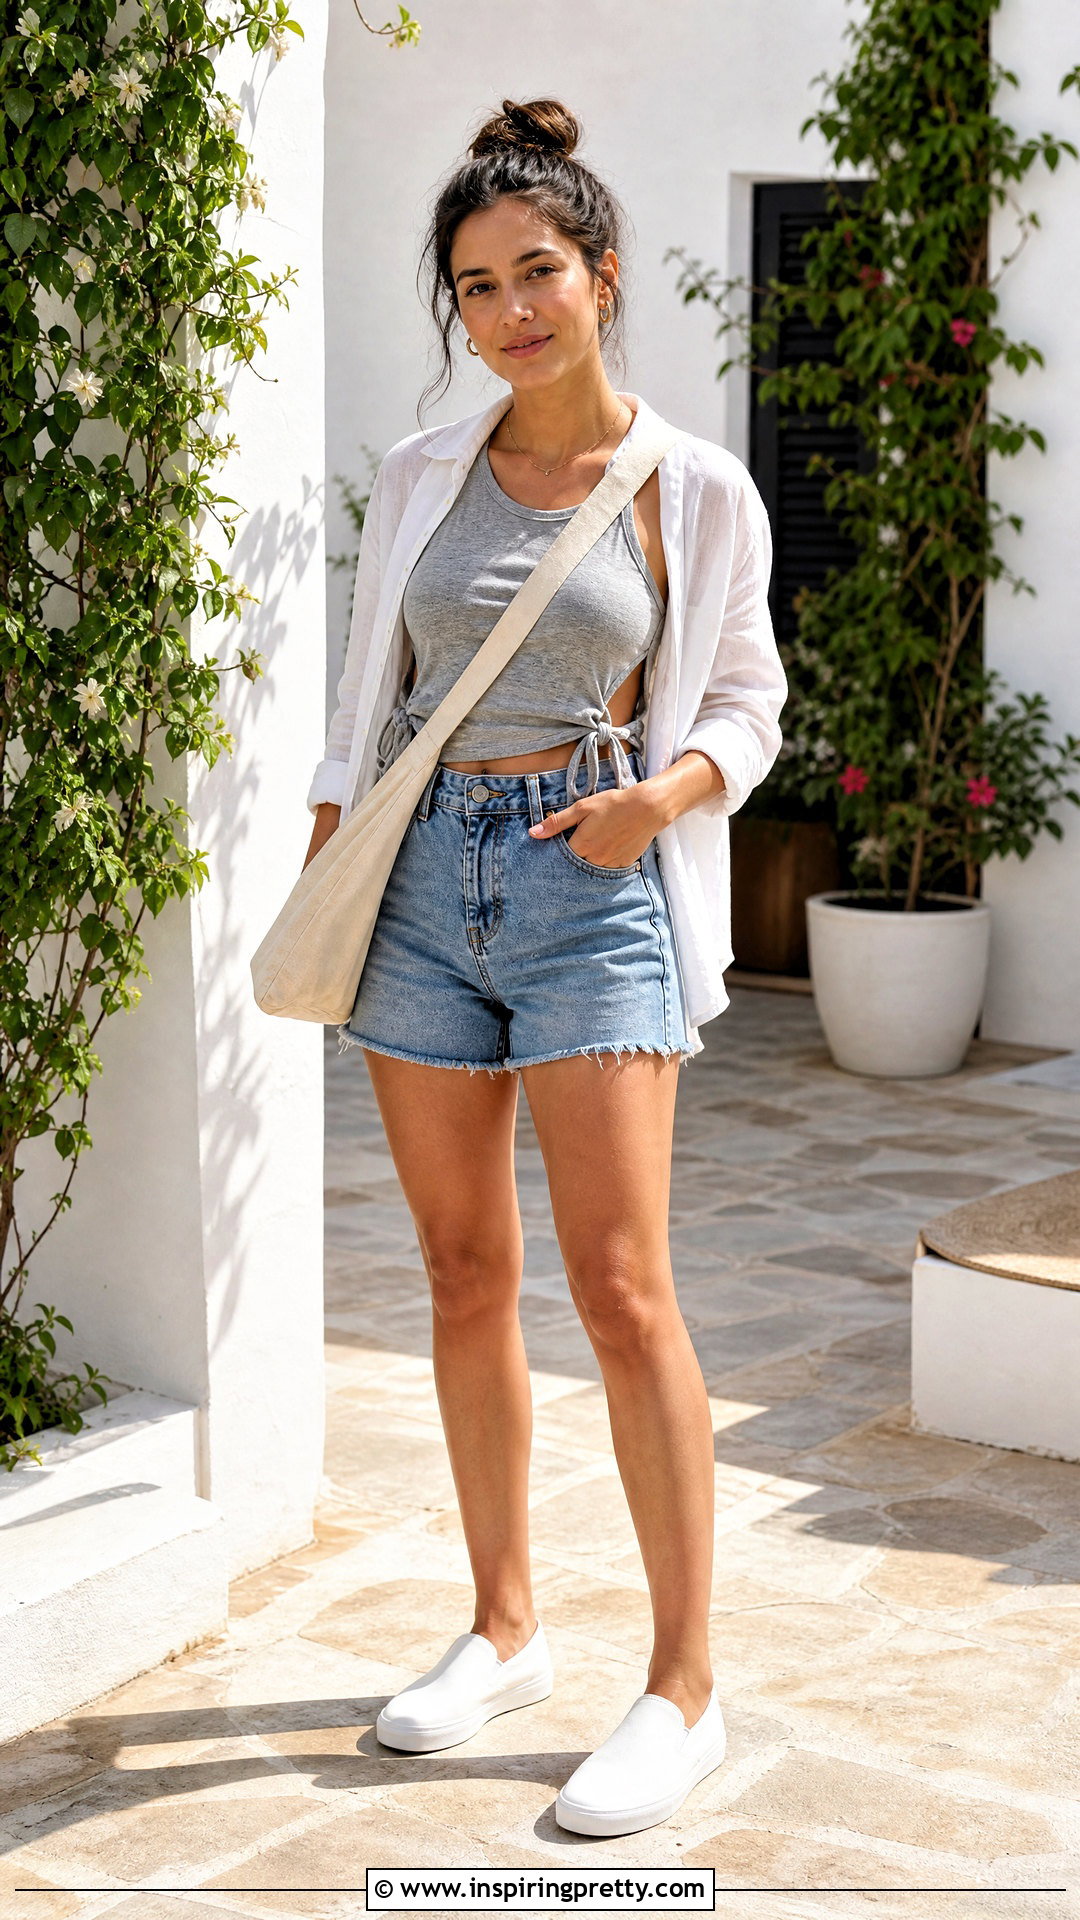
Side ties offer an easy way to shorten and shape an oversized tank. Cut a vertical slit upward from each side of the hem, stopping below the natural waist or desired tie point. Divide the front and back flaps into narrower tails if you want smaller knots. Try on the tank and tie each side loosely, adjusting until the hem sits evenly. Pair it with high-waisted denim shorts, slip-on sneakers, a canvas crossbody, and a lightweight open shirt. The side knots add shape while the outer layer keeps the outfit relaxed. Avoid cutting above the waistband unless you plan to add a fitted underlayer. Longer tails are easier to knot, so begin with a conservative slit and trim the excess only after testing the finished fit.
22. Front Tie DIY Tank Top
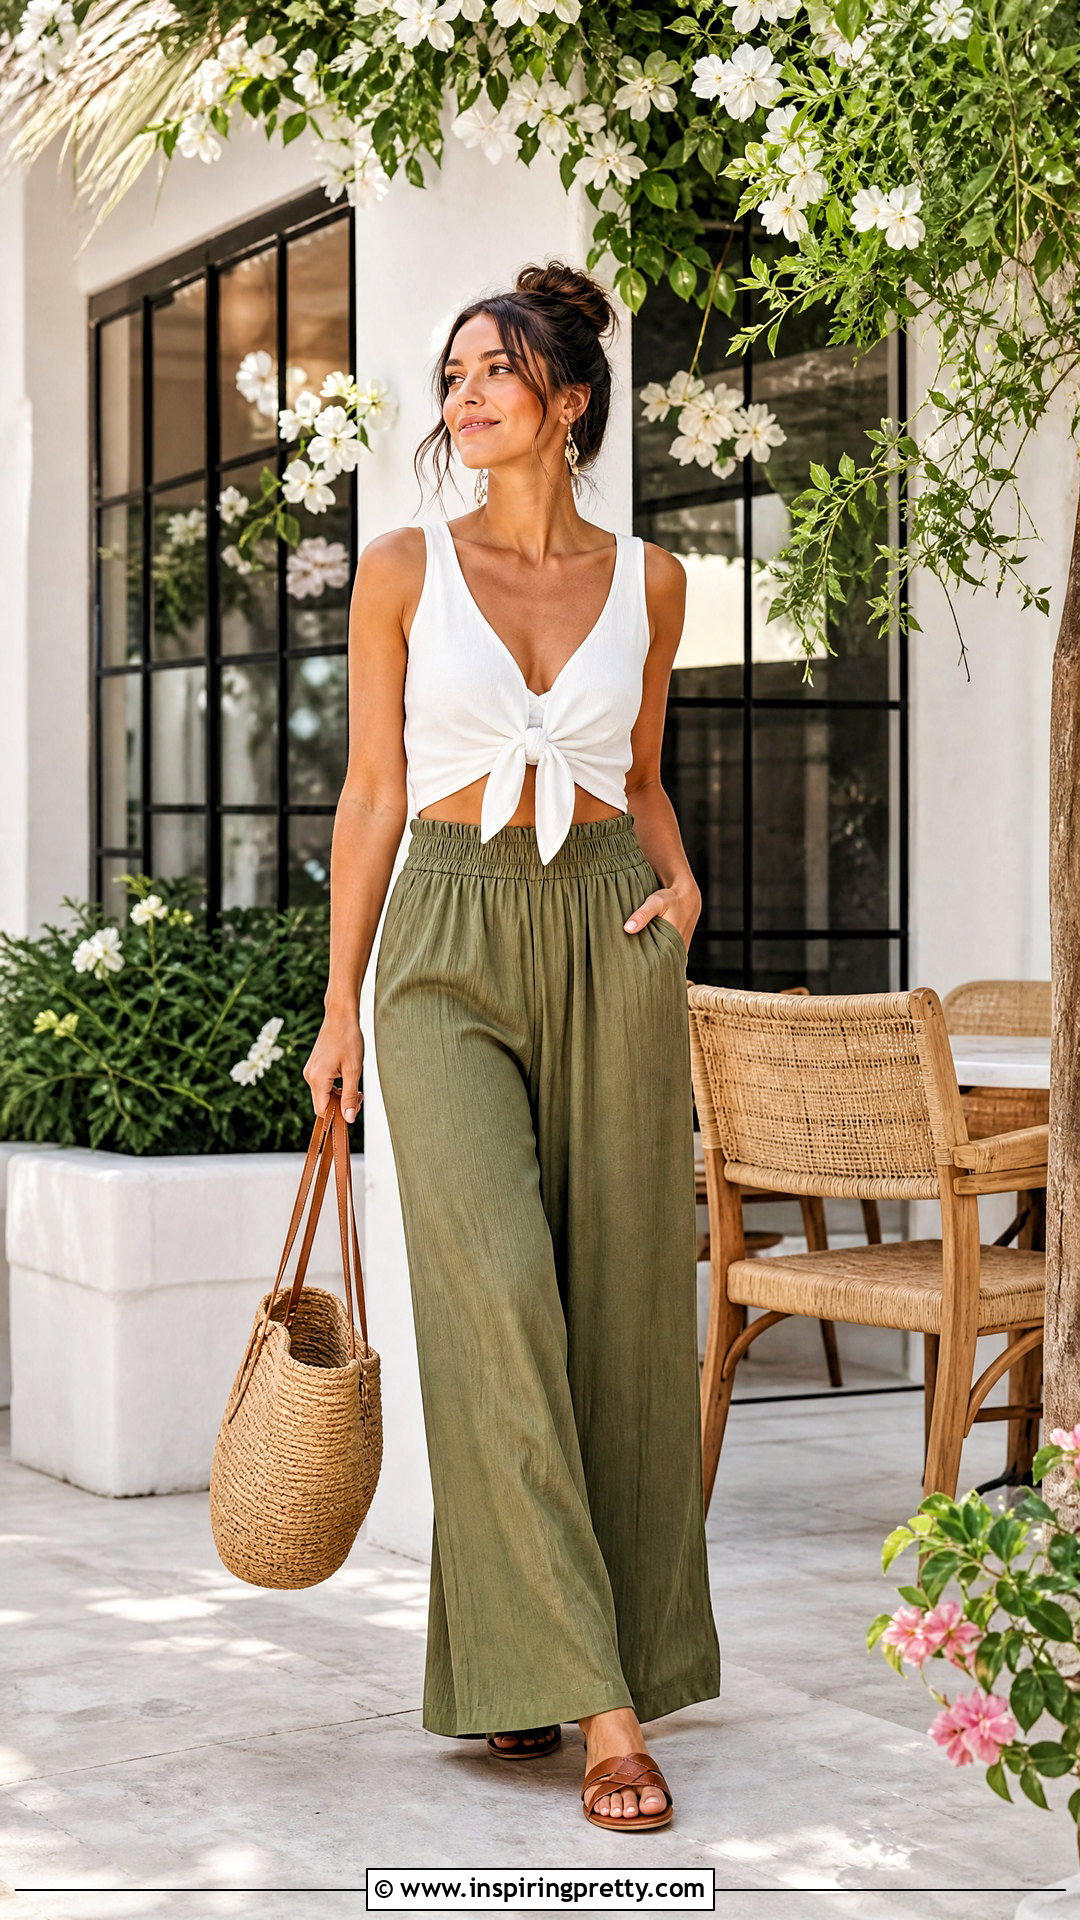
A front-tie tank transforms a long shirt into a fitted crop without removing the entire hem. Mark the desired back length and cut straight across the back panel only. On the front, cut downward from the center of the hem to create two long sections. Angle the outer edges upward so each section becomes a tie. Knot the tails at your natural waist and adjust the opening carefully. Wear the top with high-rise flowing pants, flat sandals, a straw-textured tote, and delicate earrings. The wide pants balance the shorter fitted shape. Keep the front tails broad enough that they will not curl into thin cords. If the original shirt has a graphic, position the angled cuts so the main design remains visible above the knot.
23. Twist Front DIY Tank Top
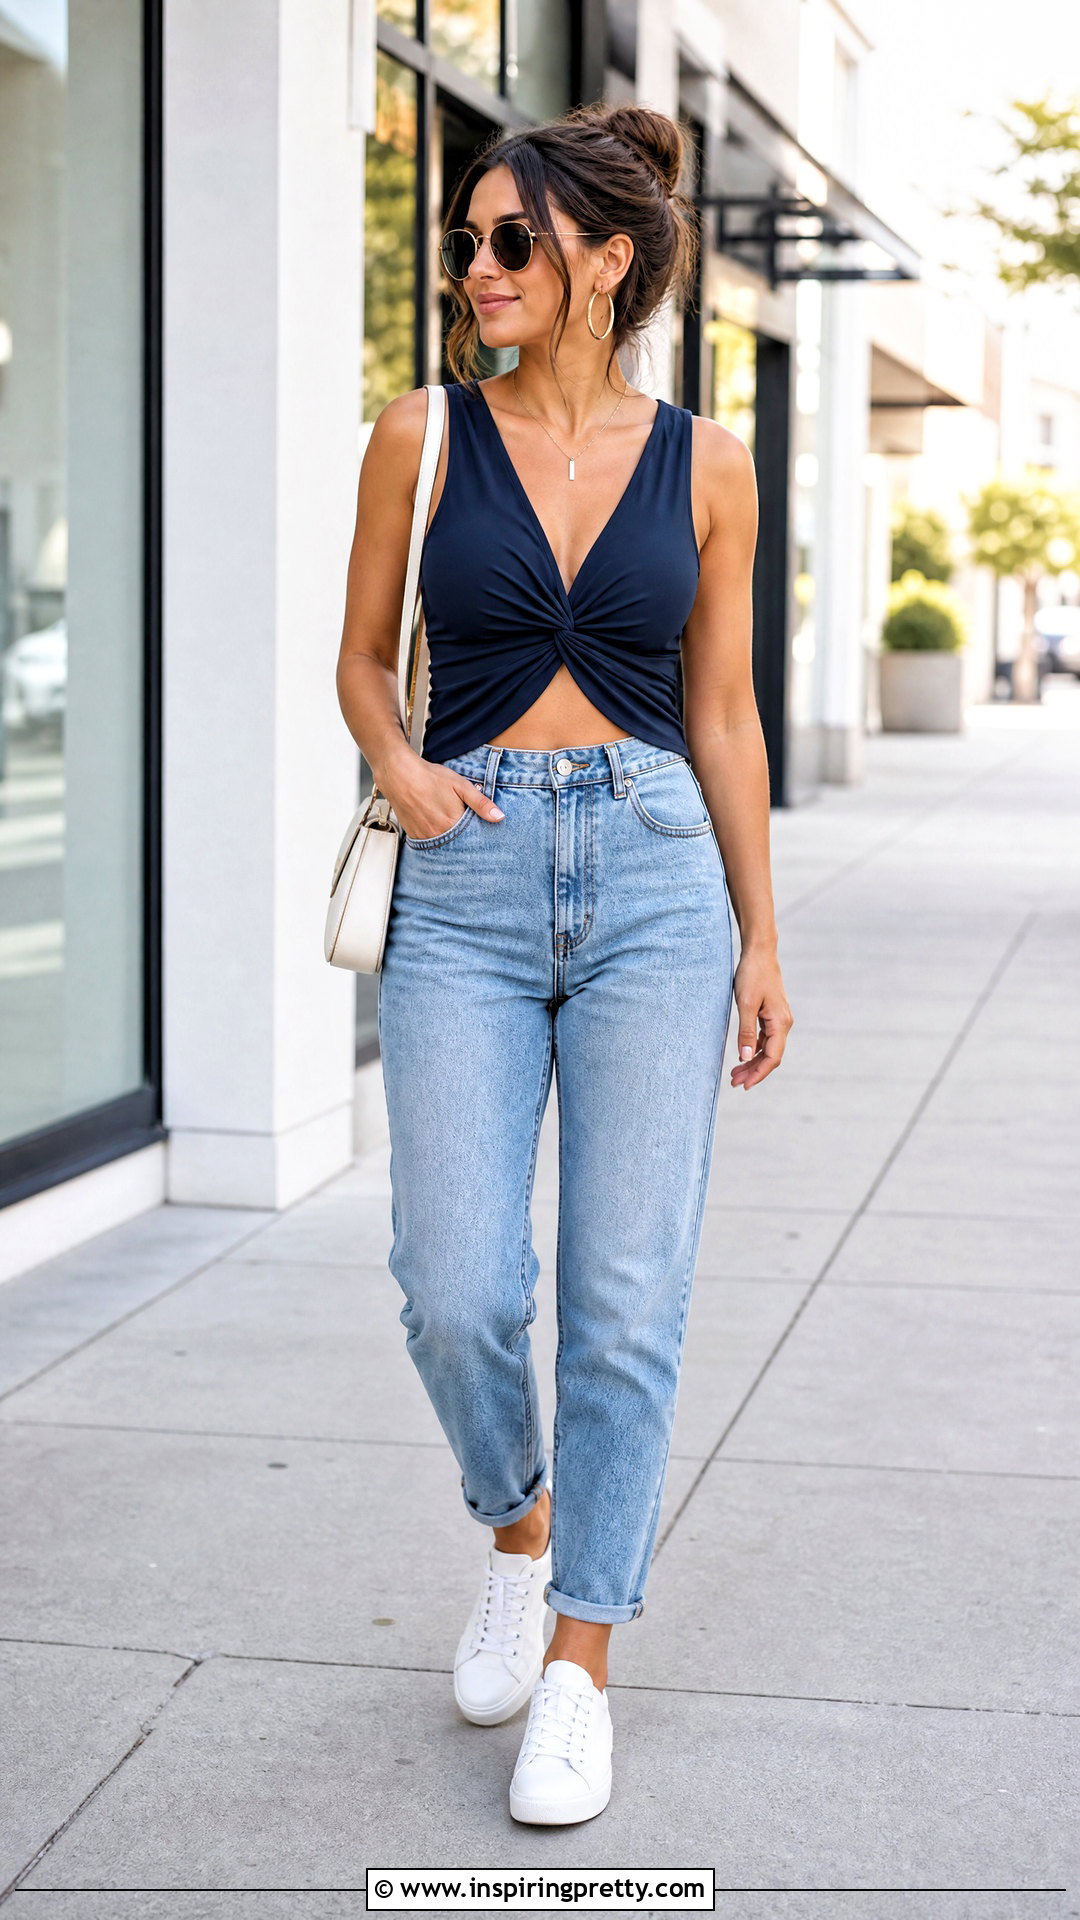
A twist-front cut creates a gathered center without requiring complicated sewing. Crop the back of an oversized tank to the desired length, then leave the front several inches longer. Cut a short vertical slit at the center front hem, forming two wide panels. Twist the panels around each other once and secure them with a knot or a few hidden stitches. Pair the finished top with high-waisted mom jeans, low-top sneakers, a small shoulder bag, and simple hoop earrings. The gathered front adds shape to a relaxed denim outfit. Avoid making the center slit too long, since it can reveal more fabric underneath than expected. Test the twist while wearing a base layer, and trim the panels only after finding the most comfortable position.
24. Knotted Hem DIY Tank Top
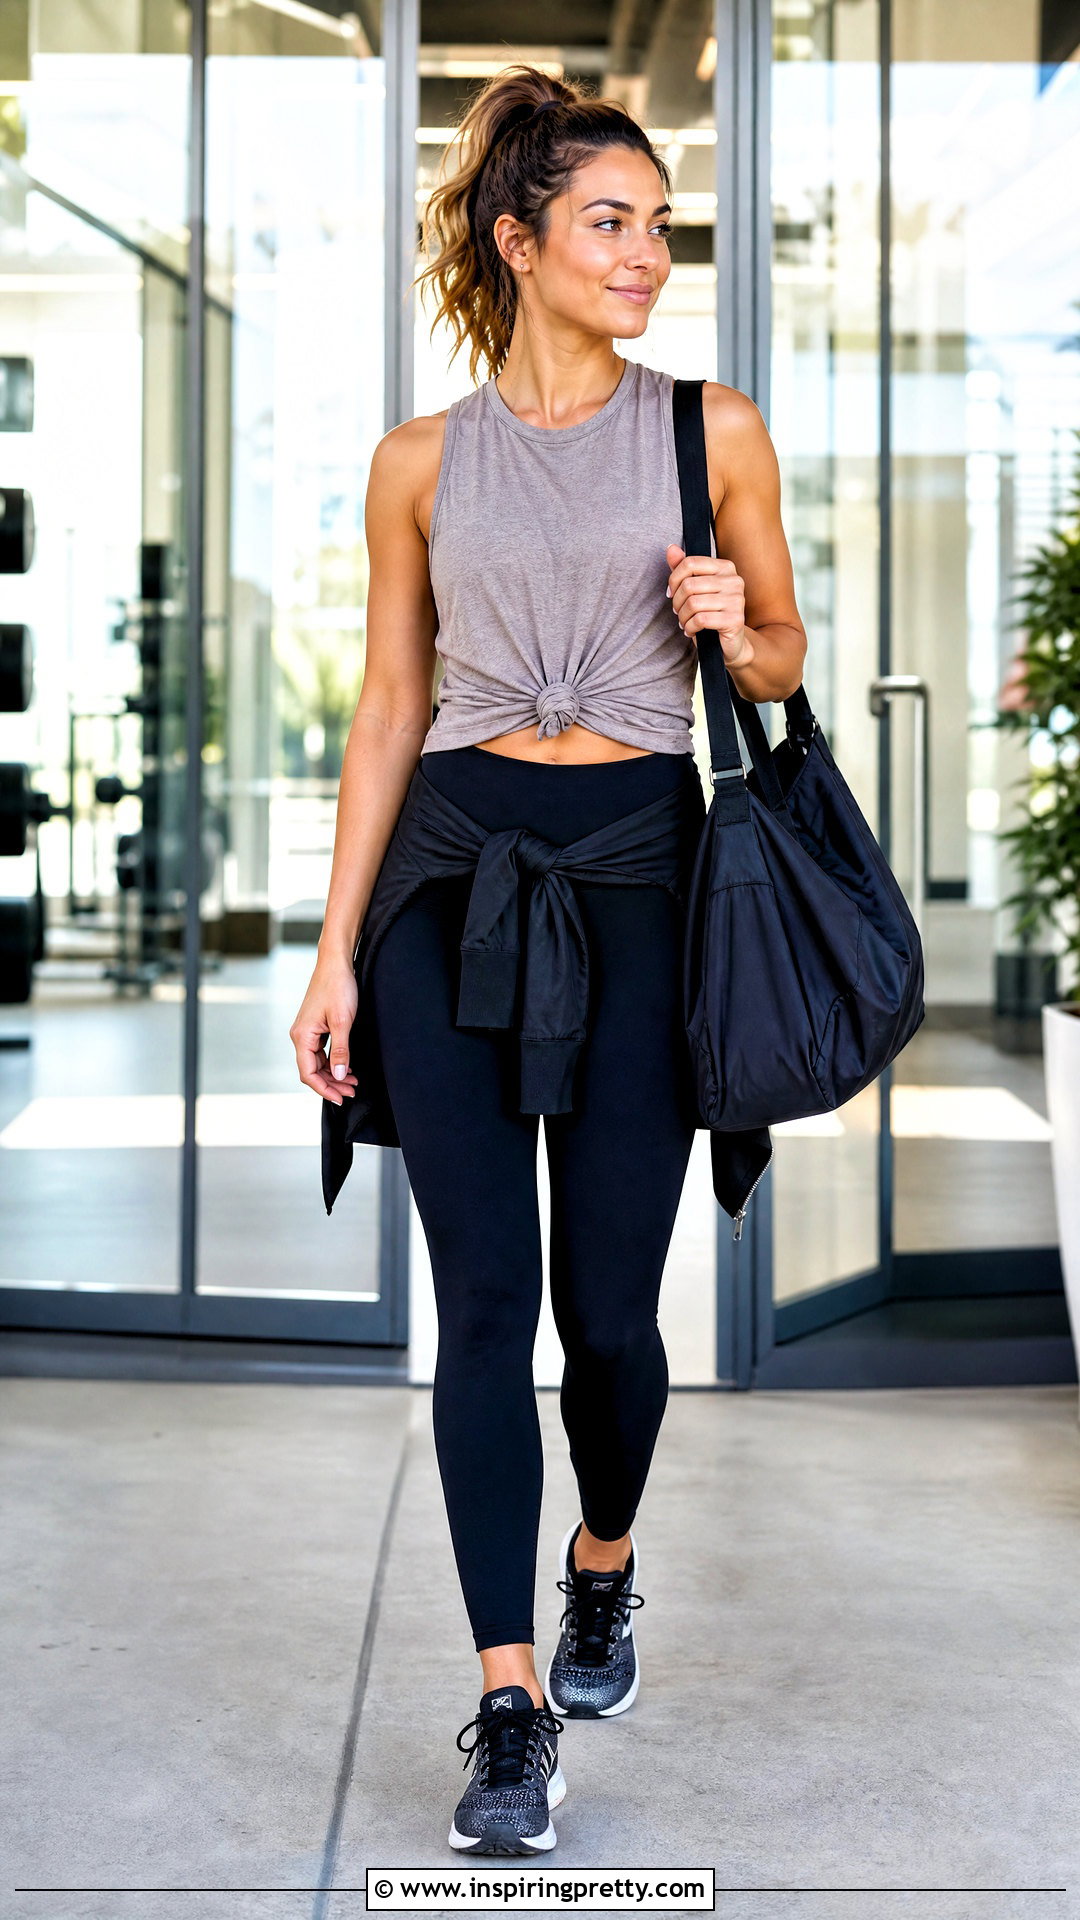
A knotted hem is a quick option when you want a fitted waist without dramatically changing the upper tank. Cut a small vertical slit at one side or at the center front of the hem. Separate the fabric into two sturdy tails and tie them once. If the tank is especially long, crop the back slightly so it aligns with the raised front. Build a comfortable outfit with high-rise leggings, supportive sneakers, a zip jacket, and a roomy gym tote. The knot prevents extra fabric from shifting during light activity. Make the tails wider than you think you need because jersey rolls after cutting. A side knot creates an asymmetrical effect, while a centered knot gives the tank a more balanced, sporty appearance.
25. Fringe Hem DIY Tank Top
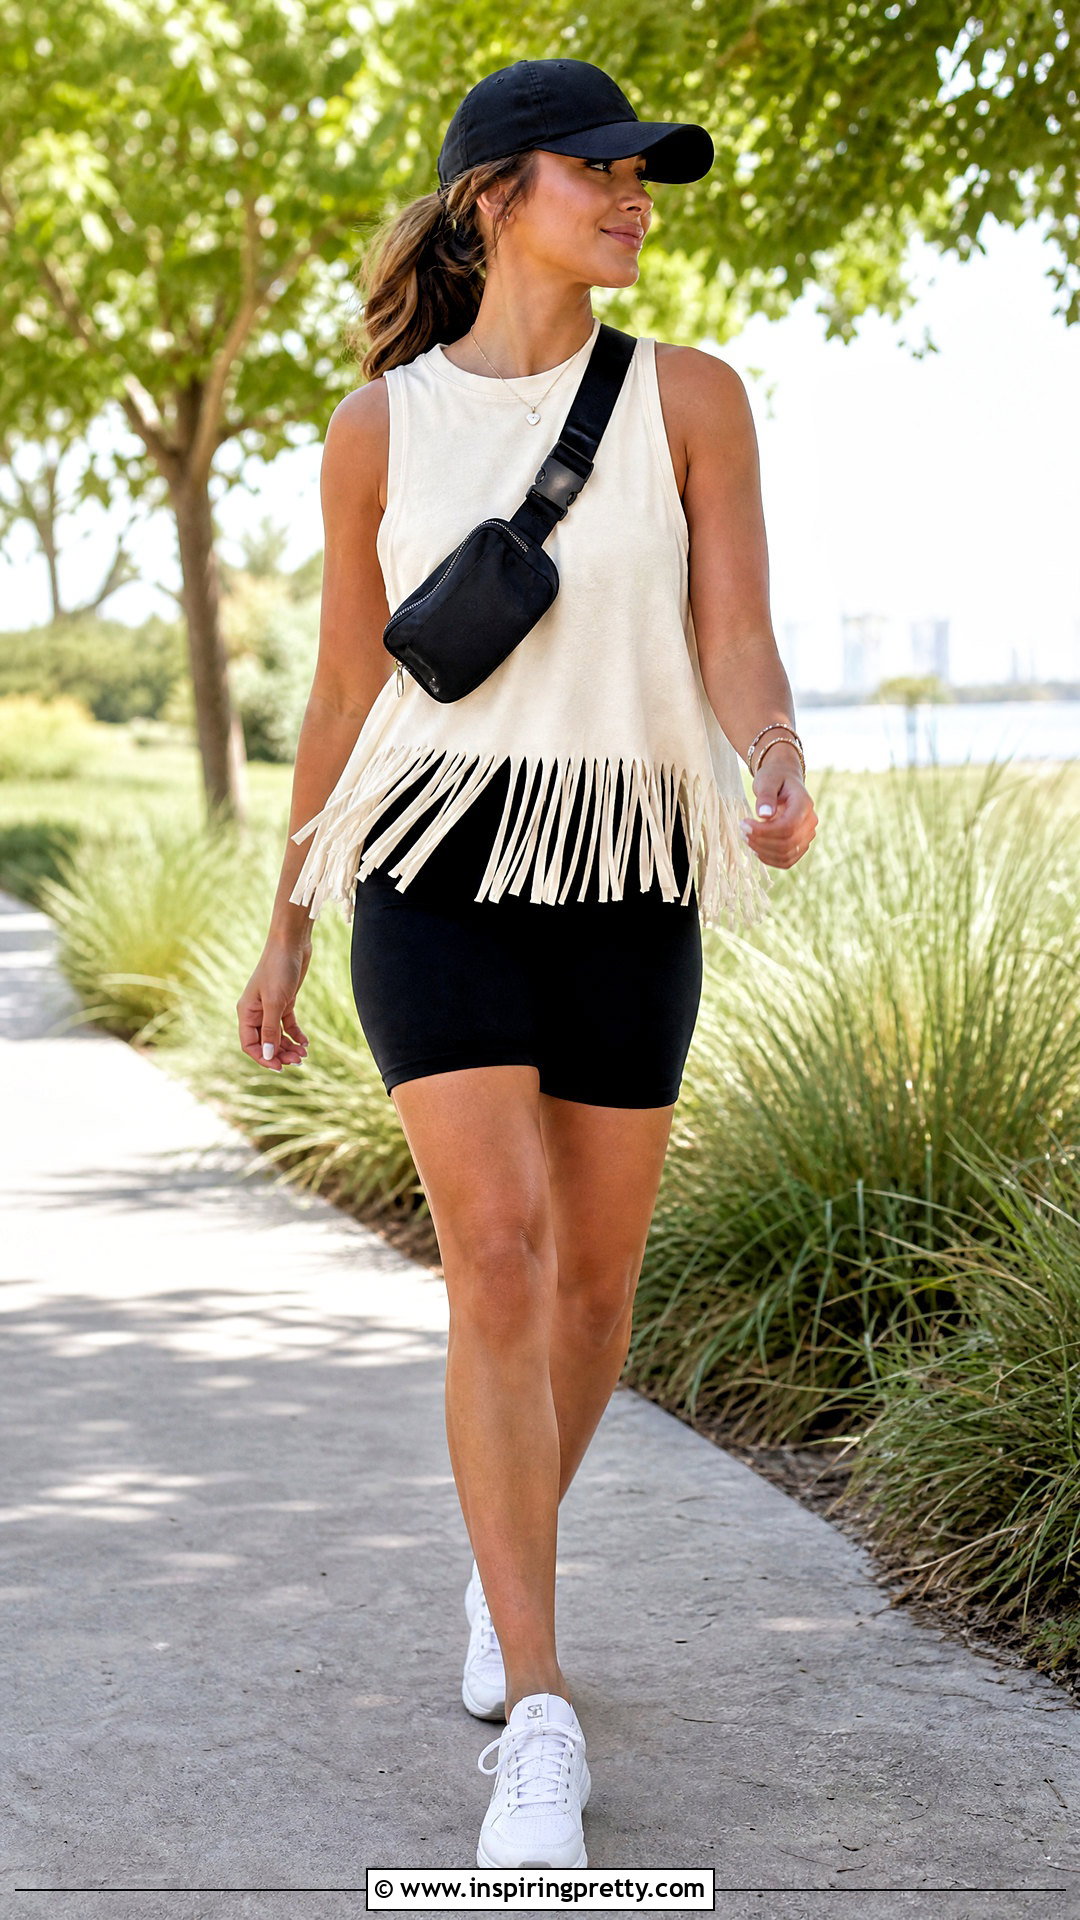
Long fringe can bring movement to a plain tank while using the existing hem as the design base. Mark a horizontal stopping line several inches above the bottom. Cut vertical strips from the hem to this line, keeping them approximately equal in width. Stretch each strip gently so it becomes a rolled cord. Leave the fringe loose or knot neighboring strands for more texture. Wear the finished tank with fitted bike shorts, simple sneakers, a crossbody belt bag, and a cap. The streamlined bottoms keep the fringe from making the outfit appear too busy. Avoid making extremely thin strips, which can snap or tangle. For a cleaner result, use a ruler to mark every cutting point before starting and trim the strands to an even length afterward.
26. Beaded Fringe DIY Tank Top
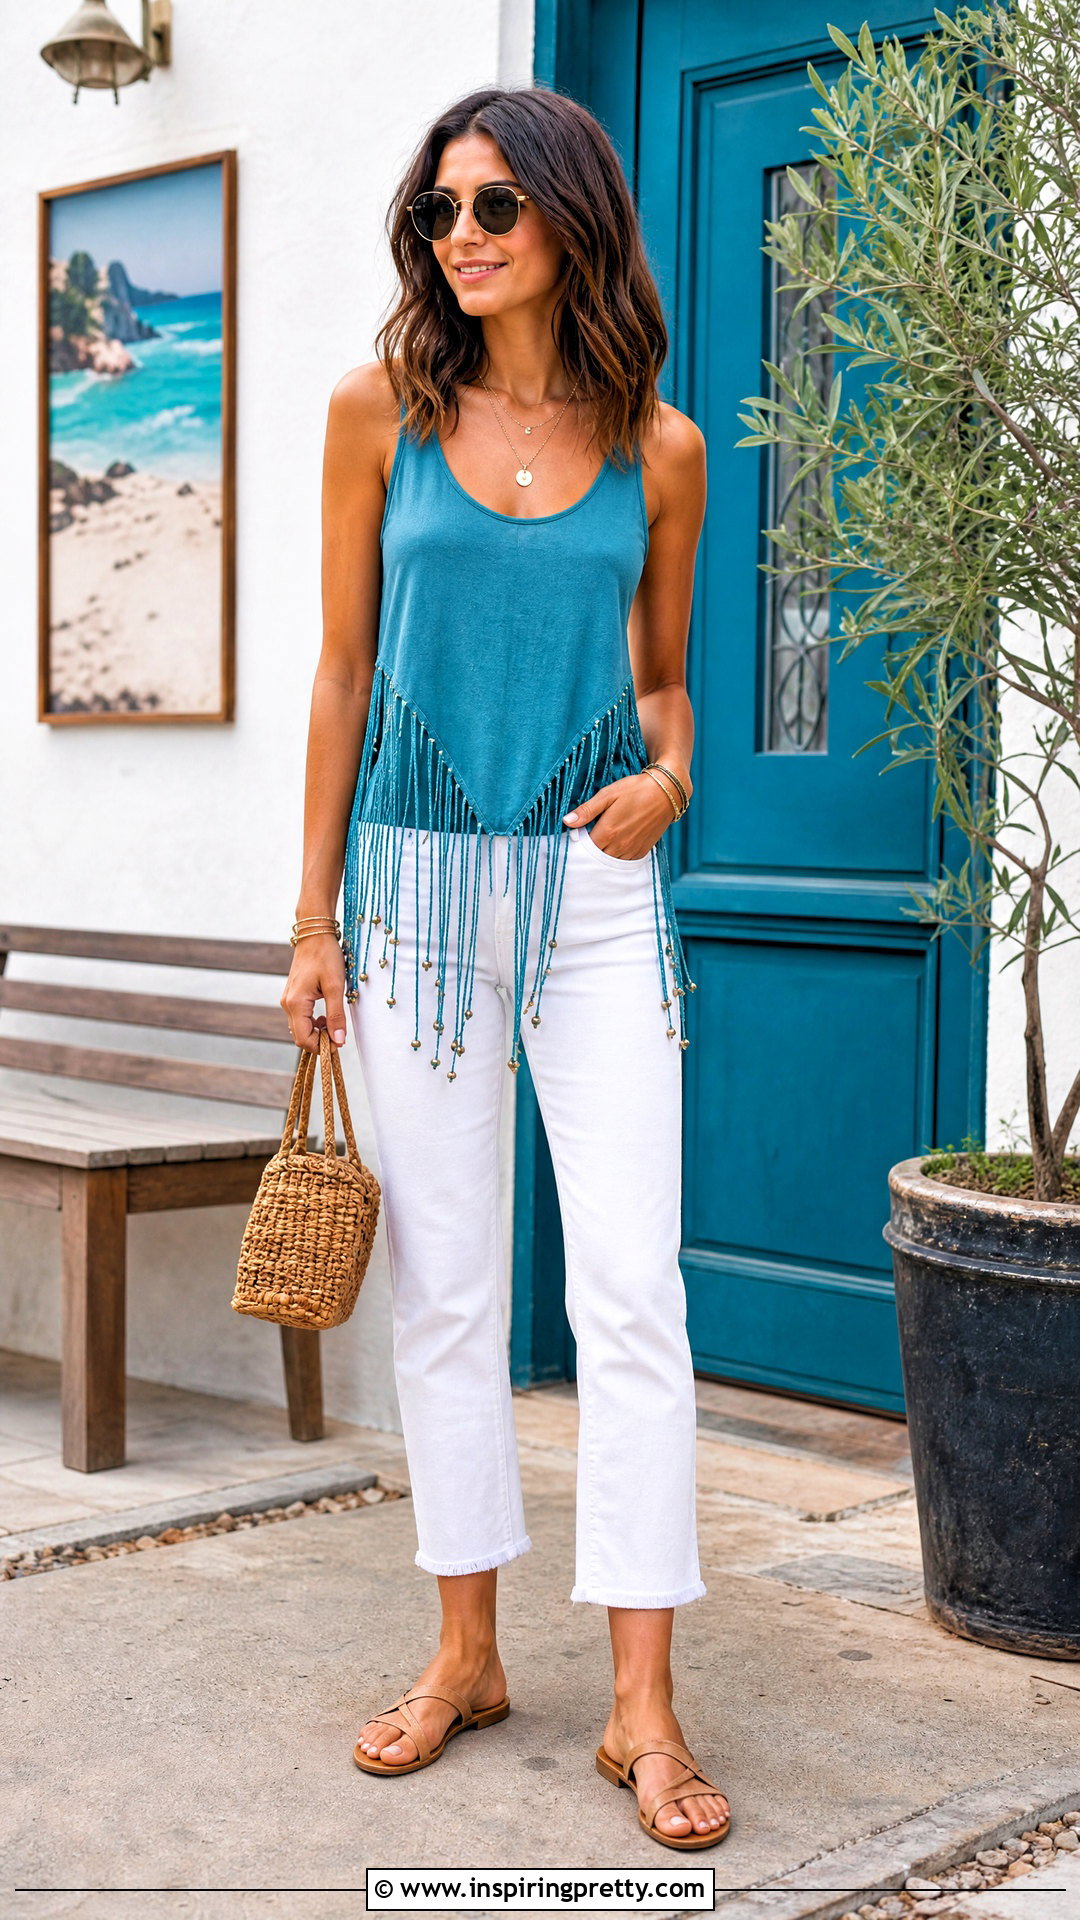
Beaded fringe adds color and weight to a basic cut-fringe tank. Begin by marking and cutting medium-width strips along the lower hem. Stretch each strip, then slide one or two lightweight beads onto selected strands. Tie a firm knot beneath every bead so it cannot fall off. Use large-hole beads with smooth edges to avoid damaging the fabric. Pair the finished tank with solid cropped jeans, flat sandals, a small woven bag, and simple bracelets. Keeping the rest of the outfit understated lets the fringe remain the focus. Distribute the beads evenly so one section does not become noticeably heavier. This top should be washed gently in a mesh bag or by hand because loose fringe and decorative beads can catch inside a washing machine.
27. Braided Back DIY Tank Top
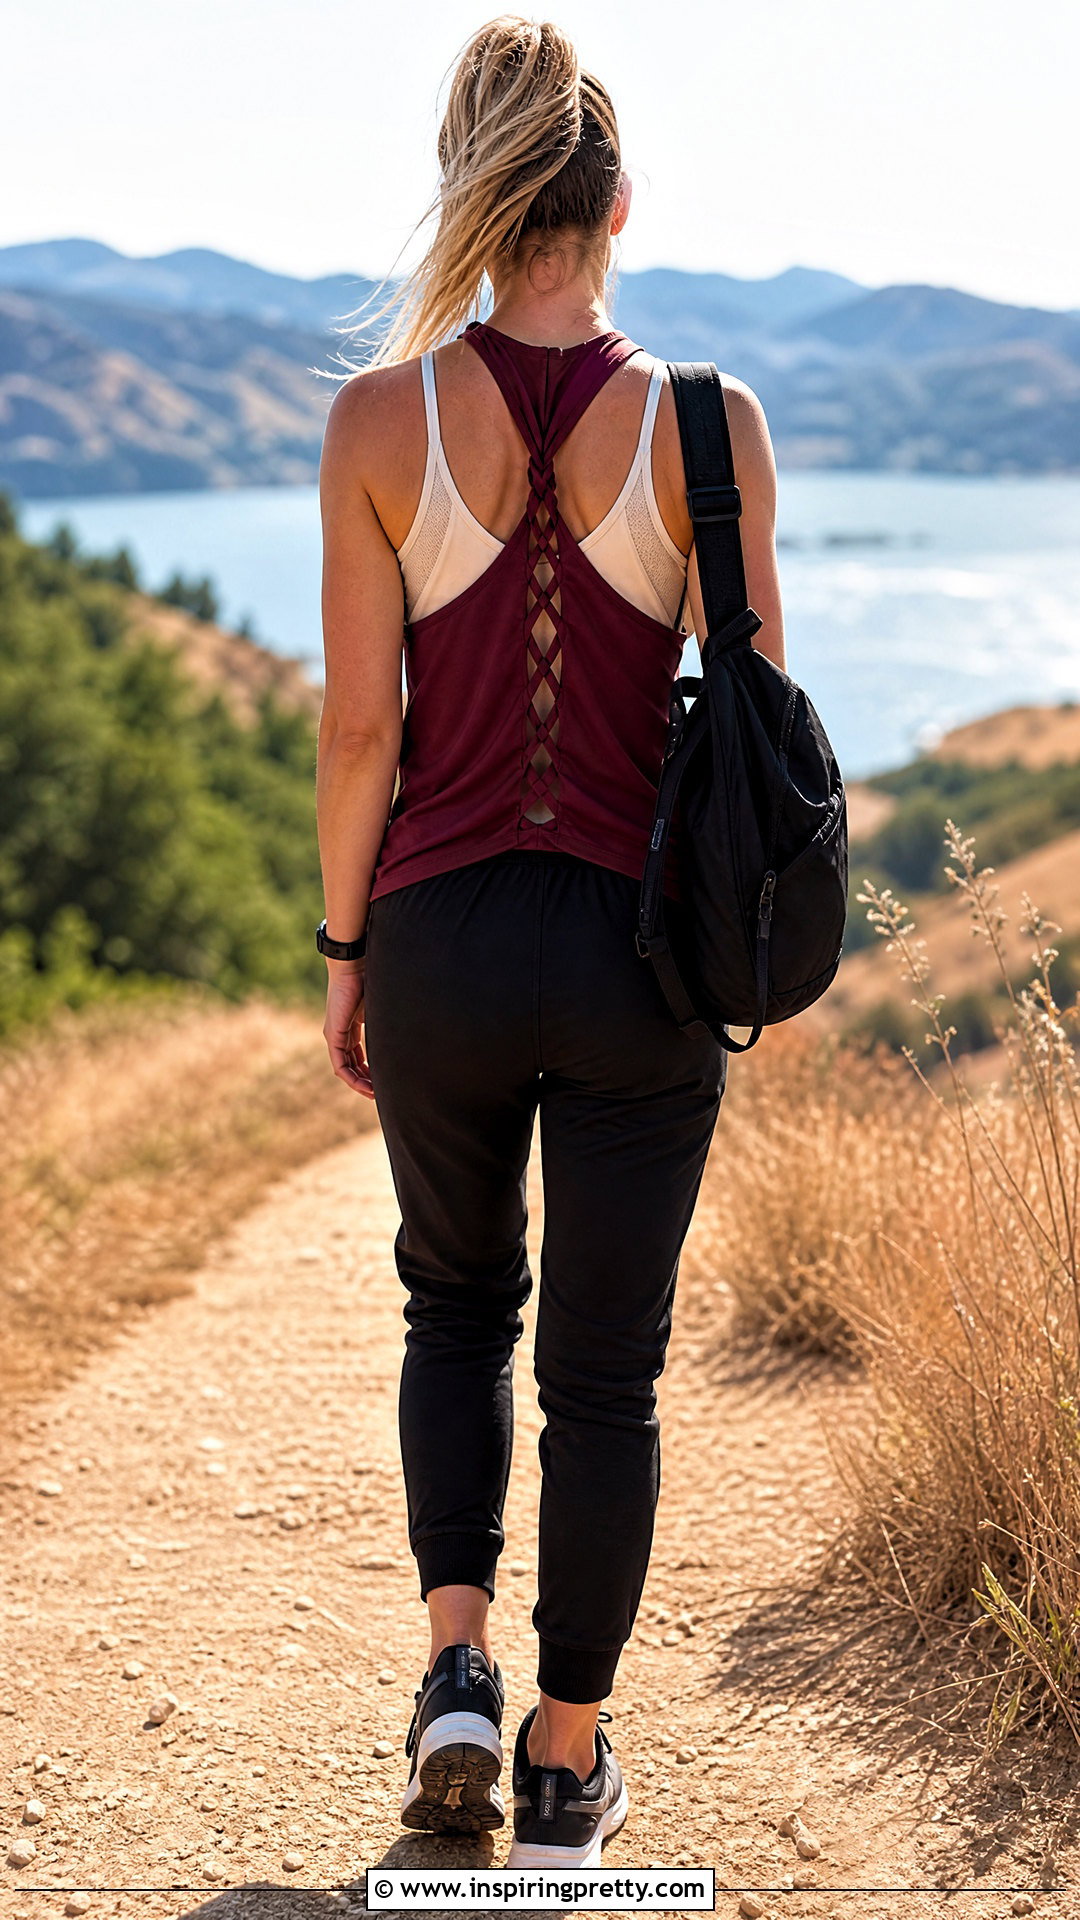
A braided back turns several cut fabric strips into an intricate-looking center detail. Start with a loose tank and cut the upper back into three long vertical sections, leaving the neckline and lower back intact. Stretch the sections into cords, braid them without pulling too tightly, and secure the end with hand stitching or a saved fabric tie. Wear the tank over a contrast athletic layer with tapered joggers, supportive sneakers, and a streamlined backpack. The simple sporty pieces make the braid easy to see. Check that the finished braid allows comfortable shoulder movement before fastening it permanently. This technique works best on soft jersey with some stretch. Avoid heavily worn fabric because narrow braided sections need enough strength to support the back of the tank.
28. Braided Strap DIY Tank Top
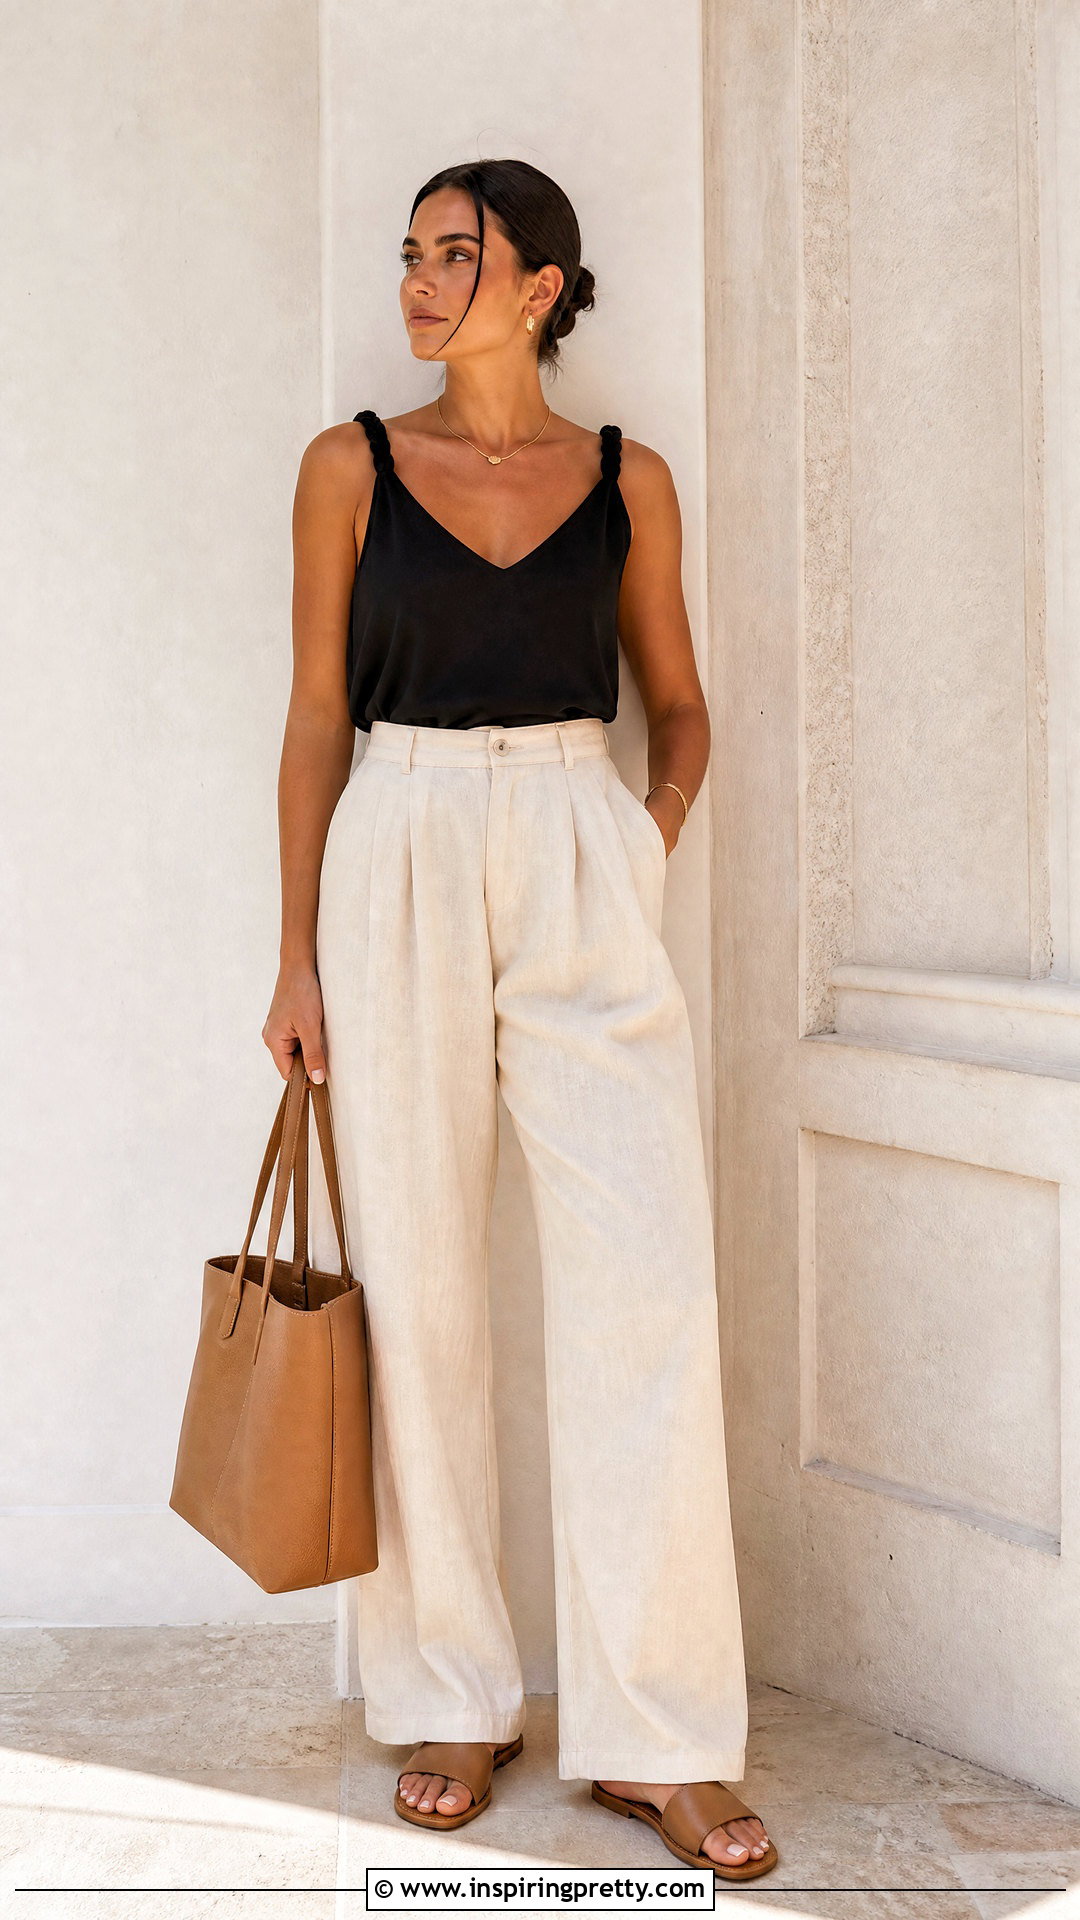
Braided straps can replace wide tank shoulders with a more decorative finish. Cut each existing shoulder panel into three equal strips, stopping before the front and back body panels. Stretch the strips lightly and braid them toward the top of the shoulder. Secure the ends with several small stitches, making sure both straps finish at the same length. Style the top with high-waisted linen trousers, comfortable slide sandals, a structured tote, and minimal jewelry. The refined bottoms keep the handmade straps looking intentional. Try on the tank before final stitching because braiding shortens the shoulder length and may raise the armholes. If the straps feel too tight, connect them with extra fabric strips rather than stretching the neckline or body of the top.
29. Wrapped Racerback DIY Tank Top
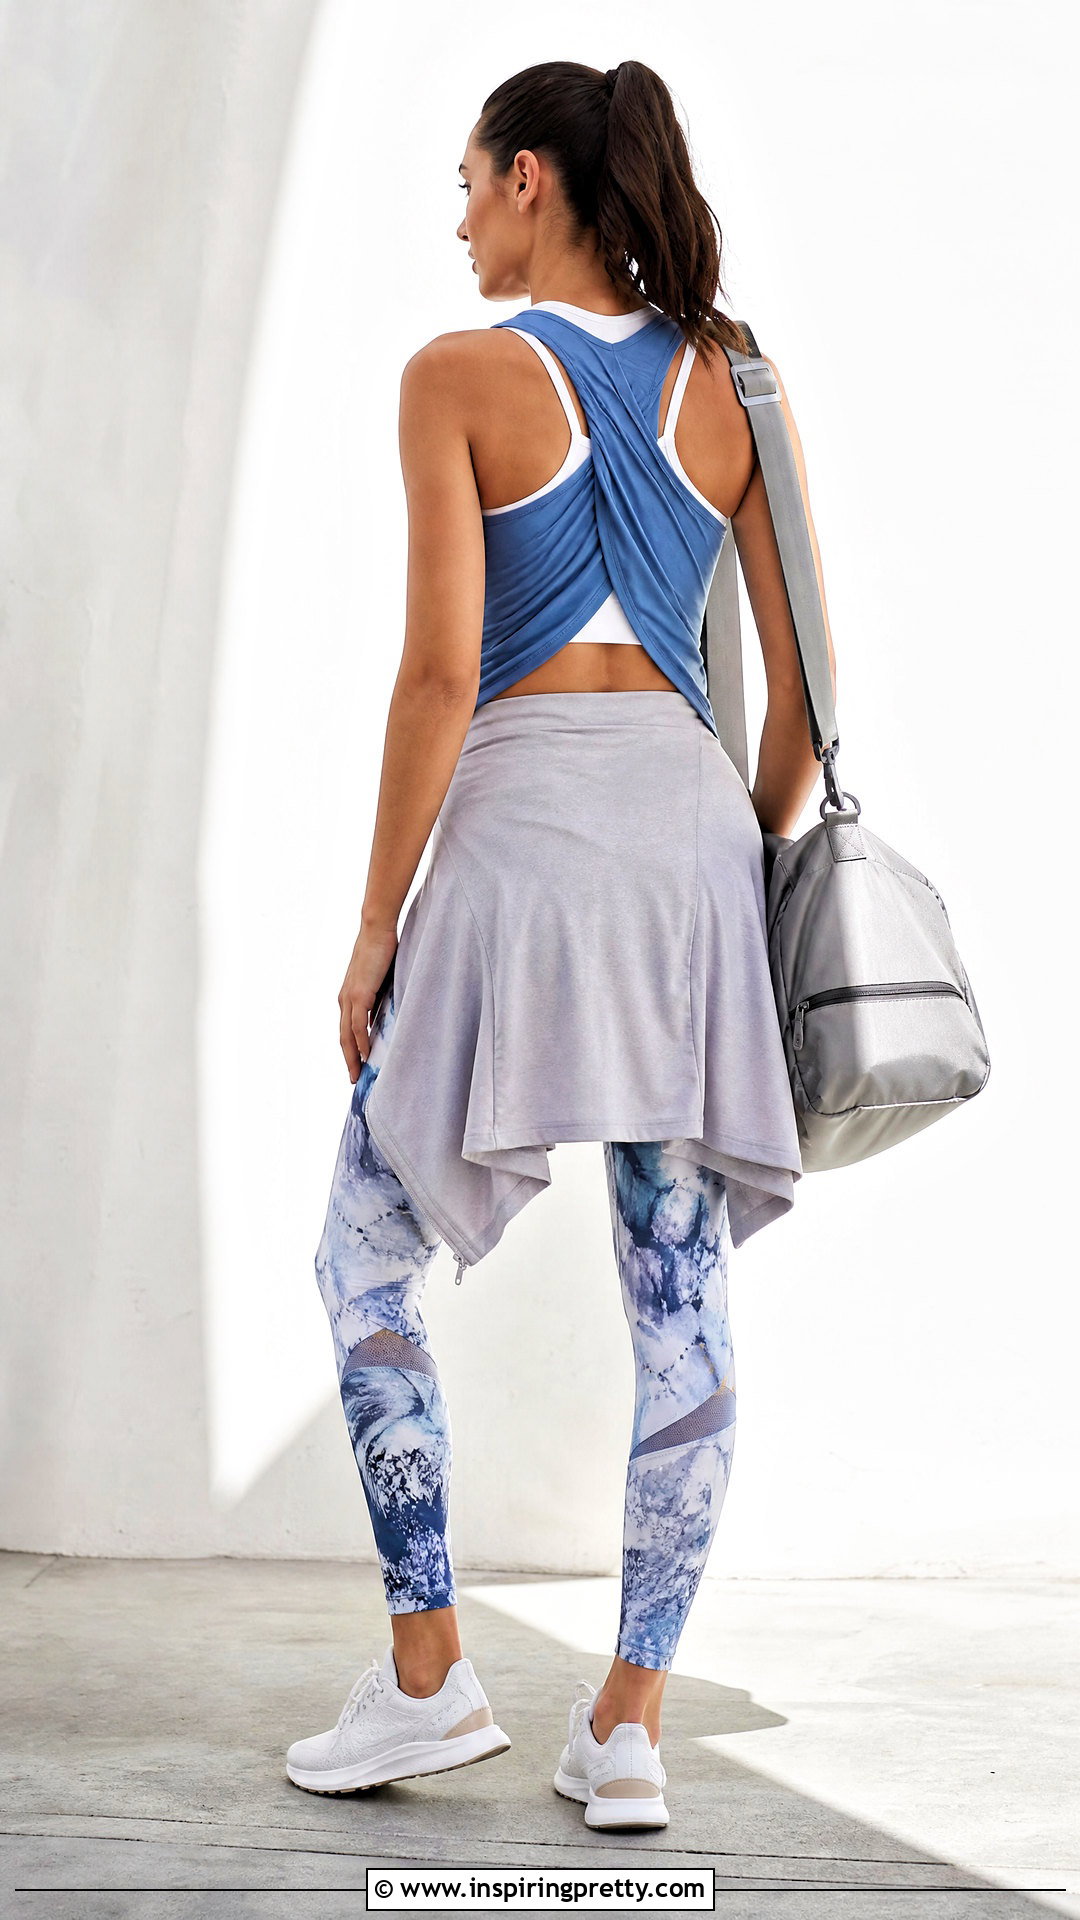
A wrapped racerback uses scrap fabric to gather a standard racerback into a narrow center column. After creating curved back armholes, cut a long strip from the removed hem or sleeve. Pinch the two back shoulder sections together and wrap the strip around them several times. Tie or stitch the ends securely on the inside. Pair the tank with patterned leggings, clean trainers, a lightweight sweatshirt tied at the waist, and a practical shoulder bag. A coordinating sports layer underneath completes the workout-inspired outfit. Do not wrap the fabric so tightly that the neckline pulls backward against your neck. Test your range of motion first, then adjust the wrap. A broad, neat wrap generally feels more comfortable and durable than a very thin, tightly wound cord.
30. Bow Back DIY Tank Top
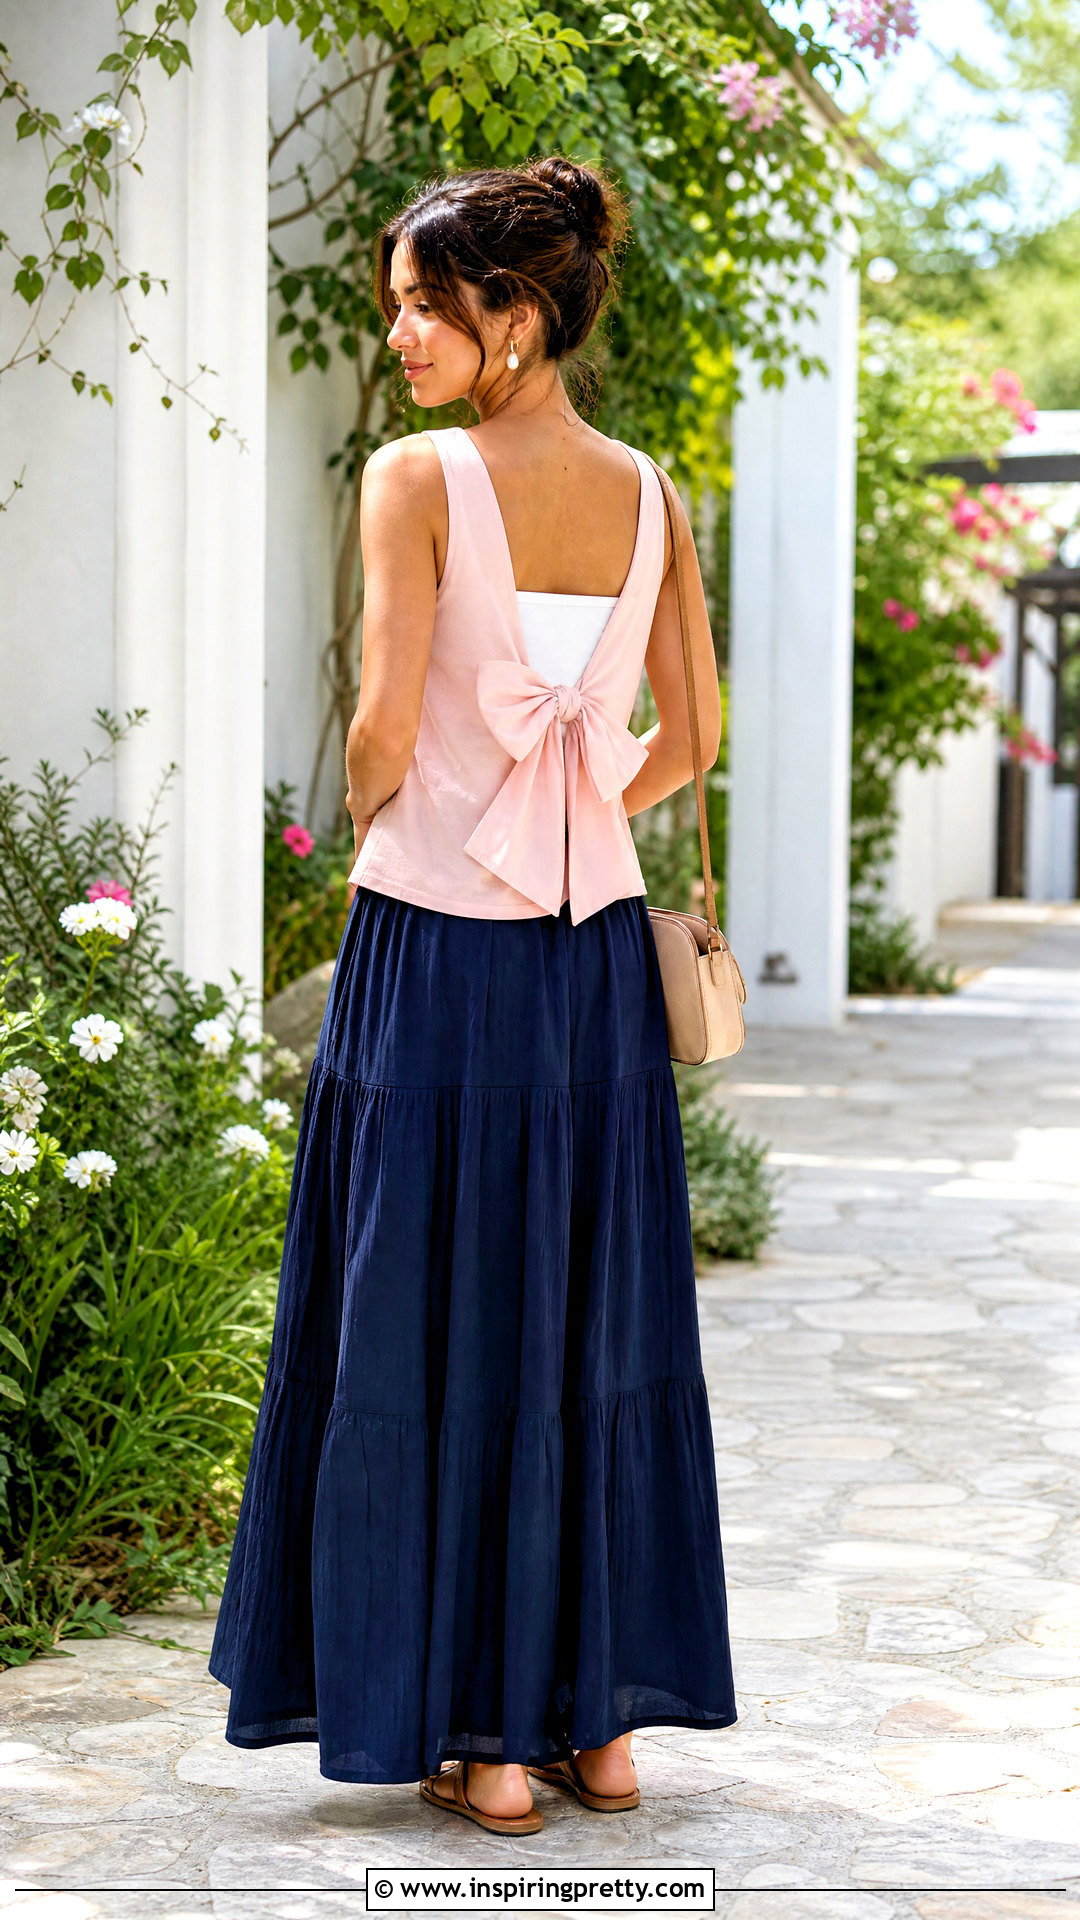
A bow-back tank combines an open panel with a soft tie detail. Cut a wide horizontal opening across the upper or middle back, leaving the side seams untouched. Create two long fabric tails from the center edges of the opening, or attach strips saved from the hem. Tie them into a loose bow that sits flat against the back. Style the tank with a flowing maxi skirt, flat sandals, a small shoulder bag, and understated earrings. A fitted contrast camisole beneath the opening can make the bow stand out. Keep the tails wide enough to hold their shape and avoid an overly tight knot. If the bow feels heavy, shorten the strips gradually. Hand-stitch the attachment points so repeated tying does not stretch or tear the back panel.
31. Open Back DIY Tank Top
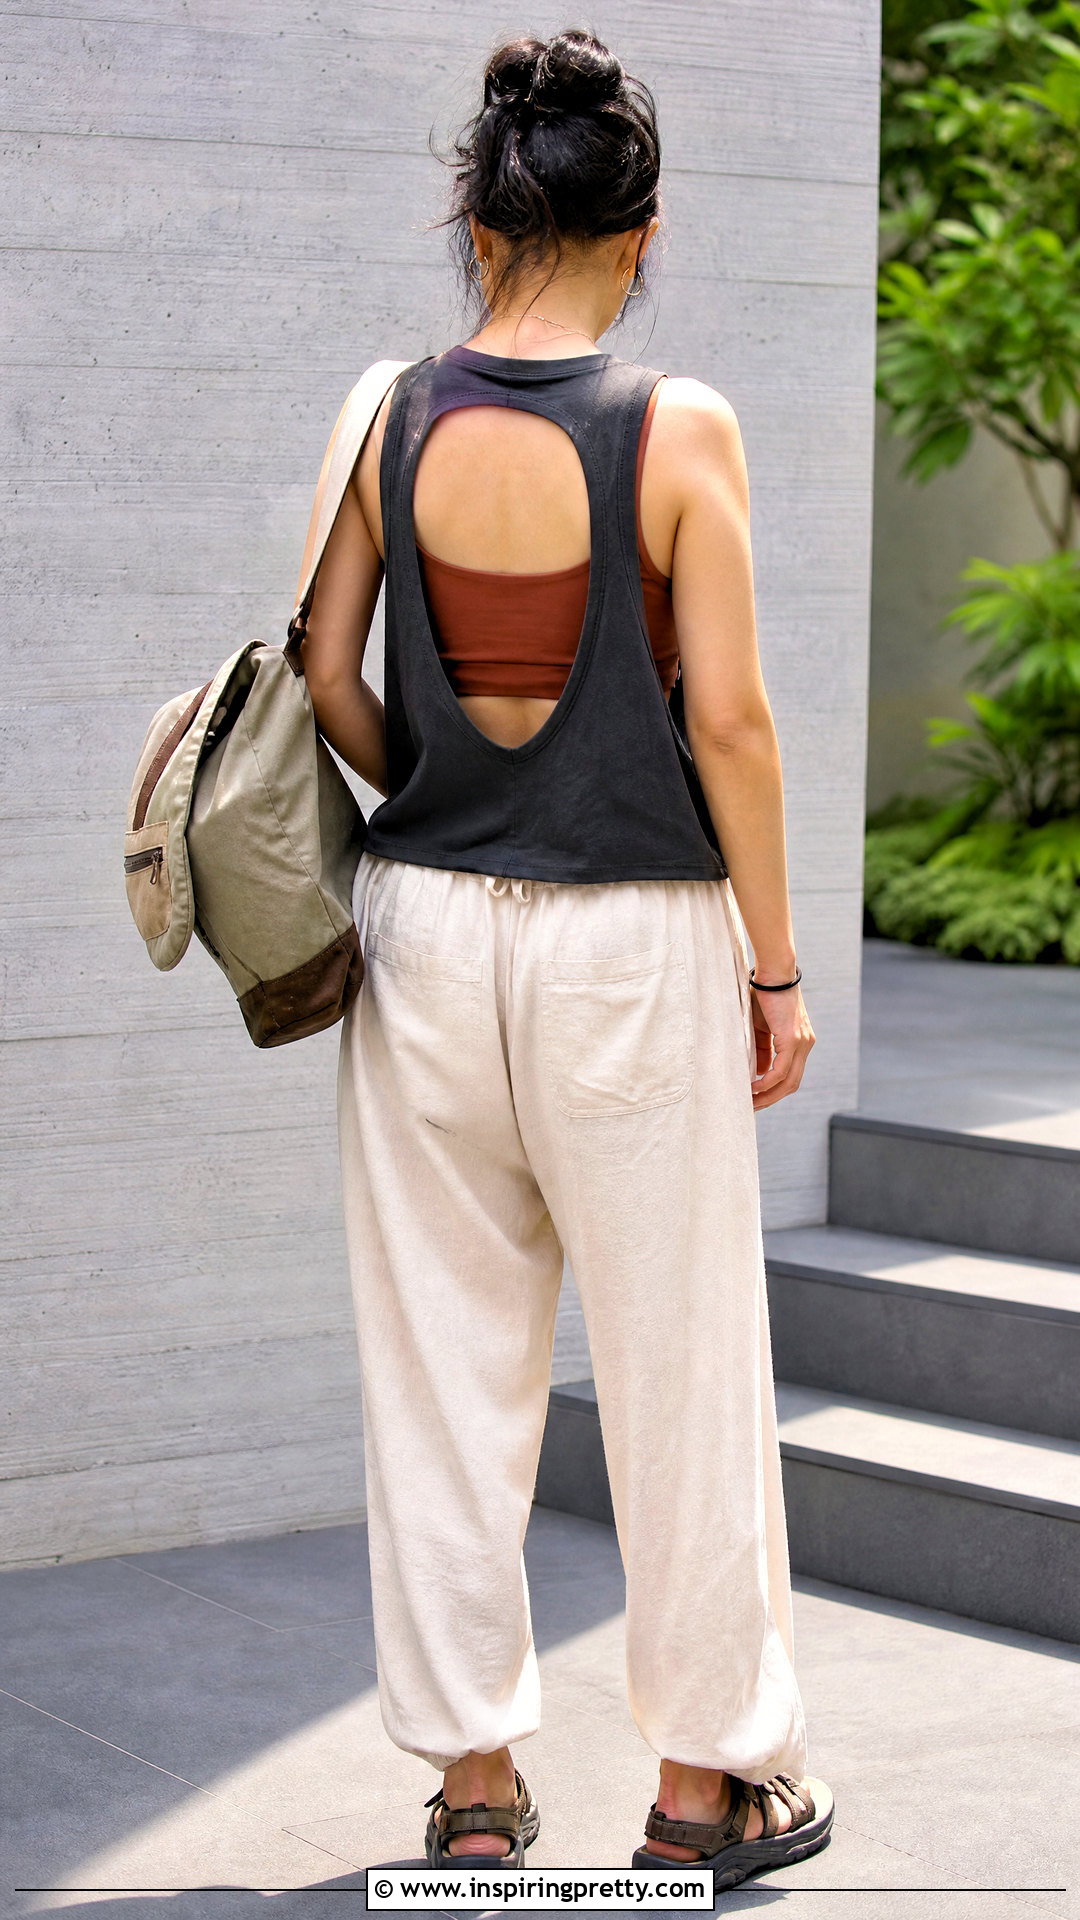
An open-back cut creates a dramatic transformation while leaving the front of a favorite graphic tank untouched. Turn the shirt over and mark a large rounded opening that begins below the shoulders and ends above the waist. Keep wide fabric borders beside the armholes and along the hem. Cut conservatively, then try on the tank before enlarging the opening. Wear it over a fitted contrast top with loose drawstring pants, sporty sandals, and a canvas backpack. The relaxed outfit makes the open back suitable for casual summer activities. Add a horizontal fabric tie across the upper opening if the shoulders spread or slip. Medium-weight cotton jersey is preferable because very lightweight material may sag when a large section of the back is removed.
32. Cross Strap Back DIY Tank Top
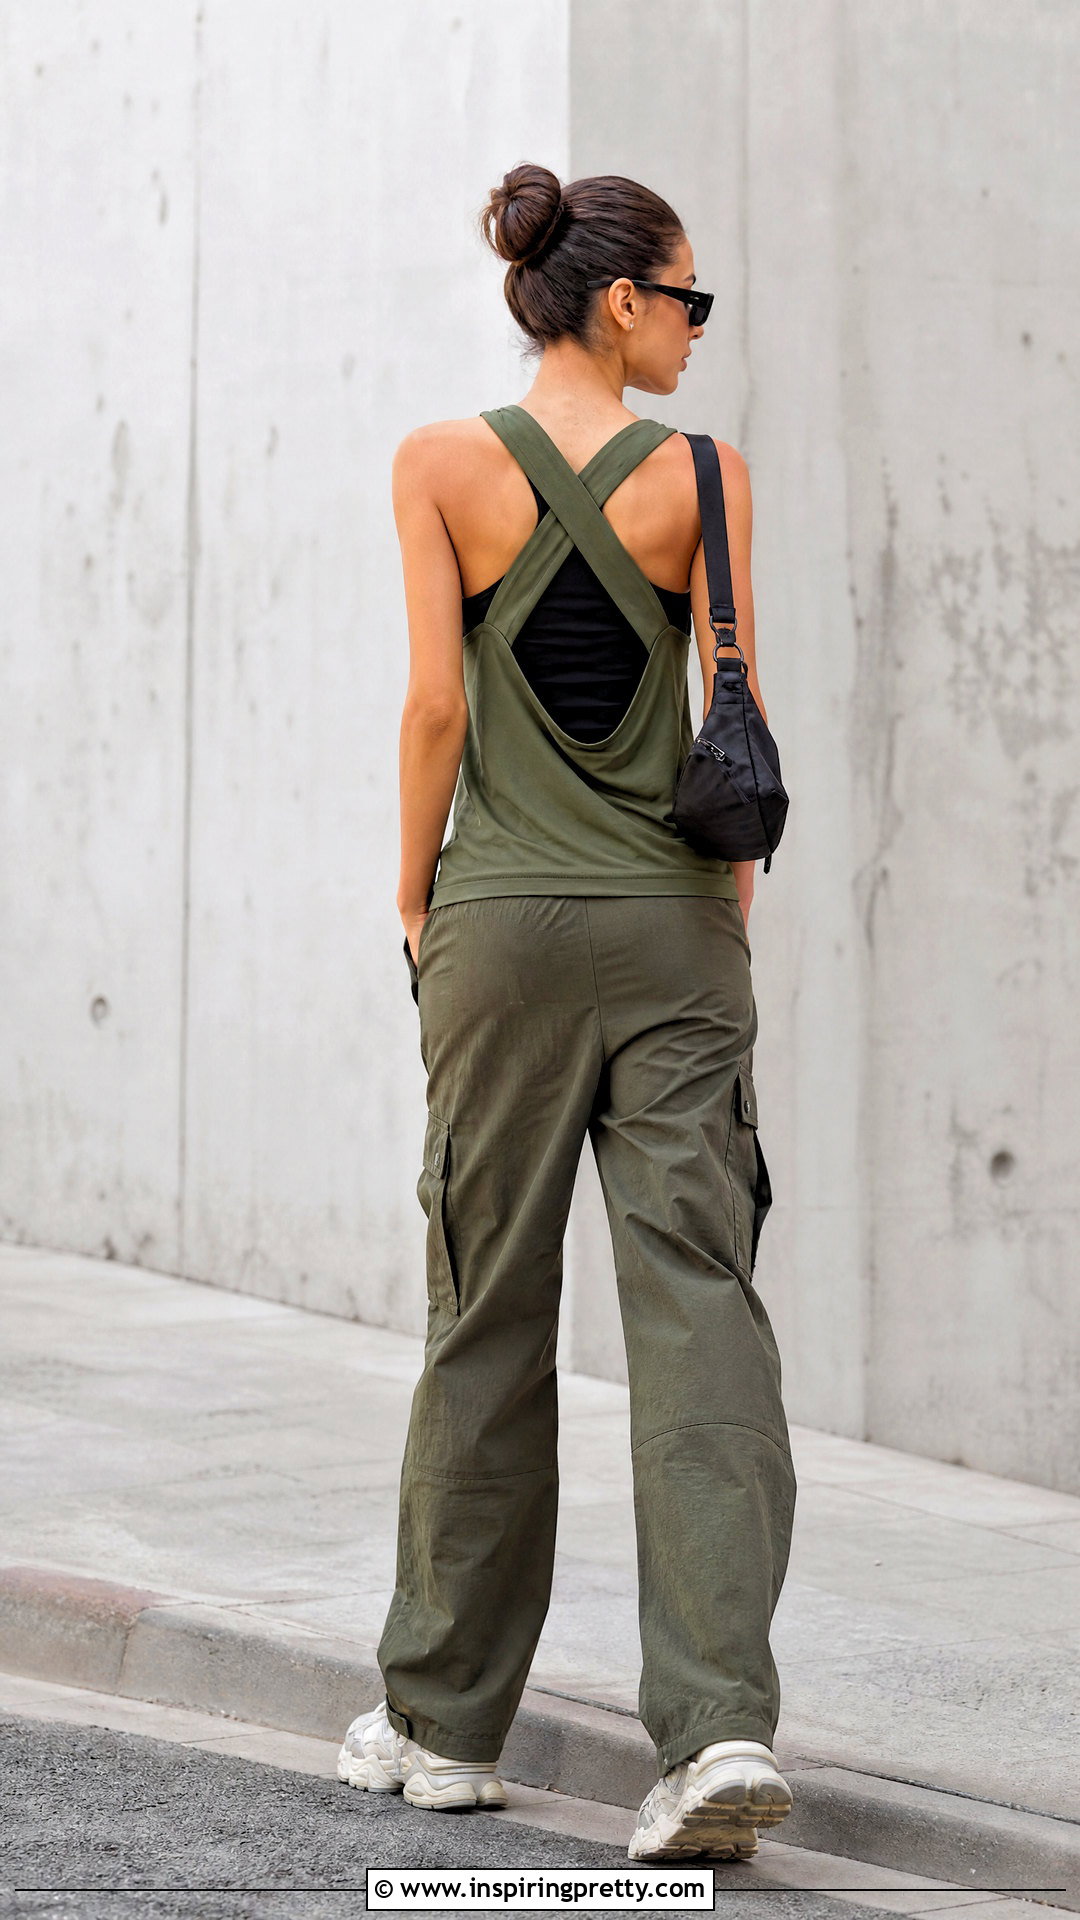
Create a cross-strap back by opening the center panel and preserving diagonal fabric strips. Sketch the design first, marking two wide straps that travel from opposite shoulders toward the lower back. Cut away the surrounding sections while keeping the crossed areas continuous whenever possible. If continuous straps are not practical, use hem scraps and stitch them securely at four points. Pair the tank with straight-leg cargo pants, chunky sneakers, a small nylon bag, and simple sunglasses. A fitted underlayer provides dependable coverage beneath the open design. Make the straps at least an inch wide before stretching because raw jersey edges will curl and appear narrower. Check that the X sits flat and does not pull the armholes toward the back before reinforcing each attachment point.
33. Cutout Shoulder DIY Tank Top
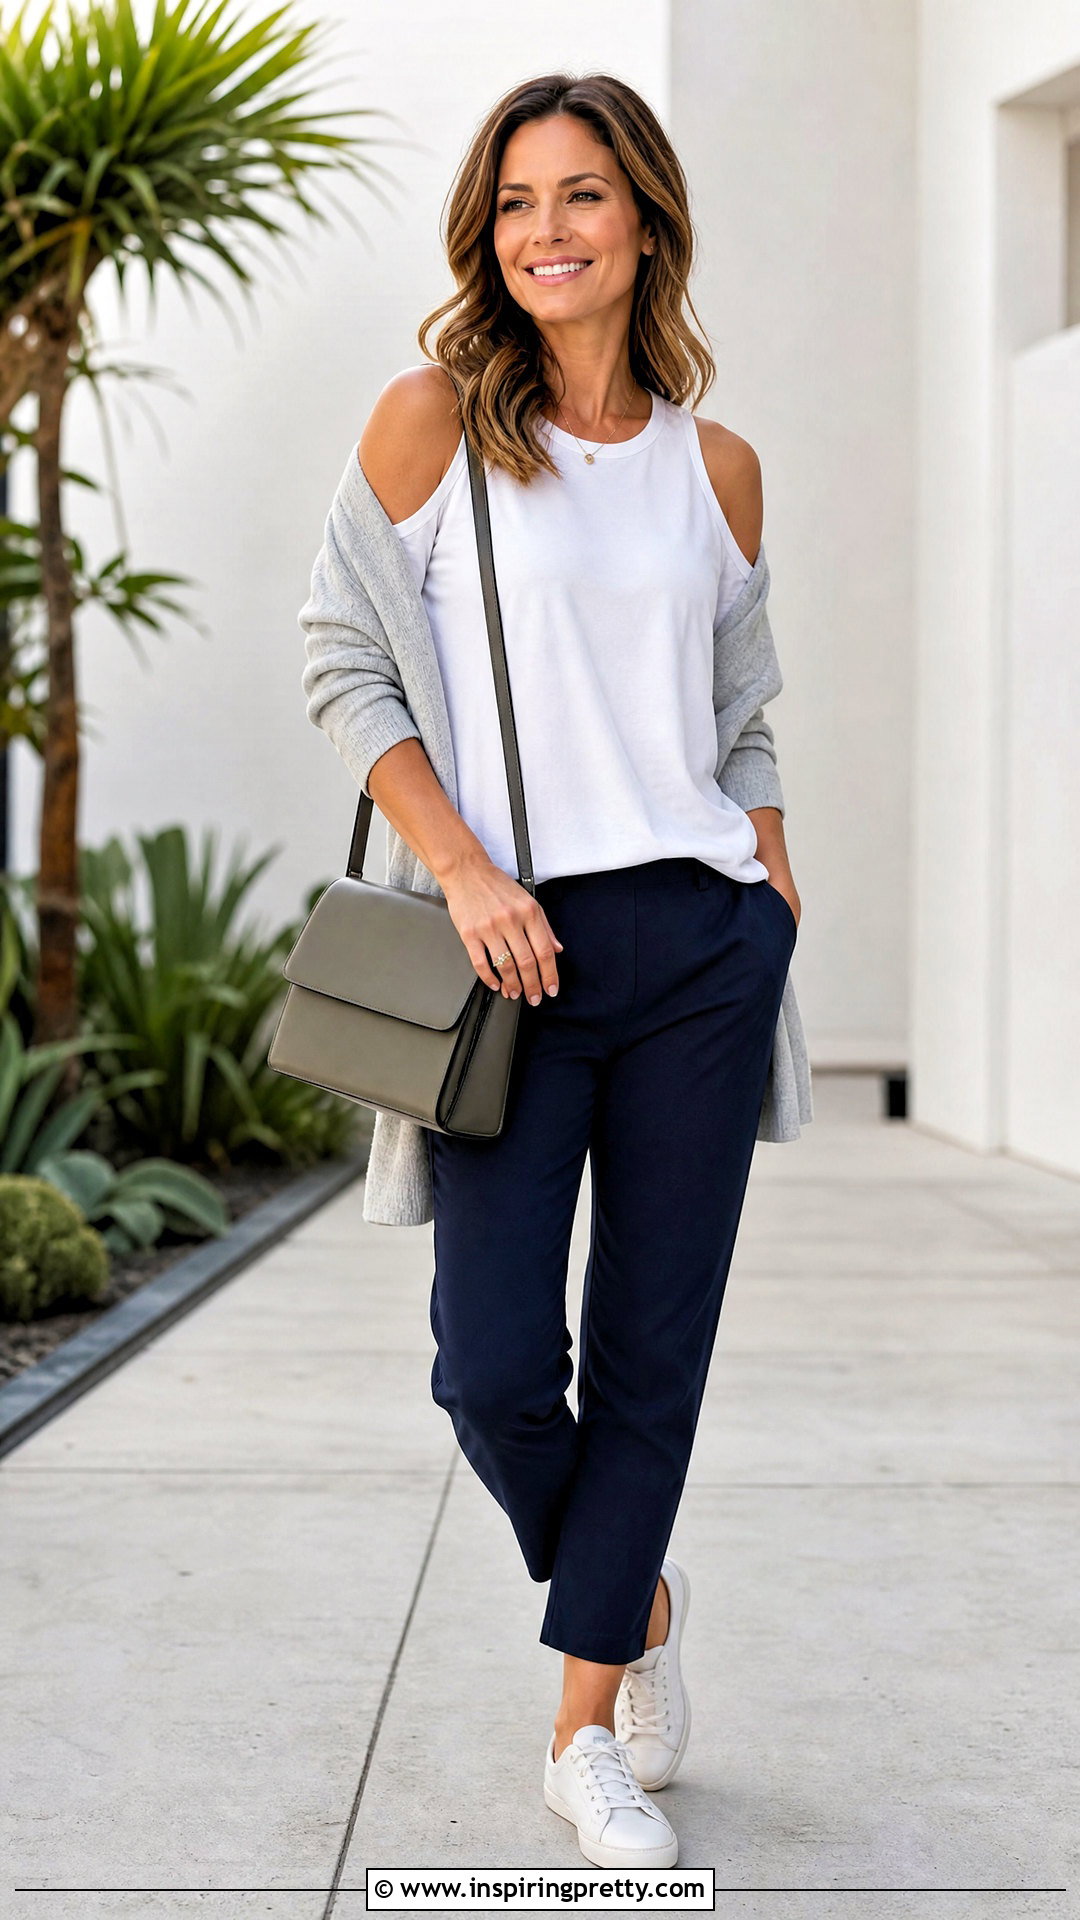
Shoulder cutouts add small openings without changing the tank’s length or overall coverage. Mark matching ovals at the top of each shoulder, keeping enough fabric beside the neckline and armholes. Insert cardboard into one shoulder section and cut the opening with short snips. Use the removed piece as a template for the opposite side. Style the finished tank with relaxed ankle pants, low-profile sneakers, a soft cardigan, and a structured crossbody bag. The cardigan can be removed to reveal the cutouts while keeping the outfit versatile. Avoid making the openings too large because the remaining shoulder fabric must support the tank. Rounded shapes are more stable than sharp triangles, but you can reinforce any corner with a few close stitches if you prefer a geometric result.
34. Asymmetrical Hem DIY Tank Top
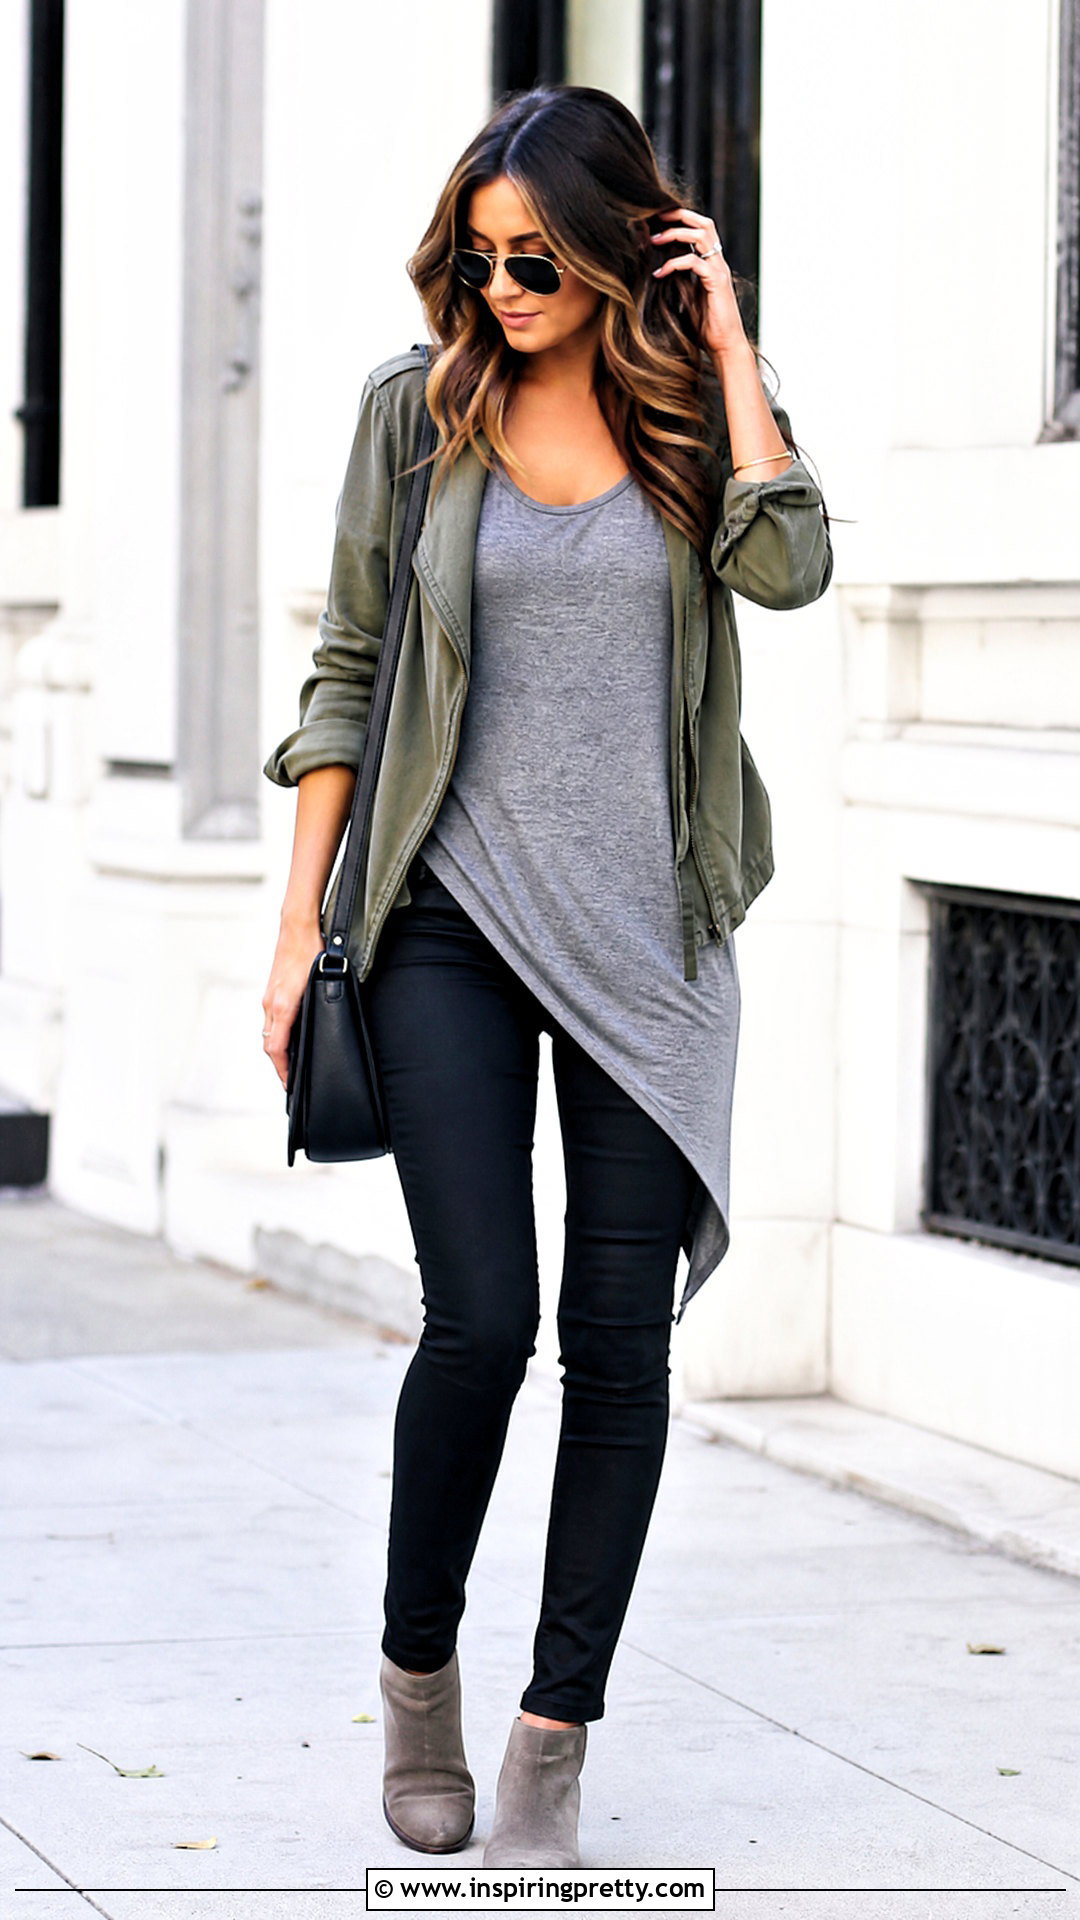
An asymmetrical hem gives an oversized tank a directional shape without altering its neckline. Try on the tank and mark one side at your preferred short point and the opposite side several inches lower. Lay it flat and connect the marks with a smooth diagonal line. Cut through both layers, then stretch the hem gently to create a rolled edge. Pair the finished top with fitted black jeans, ankle boots, a compact shoulder bag, and a lightweight utility jacket. The slim bottoms emphasize the angled line and balance the loose upper fit. Check the back before cutting because a severe diagonal may look different from behind. A moderate slope is easier to style and less likely to expose the waistband when you move or raise your arms.
35. High Low Hem DIY Tank Top
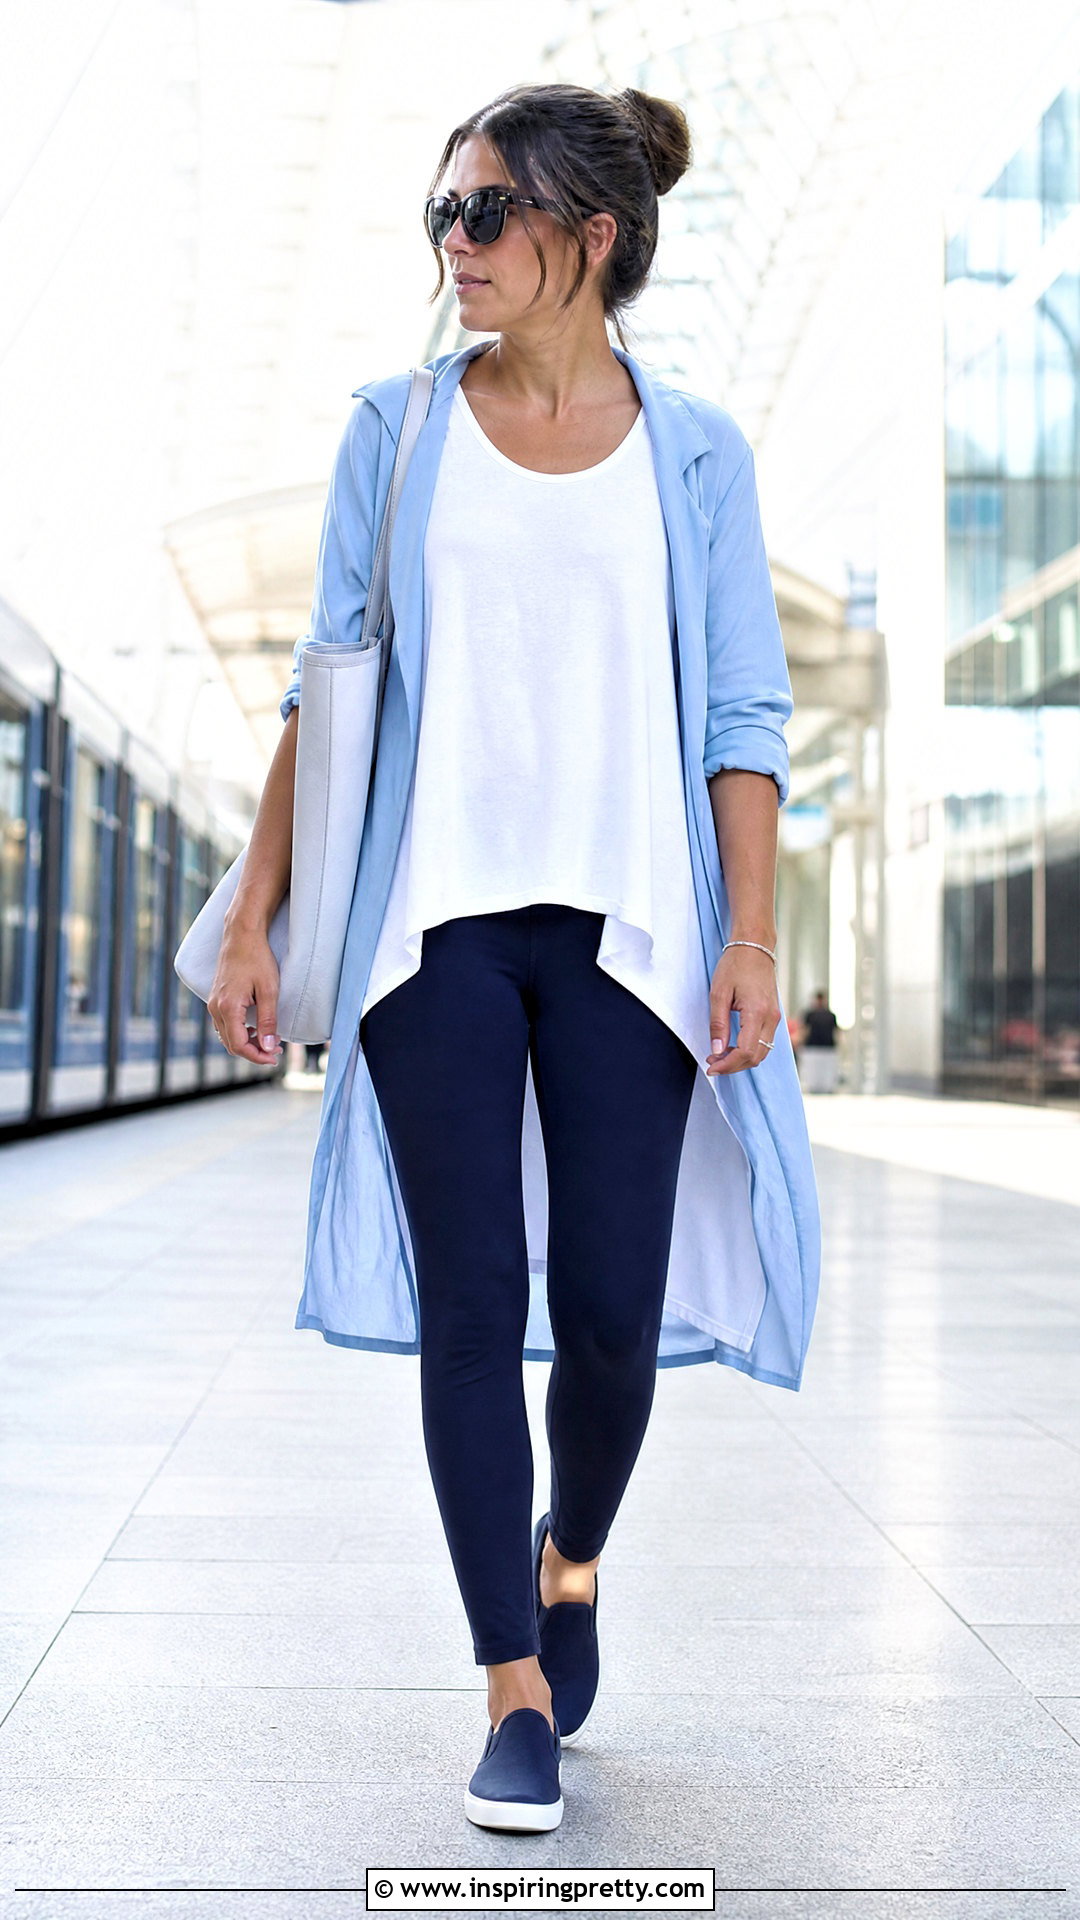
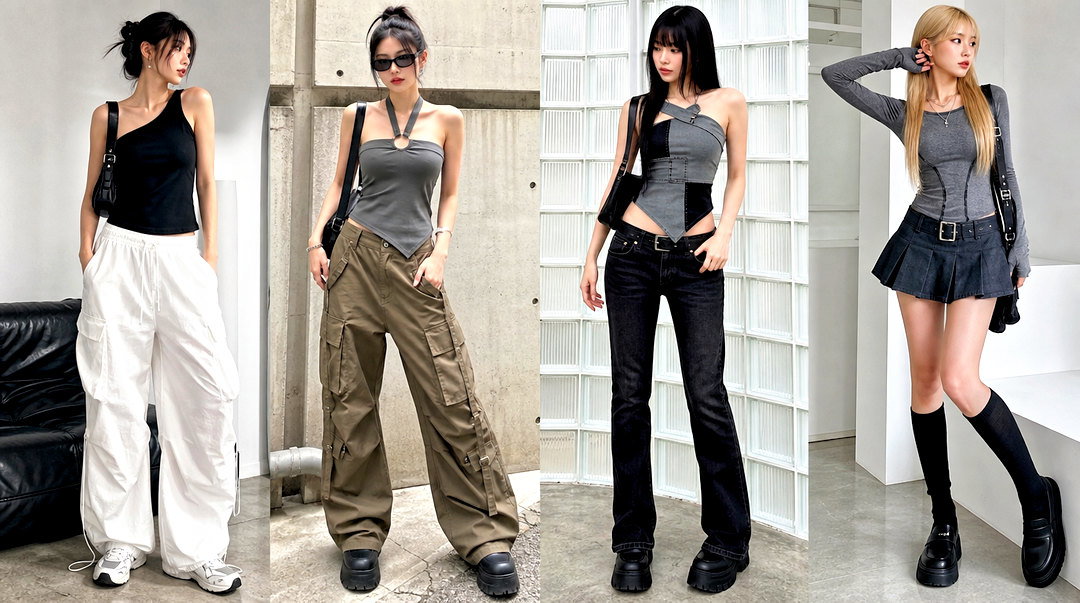
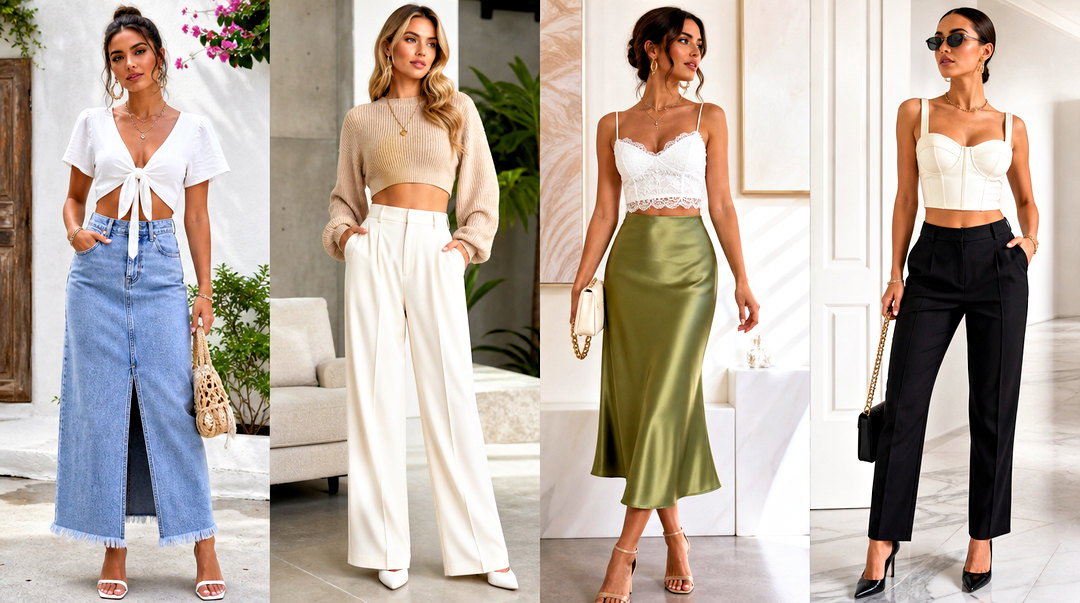
A high-low cut keeps extra length at the back while making the front feel lighter. Separate the front and back layers at the side seams near the hem. Mark a shallow curve across the front and a longer curve across the back. Cut each layer independently so the transition remains smooth. Finish the outfit with fitted leggings, slip-on sneakers, a longline open shirt, and a roomy tote. The longer back provides coverage, while the shorter front prevents the tank from overwhelming the figure. Avoid creating an extreme difference unless the shirt is intentionally oversized. After cutting, place the tank on a hanger and compare both sides. Trim any sharp corners where the front and back lengths meet so the hem falls in a natural curve.
36. Scalloped Hem DIY Tank Top
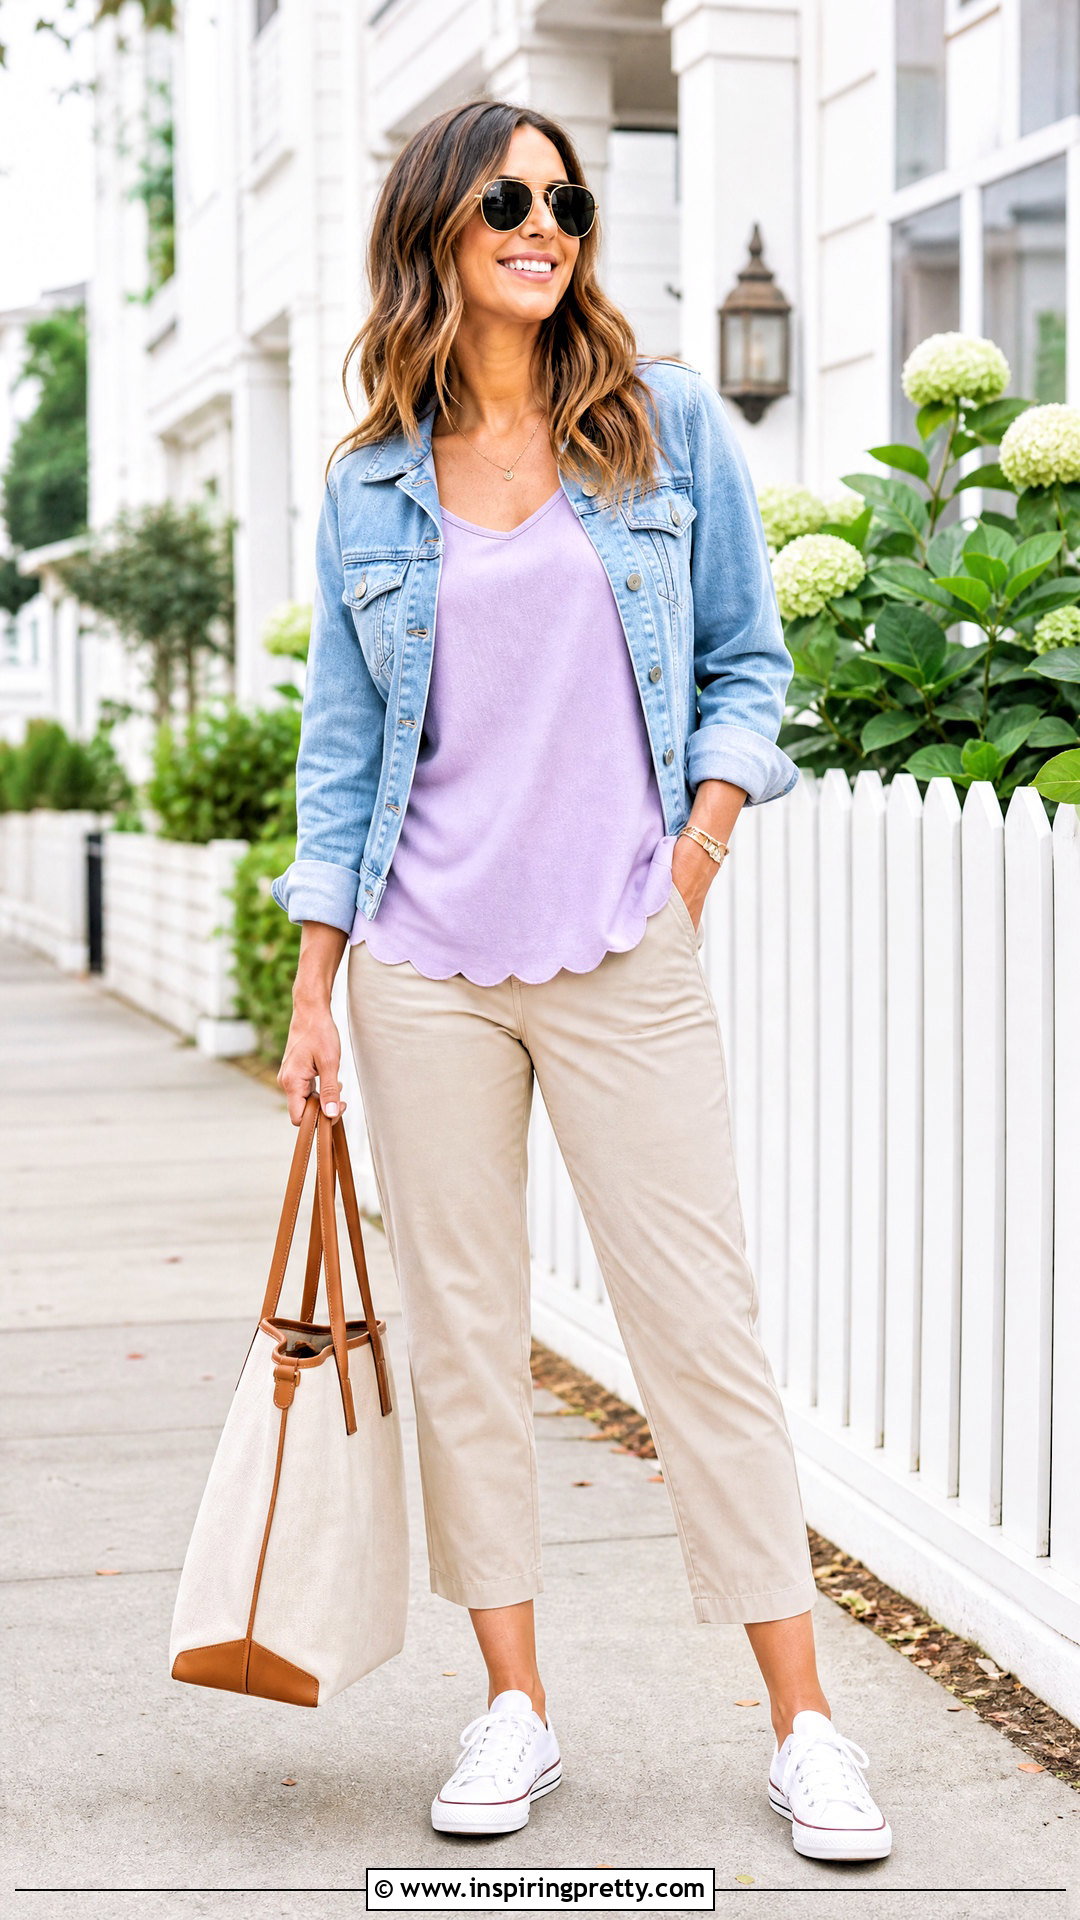
A scalloped hem adds a softer decorative border to a solid tank. Make a small semicircle template from sturdy paper and trace a row of overlapping curves along the bottom edge. Keep the scallops broad because tiny curves are difficult to cut evenly and may curl beyond recognition. Cut one fabric layer at a time with sharp scissors. Wear the finished tank with cropped chinos, canvas sneakers, a structured tote, and a lightweight denim jacket. The neat casual outfit supports the playful hem without appearing overly detailed. If you prefer subtle texture, add scallops only across the front and leave the back straight. Press the tank flat before marking, and use washable chalk that contrasts clearly with the fabric to keep every curved section consistent.
37. V Cut Hem DIY Tank Top
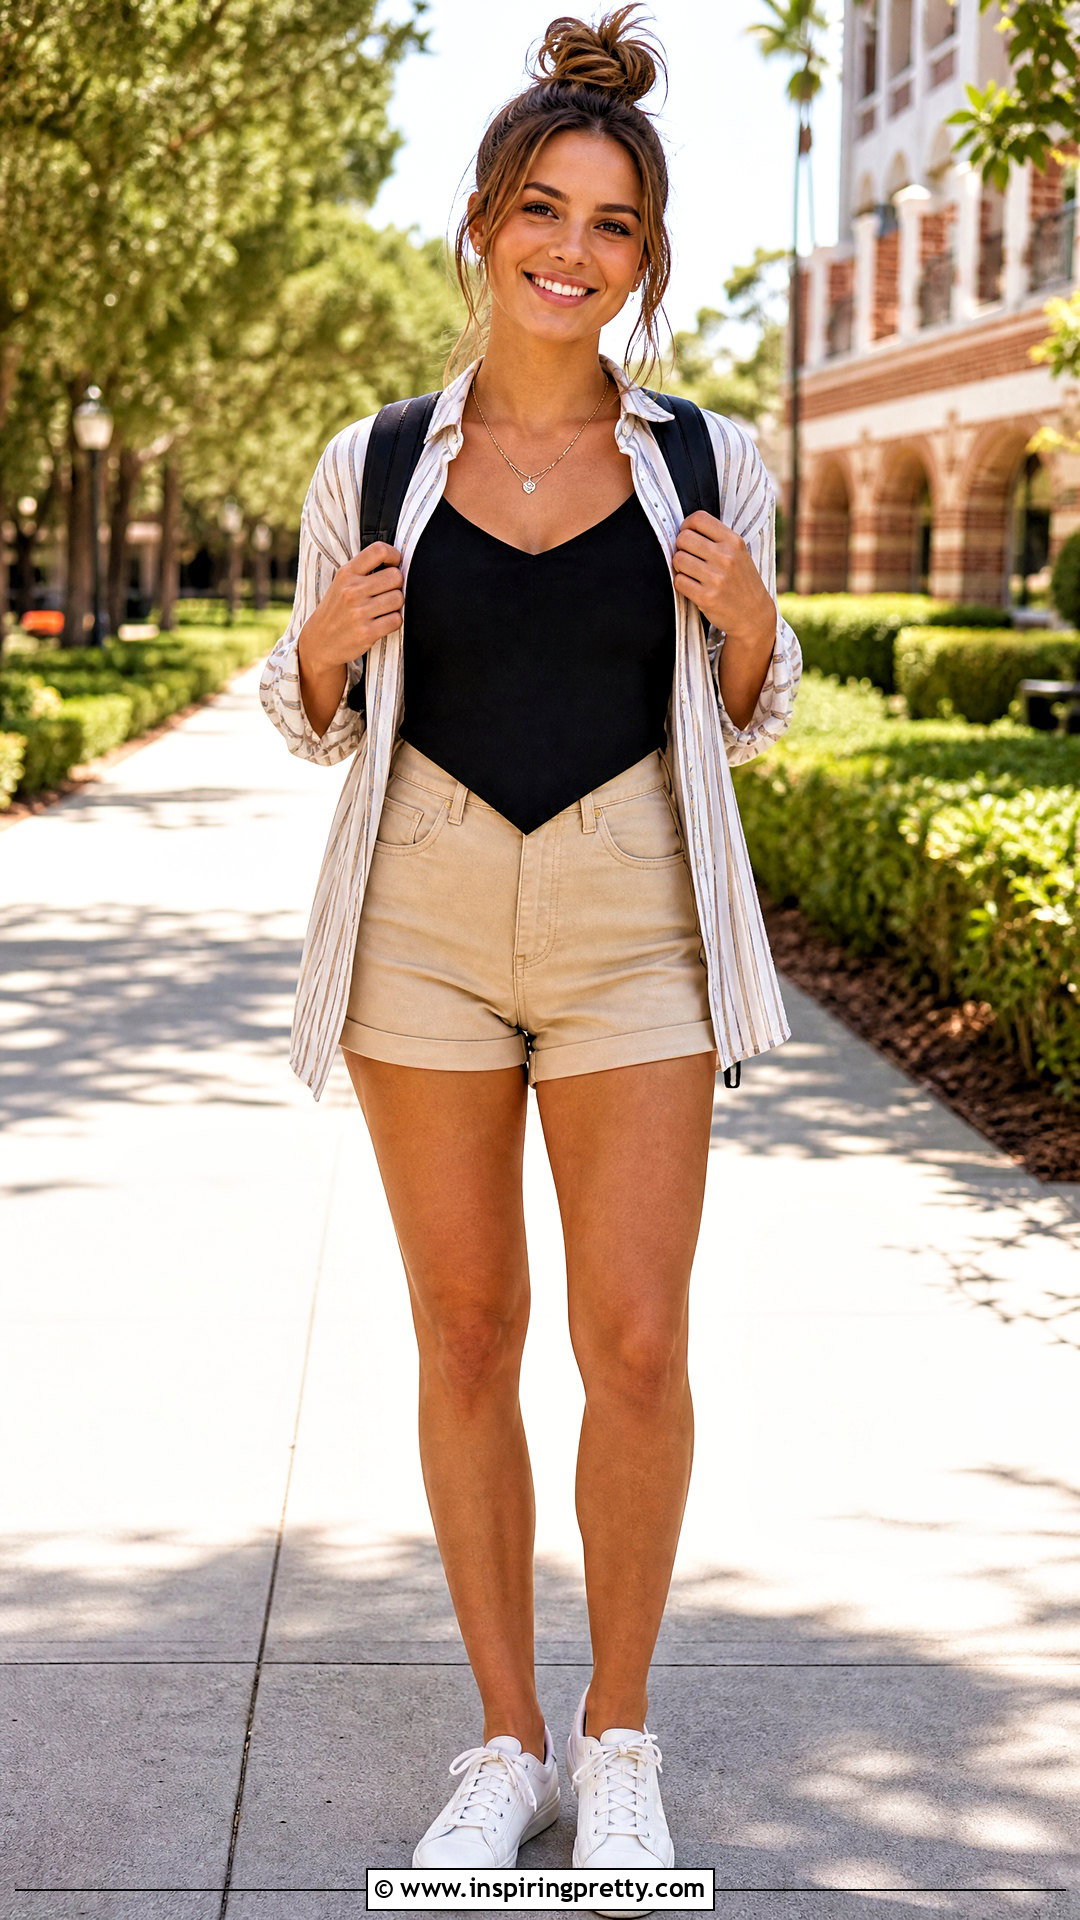
A V-cut hem produces two angled front points or one centered downward point, depending on the direction of the cut. Fold the front panel vertically, then draw a diagonal line from the side hem toward a lower center point. Cut the front separately while keeping the back straight or slightly cropped. For an inverted V, begin at a higher center point and angle downward toward both sides. Pair the tank with high-waisted shorts, low-top sneakers, a lightweight overshirt, and a compact backpack. The waistband fills the space created by the angled front. Keep the center point broad enough to prevent tearing. Try the tank on after the initial cut, since the V may appear deeper when the fabric stretches across the body.
38. Double Slit Hem DIY Tank Top
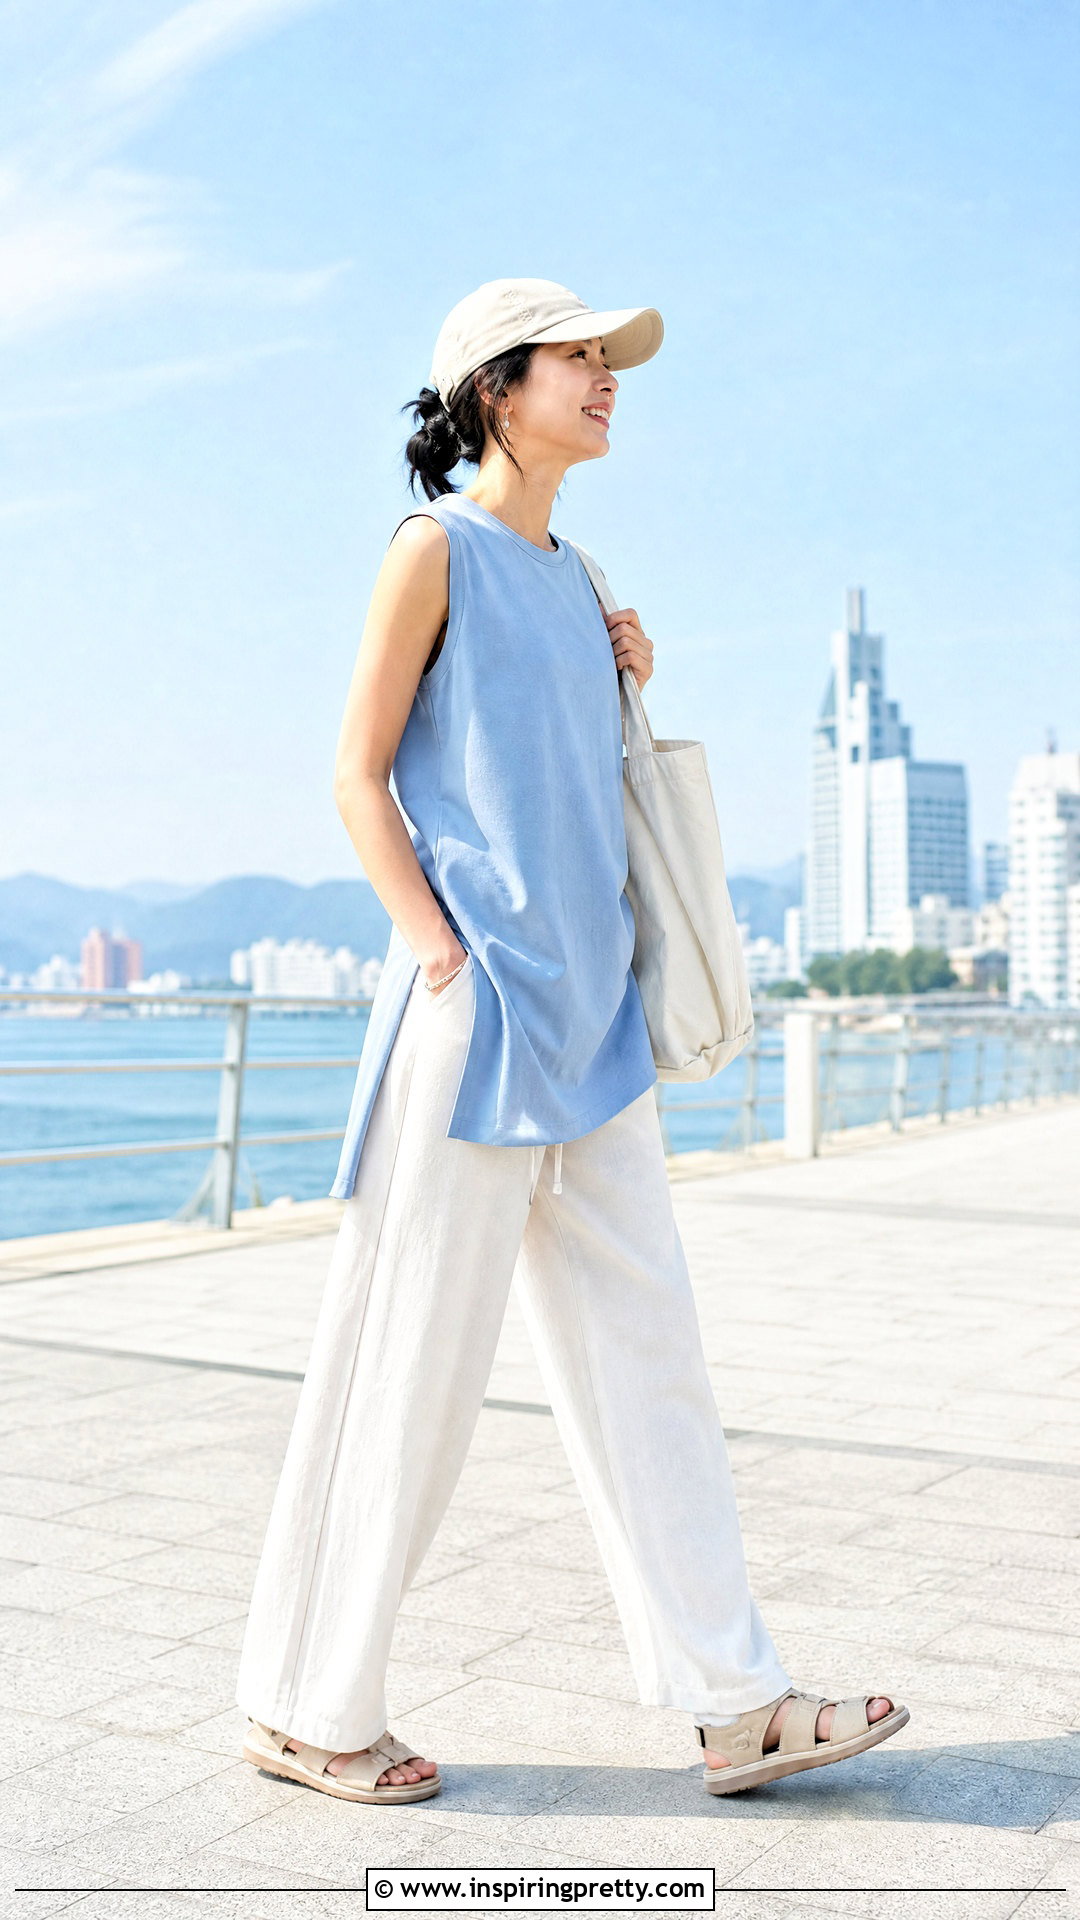
Two vertical hem slits can improve the movement and drape of a fitted or boxy tank. Mark one slit near each side seam, keeping both the same length. Cut upward slowly and stop below the waist or waistband. Leave the edges raw for a relaxed finish, or stitch across the top of each slit to prevent further tearing. Style the tank with wide-leg drawstring pants, supportive sandals, a canvas tote, and a lightweight cap. The slits allow the top to fall cleanly over fuller or high-rise bottoms. You can make the back slightly longer for added coverage. Avoid cutting directly through thick side-seam stitching unless you plan to resew it. Positioning each slit just inside the seam usually creates a stronger, cleaner result.
39. Ruched Side DIY Tank Top
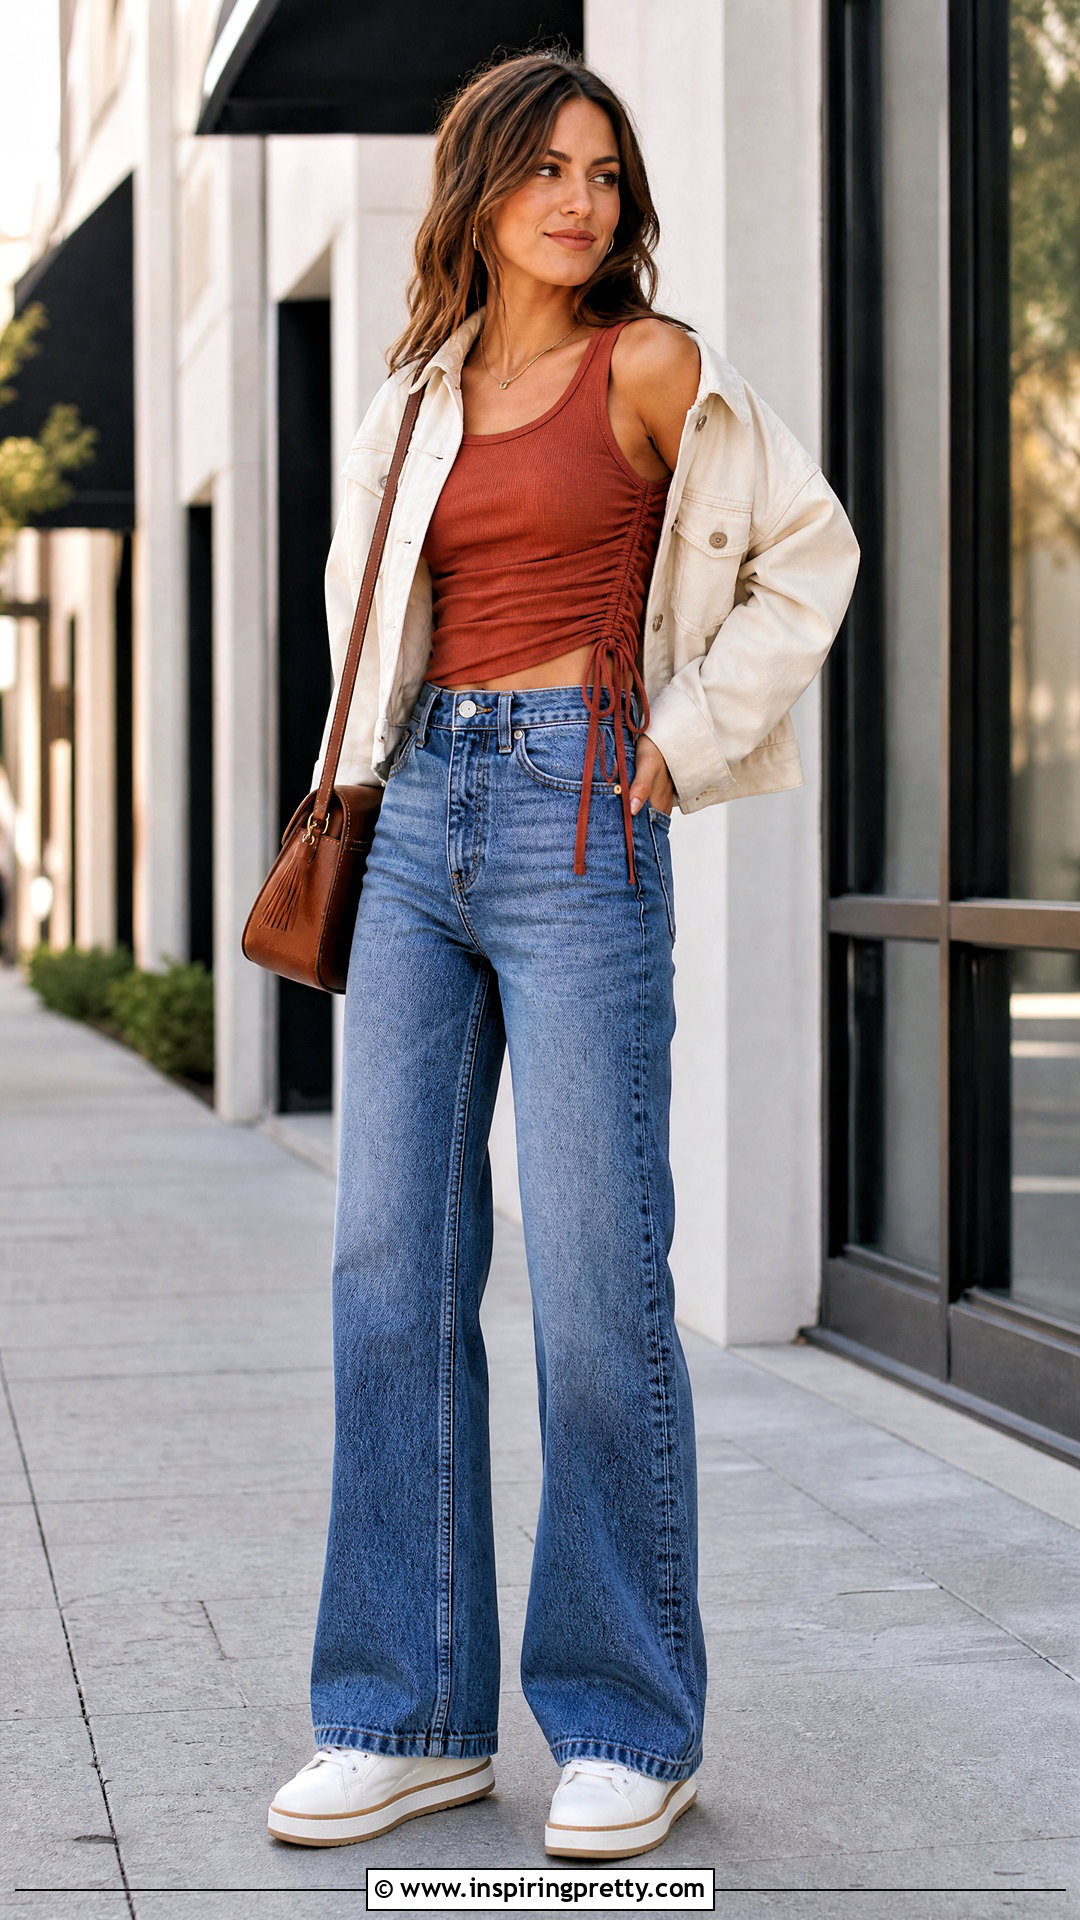
Side ruching lets you adjust the tank’s length and shape with fabric drawstrings. Cut two small holes near the lower section of each side seam, then create narrow channels with simple stitching or fabric-safe adhesive tape. Thread long jersey strips through the channels, pull them to gather the sides, and tie secure bows. Pair the ruched tank with high-waisted jeans, platform sneakers, a short utility jacket, and a crossbody bag. The gathered sides add definition while the structured jeans balance the softer folds. If you prefer a no-sew version, cut several narrow side slits and weave a strip through them. Keep the gathering even on both sides, and avoid tightening the ties so much that the tank twists or rises unexpectedly during movement.
40. Corset Lace Front DIY Tank Top
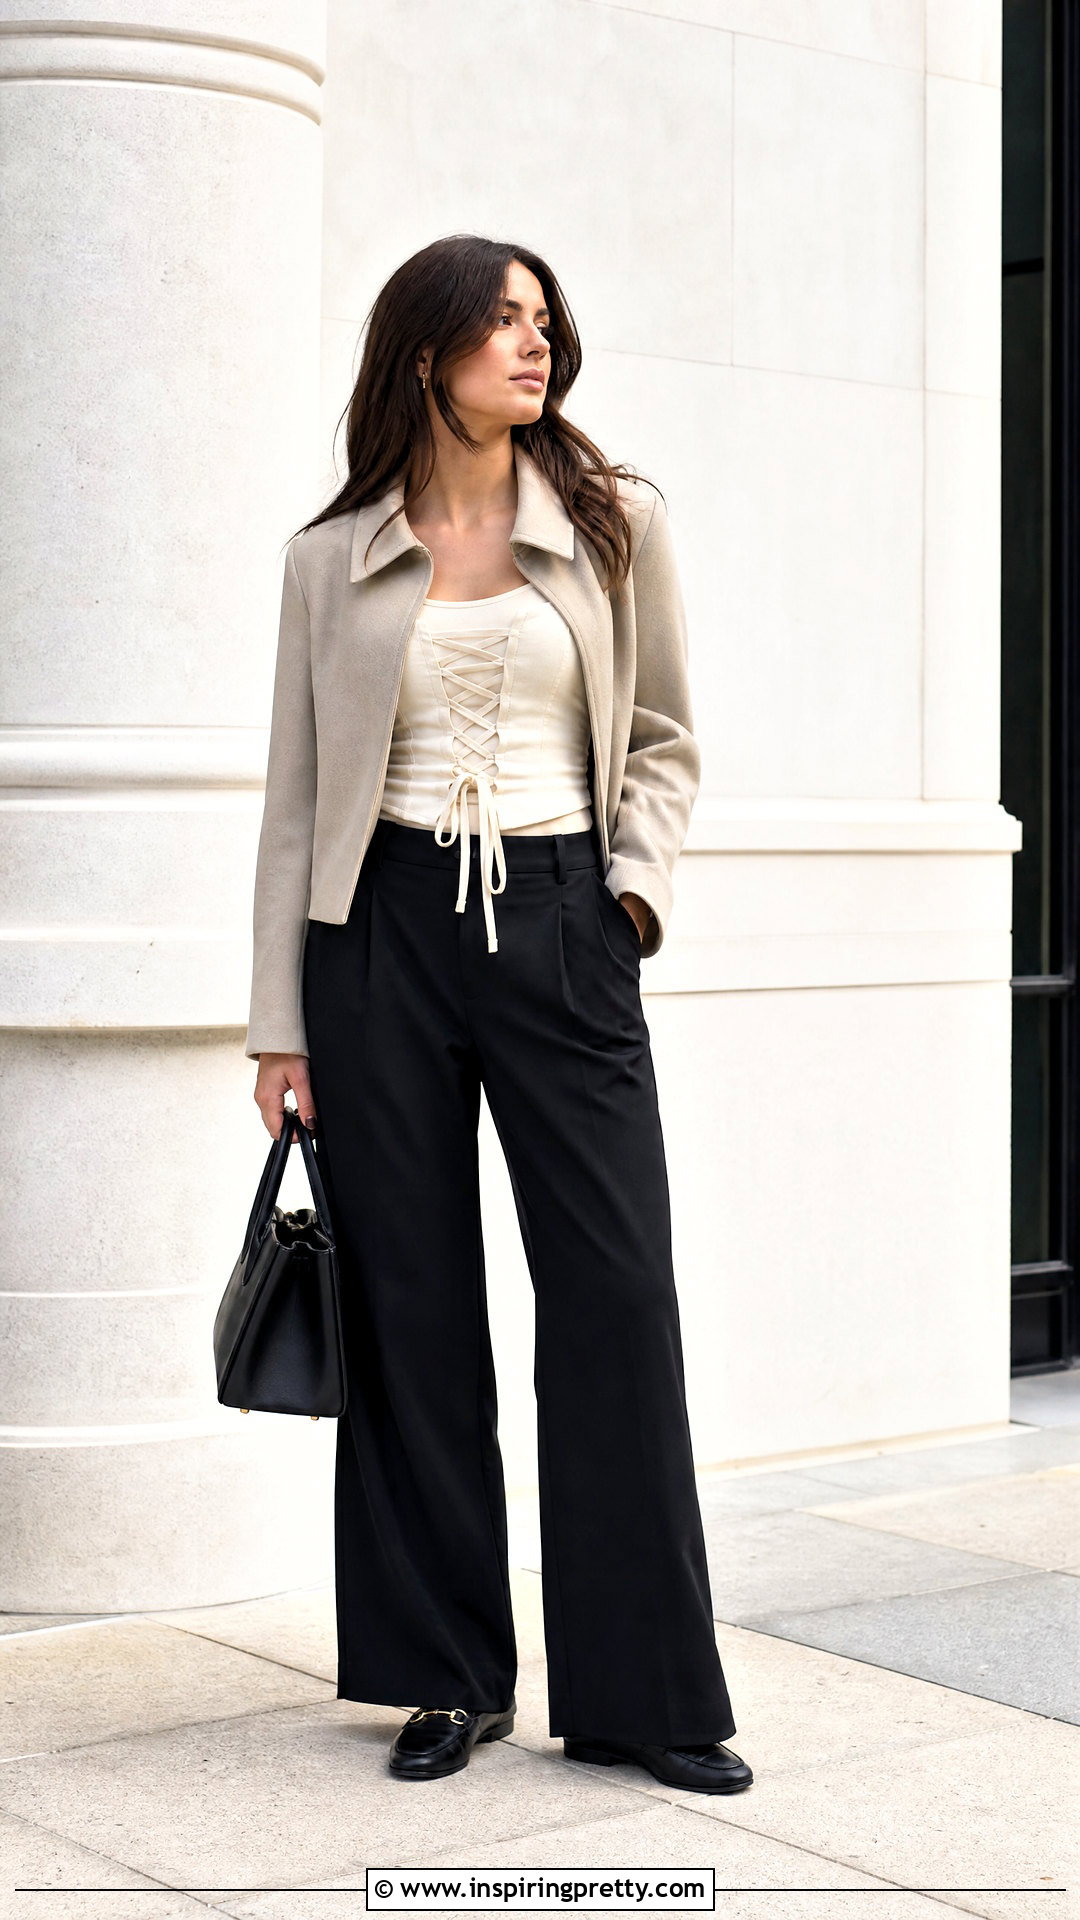
A corset-inspired front can be made with a narrow center opening and crisscross ties. Mark two parallel vertical lines below the neckline, leaving a solid section between them. Cut small, evenly spaced holes along the inner edges, then make a short slit between the panels if more separation is needed. Lace a soft jersey strip through the holes and tie it securely. Complete the outfit with loose high-waisted trousers, simple loafers, a structured bag, and a cropped jacket. The tailored pieces balance the detailed front. Wear a fitted camisole under the lacing for coverage and contrast. Reinforce each opening with hand stitches because repeated tightening may stretch the fabric. Keep the lacing comfortably loose so the tank retains its natural shape.
41. Center Front Cutout DIY Tank Top
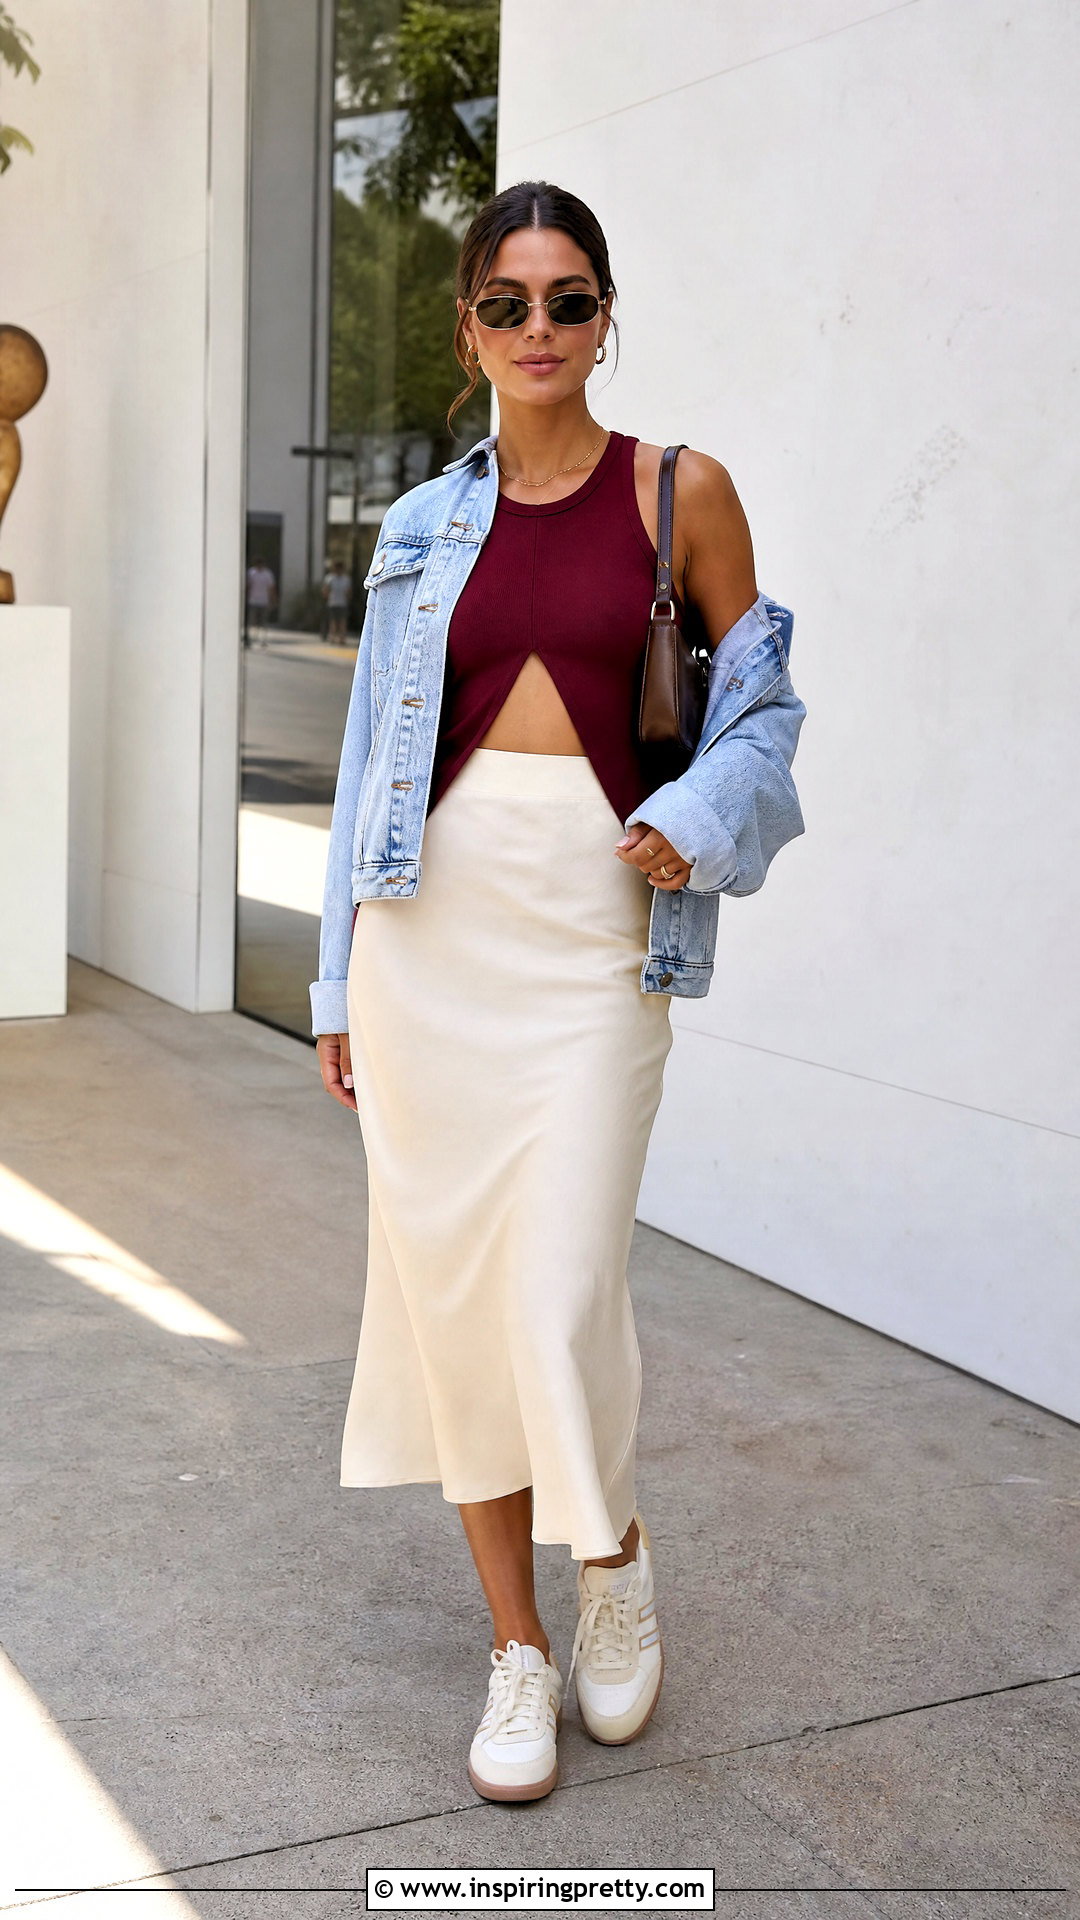
A slim center-front cutout gives a fitted tank a modern focal point. Mark a narrow oval or vertical opening between the neckline and upper waist, checking the position while the tank is being worn over a base layer. Remove the top, insert cardboard, and cut a smaller shape than your final goal. Enlarge it gradually and keep rounded ends to reduce tearing. Style the finished tank with a high-waisted midi skirt, streamlined sneakers, a shoulder bag, and a light jacket. The high waist supports the shorter visual line created by the cutout. Avoid placing the opening across printed artwork or thin, stretched fabric. For added control, connect the two sides with one or two fabric ties, rings, or short stitched bands.
42. Ribcage Slash DIY Tank Top
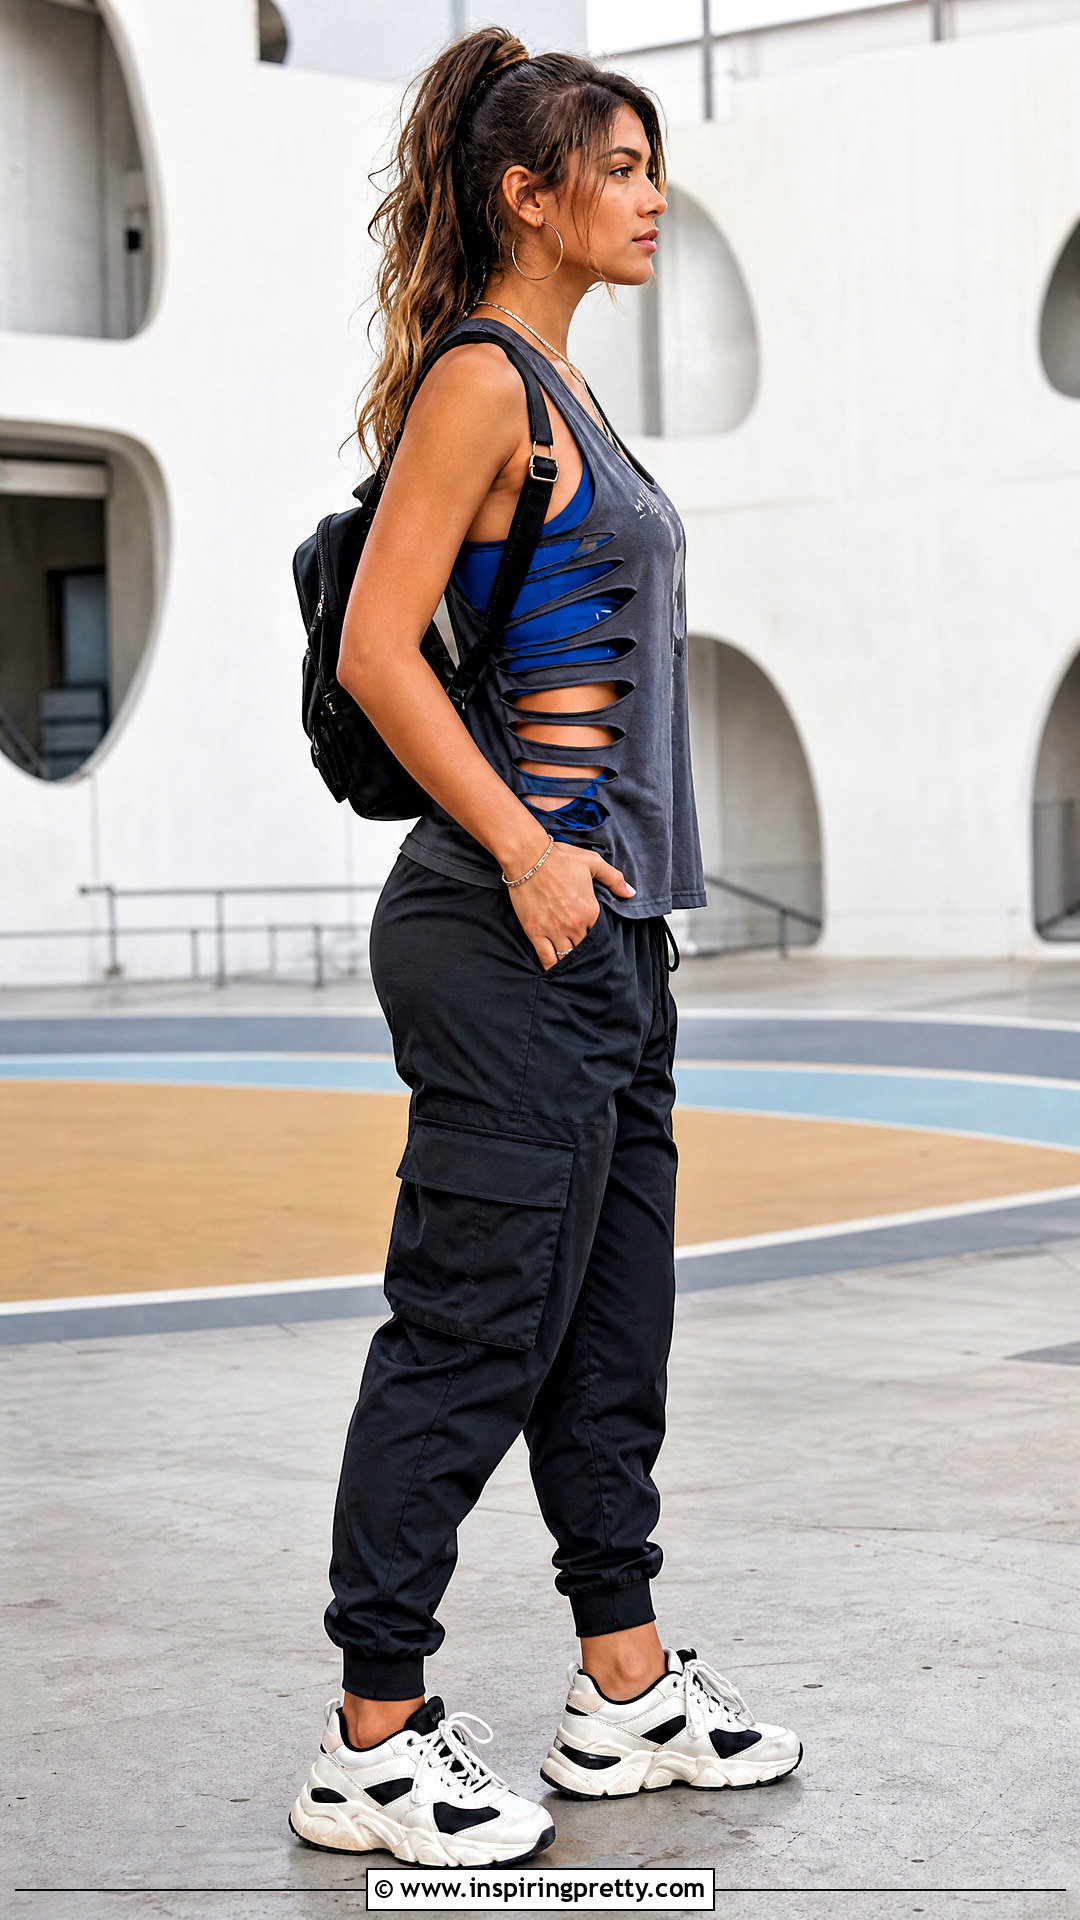
Ribcage slashes create repeated side openings that resemble narrow horizontal bands. Mark several short lines along one or both sides of the tank, spacing them evenly and keeping them away from the actual side seams. Insert cardboard, cut each line, and stretch the openings lightly. Make the center slashes slightly longer than the upper and lower ones for a curved effect. Wear the tank over a contrast fitted layer with cargo joggers, chunky sneakers, and a small backpack. The practical underlayer keeps the slashes comfortable and clearly visible. Begin with fewer cuts, since multiple openings can expand significantly when the tank is worn. Stop each slit at least an inch from structural seams and reinforce the ends if the jersey feels especially soft or thin.
43. Geometric Grid DIY Tank Top
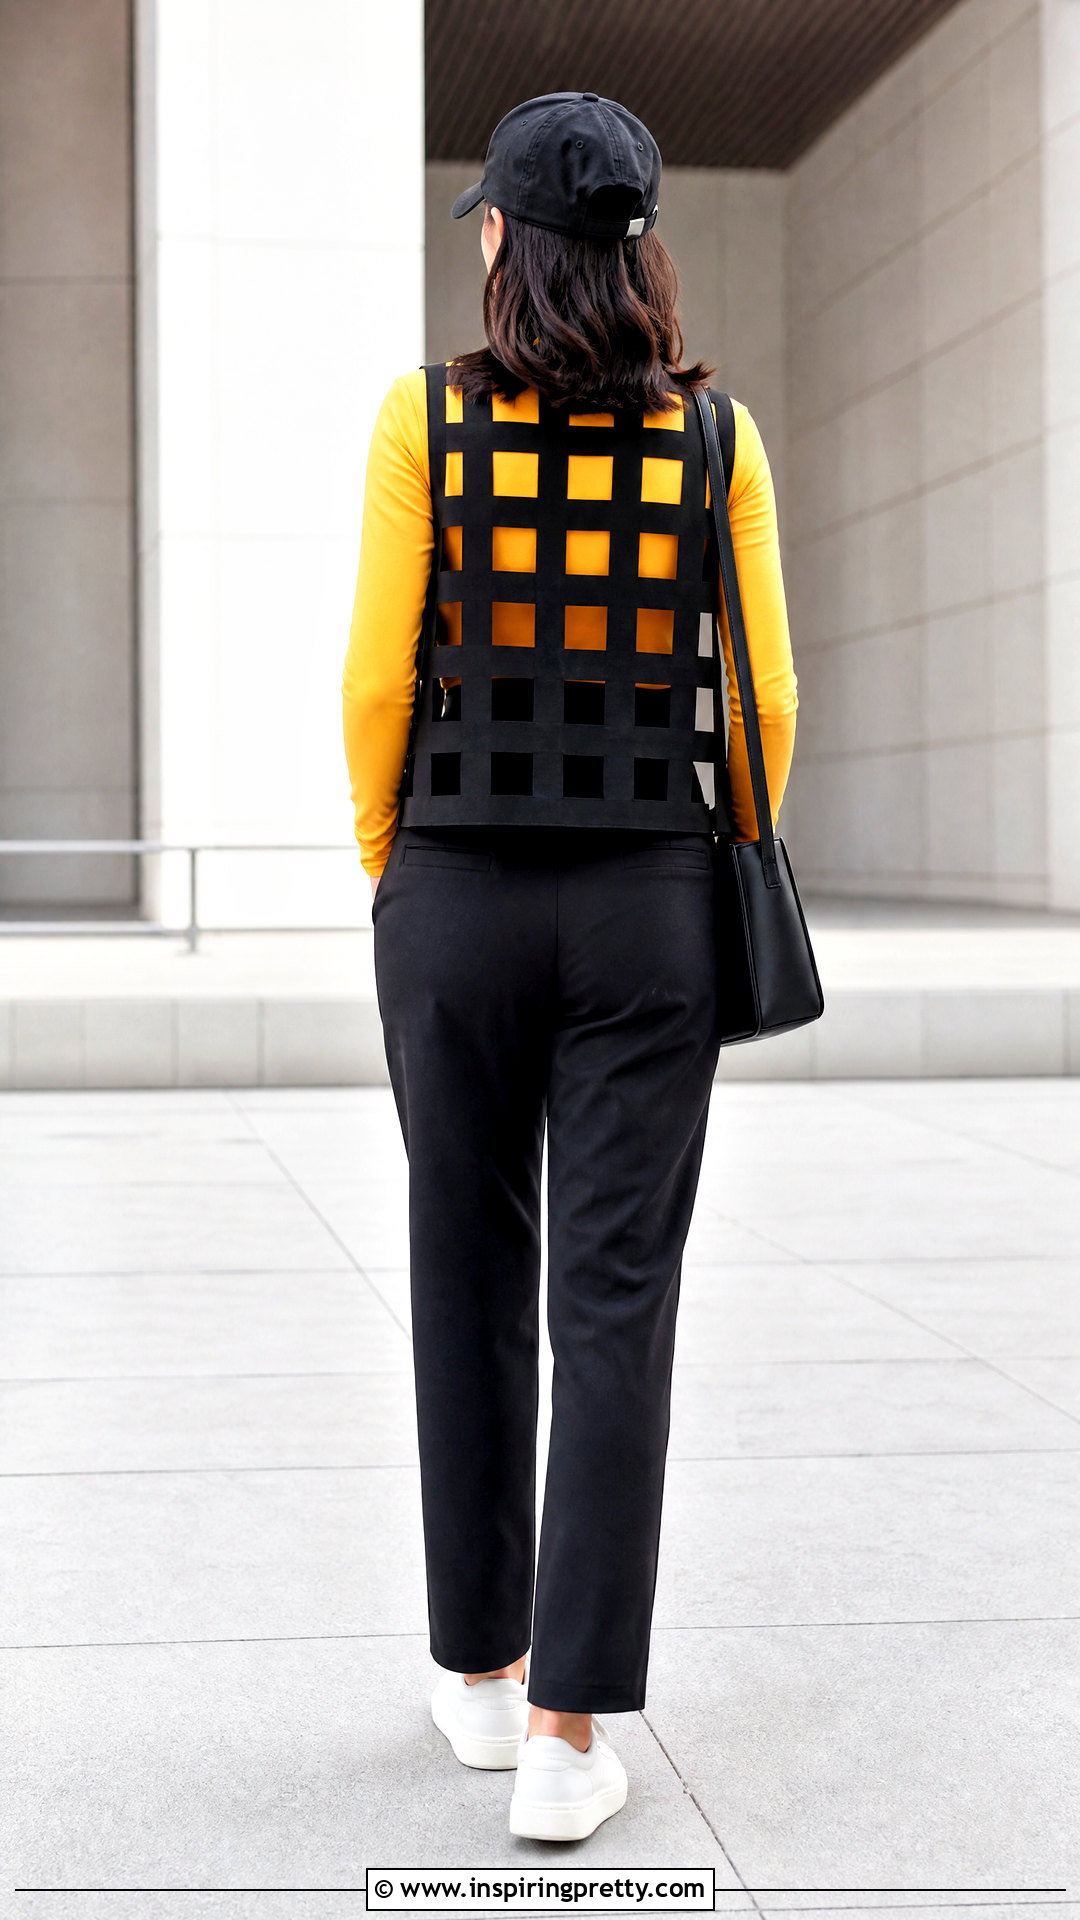
A geometric grid uses small square or rectangular cutouts to create an organized back panel. Draw the design on paper first and leave wide fabric bridges between every opening. Transfer the pattern to the upper back, place cardboard inside the tank, and cut each shape individually. Start at the center and work outward so the grid remains balanced. Pair the top with solid straight-leg pants, minimalist sneakers, a boxy shoulder bag, and a simple cap. A bright contrast tank underneath makes the repeated pattern more noticeable. Keep the grid relatively small because removing too much fabric weakens the panel. Round the inside corners slightly and avoid cutting close to the neckline, armholes, or side seams. Careful measuring makes this design look clean rather than randomly distressed.
44. Leaf Cutout DIY Tank Top
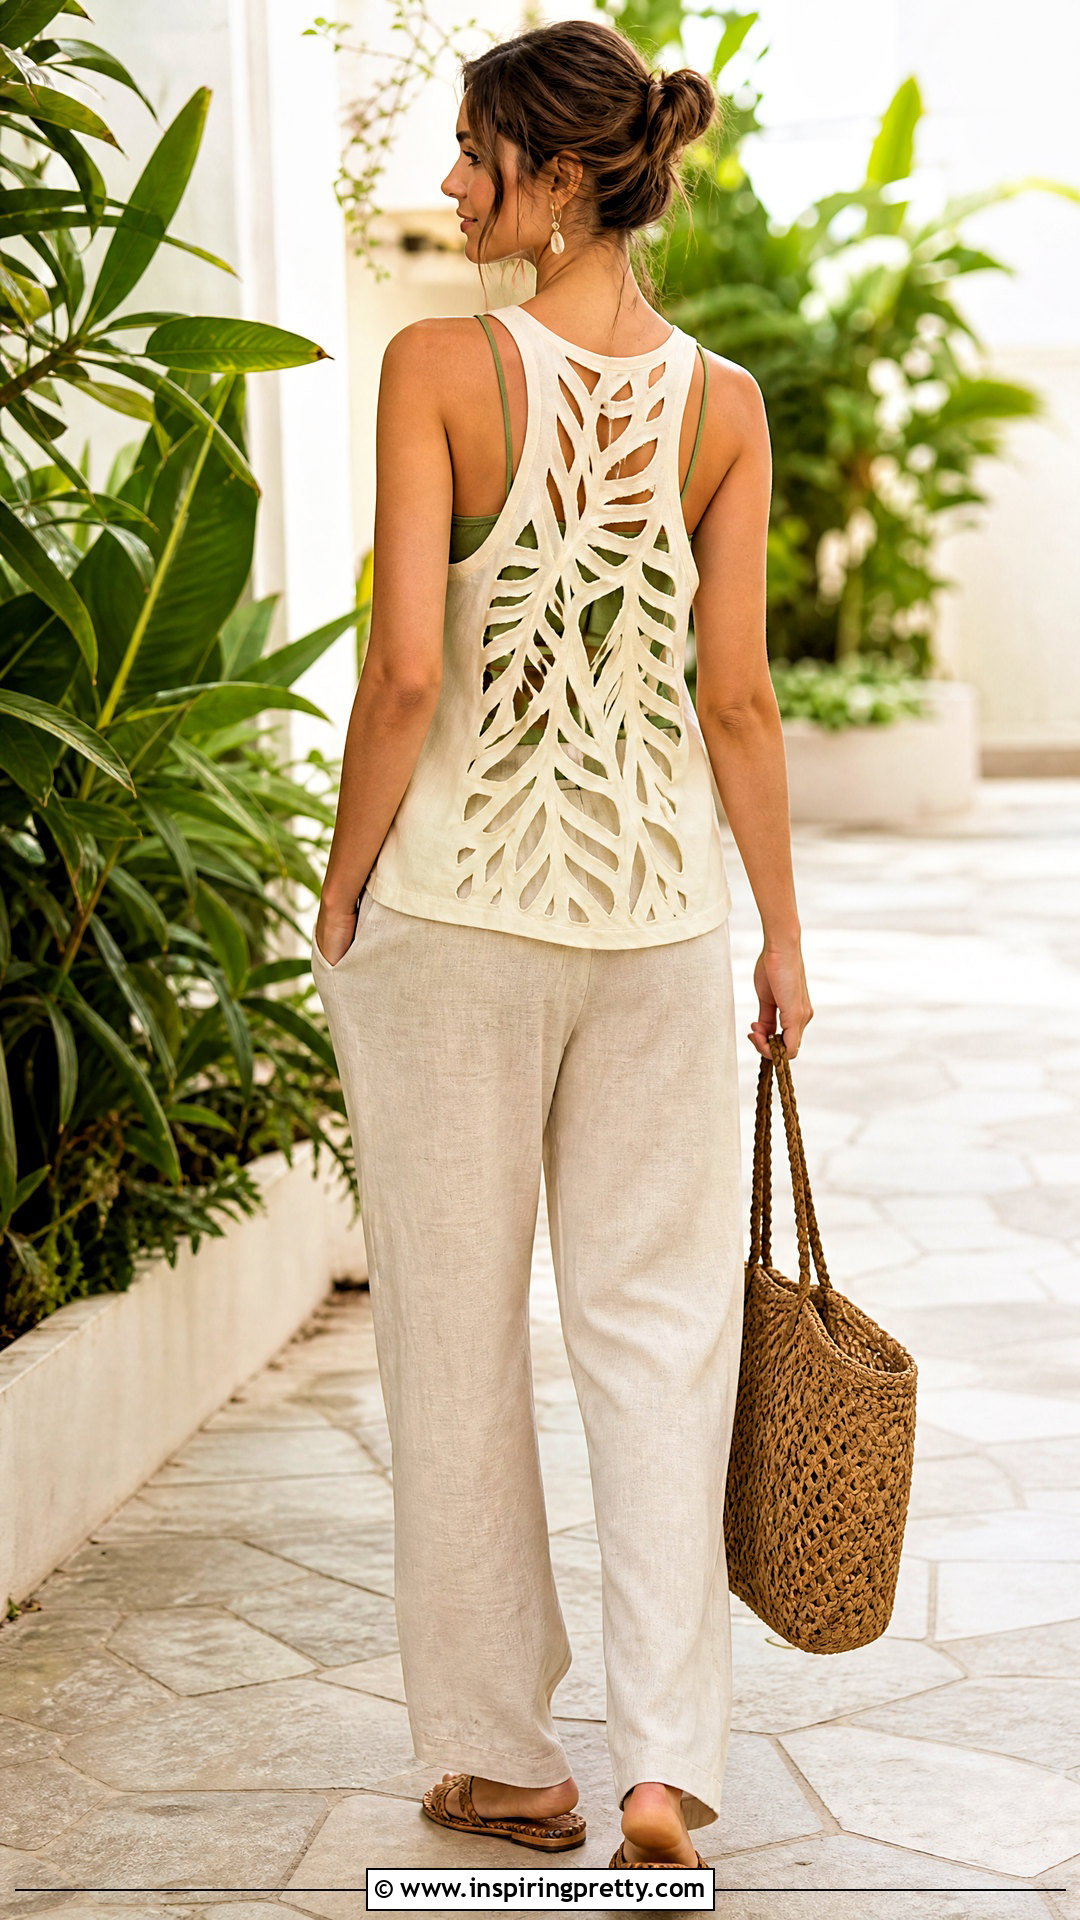
A row of leaf-shaped cutouts can create an organic pattern along the upper back or one side. Make a small paper template with rounded tips and trace several leaves with comfortable spacing between them. Change the angle of each shape slightly to suggest a branch or vine. Protect the front with cardboard and cut using short, controlled movements. Style the tank with relaxed linen pants, flat woven sandals, a natural-texture tote, and subtle earrings. A soft green, cream, or neutral underlayer can complement the cutout pattern. Avoid very narrow leaf tips because they may tear or curl inward. Three to five well-placed openings usually look more refined than a crowded design, especially on a lightweight tank with limited structural support.
45. Sunburst Back DIY Tank Top
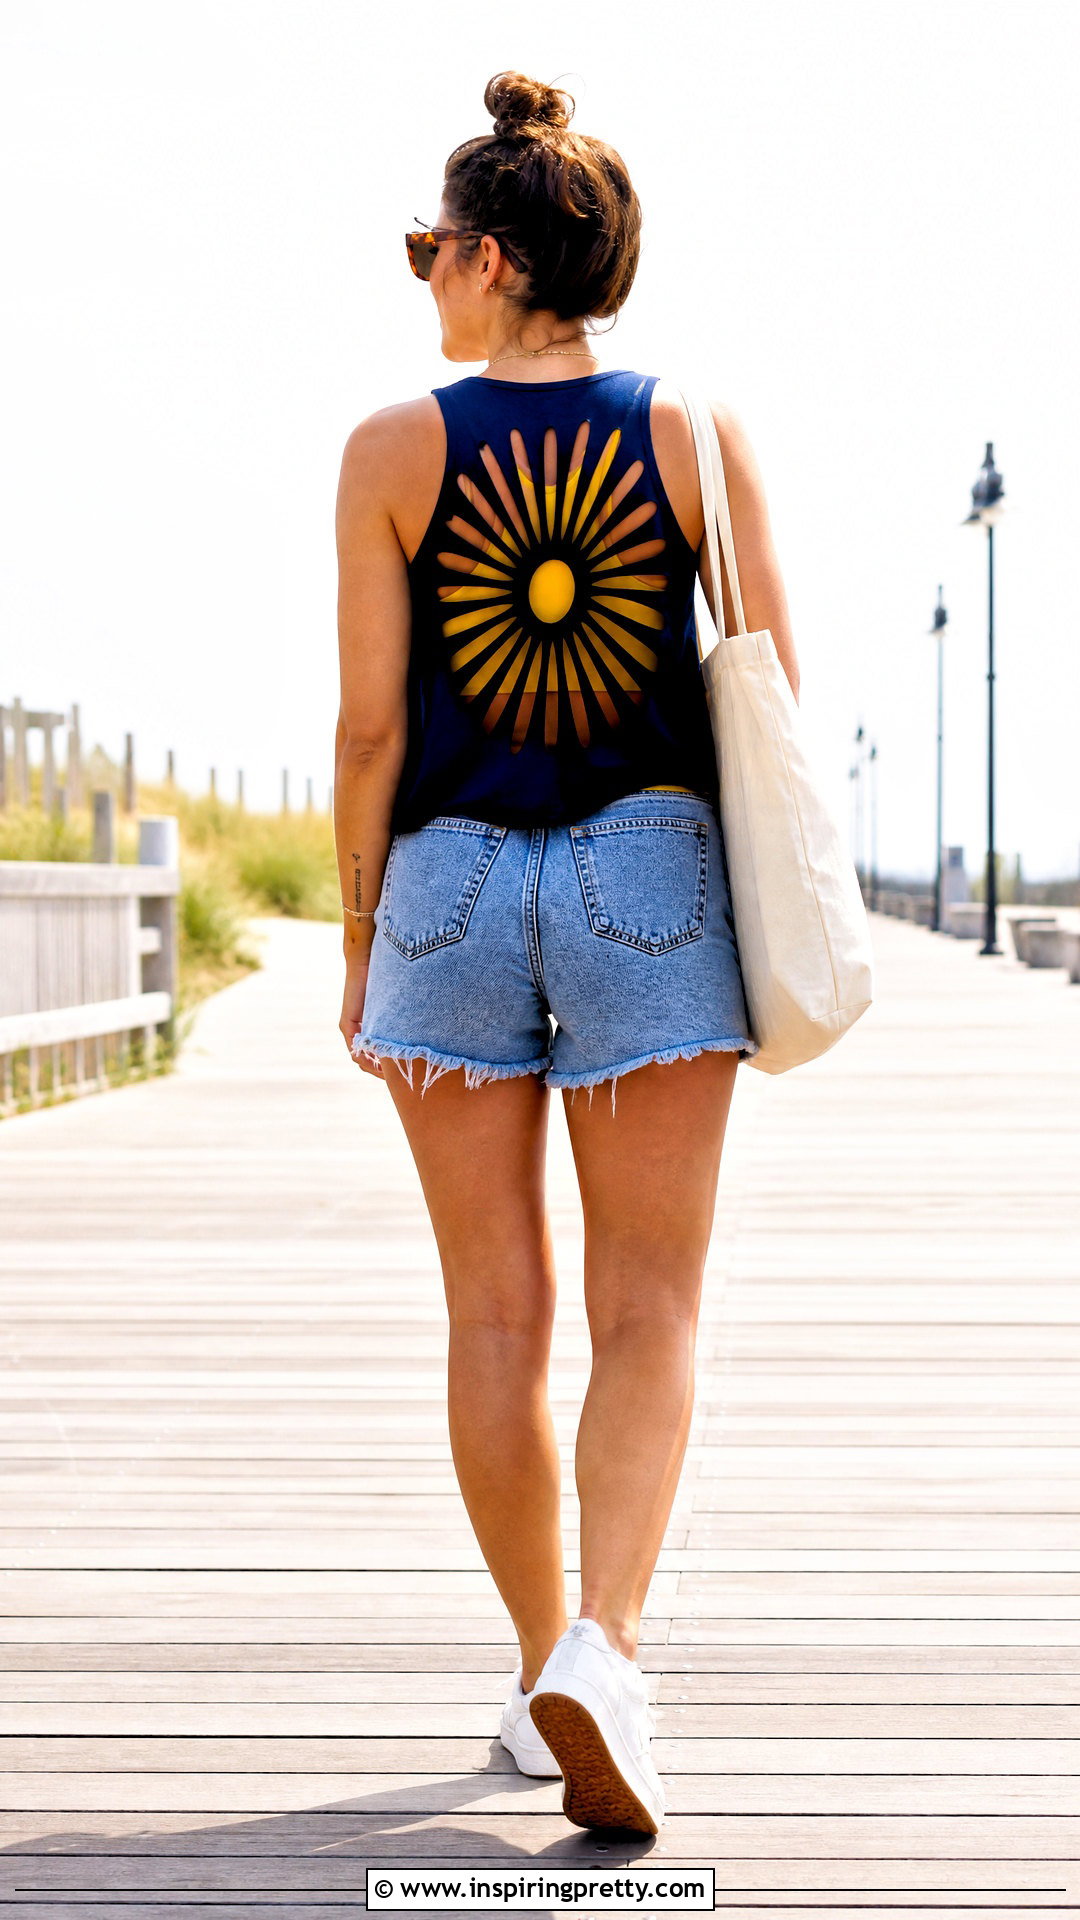
A sunburst design uses short radiating slits to create texture around a central point. Mark a small circle between the shoulder blades, then draw straight lines extending outward without reaching the neckline or armholes. Place cardboard inside the shirt and cut only the radiating lines, leaving the center intact. Stretch each slit lightly to reveal the pattern. Pair the tank with high-rise denim shorts, clean sneakers, a canvas tote, and sporty sunglasses. Wear a yellow, white, or contrasting fitted layer underneath to emphasize the sunburst. Keep the rays widely spaced so the fabric between them remains strong. Begin with short cuts and lengthen selected rays gradually. A balanced mix of lengths creates dimension without removing most of the back panel.
46. Butterfly Back Cutout DIY Tank Top
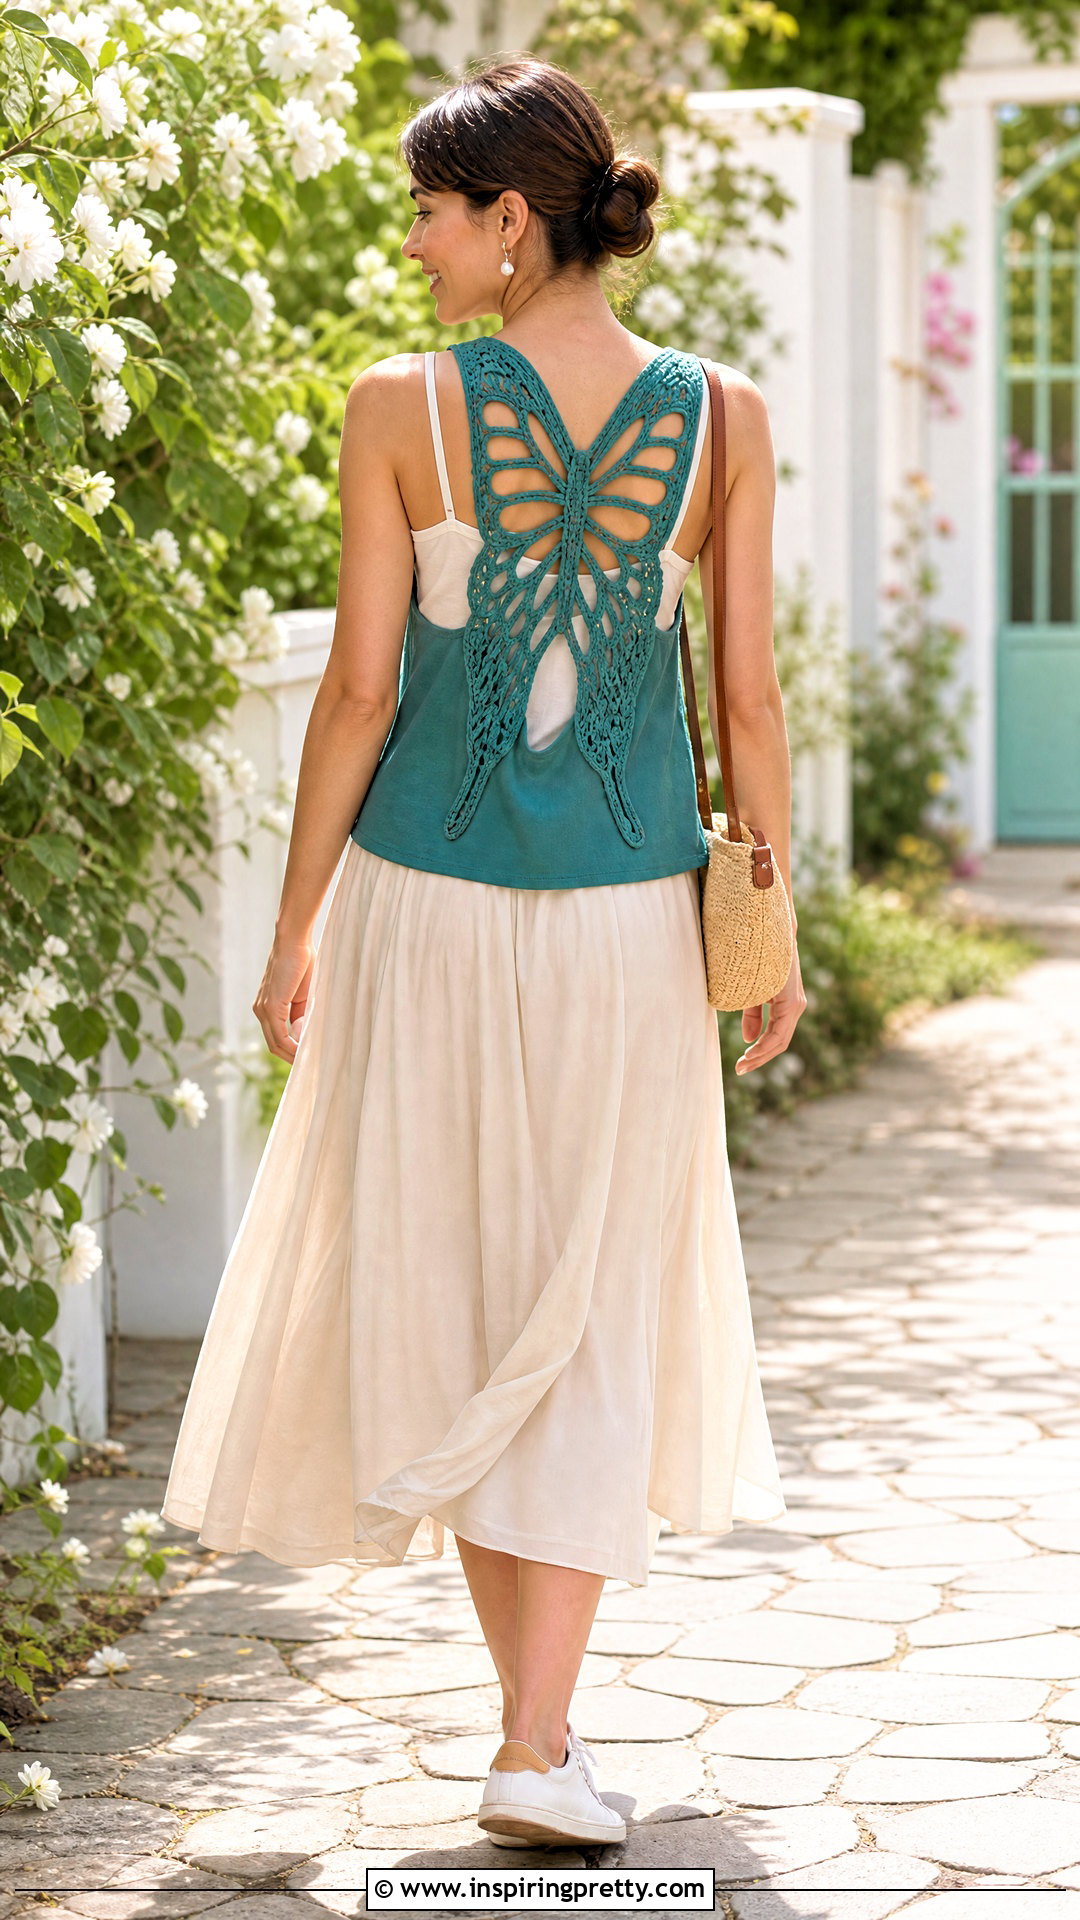
A butterfly cutout turns the back of a solid tank into a detailed statement. Use a simple symmetrical template with broad wings and a sturdy center body. Position it between the shoulder blades and upper waist, then trace the outer sections. Instead of removing the entire butterfly, cut smaller wing openings while leaving fabric lines around the body. Style the top with a flowing midi skirt, flat sneakers, a compact shoulder bag, and a contrast camisole. The soft skirt complements the curved pattern without making the outfit difficult to wear. Avoid tiny antennae or intricate wing markings because jersey fabric cannot hold extremely delicate shapes. Reinforce narrow connecting sections with hand stitching and wash the finished tank gently to preserve the design.
47. Shredded Panel DIY Tank Top
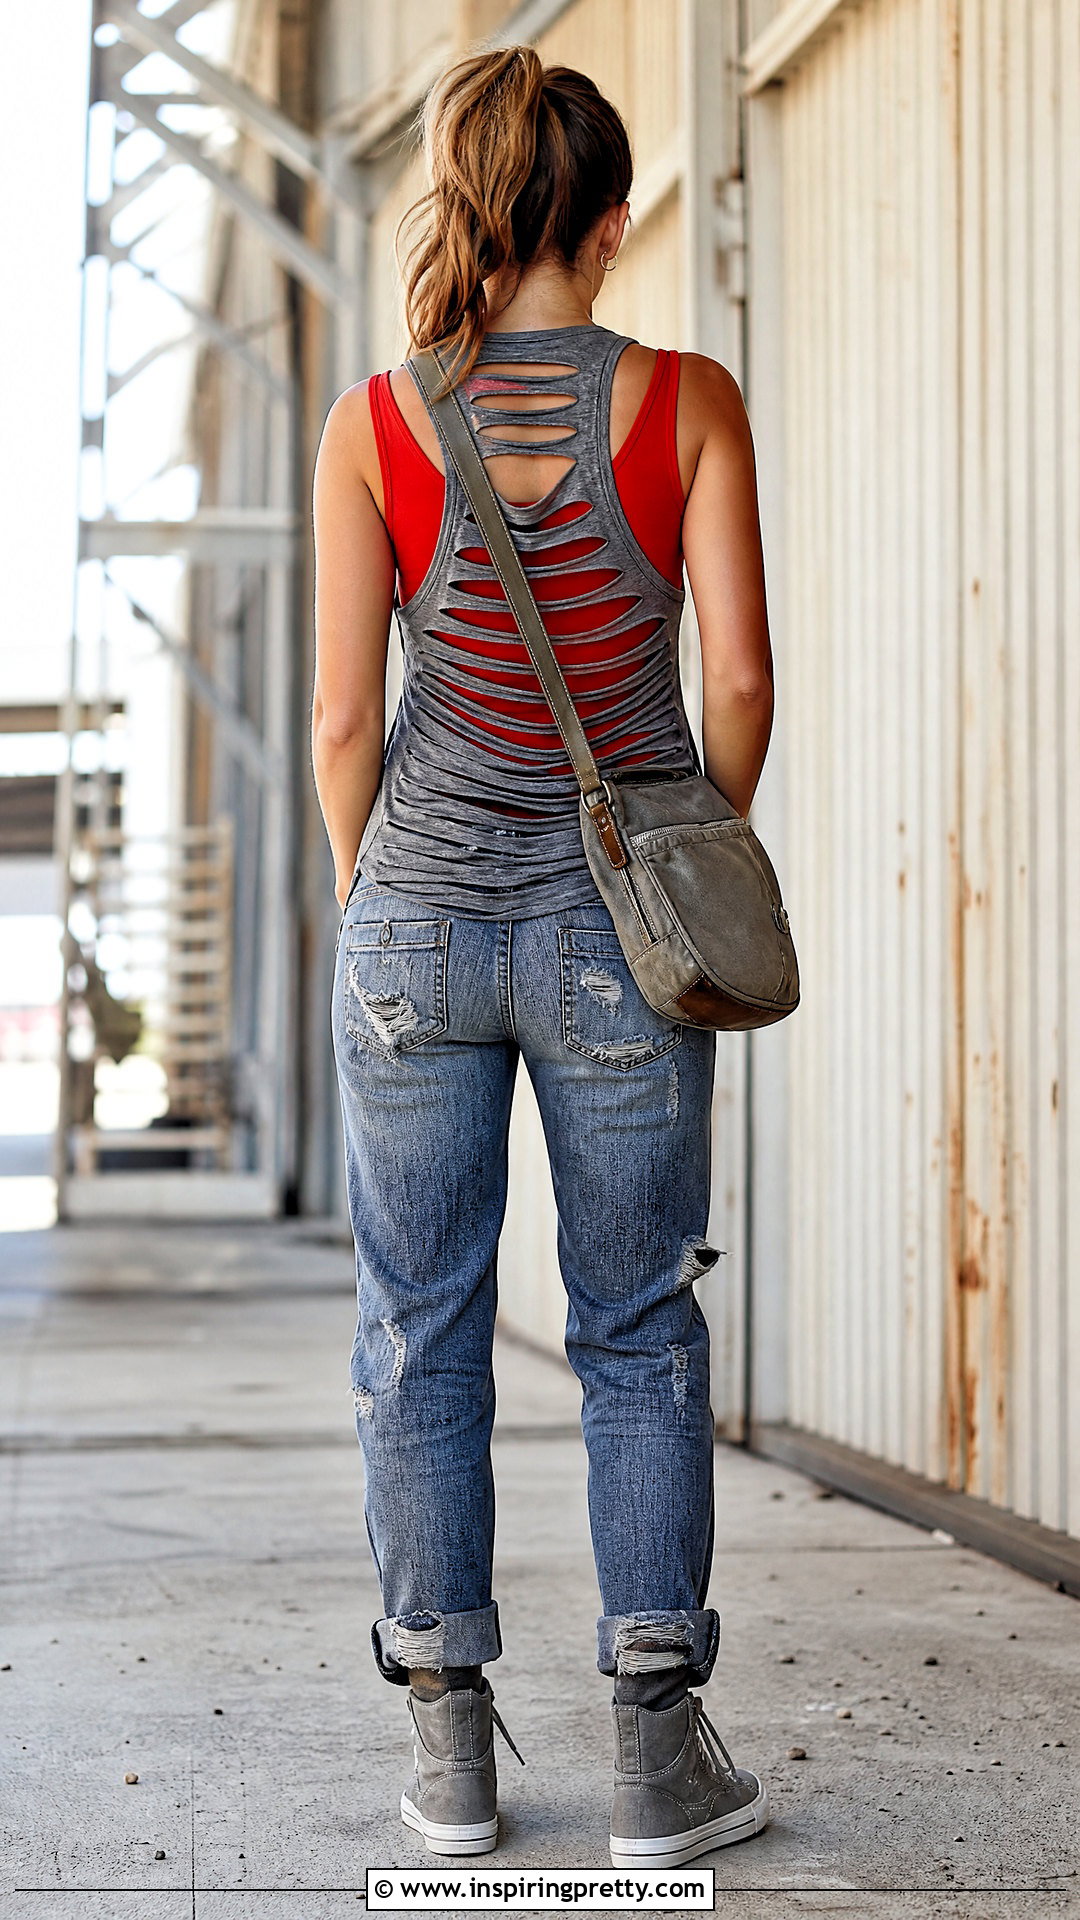
A shredded panel creates fine horizontal texture without opening the entire back. Mark a long rectangle down the center back and draw multiple lines inside it. Keep the top and bottom borders solid, then cut each horizontal line without cutting through the rectangle’s sides. Stretch the strips individually so they roll into thin cords. Wear the tank over a solid fitted top with distressed jeans, high-top sneakers, and a practical crossbody bag. The underlayer defines the shredded texture and provides coverage. Use medium-weight jersey because extremely thin fabric may break after repeated wear. Keep each cord thick enough to survive washing, and avoid pulling them aggressively. You can knot or weave selected strips together if you want a denser, more controlled pattern.
48. Distressed Edge DIY Tank Top
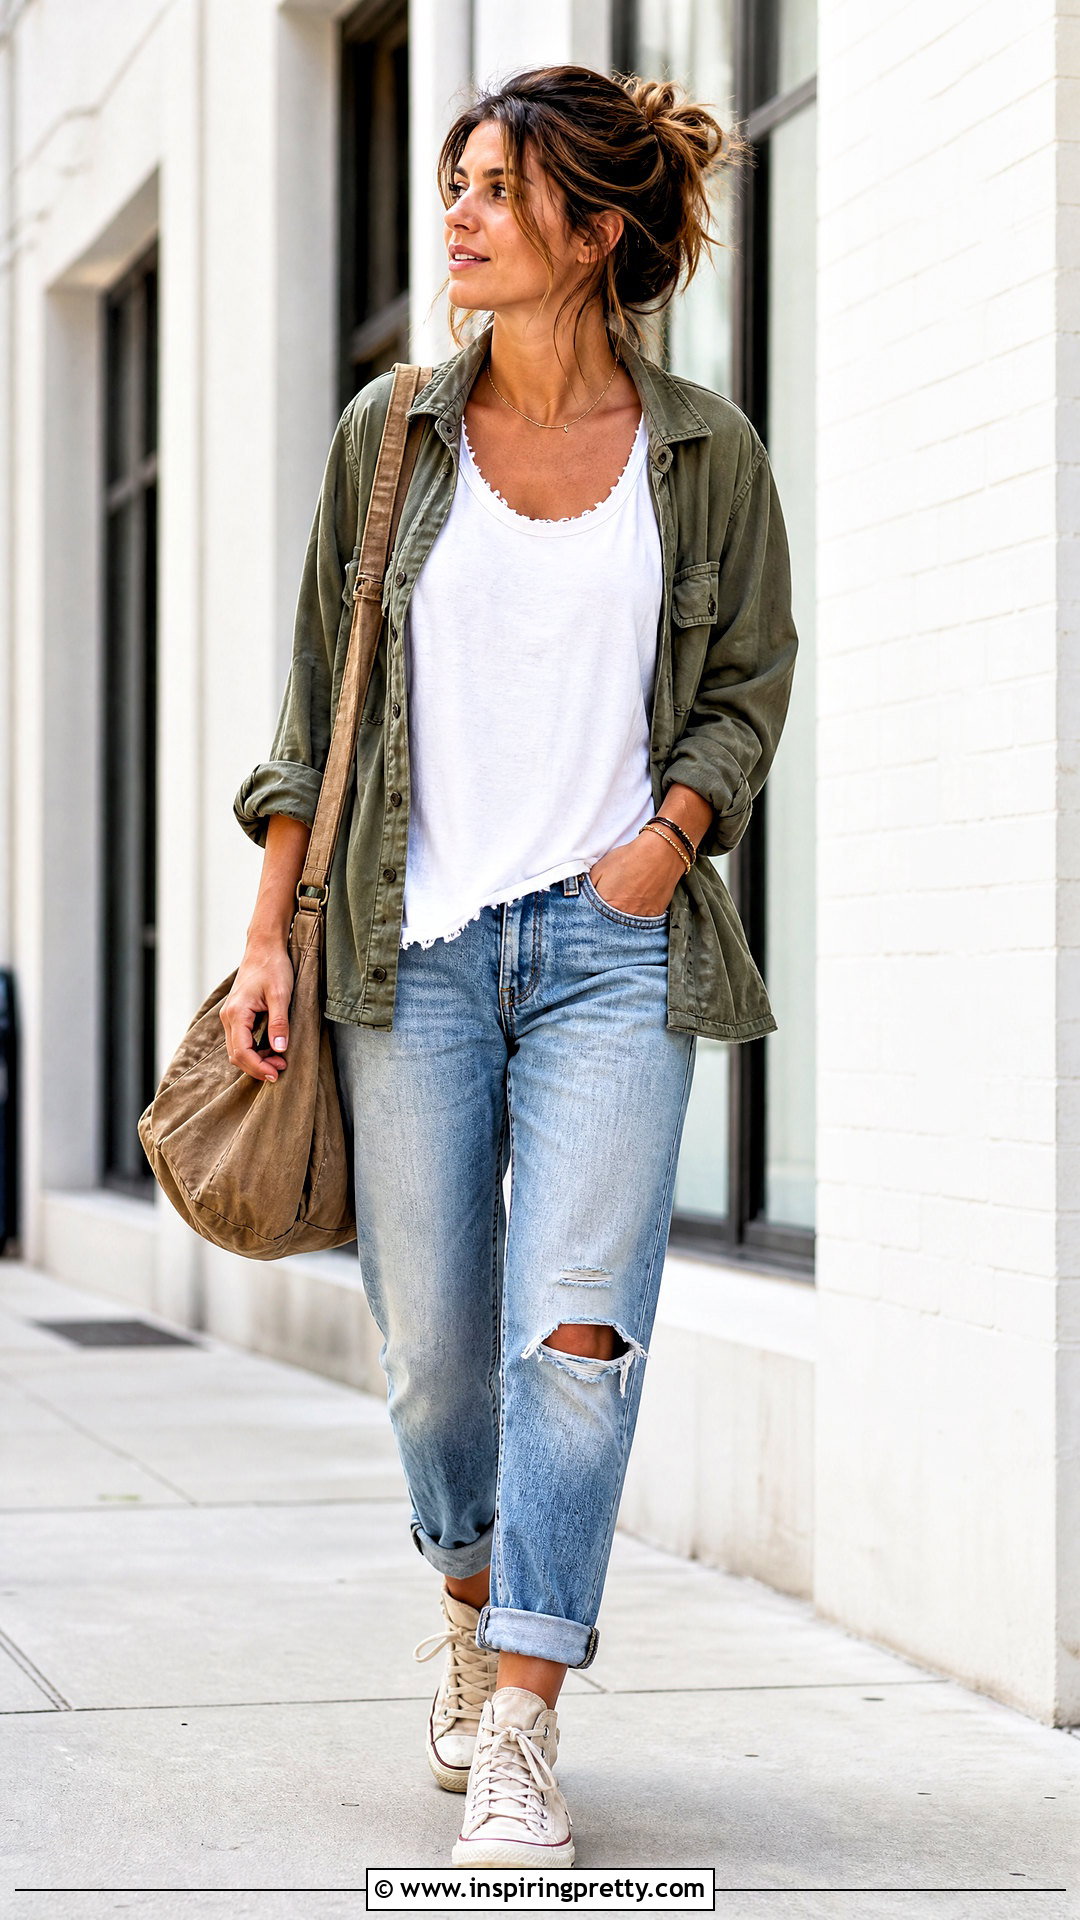
Distressed edges give a newly cut tank a softer, lived-in appearance. Begin with a basic crop, muscle tank, or scoop-neck shape. Add a few tiny snips around the armholes, neckline, or hem, spacing them irregularly rather than cutting a continuous row. Rub the edges gently with fine sandpaper and stretch the fabric so it curls. Pair the tank with relaxed boyfriend jeans, canvas high-tops, a utility overshirt, and a worn-look shoulder bag. Keep the outfit simple so the distressed finish appears intentional. Avoid cutting directly into shoulder or side seams, which support the garment. Start with minimal distressing because washing will naturally soften and enlarge the raw details. Reinforce any opening that begins to spread farther than planned.
49. Layered Contrast DIY Cutout Tank Top
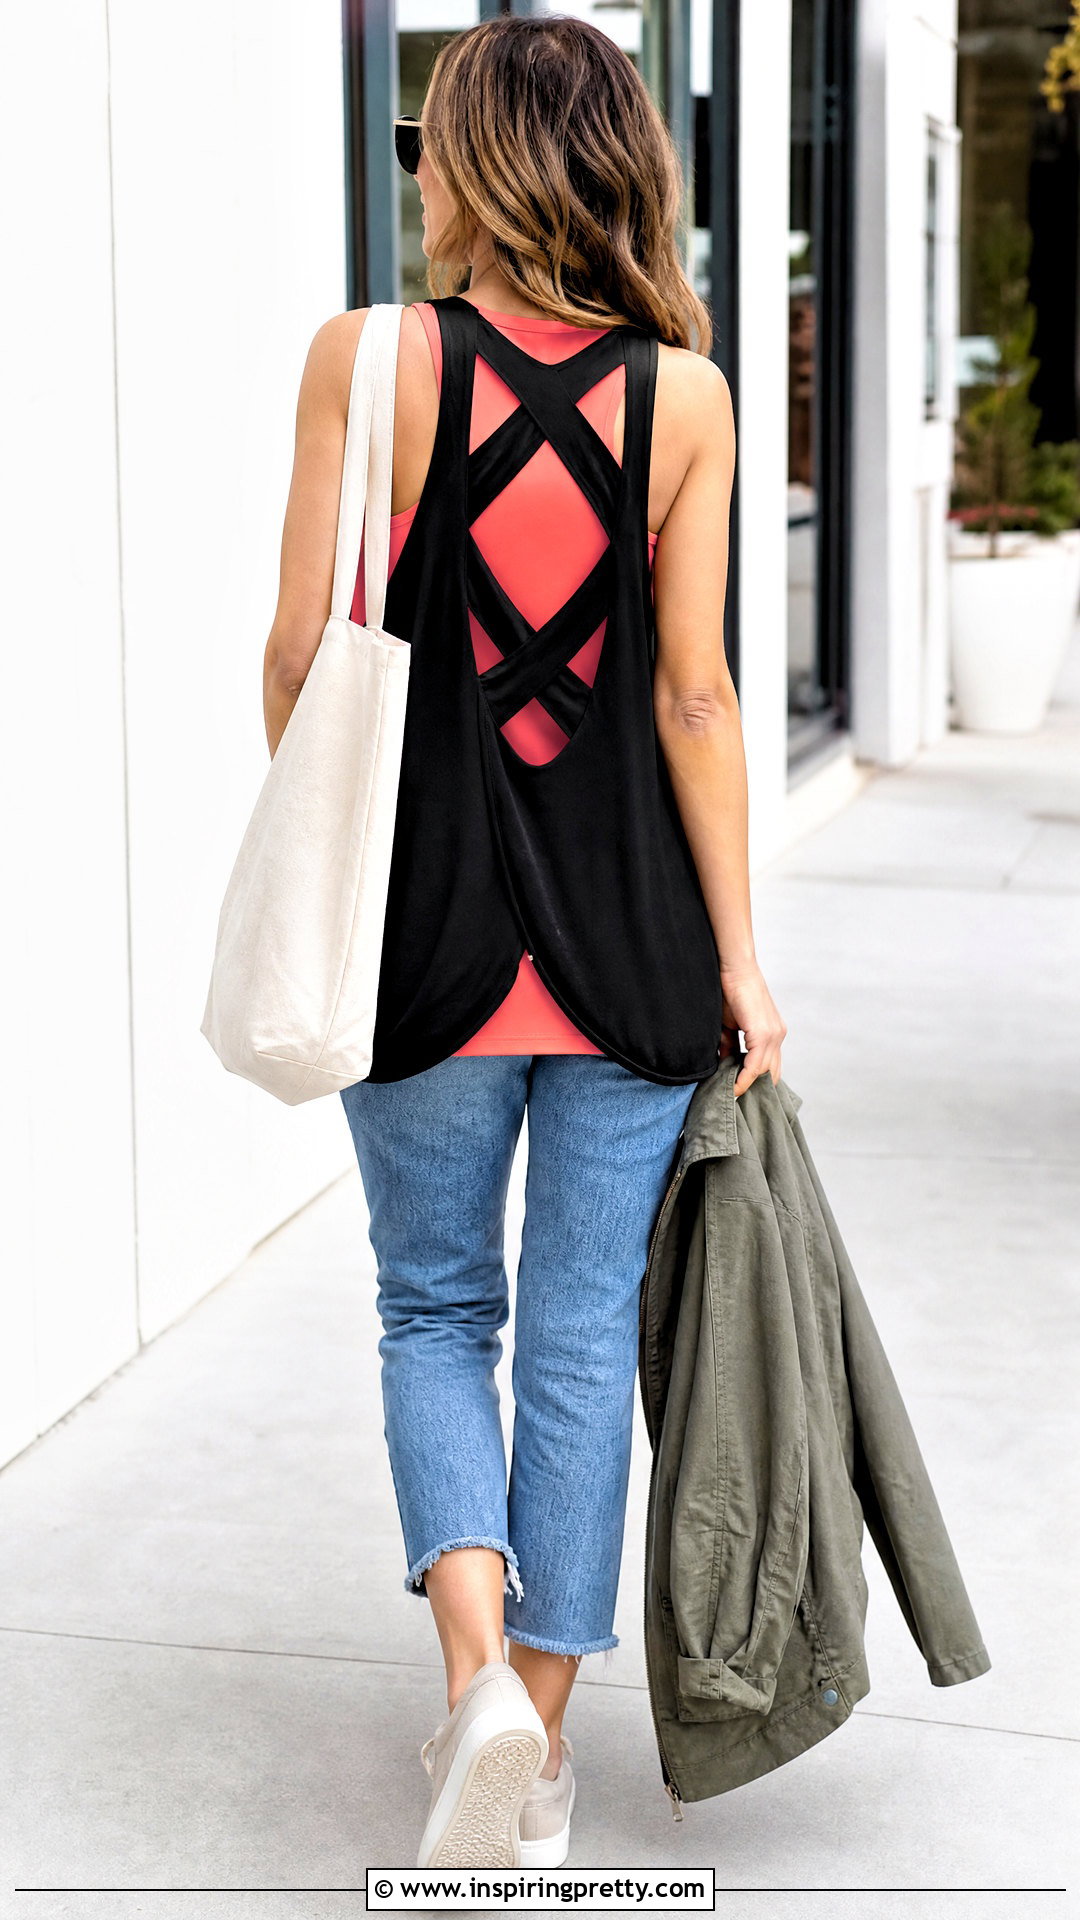
Layering two tanks allows you to highlight cutouts while maintaining comfortable coverage. Choose an outer tank in a neutral or dark shade and a fitted inner tank in a contrasting color. Add a ladder back, geometric cutout, side slashes, or a single large shape to the outer layer. Keep the inner tank uncut so it creates a clean background. Complete the outfit with cropped jeans, neutral sneakers, a canvas tote, and a lightweight jacket. The repeated color can appear again in the shoes or bag for a coordinated finish. Check that the two necklines and armholes sit comfortably together. Lightweight layers prevent bulk, while contrasting shades make even simple cuts visible. Secure the tanks at the shoulders with small stitches if they shift during wear.
50. Woven Strip DIY Tank Top
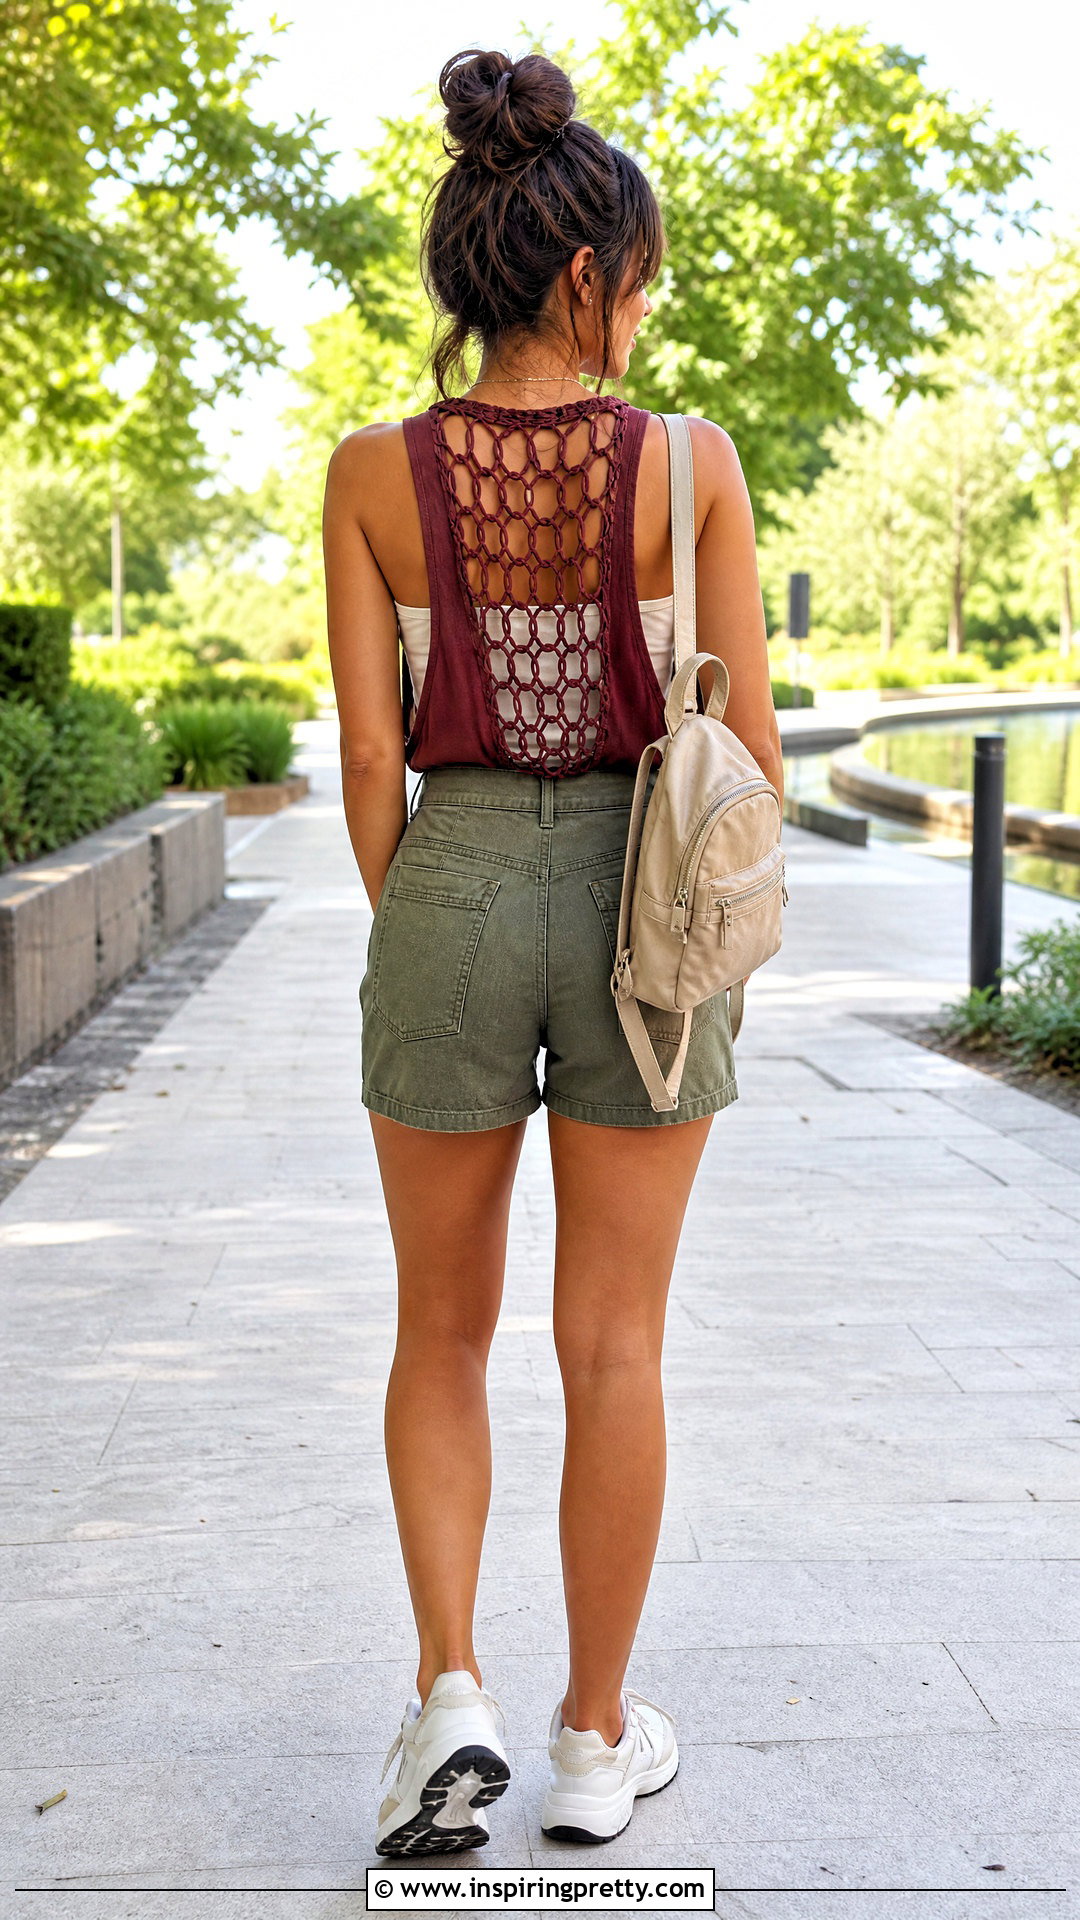
A woven-strip design transforms parallel cuts into a structured decorative panel. Mark six to ten horizontal slits across the upper back, leaving even spaces between them. Cut and stretch the strips, then loop each strip under the one below it to form a chain-like weave. Secure the final loop with hidden hand stitching or a short fabric tie. Pair the finished tank with high-waisted utility shorts, sporty sneakers, a small backpack, and a fitted contrast underlayer. The woven back becomes the central feature of the complete outfit. Work from top to bottom without pulling too firmly, since excessive tension can shorten the back panel. Practice the weaving method on fabric scraps first, and keep the lowest attachment point well above the waistline.
Conclusion:
The best 50 cut tank top diy ideas begin with patient measuring, conservative cuts, and a shirt you are comfortable experimenting with. Simple changes, including a cropped hem, scoop neck, or side tie, are excellent beginner projects. Braids, woven panels, lacing, and shaped cutouts provide a bigger challenge once you understand how jersey fabric stretches. Always mark the design, protect the opposite fabric layer, and try on the tank between major cuts. Finish each creation with balanced bottoms, comfortable shoes, useful layers, and accessories that support the overall look. Most importantly, customize the placement and coverage for your body and comfort level. Thoughtful planning turns an unused shirt into a distinctive, wearable tank.
Related posts:


Leave a Reply