
Turning an old tee into something fun, wearable, and personal can be surprisingly simple. These **25 fringe tank top DIY ideas** cover everything from basic no-sew cuts to braided, beaded, knotted, dip-dyed, and macramé finishes. Most designs begin with a soft cotton T-shirt, fabric scissors, washable chalk, and a ruler. Cutting evenly spaced strips and gently stretching them helps jersey fabric form narrow, curled strands. More detailed knotwork may require fringe counts that divide evenly into small groups. () Each project below also includes a complete outfit suggestion, making it easier to turn your handmade top into a polished summer look. Gather an old shirt, test your cuts carefully, and explore these **25 fringe tank top DIY ideas**.
1. No-Sew Fringe Tank Top
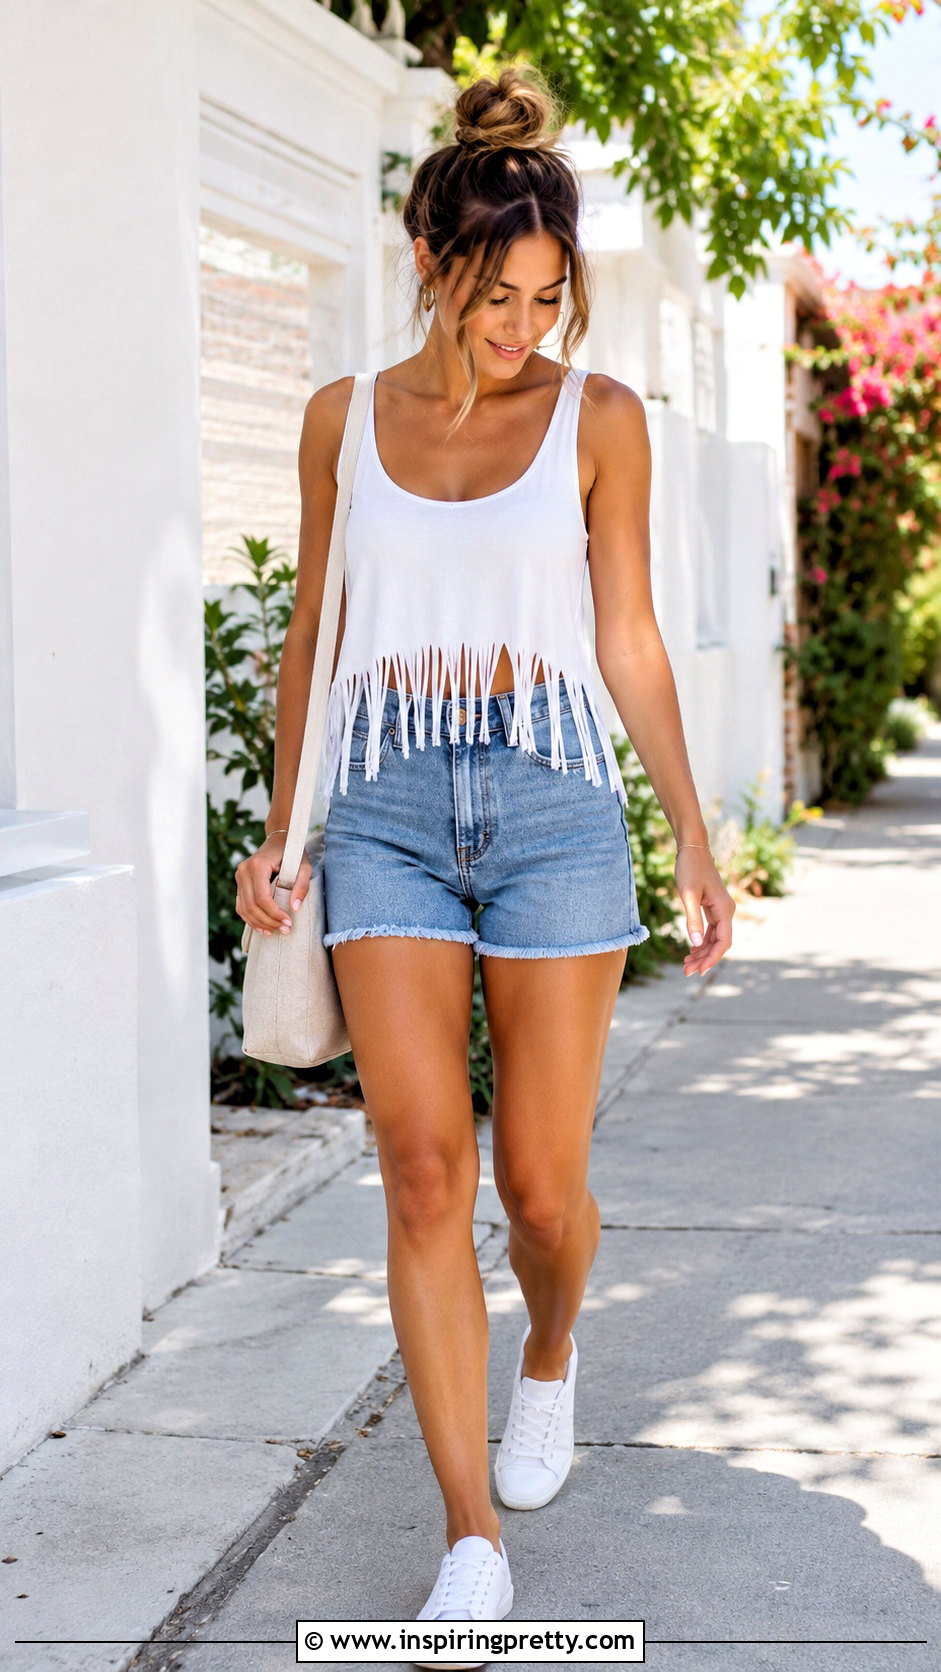
A basic no-sew design is the easiest place to begin. Lay an oversized cotton T-shirt flat, remove the sleeves, and reshape the neckline into a comfortable scoop. Mark a straight line several inches above the hem, then cut narrow vertical strips from the bottom edge to that line. Gently pull each strip so the knit fabric curls into smooth fringe. Leave the strands loose for relaxed movement or knot every two strips near the top. Wear the finished tank with high-rise denim shorts, clean white sneakers, small hoop earrings, and a canvas crossbody bag. The simple outfit balances the playful texture while keeping the handmade top as the main feature.
2. Cropped Fringe Tank Top
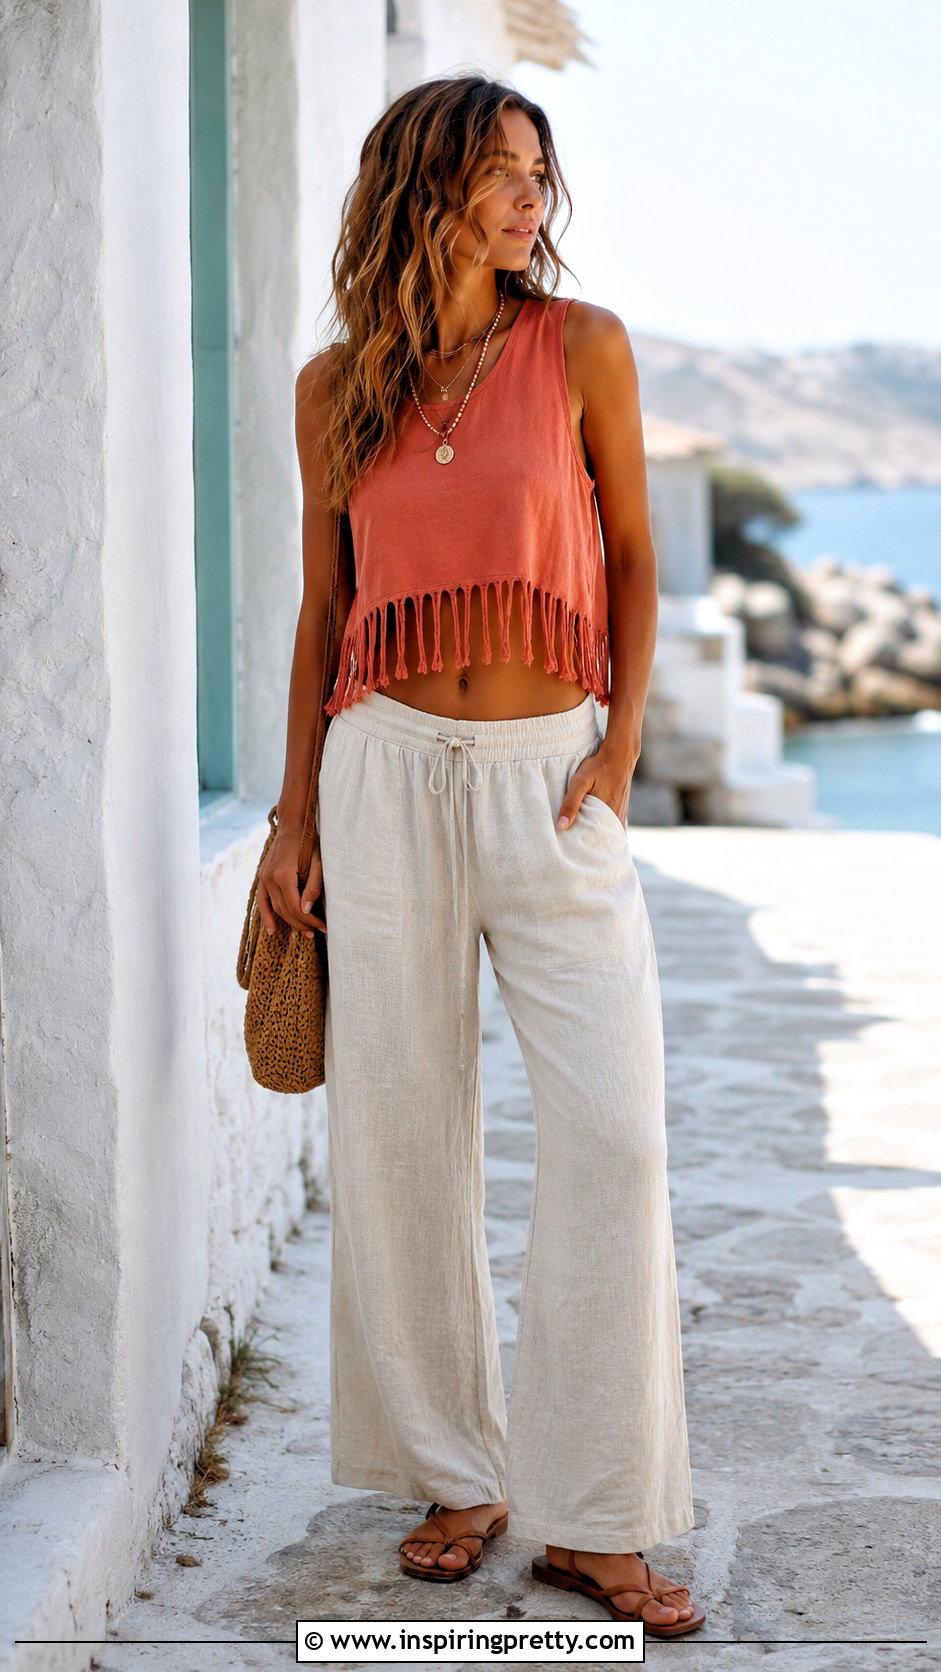
Want a shorter top without losing the movement of long fringe? Mark the intended crop line around the shirt, but remember that the fringe will begin there rather than end there. Cut away the sleeves and adjust the neckline before making evenly spaced strips along the lower section. Keep the front fringe slightly shorter if you want the waistband of your bottoms to remain visible. Pair this cropped fringe tank top with loose linen pants, flat leather sandals, a woven shoulder bag, and delicate layered necklaces. The fitted-and-flowing combination creates balanced proportions. A neutral tank works beautifully with colorful pants, while a bright shirt can become the focal point of an otherwise simple vacation-ready outfit.
3. Knotted Fringe Tank Top
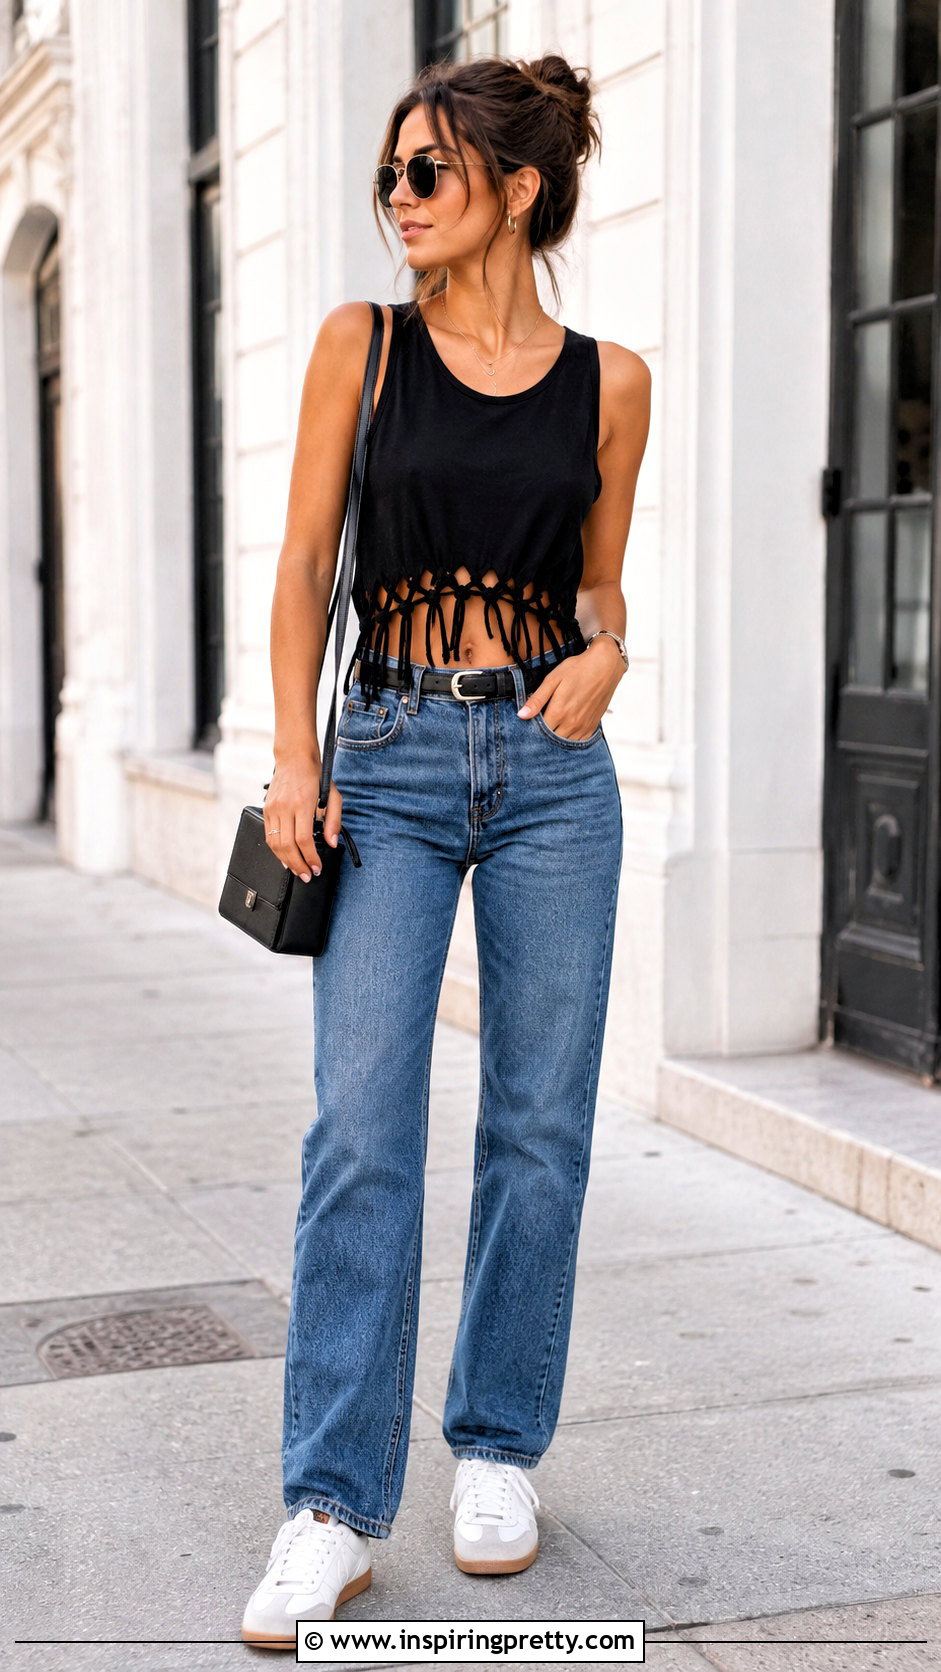
Small knots give raw fringe a cleaner, more intentional finish. Start with a loose T-shirt and convert it into a tank by trimming the sleeves just inside the seams. Cut equal-width strips around the bottom, stopping several inches below the bust. Stretch the strips gently, then tie neighboring strands together using simple overhand knots. Place every knot at approximately the same height for a tidy row. Complete the outfit with straight-leg jeans, low-profile sneakers, a slim belt, and a structured mini bag. If the tank has a graphic print, keep the accessories understated. This DIY works especially well when you want handmade texture without an overly complicated cutting or weaving technique.
4. Double-Knot Fringe Tank Top
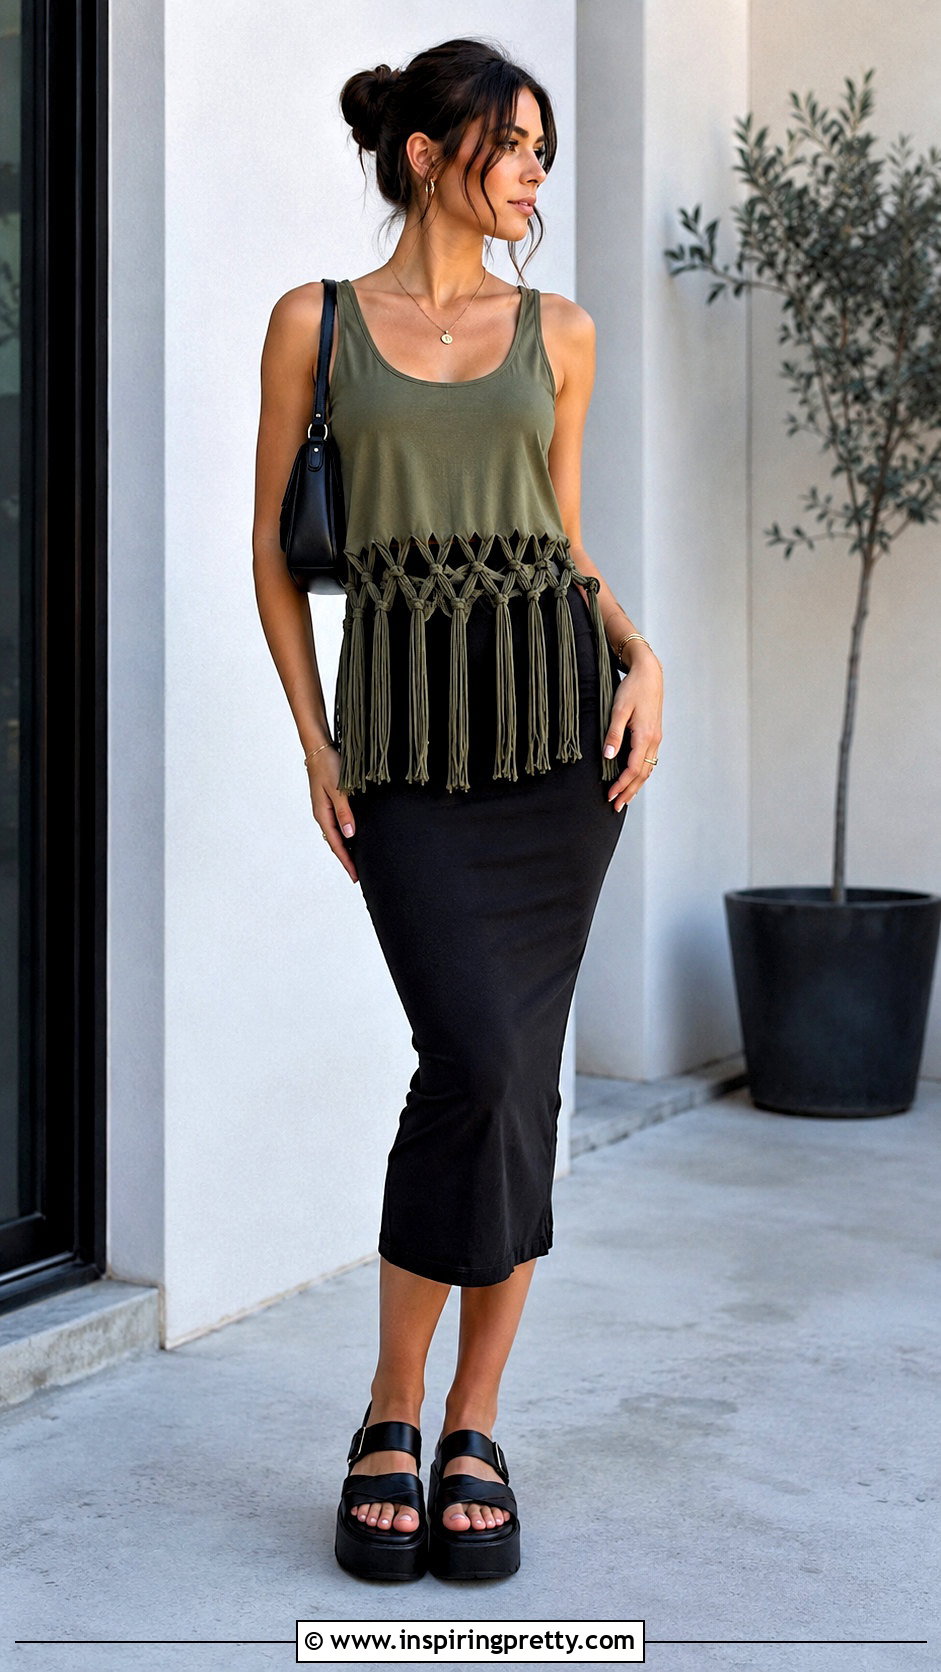
A second row of knots transforms ordinary fringe into a loose net pattern. After creating the first row of paired knots, separate the strands and connect each one to a strand from the neighboring pair. Keep the tension light until the entire row is finished, then adjust the knots so they sit evenly. Leave several inches of loose fringe beneath the pattern. Style the tank with a fitted midi skirt, simple platform sandals, a compact shoulder bag, and understated metal jewelry. The sleek skirt contrasts with the handcrafted hem and prevents the outfit from looking overly casual. Choose a tank in black, cream, olive, or rust for an easy look that transitions from daytime errands to outdoor gatherings.
5. Braided Fringe Tank Top
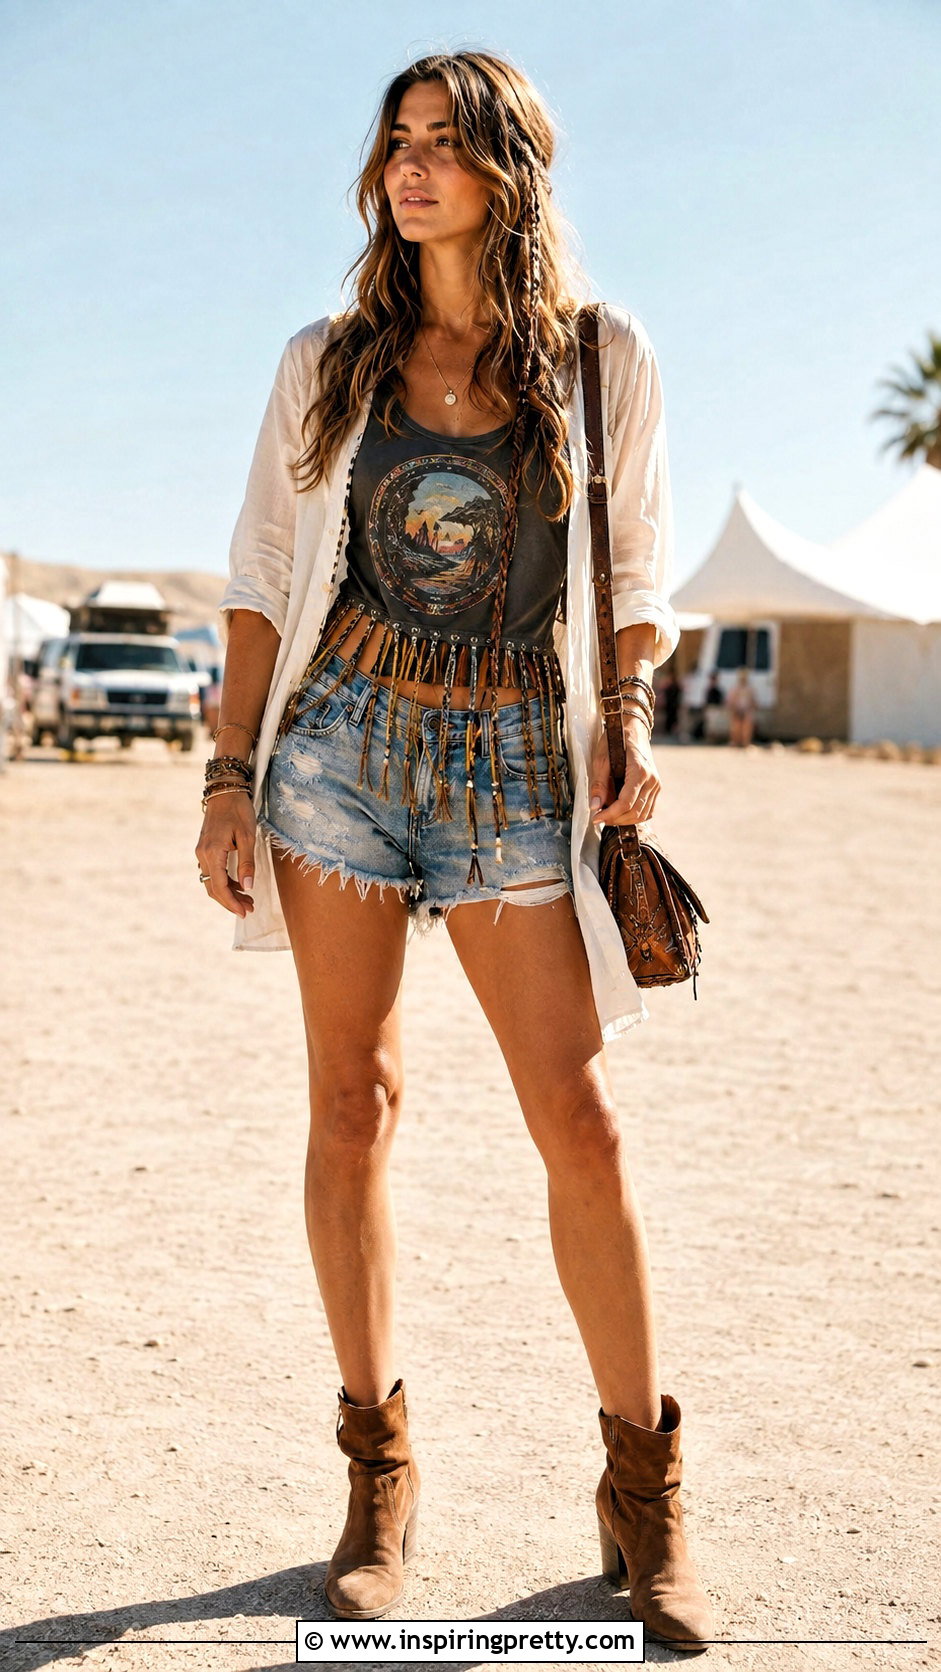
Braided fringe creates more structure while still preserving plenty of movement. Cut the shirt hem into groups of three narrow strips, making sure each group has a similar width. Stretch the fabric strips before braiding so they become easier to handle. Braid each group loosely, secure the ends with small knots, and trim uneven fabric only after every braid is finished. Wear the top with distressed denim shorts, ankle boots, a lightweight open shirt, and a practical crossbody bag. This head-to-toe combination has a casual festival influence without requiring excessive accessories. A faded graphic tee makes the design look especially authentic, but a solid cotton shirt provides a cleaner result and highlights the braided texture.
6. Beaded Fringe Tank Top
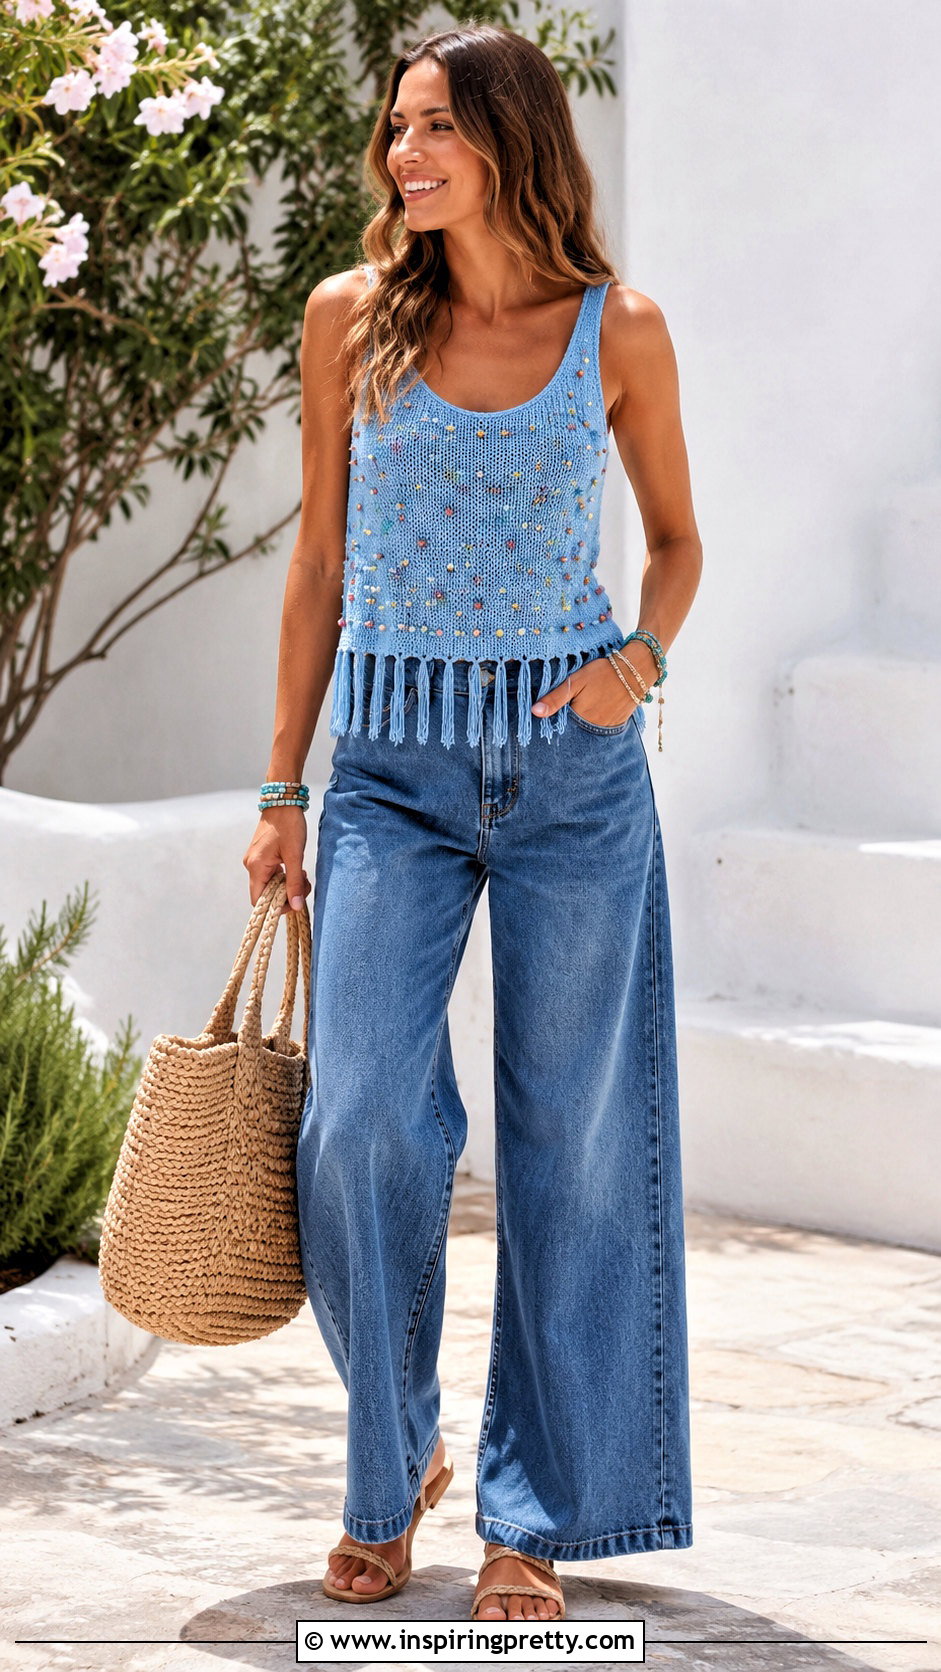
Beads add color, weight, and personality to a simple fringe hem. Choose lightweight beads with openings large enough to accommodate stretched jersey strips. Slide one or two beads onto selected strands, then tie secure knots directly beneath them. Avoid overloading every strip because heavy embellishment can pull the hem out of shape. A scattered arrangement usually feels more balanced. Pair the finished top with wide-leg denim, flat sandals, a woven tote, and colorful bracelets that coordinate with the beads. Wooden beads create an earthy look, while acrylic beads produce a brighter finish. Check every knot before wearing or washing the tank, especially if the top will be used for active summer events.
7. Wooden Bead Fringe Tank Top
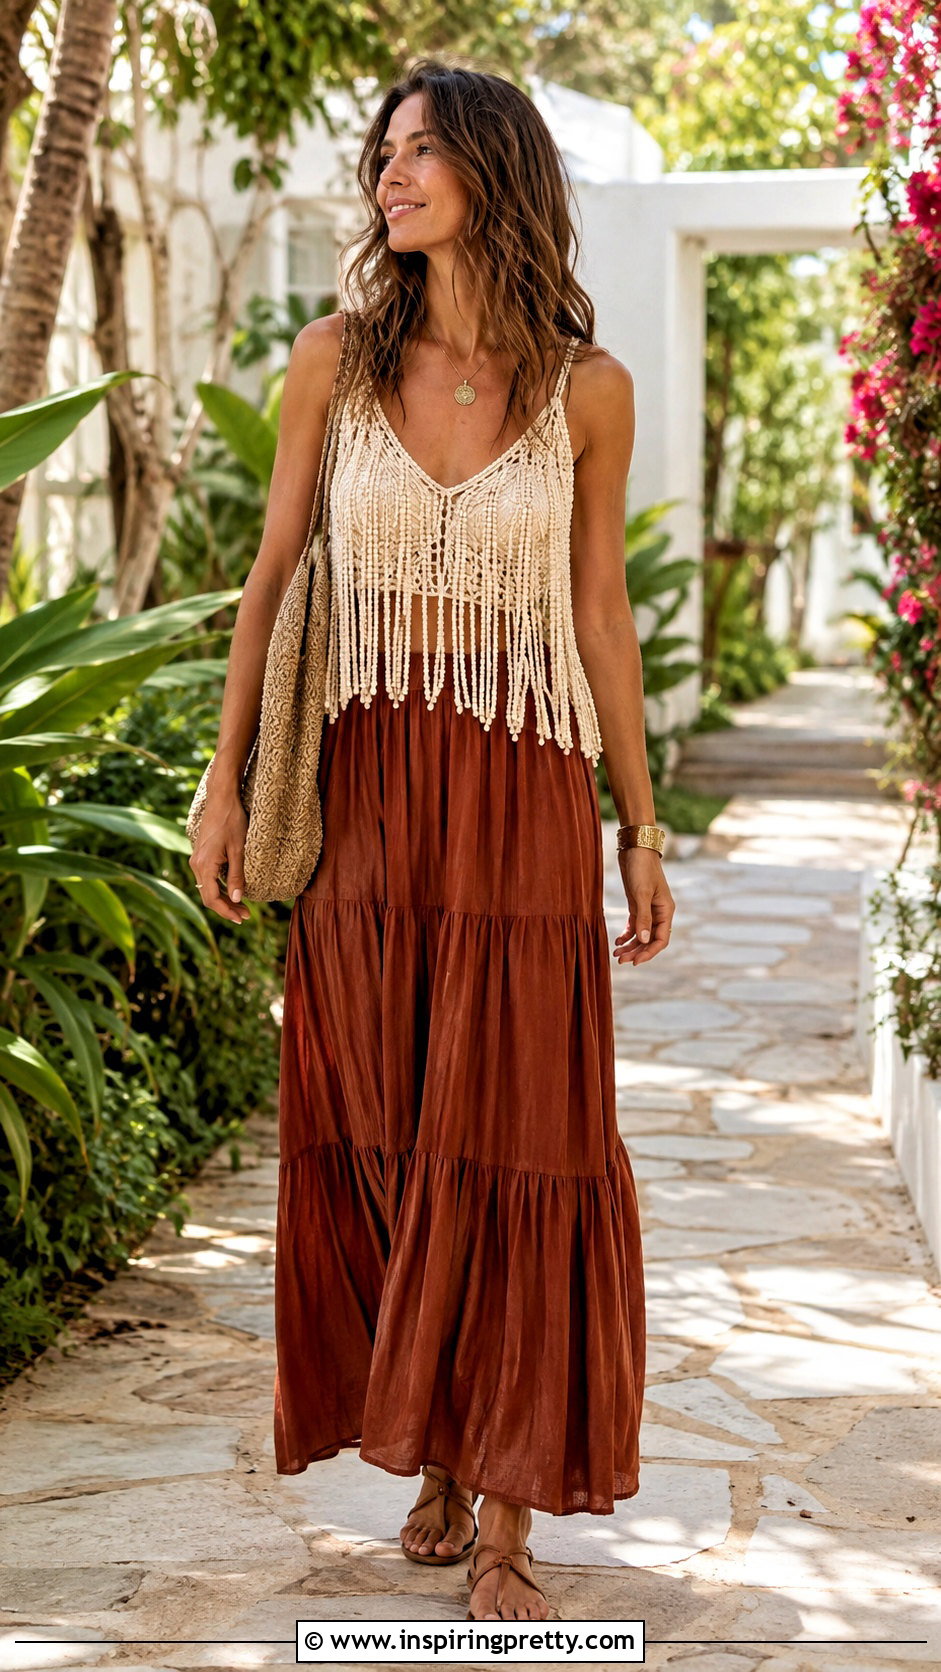
Natural wooden beads give a fringe tank top an easy bohemian finish. Begin with a cream, brown, muted green, or faded terracotta shirt. Cut medium-width fringe, pull the strips to create rolled cords, and add beads to alternating strands. Secure each bead with a firm knot, leaving loose fabric beneath it for movement. Style the tank with a tiered maxi skirt, comfortable flat sandals, a slouchy woven bag, and simple wood or brass jewelry. Keeping the colors grounded helps the handmade embellishments look cohesive rather than costume-like. For better balance, use beads in two related sizes and distribute them symmetrically across the front and back of the tank.
8. Pony Bead Fringe Tank Top
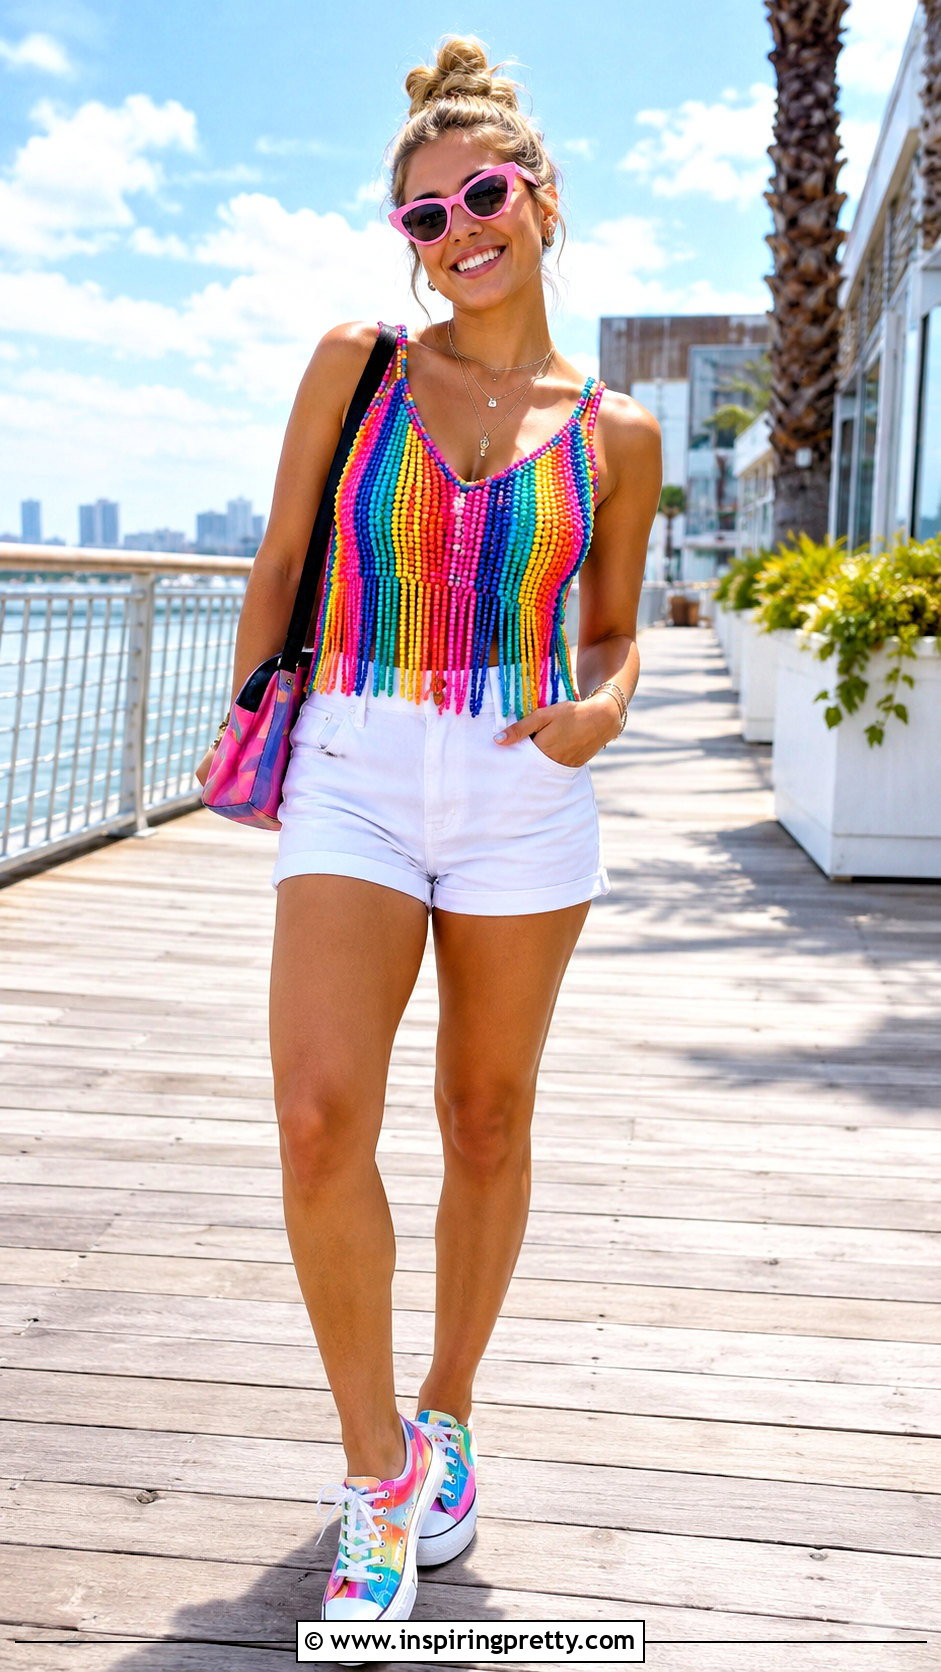
Colorful pony beads can turn an old tank into a cheerful summer statement. Cut slim fringe strips because standard plastic beads work best with narrow, tightly rolled jersey fabric. Arrange the beads by color before threading them, then repeat a simple pattern across the hem. Knot the ends securely and leave enough fabric below each bead to create movement. Build a complete outfit with high-waisted white shorts, colorful canvas sneakers, a small nylon shoulder bag, and playful sunglasses. The clean bottoms keep the bright beadwork from overwhelming the look. This project is also easy to personalize with school colors, favorite shades, or a controlled rainbow pattern rather than a completely random mixture.
9. Macramé Fringe Tank Top
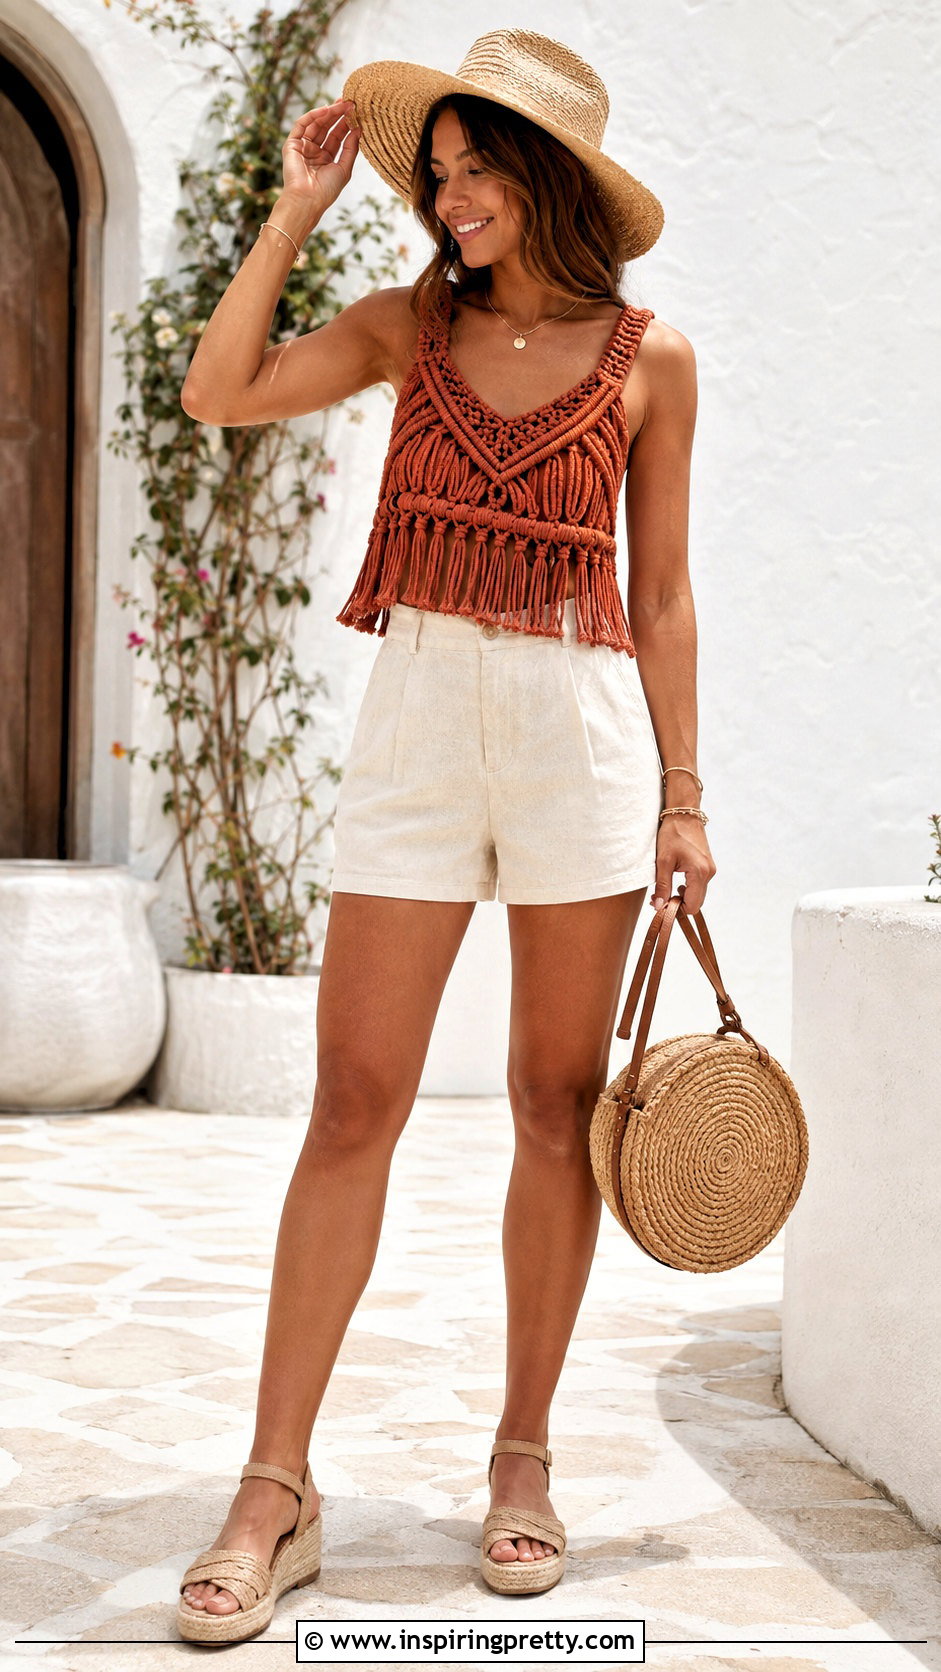
Macramé knotting gives a basic tank top an intricate woven hem without requiring separate trim. Cut uniform strips and organize them into groups of four. Use square knots to create the first row, then alternate the strand groupings for the next row. Work on a flat surface and keep the knots slightly loose until the pattern is aligned. Finish the outfit with high-rise linen shorts, espadrille sandals, a round woven bag, and a lightweight sun hat. The breathable pieces complement the open knotwork and create a cohesive warm-weather look. Solid-colored fabric makes the pattern easier to see, while soft jersey is generally simpler to knot than thick, rigid material.
10. Chevron Fringe Tank Top
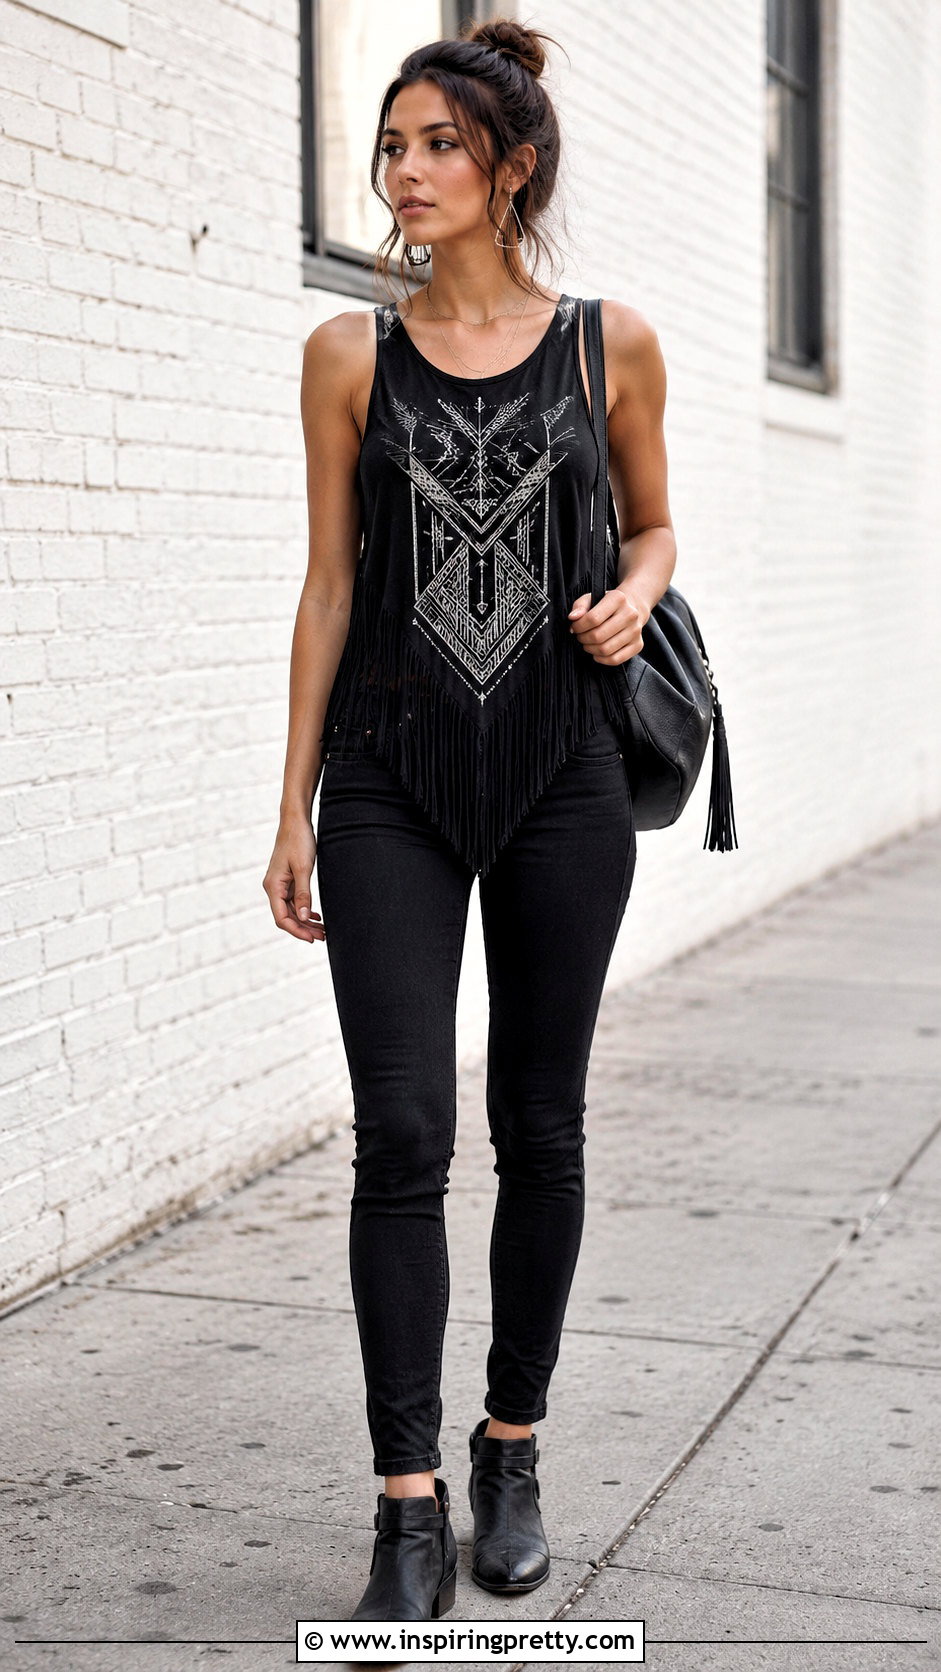
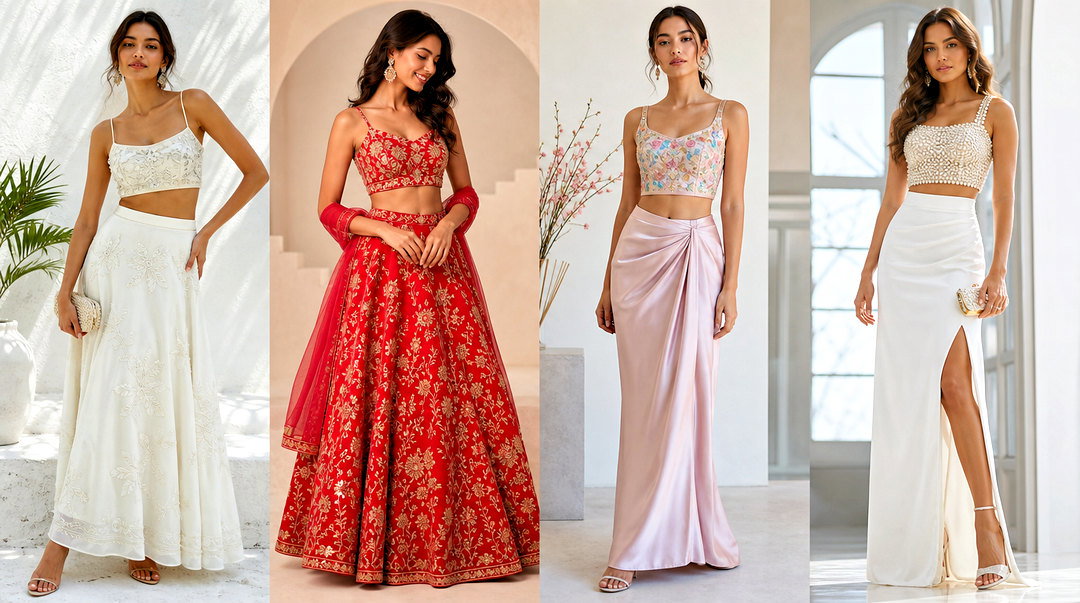
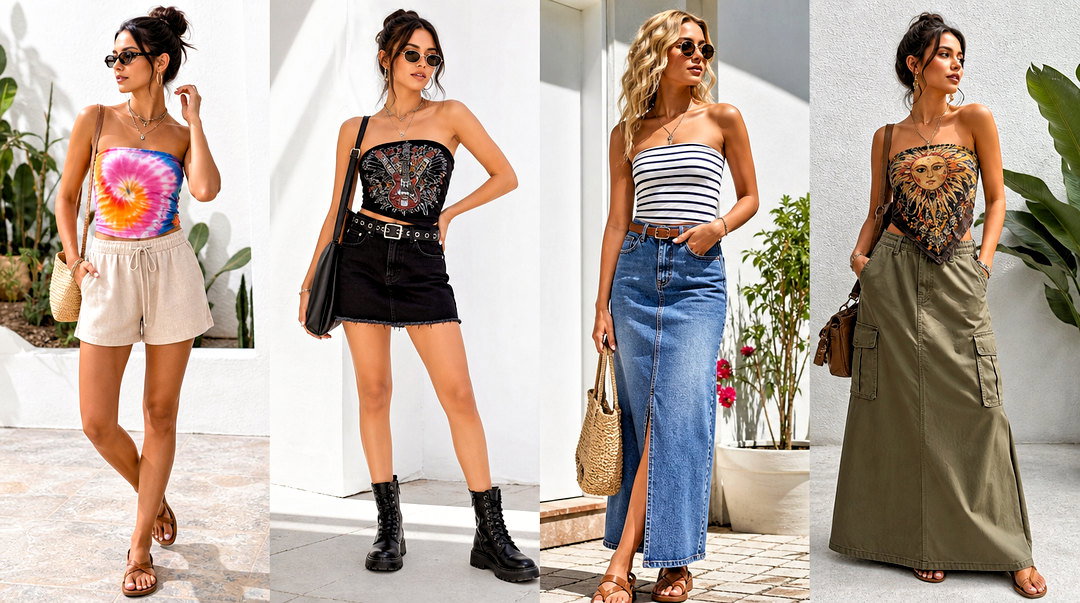
A chevron hem gives fringe a sharp, graphic shape. Put the shirt on and mark the center front at the preferred length. Draw diagonal guidelines that rise toward both side seams, creating an inverted point. Cut fringe from the original hem up to those angled lines, then stretch each strip and trim only when necessary. Keep the back straight or repeat the same pointed pattern for symmetry. Wear the tank with slim black jeans, low ankle boots, a compact backpack, and geometric earrings. A monochrome outfit emphasizes the V-shaped hem and makes the silhouette appear longer. This cutting method works especially well on oversized shirts with bold front graphics or centered logos.
11. Asymmetrical Fringe Tank Top
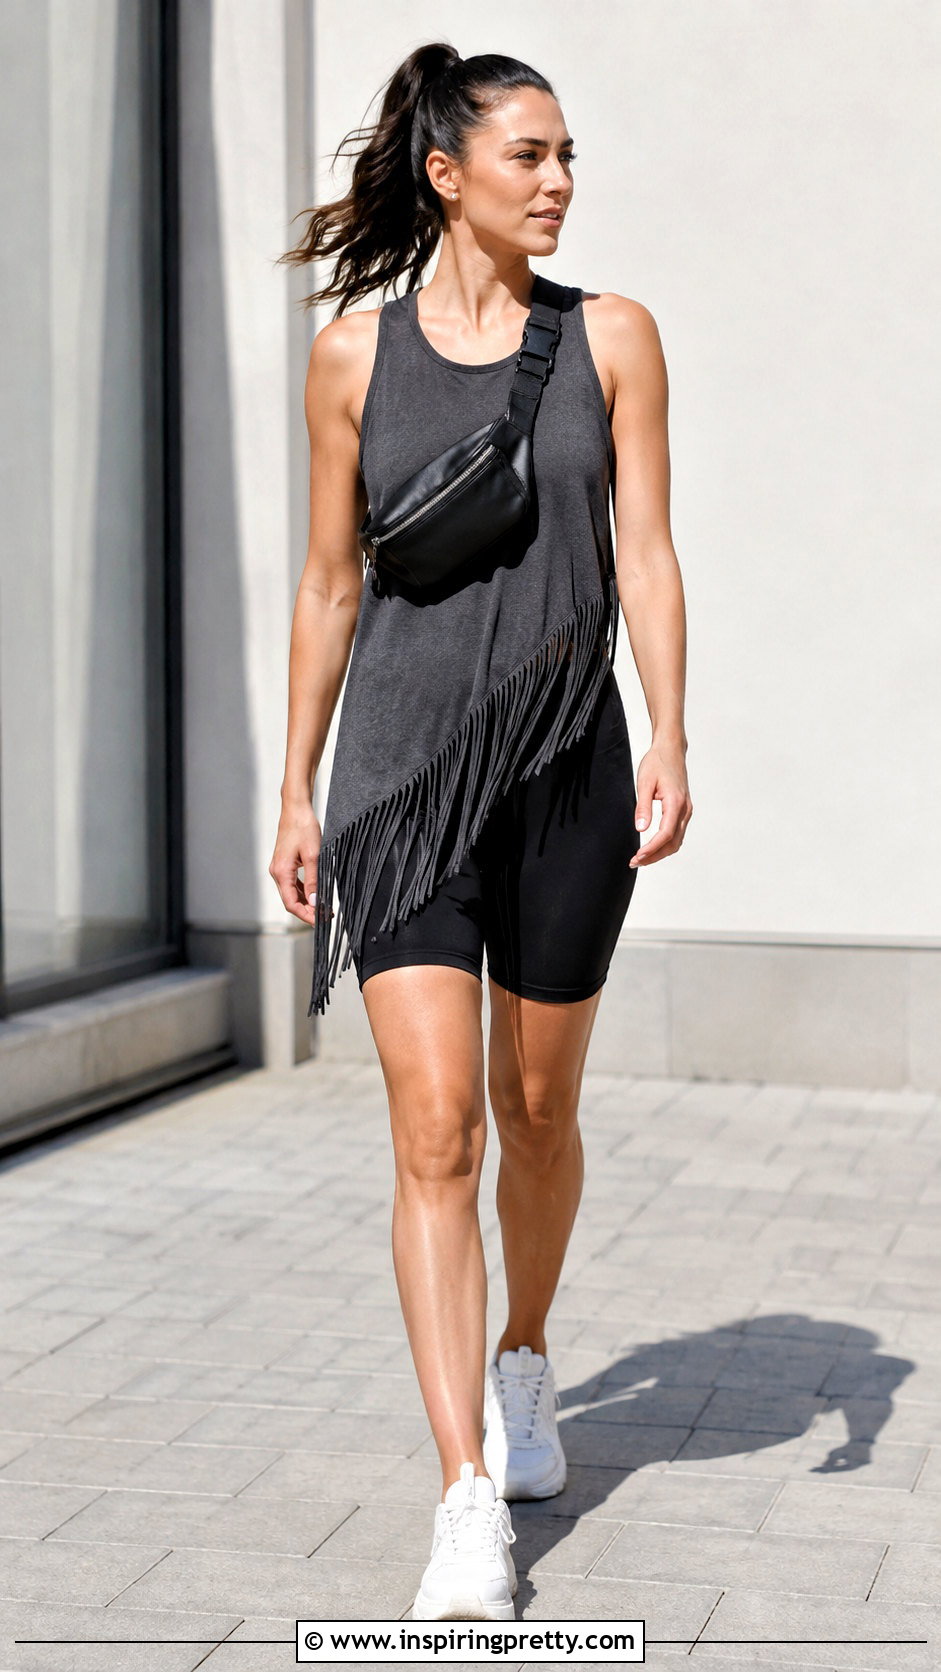
An asymmetrical fringe hem brings movement to one side of the outfit. Draw a diagonal line from the higher point at one hip to a lower point on the opposite side. Cut vertical strips from the bottom edge up to that guideline, keeping the strips narrow and evenly spaced. Stretch them after cutting so they curl naturally. Pair the finished tank with fitted biker shorts, chunky white sneakers, a belt bag worn crossbody, and minimal stud earrings. The streamlined base lets the uneven fringe remain visually clear. For a softer look, substitute cropped leggings and lightweight slip-on shoes. Check the angle while wearing the shirt before cutting because the fabric may hang differently on the body.
12. Side Fringe Tank Top
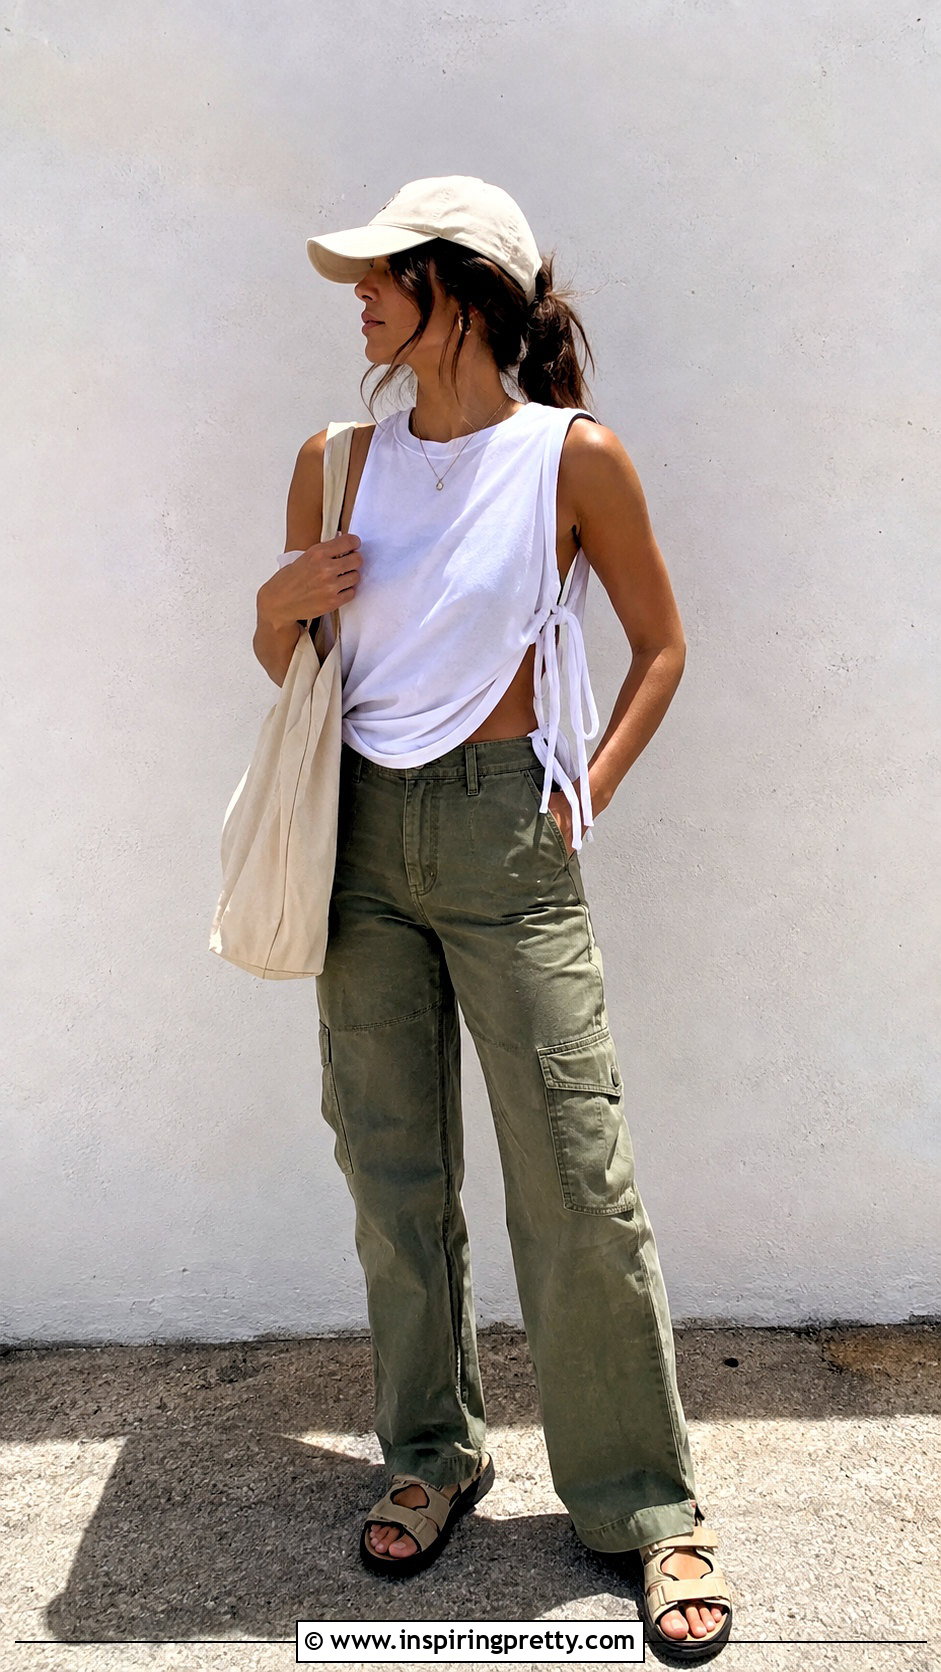
Side fringe adds texture without covering the entire hem. Start with a slightly oversized tee and cut away the sleeves to create relaxed armholes. Mark a narrow vertical section along each side seam, then cut horizontal strips through both layers within that area. Tie the matching front and back strips together to reshape the waist. Wear the finished tank with high-rise cargo pants, sporty sandals, a canvas tote, and a simple baseball cap. The side knots provide definition while the loose pants maintain a relaxed silhouette. This approach is useful for adjusting a boxy shirt because the ties can make the body narrower. Leave enough room for comfortable movement and easy layering over a fitted camisole.
13. Tie-Side Fringe Tank Top
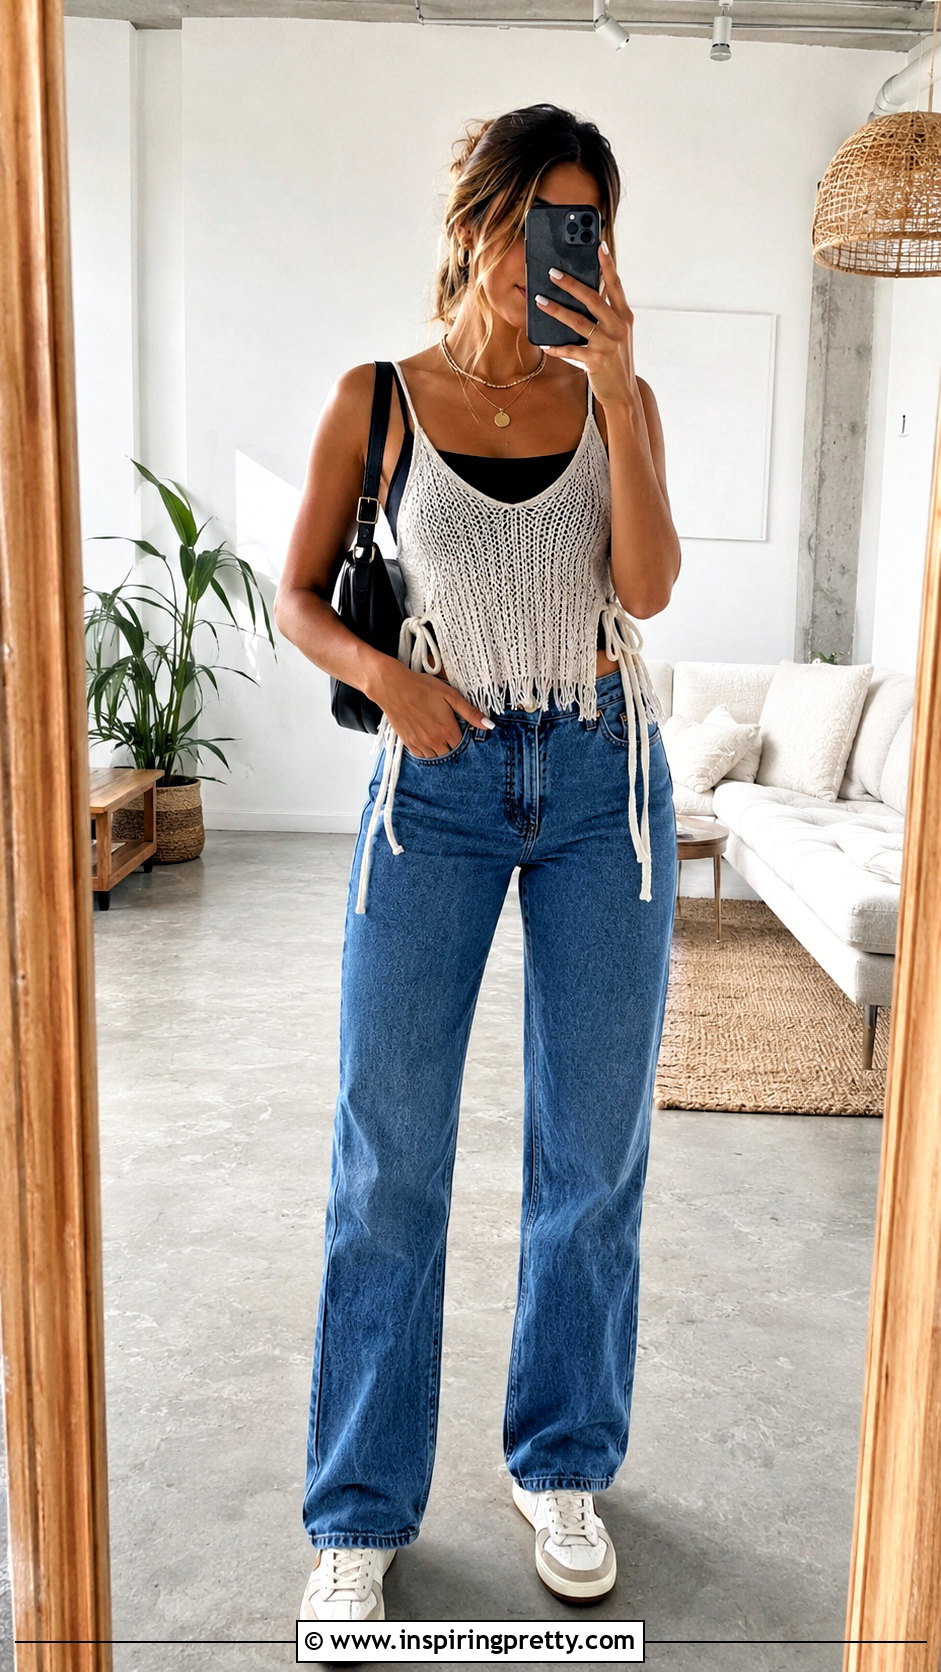
A tie-side tank combines fringe decoration with an adjustable fit. Remove the shirt’s side seams from the armhole to the hem, then cut matching horizontal strips along the front and back edges. Tie each pair together, beginning near the waist and working downward. Use loose knots for a relaxed shape or tighter knots for more definition. Style the top over a fitted bandeau or camisole, then add high-waisted denim, flat sneakers, a shoulder bag, and layered necklaces. The base layer provides coverage through the open sides and introduces another color. For a neat finish, keep the ties similar in length and stop cutting before the armhole becomes too open or difficult to wear.
14. Back Fringe Tank Top
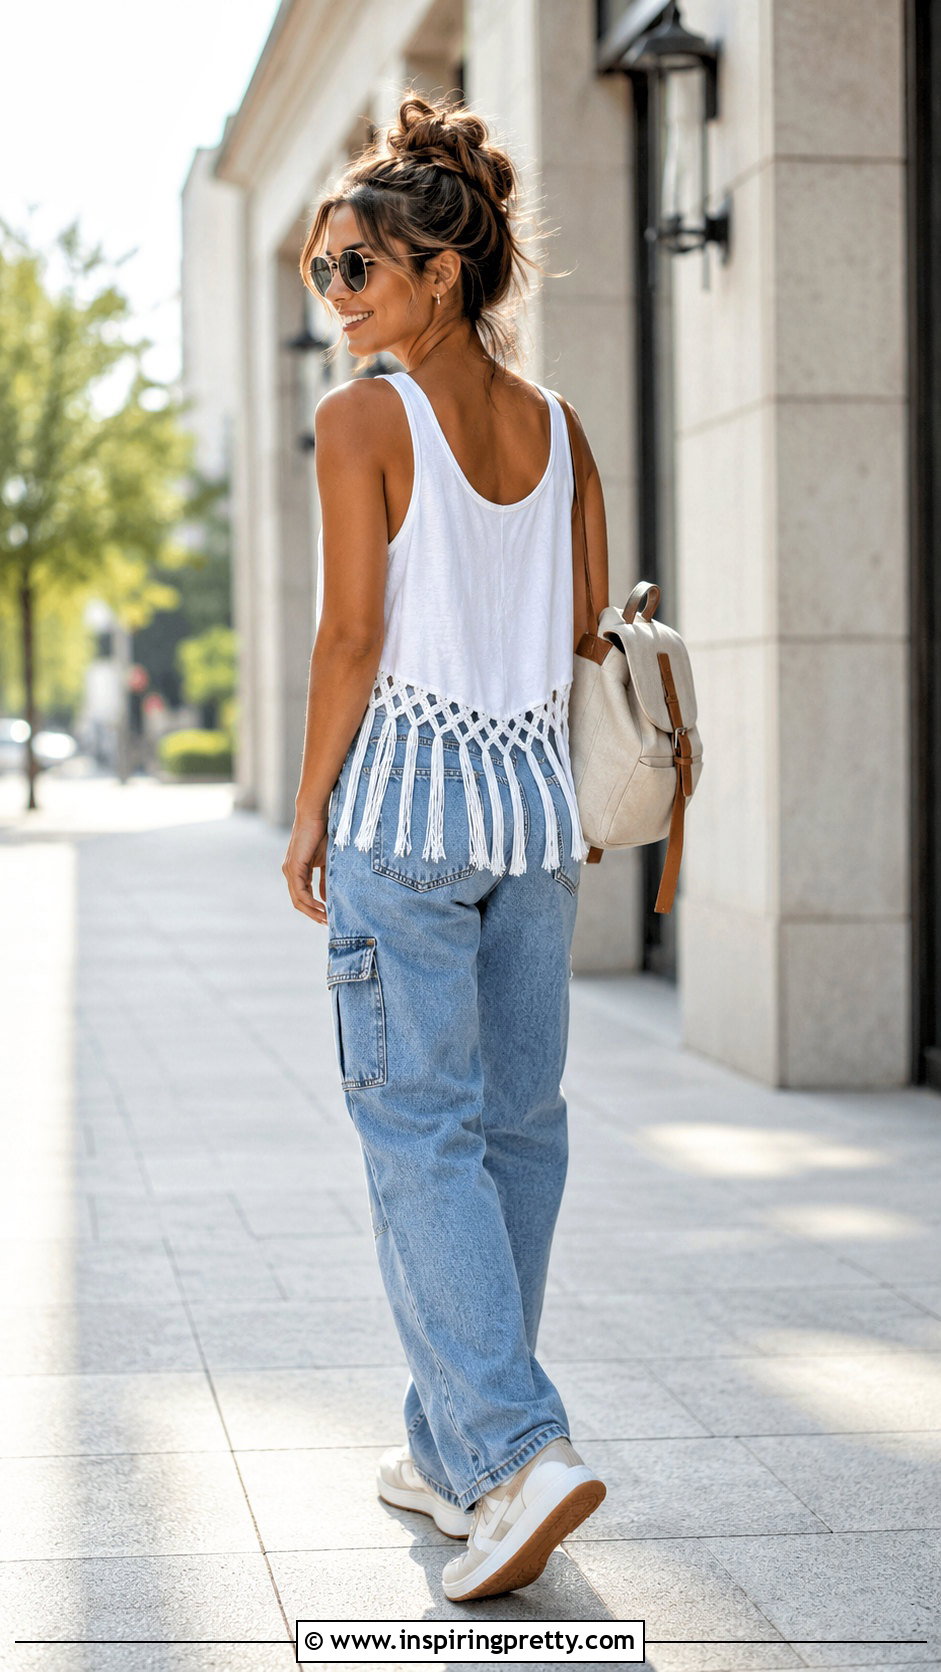
Placing fringe on the back creates an unexpected detail while keeping the front simple. Turn the shirt inside out and carefully separate the back layer from the front. Mark the upper cutting limit, then create vertical strips only across the back hem. Knot or braid selected strands for additional texture. A fitted tank or sports bra underneath can add comfortable coverage. Complete the outfit with straight-leg cargo jeans, retro sneakers, a small backpack, and simple sunglasses. The utilitarian bottoms balance the movement of the fringe. Choose a shirt with an interesting front graphic so the tank looks intentional from every angle, or use a solid shirt when you want the back construction to receive all the attention.
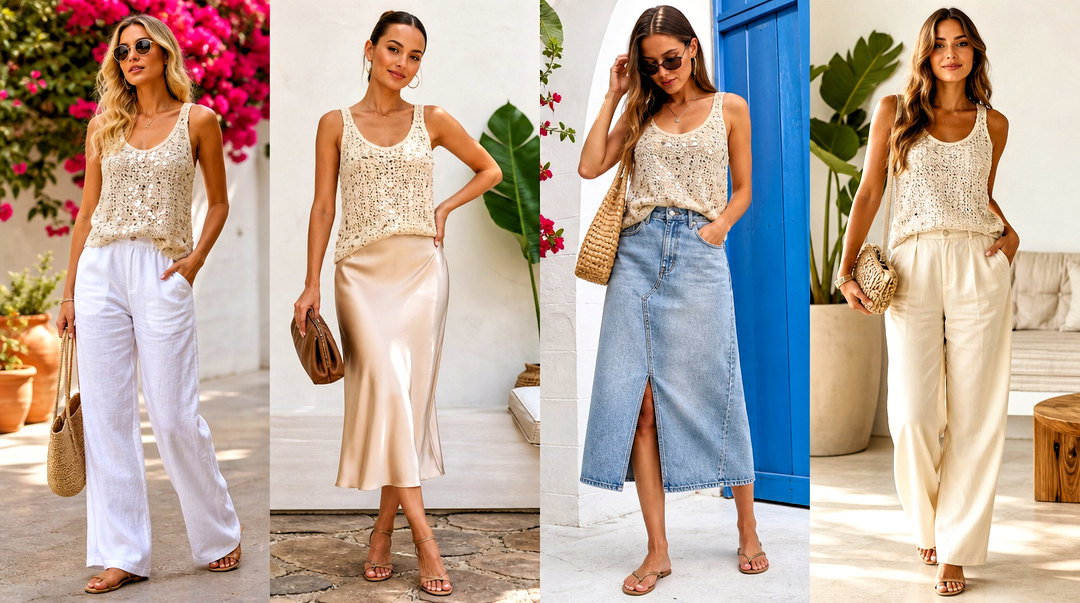
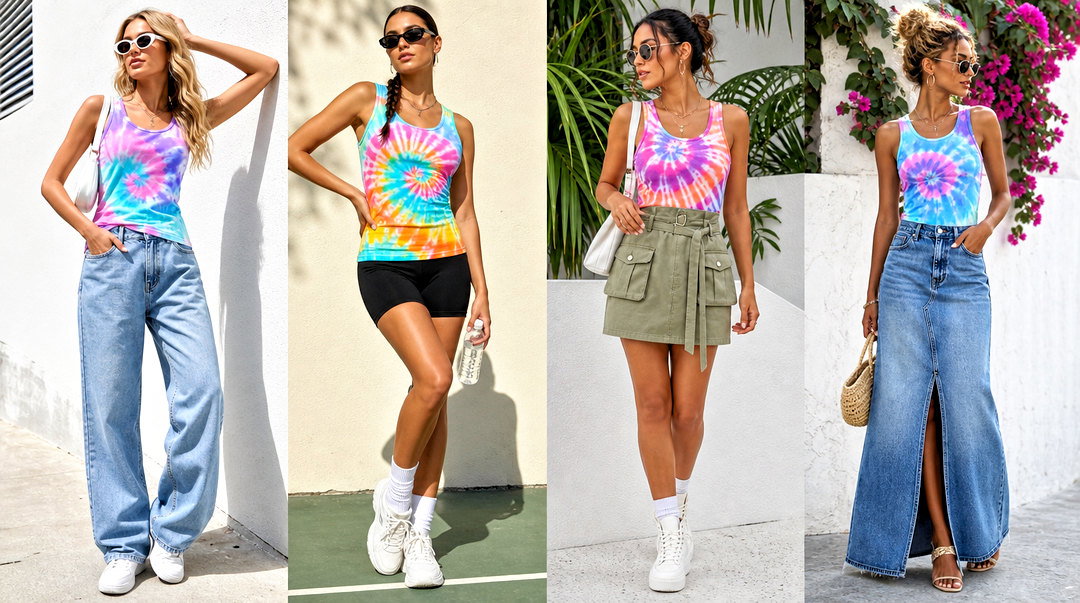
15. Racerback Fringe Tank Top
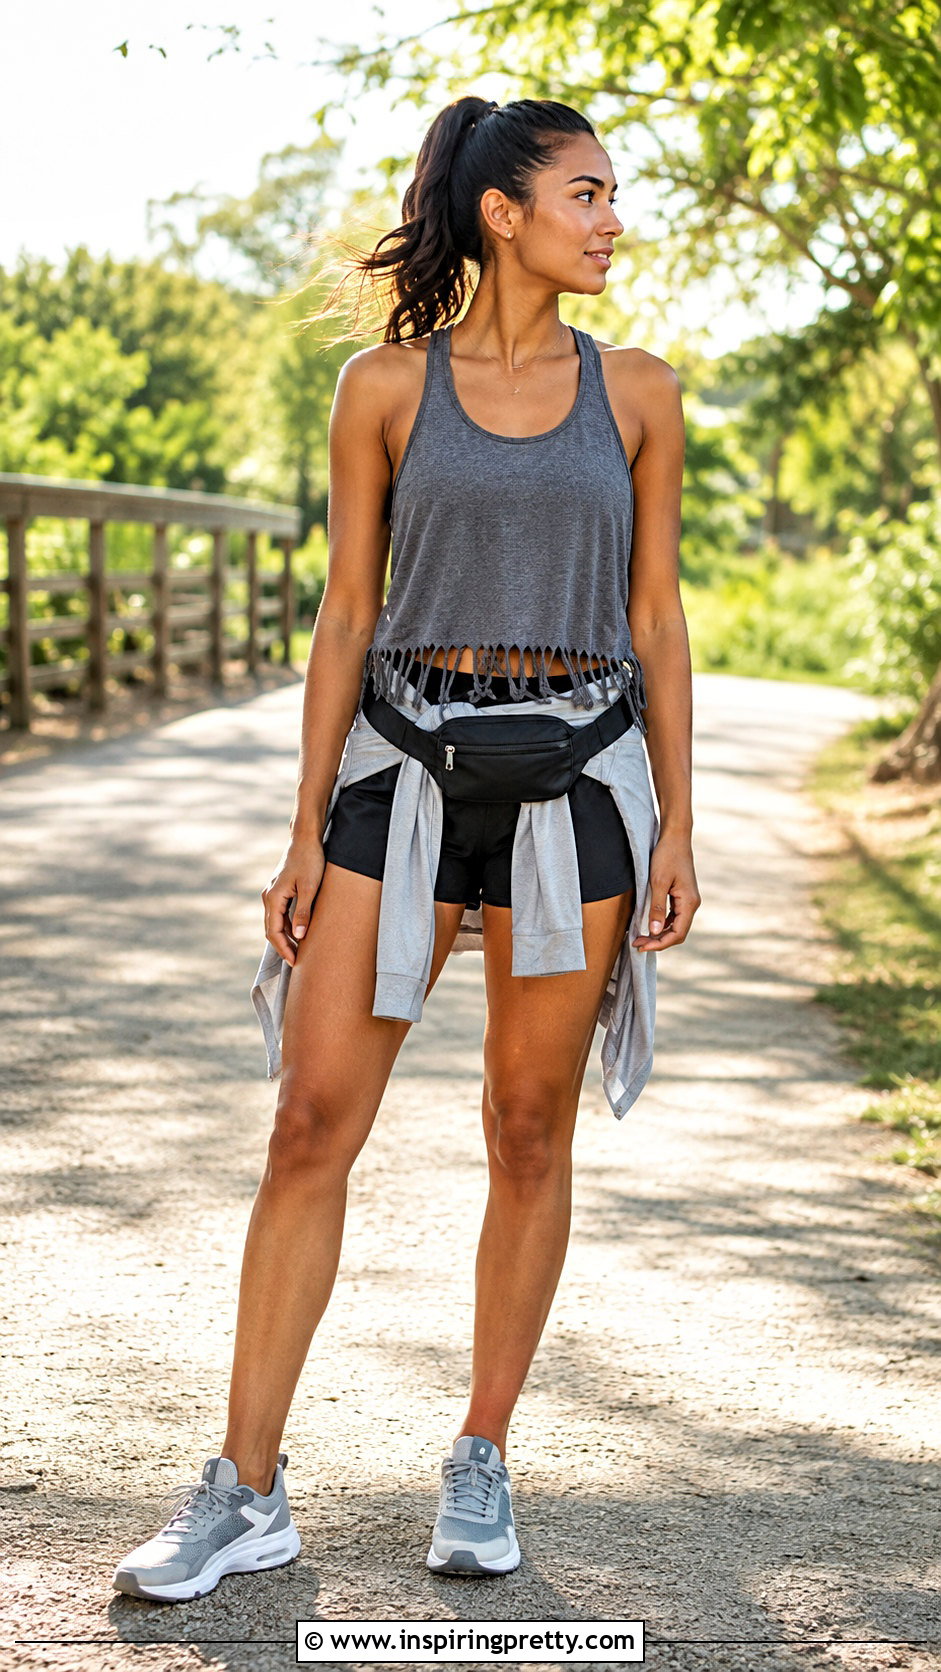
Transforming a T-shirt into a racerback gives the top a sporty shape before fringe is added. Cut away the sleeves, deepen the armholes gradually, and narrow the upper back without cutting too close to the center. Use a fabric strip from the discarded hem to gather and tie the back straps together. Add straight or knotted fringe around the bottom. Wear the completed tank with running shorts, crisp athletic sneakers, a lightweight zip jacket tied at the waist, and a compact belt bag. The pieces create a practical outfit for casual outdoor activities. Try the tank on repeatedly during cutting because jersey stretches, and overly deep armholes are much harder to correct afterward.
16. Open-Back Fringe Tank Top
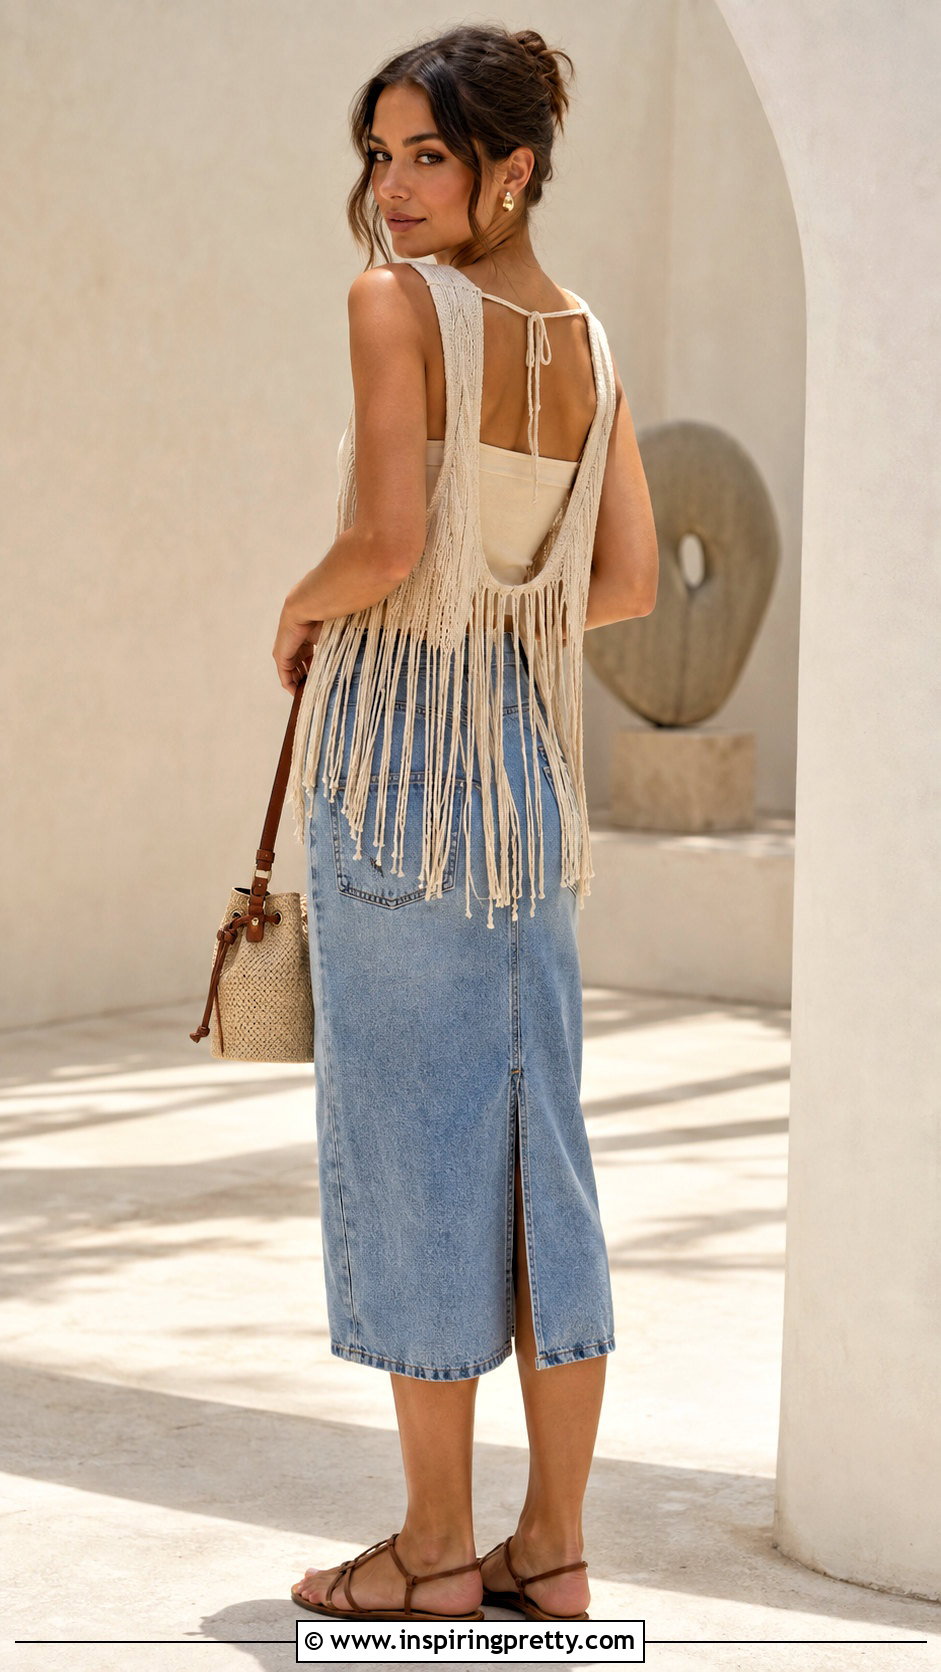
An open-back design makes a fringe tank feel lighter and more dramatic. Draw a rounded, triangular, or rectangular opening on the back while leaving enough fabric around the neckline and sides for stability. Make a small starter cut, then enlarge the opening gradually. Add narrow fringe along the lower hem and tie a few pairs together to echo the back detail. Layer the top over a coordinating fitted camisole and wear it with a denim midi skirt, flat strappy sandals, a small bucket bag, and subtle earrings. The simple base layer makes the open construction wearable. Avoid placing the back opening too close to the fringe line, since a solid band of fabric helps maintain the tank’s shape.
17. V-Neck Fringe Tank Top
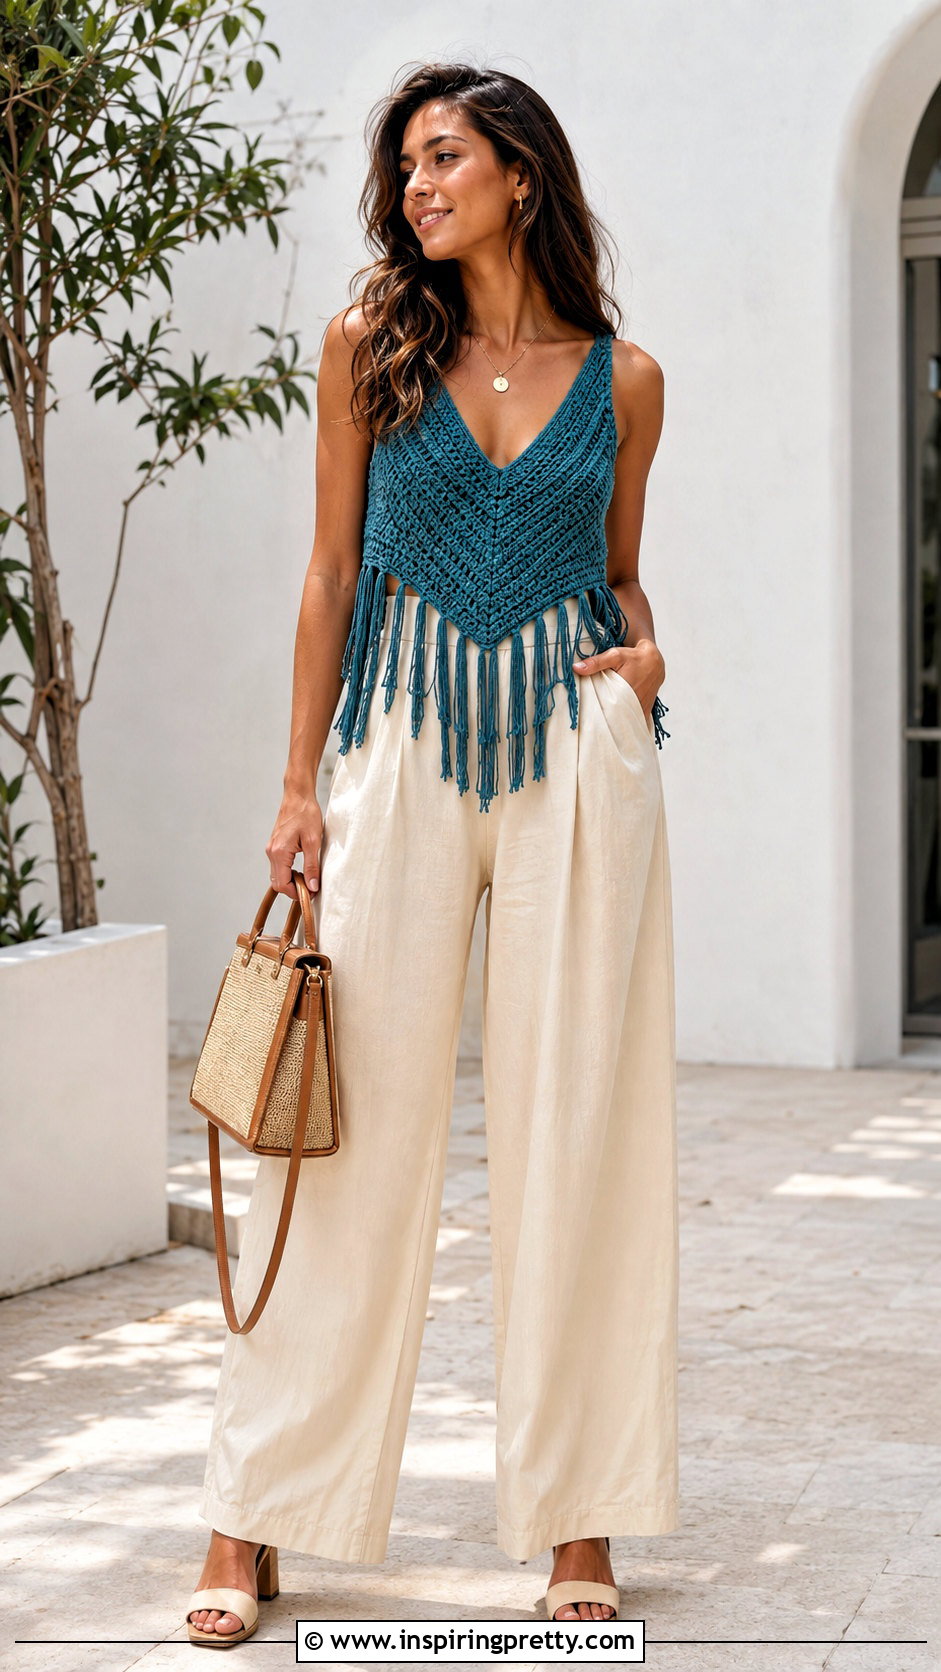
A deeper neckline can give a basic fringe tank a more defined shape. Fold the shirt vertically so the shoulder seams align, then mark a shallow V before cutting. Begin conservatively because the fabric may stretch after the original collar is removed. Add long, even fringe around the hem and finish the strands with small knots. Pair the top with high-waisted palazzo pants, low block-heel sandals, a structured handbag, and a short pendant necklace that follows the neckline. The wide-leg pants make the outfit feel polished while still comfortable. If the V-neck becomes wider than expected, wear a fitted scoop-neck camisole underneath for an intentional layered appearance and extra coverage.
18. Halter Fringe Tank Top
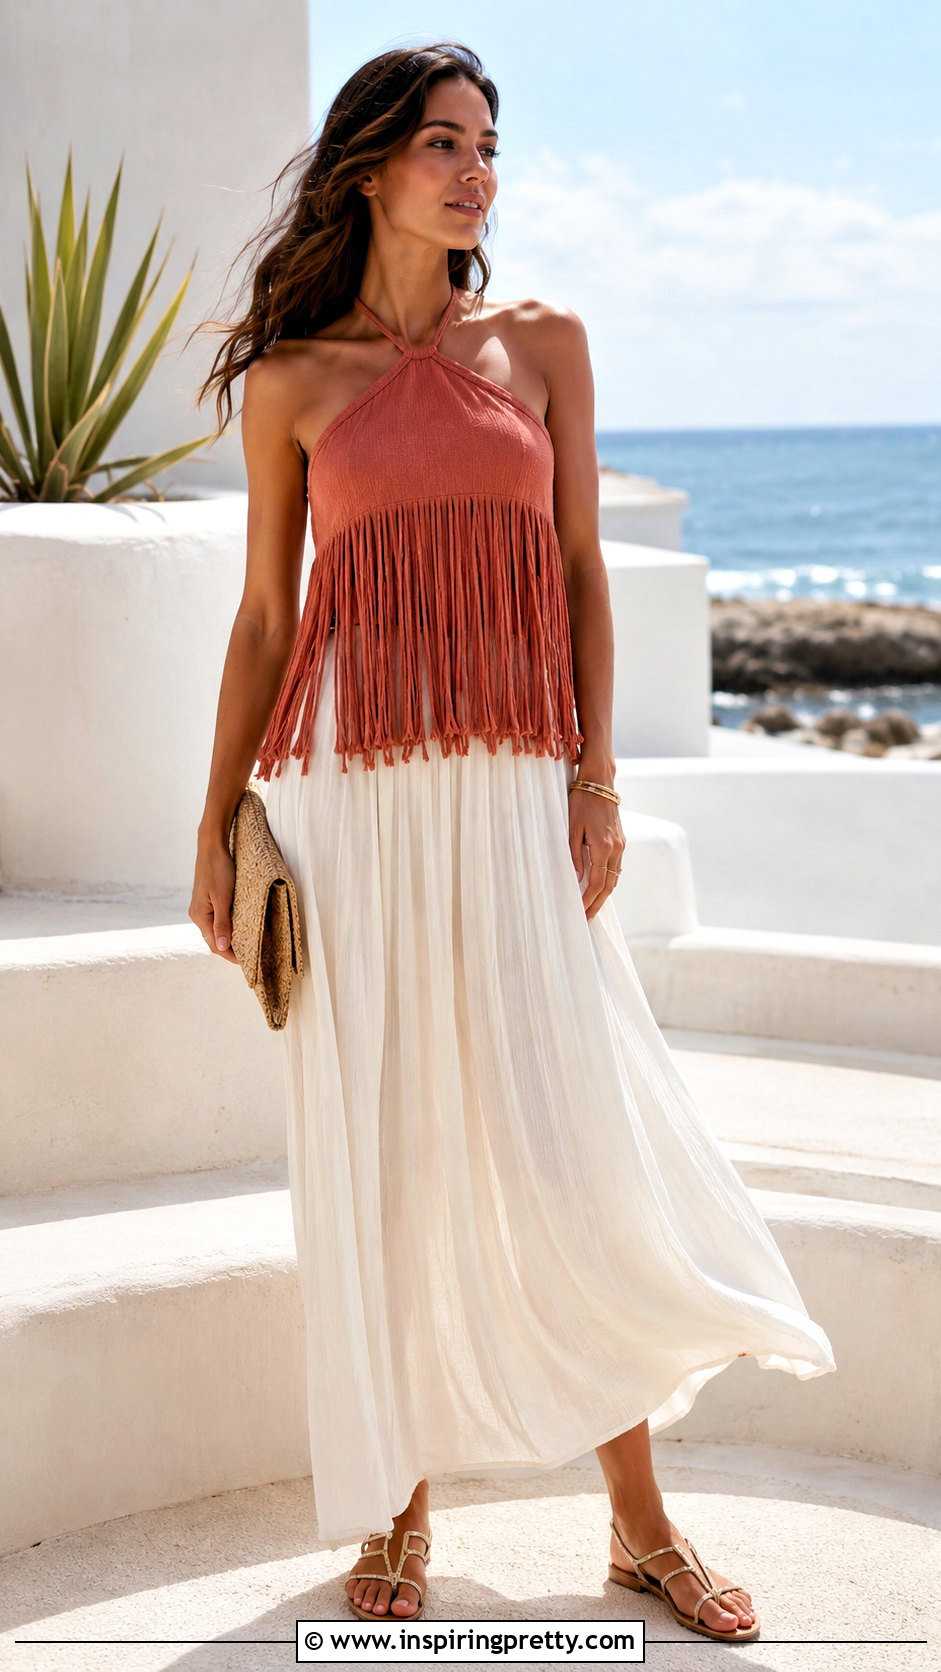
A halter conversion gives an old shirt a completely different neckline. Remove the sleeves and carefully shape the front straps so they angle toward the neck. Open the upper back while preserving enough fabric to create secure ties. Test the placement before trimming the straps to their final length. Cut the bottom into long fringe and knot the ends for weight. Style the halter tank with a flowing maxi skirt, flat metallic sandals, a woven clutch, and slim bracelets. This complete outfit balances the open shoulders with a longer bottom. Use a soft, lightweight shirt that drapes easily, and reinforce any narrow fabric ties with simple stitching if the knit feels thin or likely to stretch.
19. One-Shoulder Fringe Tank Top
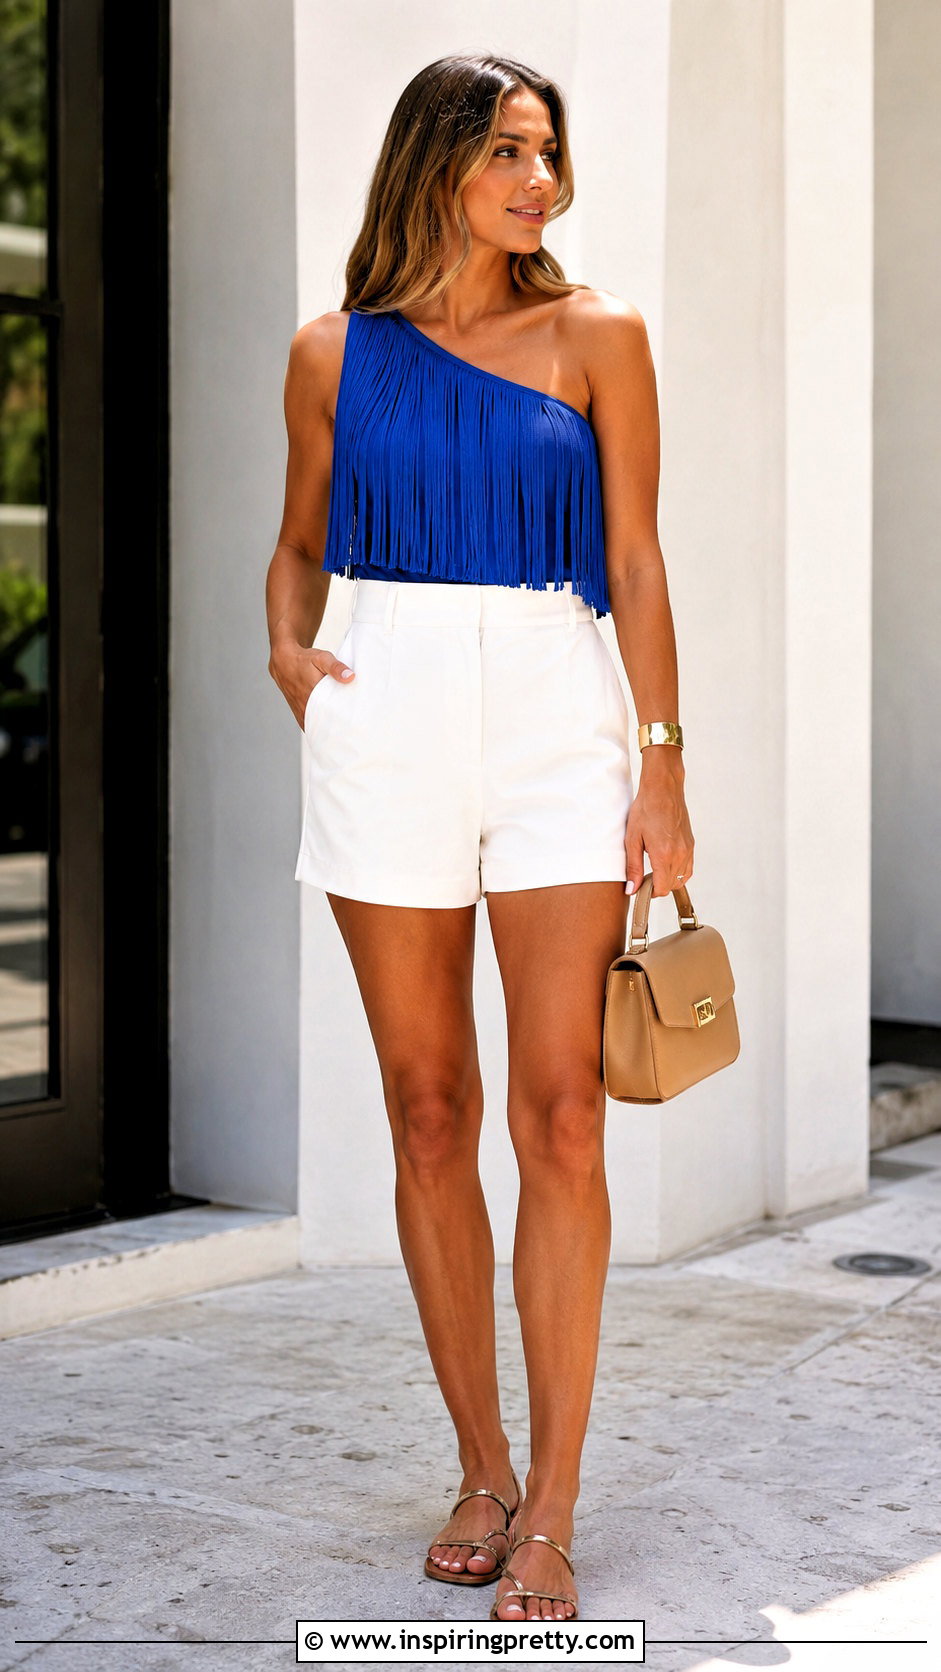
A one-shoulder neckline adds a bold asymmetrical detail to a handmade fringe top. Put the shirt on and mark the shoulder you want to remove. Take off the shirt, lay it flat, and cut a diagonal line from the opposite neckline toward the chosen underarm. Make the opening smaller than expected at first, then adjust the fit gradually. Add straight fringe across the hem for balanced movement. Wear the top with tailored high-rise shorts, sleek flat sandals, a structured mini bag, and one simple cuff bracelet. The polished accessories prevent the cut edges from looking unfinished. A solid black or saturated-color shirt makes this sculptural neckline appear particularly clean and modern.
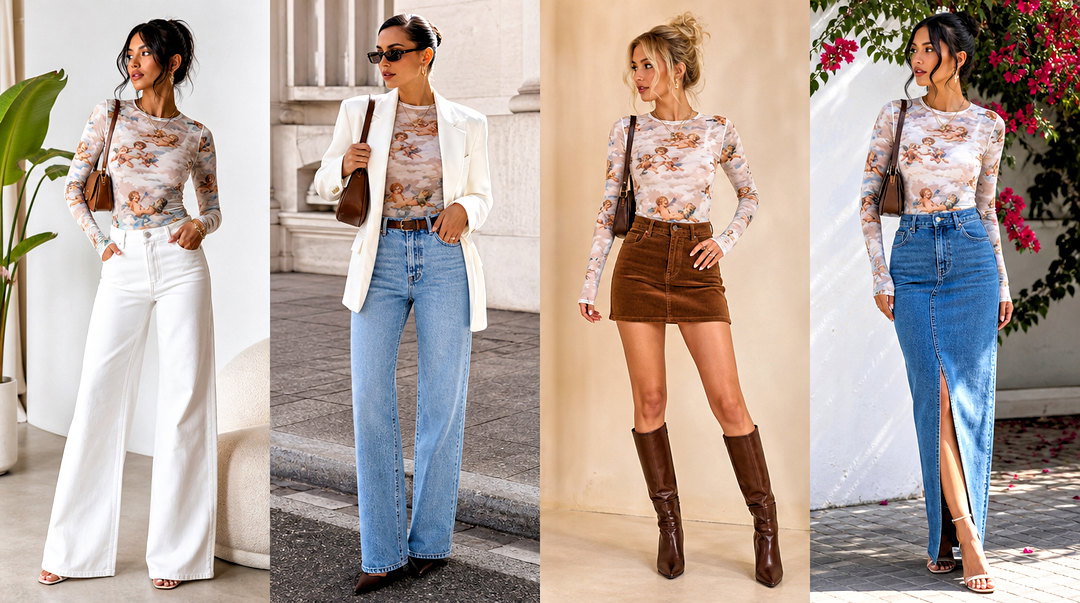
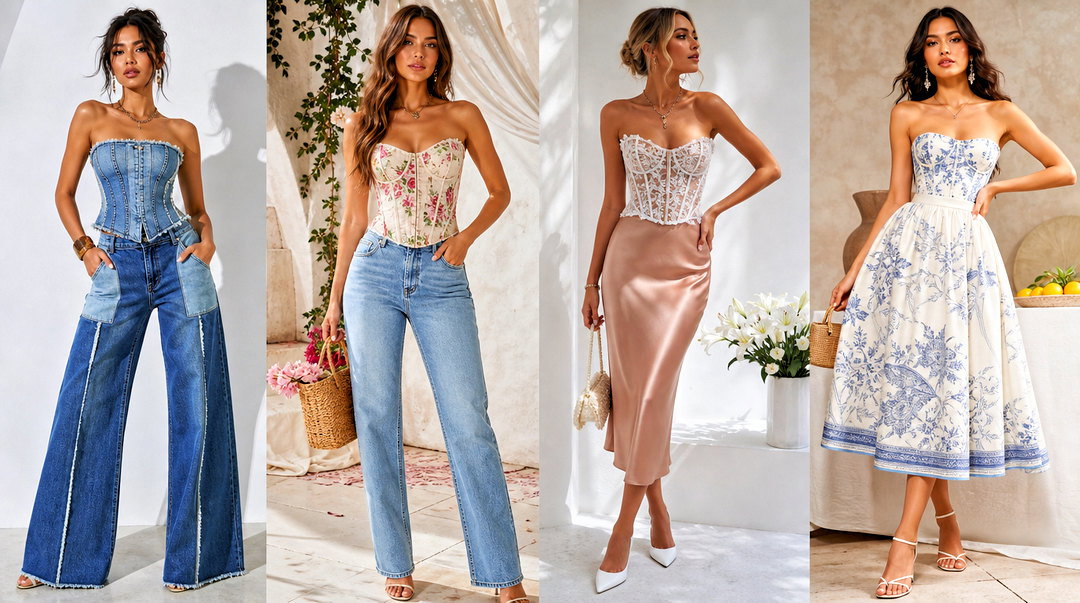
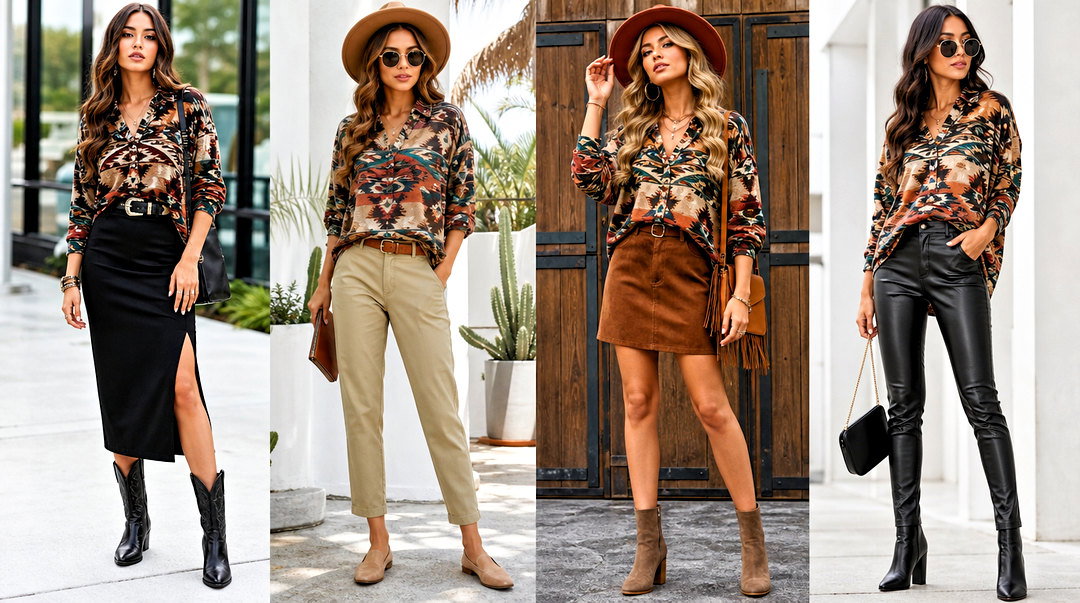
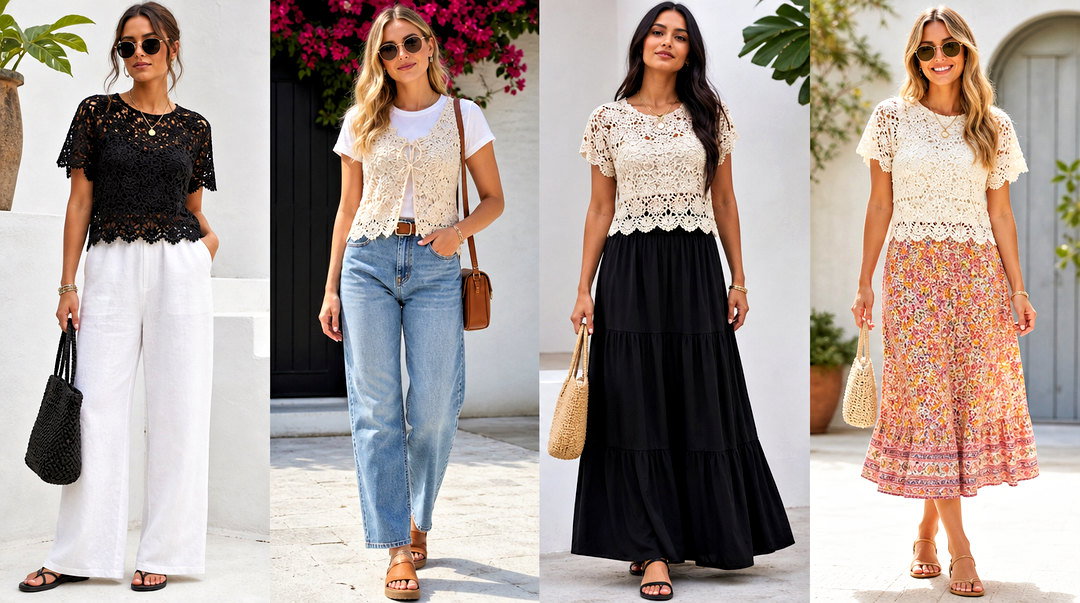
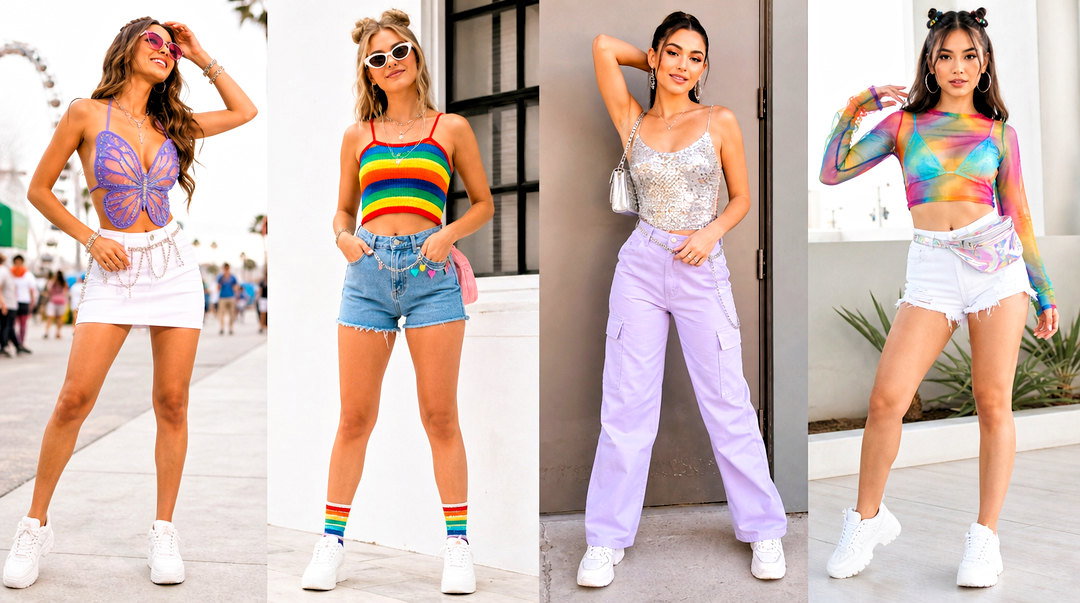
20. Graphic Tee Fringe Tank Top
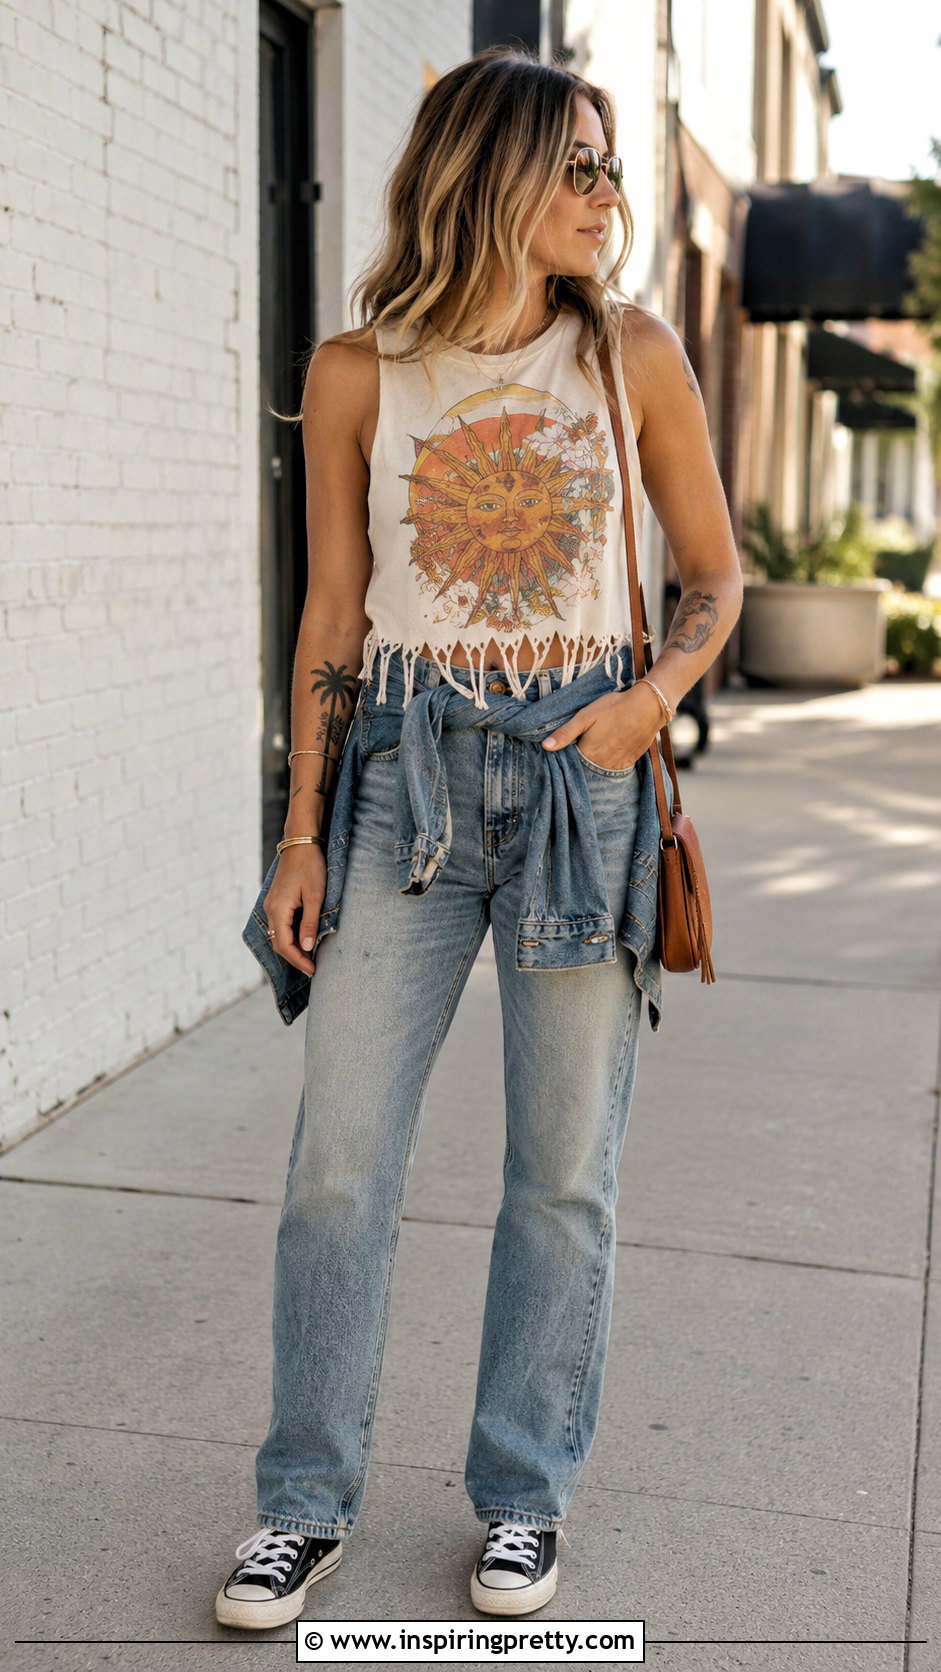
A favorite graphic T-shirt can become a fringe tank without sacrificing its artwork. Before cutting, check where the printed design ends and mark the fringe line safely below it. Trim the sleeves, reshape the neckline, and create narrow strips along the bottom. Knot only the ends so the graphic remains the dominant feature. Build the outfit with faded straight-leg jeans, classic canvas sneakers, a denim jacket carried or tied around the waist, and a small crossbody bag. The casual pieces support the vintage-inspired feel of the shirt. If the graphic is large, keep the fringe relatively simple. Complicated braiding or heavy beads may compete with the print and make the finished top feel visually crowded.
21. Tie-Dye Fringe Tank Top
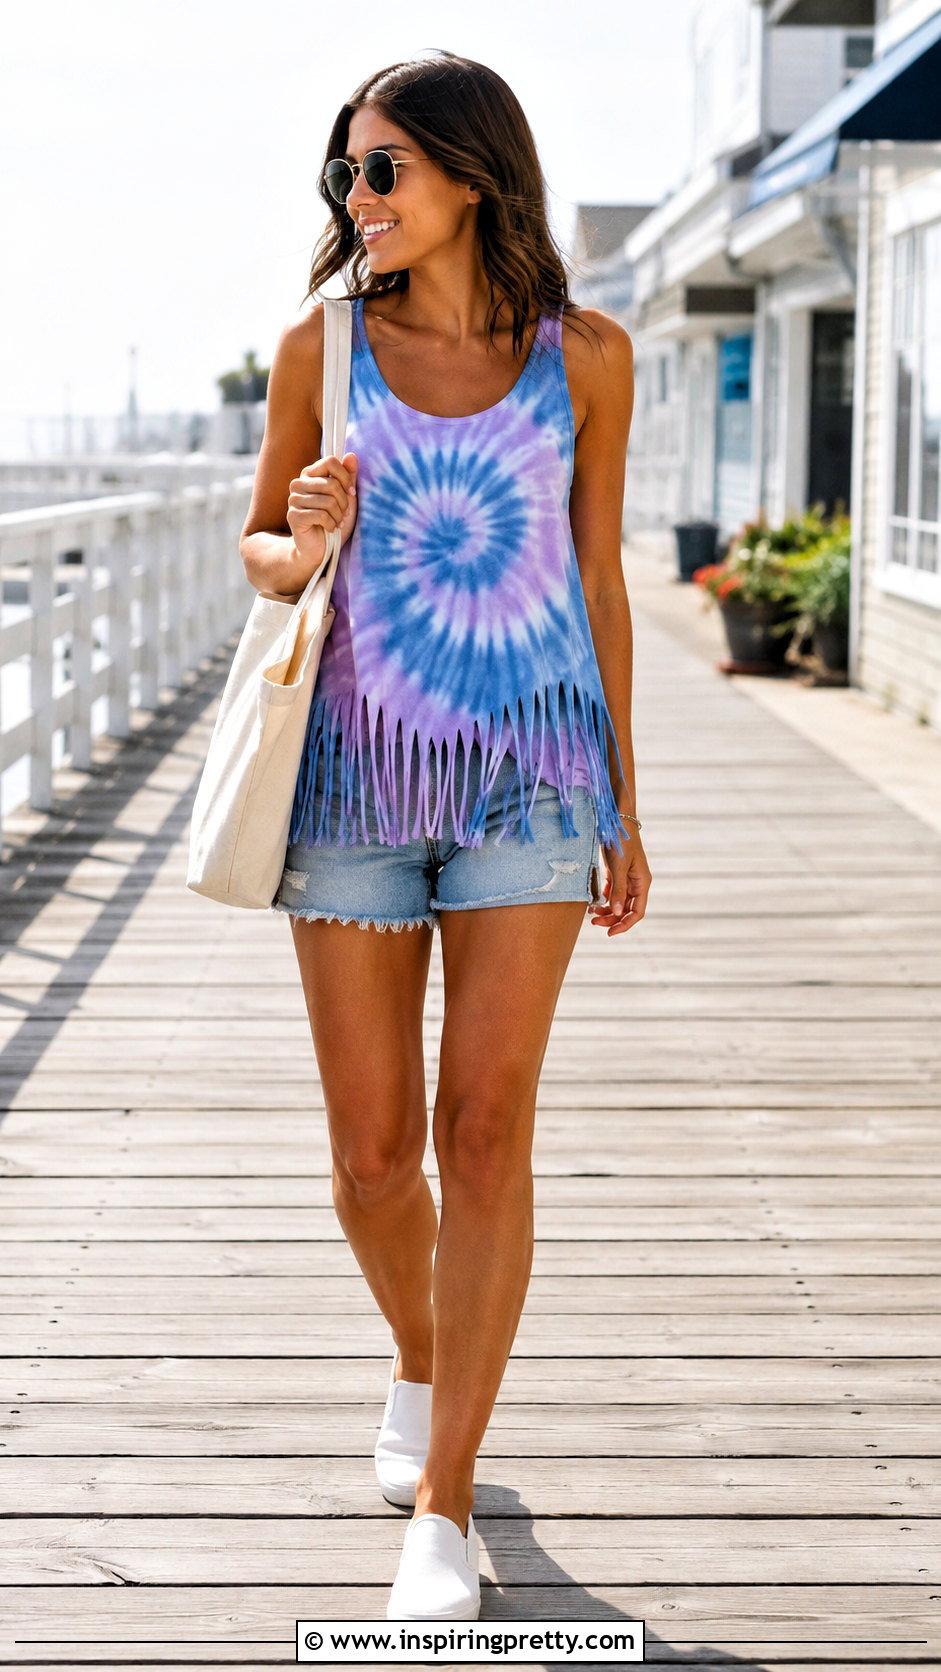
Tie-dye and fringe work together to create a bright, relaxed summer top. Dye the shirt before cutting so the color pattern reaches the entire original hem. Wash and dry it according to the dye instructions, then convert it into a tank and add evenly spaced fringe. Tie the strands in pairs or leave them loose depending on how detailed the dye pattern is. Wear the finished top with neutral denim shorts, white slip-on sneakers, a plain canvas tote, and simple sunglasses. The understated accessories allow the colors to stand out. Use two or three related dye shades for a coordinated appearance, and protect your workspace with gloves and a washable covering during the coloring process.
22. Bleach-Dyed Fringe Tank Top
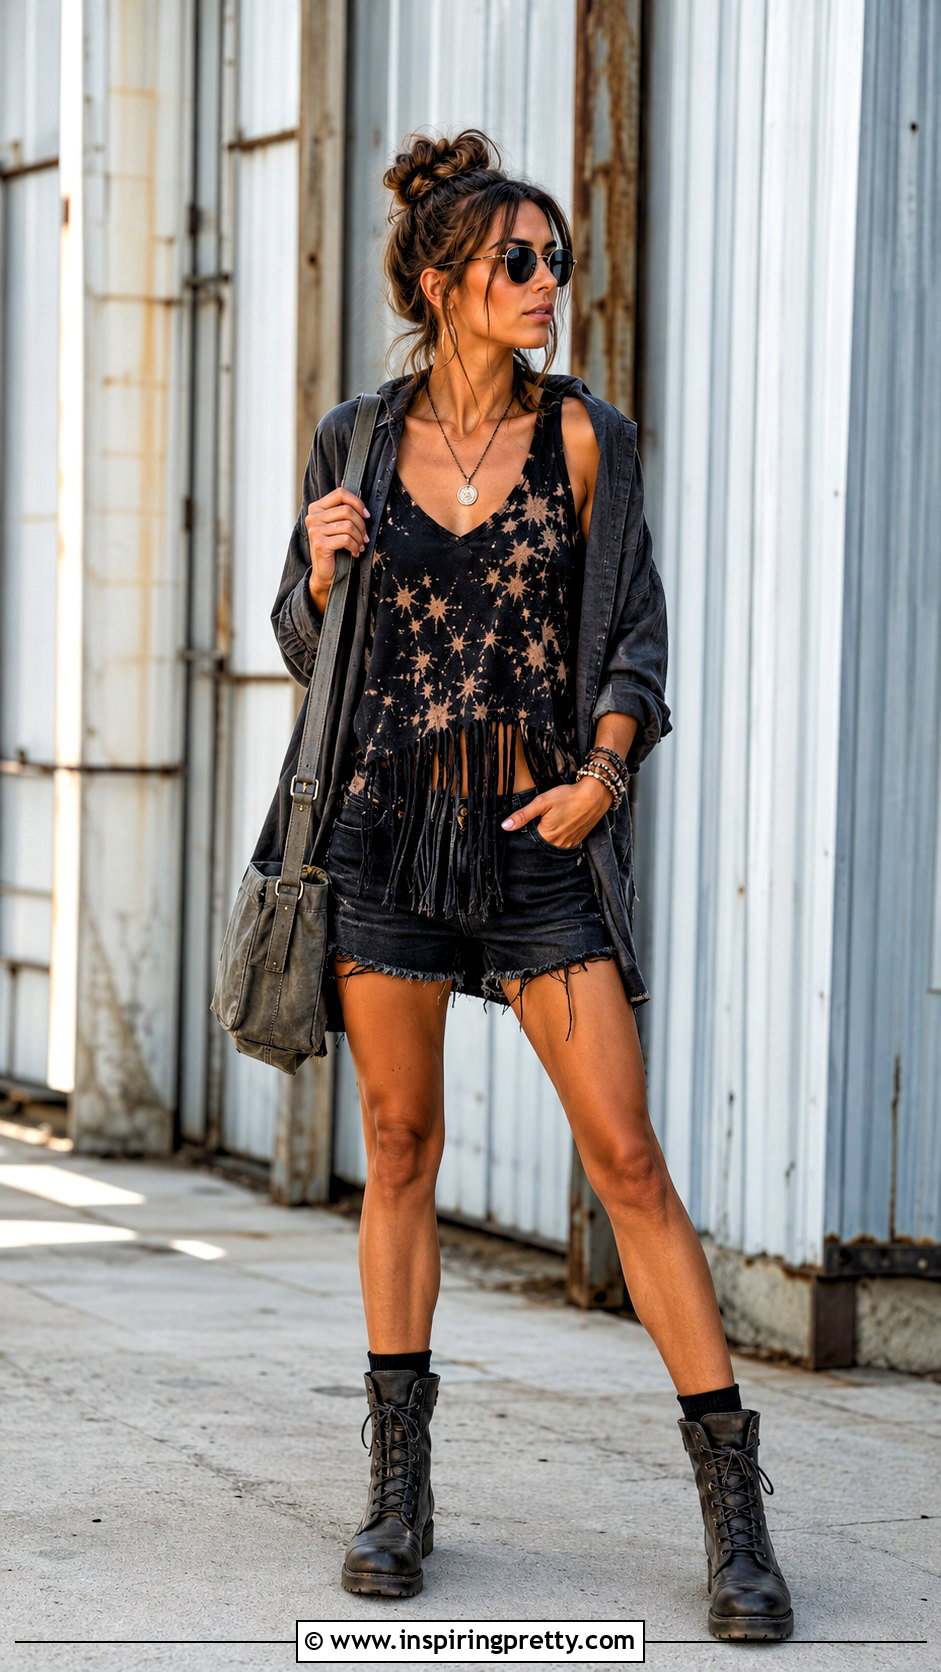
A bleach-dyed finish can give a dark cotton shirt a high-contrast, distressed appearance. Work in a ventilated area, wear gloves, and protect surrounding surfaces before applying a controlled bleach pattern. Rinse and wash the shirt fully before beginning any cutting. Remove the sleeves, adjust the neckline, and create medium-length fringe across the hem. Style the finished tank with black denim shorts, sturdy lace-up boots, a lightweight overshirt, and a compact canvas bag. Keeping the rest of the outfit dark makes the altered color pattern more noticeable. Since different fabrics react unpredictably, test a hidden section first and avoid combining bleach with other cleaning chemicals at any stage of the project.
23. Ombre Fringe Tank Top
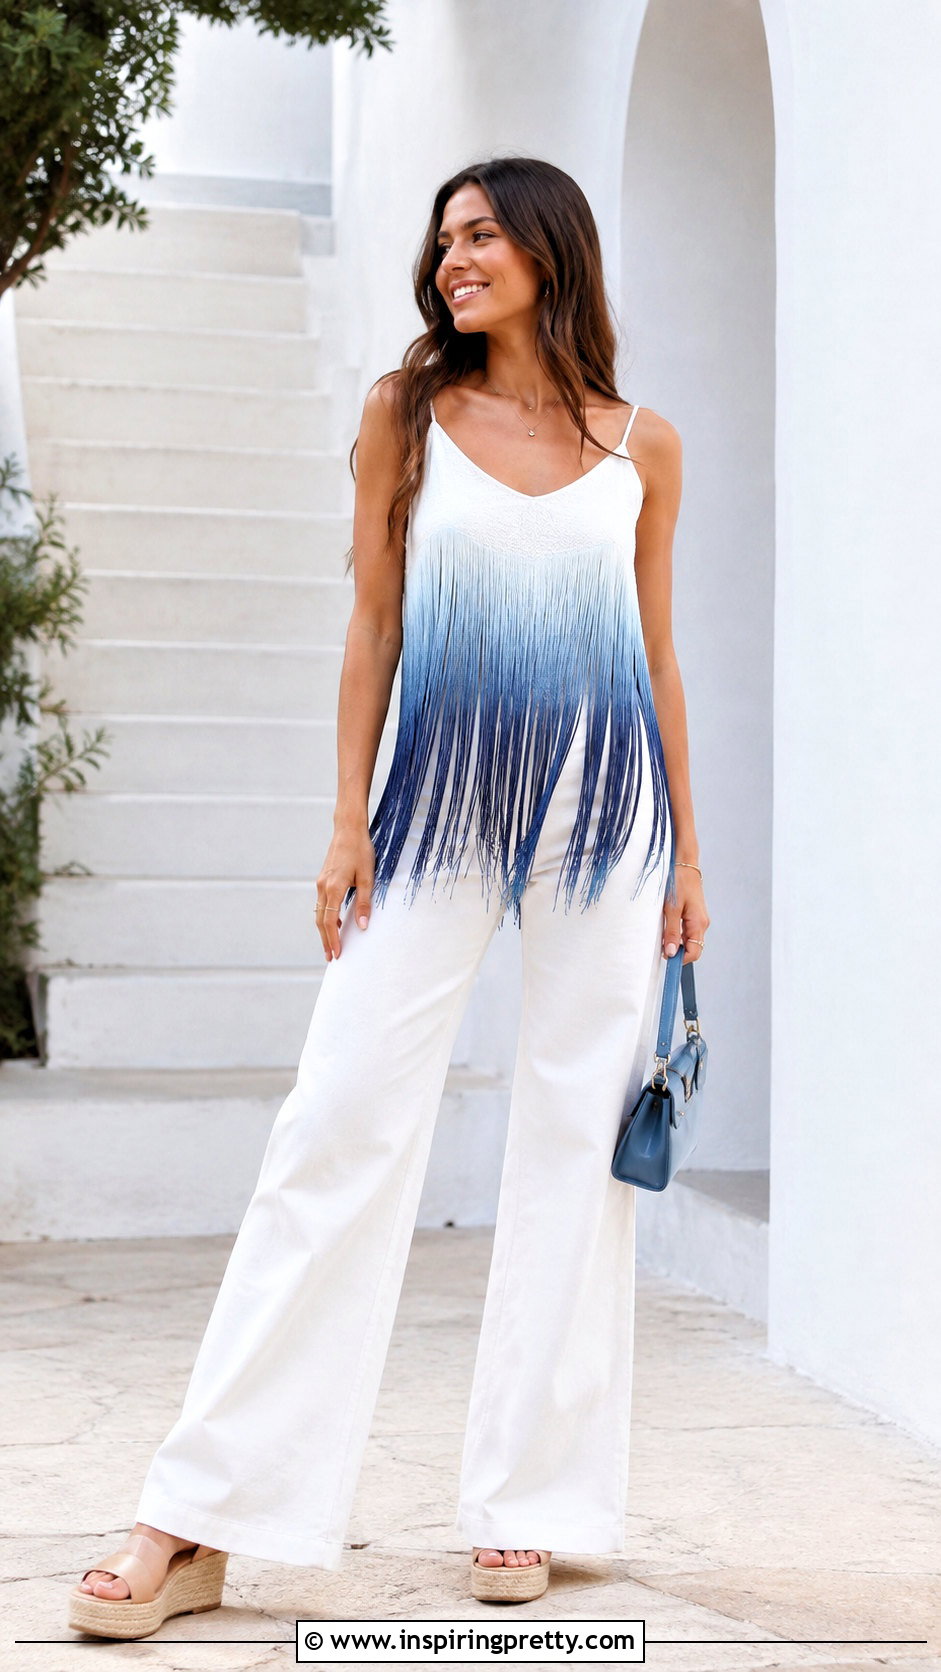
An ombre treatment makes long fringe look especially striking because the color continues down each moving strand. Select a light cotton shirt and prepare fabric dye in a shade that complements its original color. Dip the lower portion gradually, keeping the hem submerged longest to create the deepest tone. Wash and dry the shirt before cutting it into fringe. Pair the completed tank with white wide-leg jeans, neutral platform sandals, a matching mini bag, and delicate silver jewelry. The light base allows the color gradient to stay clear. To protect the transition, avoid adding too many knots or beads. Loose, stretched fringe displays the changing color more effectively and creates a soft, fluid finish.
24. Lace-Trim Fringe Tank Top
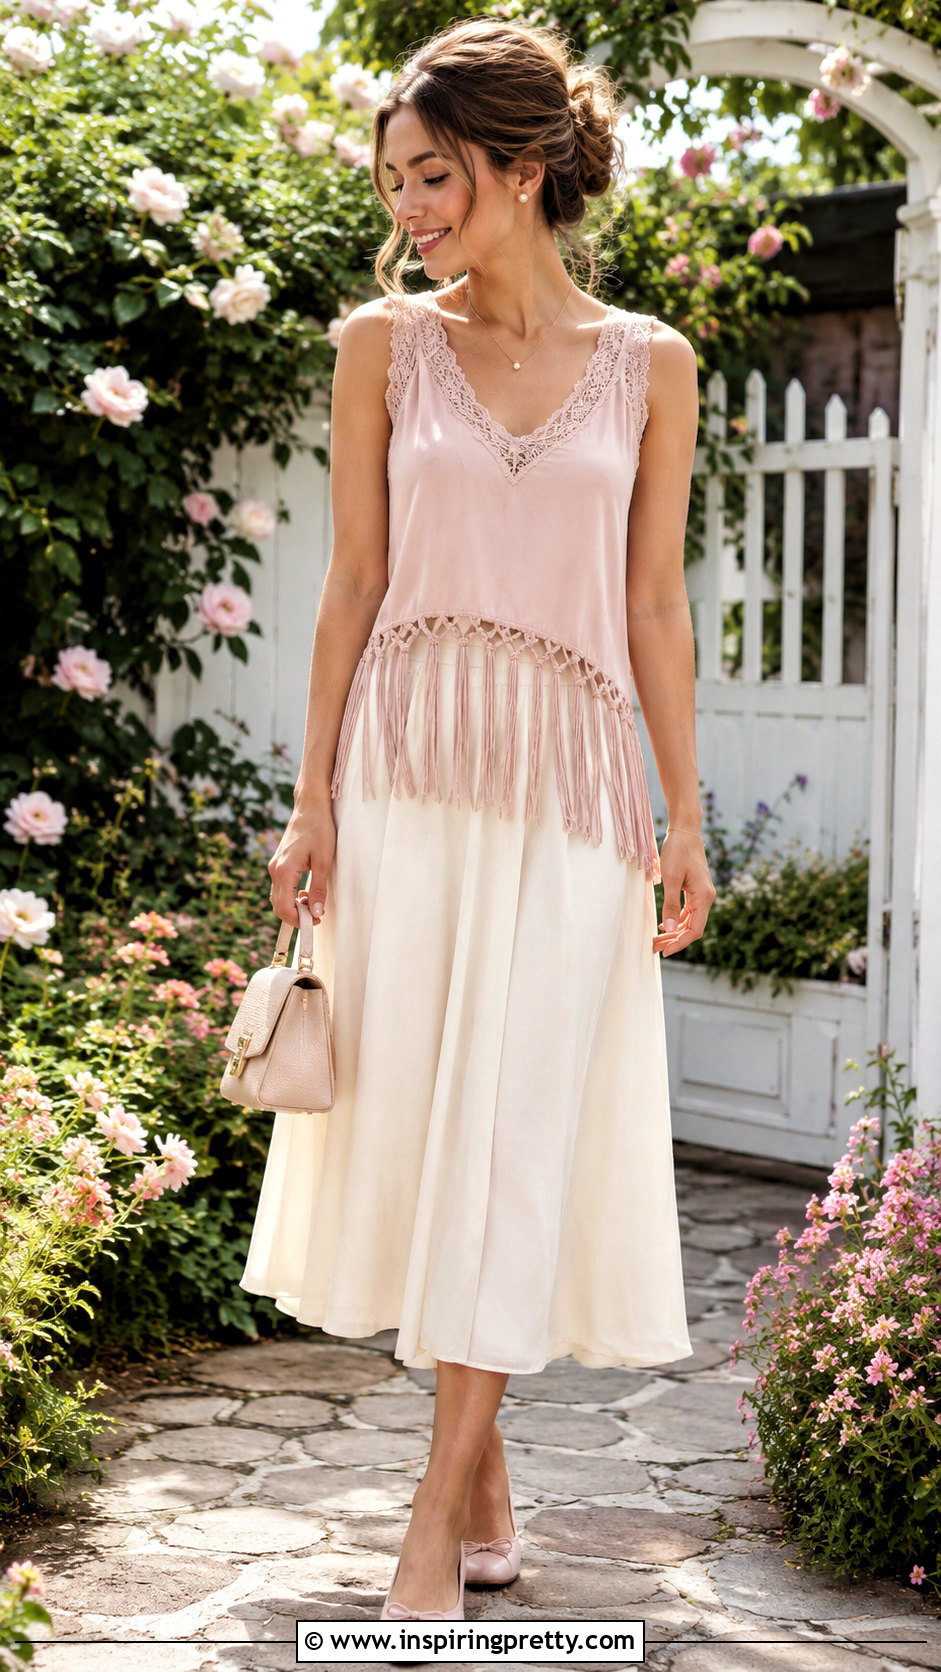
Lace trim adds softness to the neckline while the fringe keeps the bottom relaxed. Convert the shirt into a tank first, then pin narrow stretch lace around the neckline or armholes. Attach it with small hand stitches or a stretch-friendly machine stitch. Cut straight fringe around the lower edge and tie subtle knots at the ends. Wear the top with a flowing midi skirt, ballet flats, a small top-handle bag, and pearl or metal studs. Choosing lace close to the shirt color creates a refined tonal effect, while contrasting lace makes the neckline more noticeable. Prewash both materials before assembly so uneven shrinkage does not distort the finished shape after the first cleaning.
25. Tassel Fringe Tank Top
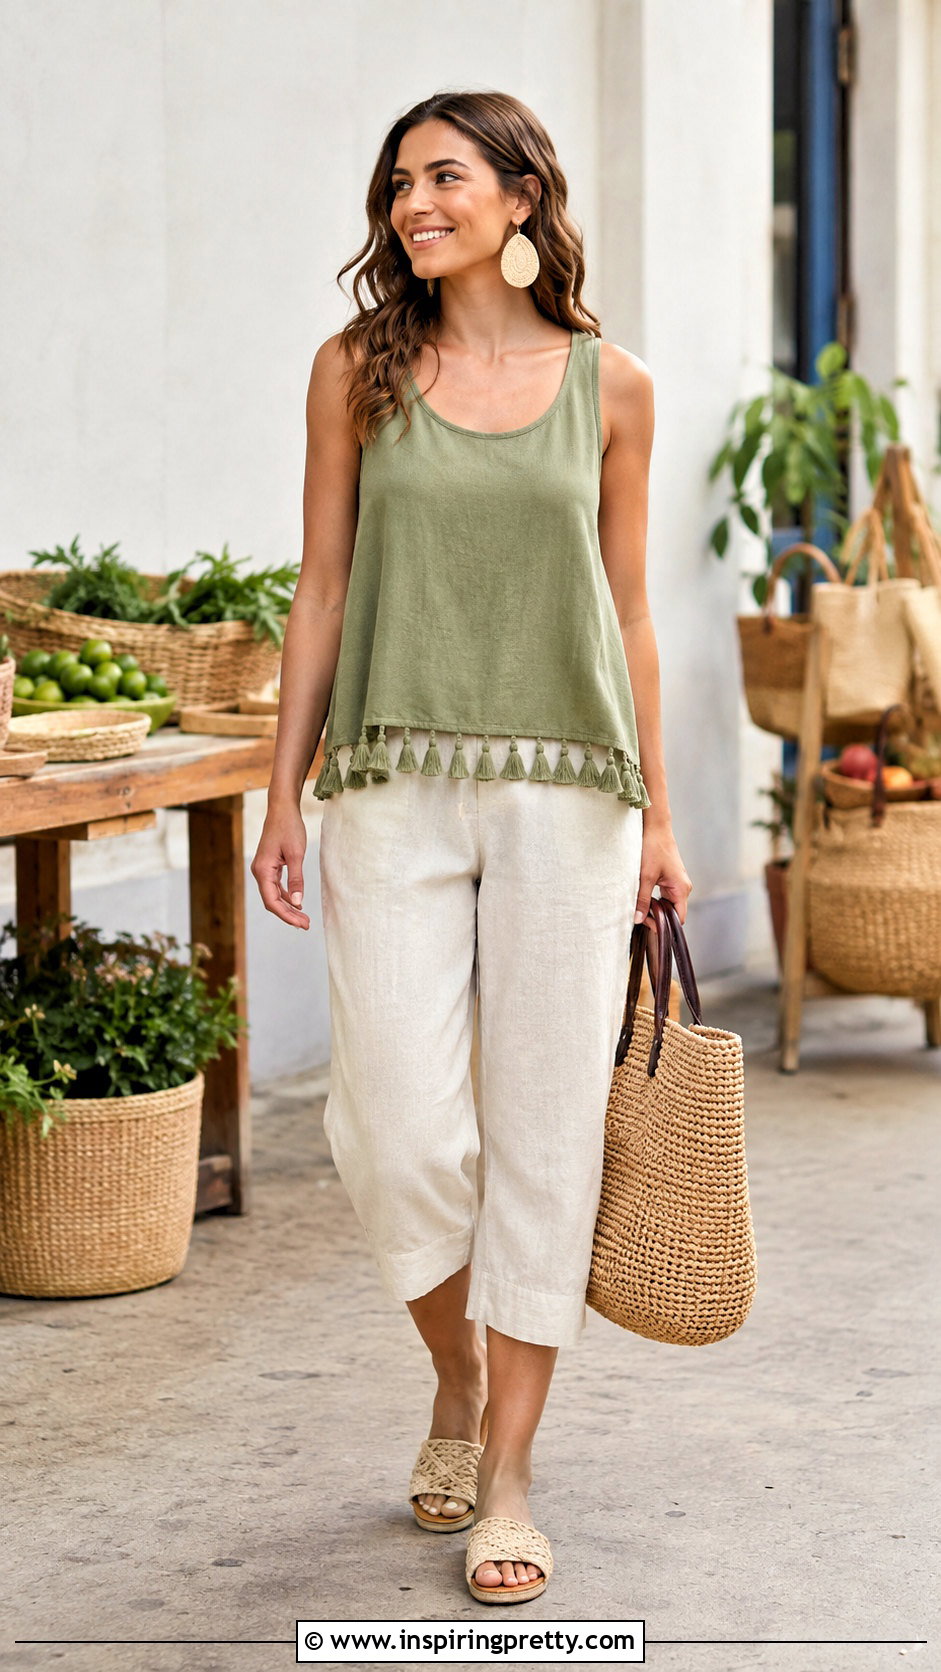
Turn ordinary jersey strips into defined tassels for a playful finishing detail. Cut long fringe around the shirt, then organize the strips into small groups. Wrap a thin fabric tie around each group near the bottom, knot it securely, and trim the loose ends to an even length. Space the tassels consistently so the hem hangs evenly. Complete the look with cropped linen trousers, woven slide sandals, a straw tote, and bold but lightweight earrings. This outfit feels coordinated without repeating too many decorative elements. For a colorful variation, use contrasting fabric ties around the tassels. Keep them soft and narrow so they do not add uncomfortable weight or make the hem stiff.
Conclusion:
These **25 fringe tank top DIY ideas** show how much variety can come from a basic shirt, careful measurements, and a sharp pair of fabric scissors. Loose fringe offers the quickest transformation, while knots, braids, beads, macramé, dye, lace, and tassels add increasing levels of detail. Always try on the shirt before making major cuts and start with smaller openings than you think you need. Soft jersey often stretches and curls after cutting, which can change the final length. Most importantly, design the top around clothing you already enjoy wearing. With thoughtful styling, an upcycled fringe tank can become part of a complete, comfortable outfit rather than a one-time craft project.
Related posts:


Leave a Reply