
Most closets hold a few shirts nobody wears anymore: a stained tee, a men's button-down that's too boxy, a blouse with one torn cuff. With some cutting and stitching they turn into handmade bohemian pieces you'll reach for. The 25 projects below run from no-sew fringe and tie-dye to lace inserts, shirring and a fully lined patchwork corset. Visible stitching, mixed fabrics and relaxed shapes suit this style well, because the handmade look is part of the charm. I've started with how to pick donor garments and ended with a skill ladder, so you know which project to try first.

Sorting the Donor Pile Before You Cut
The garment you start with decides how a project behaves far more than the technique does. Before I cut anything, I sort donor clothes by a few checks.
- Knit or woven: stretch a corner. Knits like tees stretch and won't fray, so raw edges can stay raw. Wovens like shirts barely stretch and fray, so every cut edge needs finishing.
- Fiber: read the label. Cotton and linen take dye, paint and pressing well. Polyester resists dye and can melt under a hot iron.
- Weight: when combining pieces, keep them close in weight. A heavy panel on a light top drags and puckers.
- Wear: hold fabric up to the light and check elbows, collars and underarms for thin spots. Cut around them.
- Shrinkage: wash and dry every donor piece the way you'll wash the finished top, so nothing shrinks after it's sewn together.
A few tools make a big difference: a ballpoint or stretch needle for knits, a fine needle for silky scarves, sharp fabric scissors kept only for fabric, a seam ripper, and chalk or a washable marker. Pinking shears help on wovens when you don't have an overlocker.
1. Lace Panel T-Shirt With Maxi Skirt

A lace panel is the project I'd suggest to anyone who has sewn a straight seam before. Start with a slightly loose tee, because cutting out a section removes a little ease. Cut the opening with a narrow seam allowance, pin the lace behind it, and stitch with a small zigzag. Jersey doesn't fray, so the cut edge can stay raw. Reinforce the corners of the opening with a few backstitches; that's where it tears first. Cream lace looks softest on rust, olive or faded black. Wash it in a mesh bag.
2. Patchwork T-Shirt With Wide-Leg Jeans

Patchwork goes wrong when the scraps are all different weights: a heavy denim patch drags a thin tee down. I keep to lightweight cotton from worn shirts, scarves or leftovers. Lay the patches out on the shirt and photograph the arrangement before sewing anything. Three or four colors look planned; eight look random. Blanket stitch or rows of zigzag in contrasting thread make the stitching part of the design. Woven cotton edges fray, so if you leave them raw, reinforce every corner. Half-tuck it into wide-leg jeans.
3. Embroidered Peasant Top With Denim Shorts

Hand embroidery takes time but very few tools. Turning a roomy white blouse into an embroidered peasant top only needs backstitch, lazy daisy and French knots. Sketch a vine with a washable marker and stitch over it. Use an embroidery hoop so the fabric stays taut, or the stitches pucker the moment you take it off. Short on time? Cut embroidered sections from a damaged vintage textile and appliqué them on. Cotton and linen take stitching best. Wear it with denim shorts and keep jewelry quiet.
4. Fringe Hem Tank Top With Flared Pants

Fringe is the easiest project here, as long as the tank is cotton jersey. Mark a line several inches above the hem, cut narrow strips up to it, then pull each one firmly. Jersey cut across the grain rolls into soft cords on its own. Cut slightly shorter than you want, since pulling adds length. Wooden beads on a few strands look good; heavy beads stretch them. Start with a long tank, or the fringe leaves too little body. This handmade fringe tank balances printed flares well.
5. Tie-Dye T-Shirt With Linen Pants

Tie-dye is a good rescue for a white tee with a stain you can't shift, since the dye hides it. Fiber-reactive dyes only bond properly with natural fibers like cotton, so check the label first; polyester barely takes them. Bind the damp shirt, apply two related colors like terracotta and sage, and follow the dye's own instructions on timing. Rinse until the water runs clear and wash it alone the first time. Two shades look calmer than a rainbow. Cream linen pants ground the pattern.
6. Crochet Trim Blouse With Tiered Skirt

Crochet trim from a damaged tablecloth, an old collar or a worn-out crochet top can give a plain blouse a new life. Check the trim lies flat before you sew; crochet stretches unevenly. Open crochet is hard to machine-stitch without catching, so I hand-sew it with small stitches in matching thread. Heavy cotton trim pulls a light blouse out of shape, so match the weights. For a bigger change, replace part of the back yoke with a crochet panel. Hand wash older crochet. Wear it with a tiered skirt and clogs.
7. Scarf Sleeve Top With Straight-Leg Jeans

Silky scarves make lovely floaty sleeves, and they're the hardest fabric here to sew. They slip, shift and pucker. I use fine pins, a fresh microtex or fine needle, and a slightly longer stitch. Tissue paper under the seam helps; it tears away after. Choose two scarves of the same weight even if the prints differ. Finish the raw edges, gather the tops and sew them to the armholes. A solid base top keeps mixed prints calm. Straight-leg jeans and ankle boots balance the airy sleeves.
8. Off-Shoulder Shirt With Maxi Skirt

This is a good second project because it's mostly a casing and elastic. Try the shirt on first and mark the new neckline while standing relaxed; it's easy to cut too low. Remove the collar, cut a smooth curve across the shoulders, fold the edge inward to form a casing, and thread elastic through it. The elastic should hold without digging in. Measure it around your shoulders, not your neck. Keep the sleeves full, or add elastic at the cuffs too. A slim belt helps if the shirt is very roomy.
9. Ruffle Sleeve Top With Cropped Jeans

Ruffles need about one and a half to two times the length of the edge they're sewn to, so cut long strips. Finish the edges, run two rows of long gathering stitches, and pull them up to fit the sleeve opening. Cotton voile, light linen and rayon gather softly; quilting cotton gathers stiffly and adds bulk. If the top is already loose, keep the ruffles modest. Press the gathered seam flat, which makes homemade gathers look neat. Cropped jeans make the sleeves wearable for everyday.


10. Bandana Patchwork Top With Denim Skirt

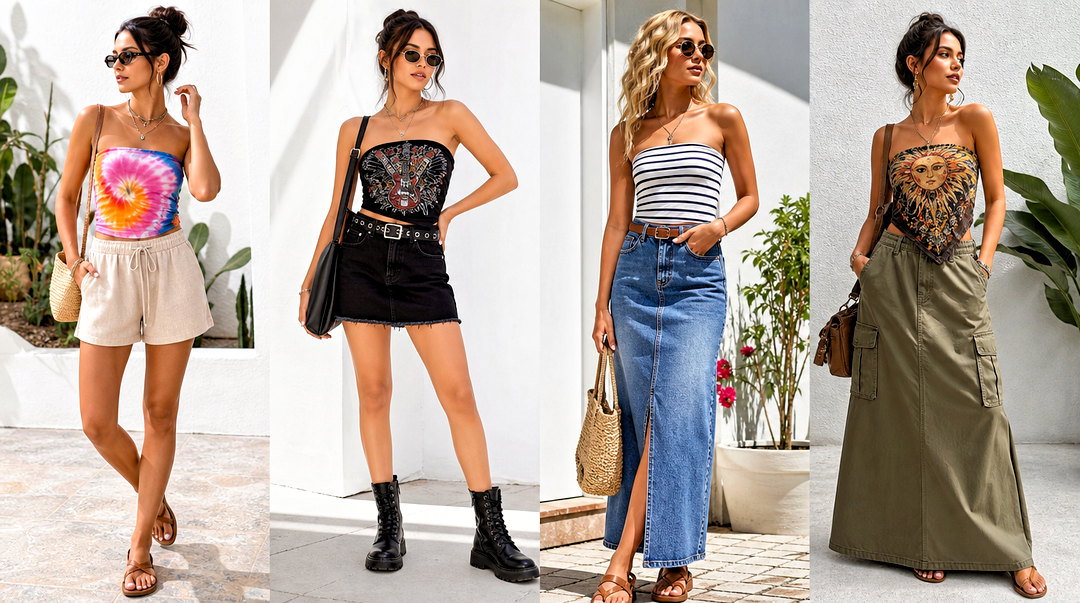
Bandanas are ready-made squares with finished edges, which saves hemming. Cotton bandanas often shrink and bleed red dye, so wash and dry them before cutting. Cut from the strongest areas, sew squares or triangles into a patchwork overlay, then attach it to a fitted tank or cropped tee. You can cover the front only or make a loose layer that ties at the shoulders. A soft cotton lining hides scratchy seams. A denim A-line skirt and boots suit the western feel.
11. Macramé Back Tank With Palazzo Pants

A macramé back sounds hard, but it's square knots and a few crossings. Cut out the center back, keeping firm fabric around the neckline and side seams so the cords have something to pull against. Attach equal cord lengths at the top, knot down, and anchor the bottom ends very securely. Use soft, washable cotton cord. Stiff craft rope scratches and won't survive a wash. Try it on as you go, because the back must flex when you reach forward. Palazzo pants and flat sandals keep it relaxed.
12. Block-Print Tunic With Leggings

Block printing at home only needs fabric paint and a stamp cut from a carving block, foam or a firm sponge. I always test the motif on scrap first, because the pressure and amount of paint take a few tries to get even. Put cardboard inside the shirt so paint doesn't soak through to the back. Leaves, suns or a geometric border around the neckline and hem look polished; covering the whole shirt looks busier. Heat-set the paint as the label says. Taper the side seams if it's very wide.
13. Eyelet Yoke Blouse With Corduroy Pants

Eyelet already has holes cut into it, so it fits a yoke with very little extra work. Salvage decorative eyelet fabric from an old dress or skirt. Trace the original yoke onto paper first so the new piece matches the neckline exactly, then add seam allowances. Finish the inner edges, because eyelet frays around its holes. A lining behind it gives coverage and keeps the texture visible. Press gently. Cream eyelet looks right with corduroy in camel, rust or moss.
14. Denim Corset Top With Maxi Skirt

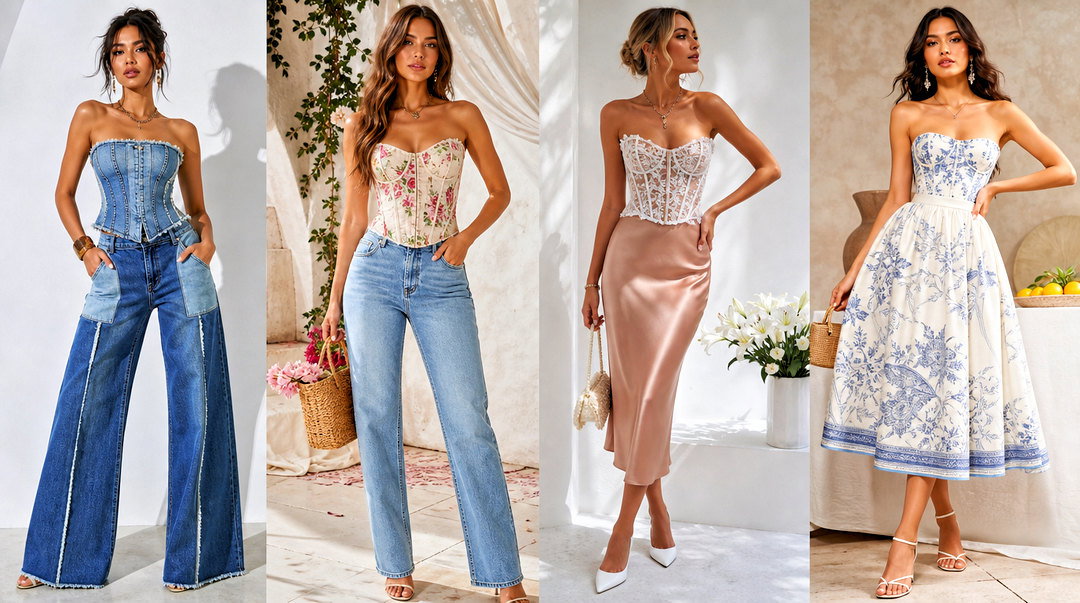
A denim corset is a real pattern project, not a hack. Don't try to shape it on your body; use a fitted bodice pattern and make a test version in scrap fabric first. Soft denim from a shirt or light jeans works better than stiff jeans, which won't curve over the bust. Line it with cotton and topstitch the seams. A back zip is easier to install than lacing. It should fit firmly but let you breathe and sit. Pair with a flowing maxi skirt so the structured top doesn't feel heavy.


15. Fabric Scrap Appliqué Top With Cargo Pants

Appliqué works best on a stable base: a sweatshirt or heavy tee holds its shape under satin stitching, while a thin knit puckers. Cut moons, flowers or leaves from prewashed scraps, fuse them in place with fusible web, then stitch around each edge. Group the shapes across one shoulder and the opposite lower corner for an asymmetric layout. Keep the fabrics to similar care needs; a dry-clean-only scrap on a washable sweatshirt ruins the piece. Cargo pants keep it from looking too sweet.
16. Lace-Up T-Shirt With Printed Pants

An adjustable lace-up neckline looks simple, but knit fabric tears at the point of a V if it isn't reinforced. Iron a strip of lightweight interfacing behind the area before cutting. Bind both edges, then add small eyelets or stitched fabric loops. Metal eyelets can distort thin knit, so test one on scrap. Leave a little fabric below the lowest eyelet. Lace with cotton cord or a fabric tie. A neutral tee lets printed pants lead; matching the lacing to a print color ties them together.
17. Peplum Shirt With Wide-Leg Trousers

Men's shirts have lots of fabric and a ready-made placket, which makes a peplum straightforward. Decide where the waist seam should sit, checking it seated as well as standing, since it rides up when you sit. Cut across, gather the lower section and sew it back on, or add a wider strip from a second shirt. Keep the buttons so the front stays adjustable. A light gather is easier to wear and layer than a full one. Roll or shorten the sleeves. Wide-leg trousers balance it.
18. Kantha Pocket Top With Linen Shorts

Kantha-style fabric is layered and quilted with running stitch, so it's heavier than shirting. That's why I'd use it in small doses, like a pocket or cuff strips. Choose an area with firm stitching and no worn spots. Bind the pocket's raw edges, then sew it on with visible running stitches to echo the quilting. Reinforce the top corners with small triangles of stitching, because that's where pockets pull away. Linen shorts and leather sandals keep it simple.
19. Crochet Sleeve T-Shirt With Flared Jeans

Crochet sleeves from a worn-out top can transform a plain tee. Unpick the original sleeves carefully and use one as a template if the crochet needs reshaping. Crochet stretches a lot as you sew, so stabilize the seam with washable tape. A narrow zigzag lets the seam move with the knit. Add a light lining inside if you want coverage. Open stitches catch on rings and bag hardware, which is worth knowing before you wear it out. High-rise flares balance the textured sleeves.


20. Floral Painted Blouse With Midi Skirt

Painting a blouse is the most forgiving project here because you can build color slowly. Use paint made for the garment's fiber, slip cardboard between the layers, and sketch the design with a removable marker. Keep detail away from thick seams and buttonholes, where the brush can't reach evenly. Thin layers dry flexible; a thick coat cracks when the fabric bends. Heat-set according to the paint's directions. For a first try, decorate just one shoulder or the hem. Wear it with a solid midi.
21. Handkerchief Hem Top With Slim Jeans

Handkerchief hems are angled pieces, and angled pieces are partly on the bias, which stretches. Sew the panels on, then hang the top overnight before hemming so the bias sections can drop. Otherwise the points end up uneven after the first wear. Rolled hems suit rayon and voile; a narrow double-fold hem suits sturdier cotton. Keep the upper part from the better-fitting shirt. Small tassels at the points add weight that helps them hang. Slim jeans balance the uneven volume.
22. Shirred Button-Down Top With Maxi Skirt

Shirring uses elastic thread wound by hand onto the bobbin, with regular thread on top. I always test on a scrap first, because the tension changes how tightly it gathers. Sew parallel rows across the waist or bodice, and backstitch at both ends of every row so the elastic doesn't pull out. A shot of steam makes the rows contract further. Cotton and light rayon gather evenly; heavier fabric barely shirrs. Shirr the cuffs to match. Wear with a plain maxi.
23. Mixed Print Tunic With Cropped Pants

Mixing prints from two or three shirts works when they share at least one color and have similar fabric weights. Keep the neckline and shoulders from whichever shirt fits best, and swap in side panels, sleeves or a lower section from the others. Solid binding at the neck is a designer's trick to link prints that otherwise look unrelated. Finish every internal seam, because different fabrics fray at different rates. Add side slits and a slightly longer back. Prewash all donors.
24. Tassel Trim Blouse With Denim Culottes

Tassels look charming but tangle in the wash, so I stitch them to cotton twill tape first and sew the tape on. It's stronger, and easy to remove for washing. Make them from embroidery floss, fine cotton yarn or reclaimed thread, all the same length and evenly spaced, or the hem hangs crooked. If a full row feels like too much, trim just the cuffs or neck ties. Denim culottes balance the movement with some structure. Hand wash if you leave the tassels on.


25. Patchwork Corset Blouse With Palazzo Jeans

This patchwork corset is the most advanced project here. Use a tested bodice pattern and make a muslin first, adjusting fit and coverage before cutting any shirts. Lay out the patchwork pieces on the pattern to balance prints and colors. Interface the center front and closure area, line the whole bodice, and topstitch every seam, which also strengthens it. It should support the body gently; if it only fits with tight lacing, the pattern needs adjusting. Palazzo jeans give a relaxed counterpoint.
Matching the Project to Your Sewing Skills
The 25 projects above range a lot in difficulty, so here's roughly how I'd rank them if you're working your way up.
No sewing machine needed
Fringe hems, tie-dye, painted flowers, block printing and tassels. These only need scissors, dye or paint, and patience. They're the best place to start, because a mistake rarely ruins the shirt.
Straight seams and simple gathers
Lace panels, appliqué, patch pockets, ruffled sleeves, an off-shoulder elastic casing and shirring. You'll need a machine and confidence with a zigzag stitch. Shirring takes a bit of trial on scraps to get the bobbin tension right.
Fitted and multi-piece work
Peplum shirts, mixed-print tunics, scarf and crochet sleeves, handkerchief hems, and the two corset tops. These involve slippery or stretchy fabric, setting pieces into armholes, or fitting to the body. Make a test version first, and expect to unpick a seam or two. That's normal, even for experienced sewers.
Cut Into the Shirt You'd Never Miss
Start with a garment you won't mourn if the first attempt goes wrong, and a project that fits your current skills: fringe, painting or a simple pocket. Once those feel easy, move to new sleeves, shirring and patchwork, then fitted corset work. Prewash donor garments, test every technique on scraps and reinforce altered seams. Make the tops fit your body and what's already in your wardrobe, rather than copying a design stitch for stitch. That's what keeps a handmade piece in rotation.
Related posts:




Leave a Reply