
These 20 apron top tutorials offer practical ways to sew a wearable, apron-inspired layer for casual outfits, creative work, gardening, and everyday tasks. Unlike a standard kitchen apron, an apron top can function as part of your outfit. It may feature a fitted bib, open sides, cross-back straps, pockets, or a gently gathered hem. Many versions use simple shapes and mostly straight seams, making them approachable for newer sewists. () Choose cotton, linen, denim, or upcycled fabric based on the structure you want. Before cutting, check your bust, waist, desired length, and strap placement. The projects below cover easy designs, adjustable fits, creative details, and inclusive options in these 20 apron top tutorials.
1. Easy Square-Neck Apron Top
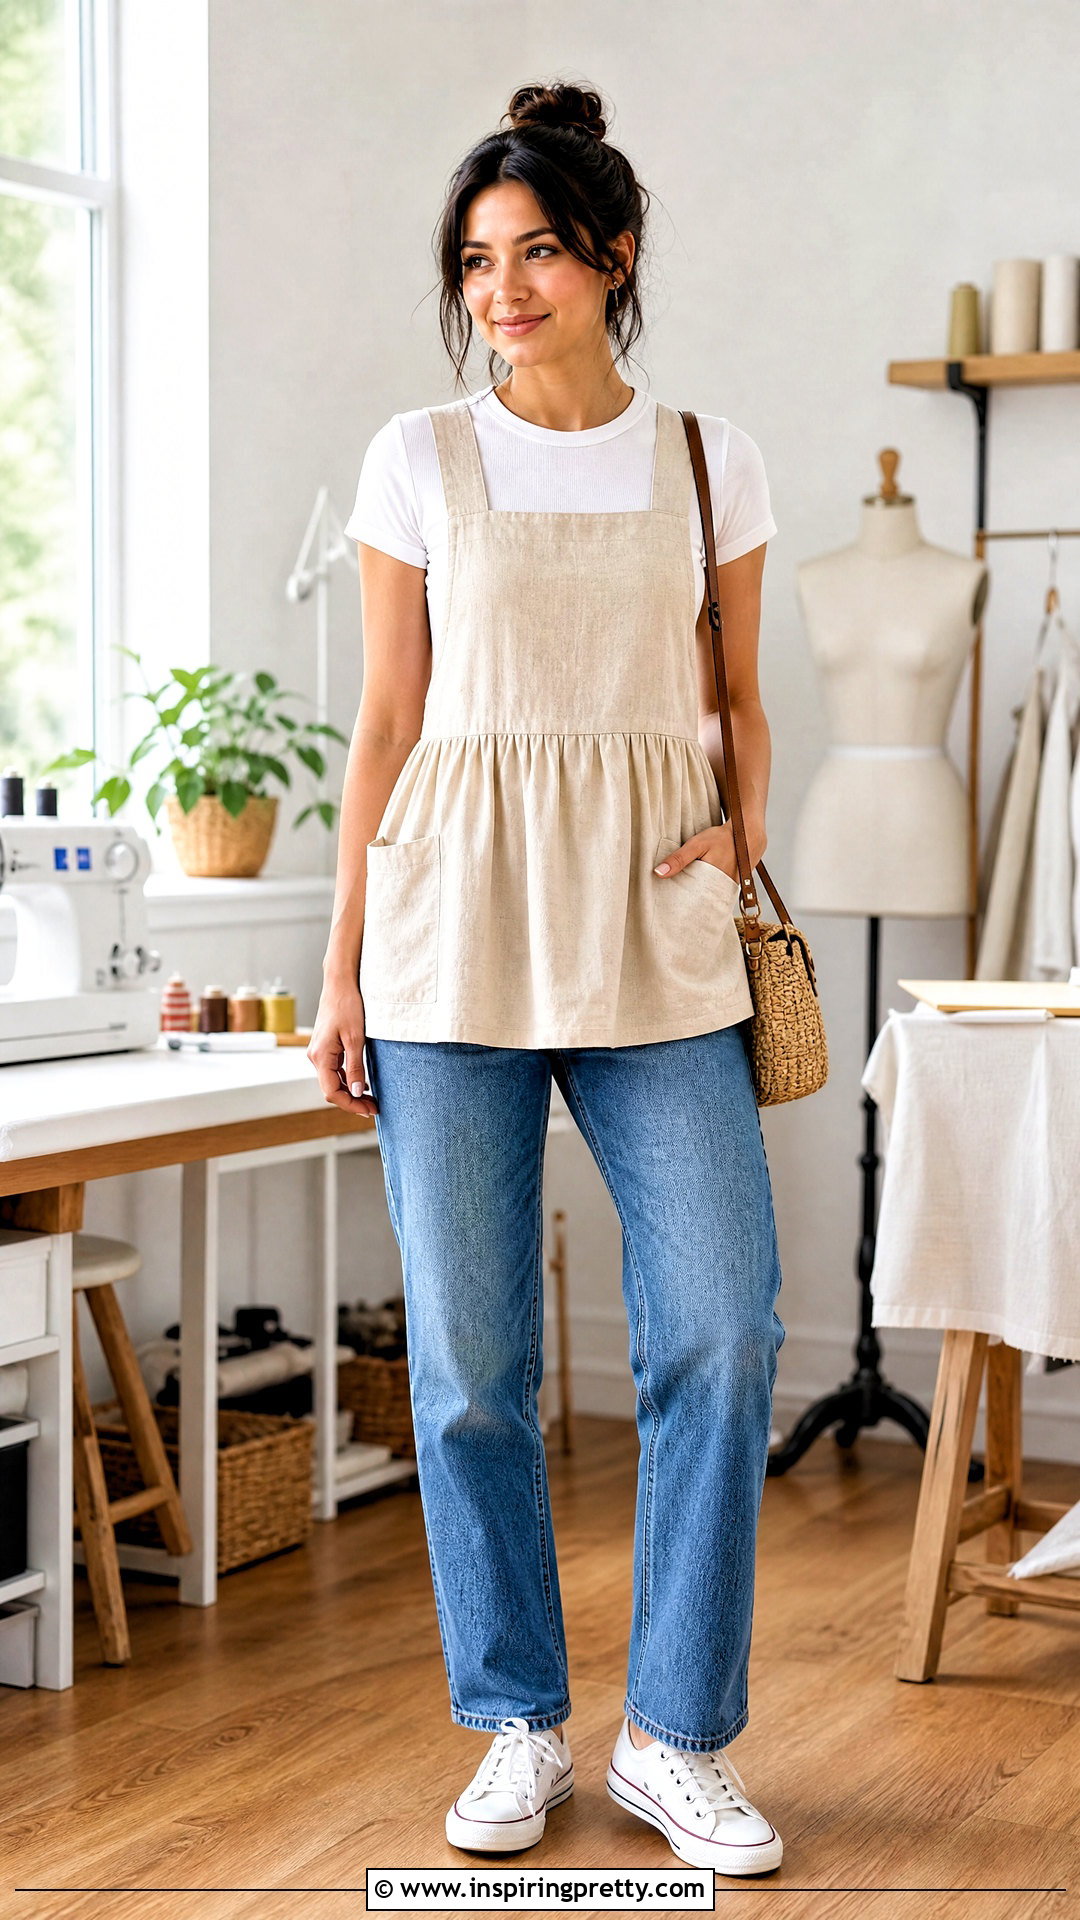
A square-neck apron top is a smart first project because its clean shape is easy to draft and sew. Cut one rectangular bib and a wider lower panel from medium-weight cotton or linen. Add seam allowance before cutting. Finish the top edge of the bib with a facing, then gather the lower panel lightly and attach it underneath. Long shoulder straps can cross in the back and connect at the waist with buttons or ties. Press every seam before topstitching for a crisp result. Style the finished top over a fitted white T-shirt with straight-leg jeans and canvas sneakers. A small patch pocket adds function without complicating construction. Test the strap length before securing it permanently so the neckline sits flat.
2. Cross-Back Apron Top
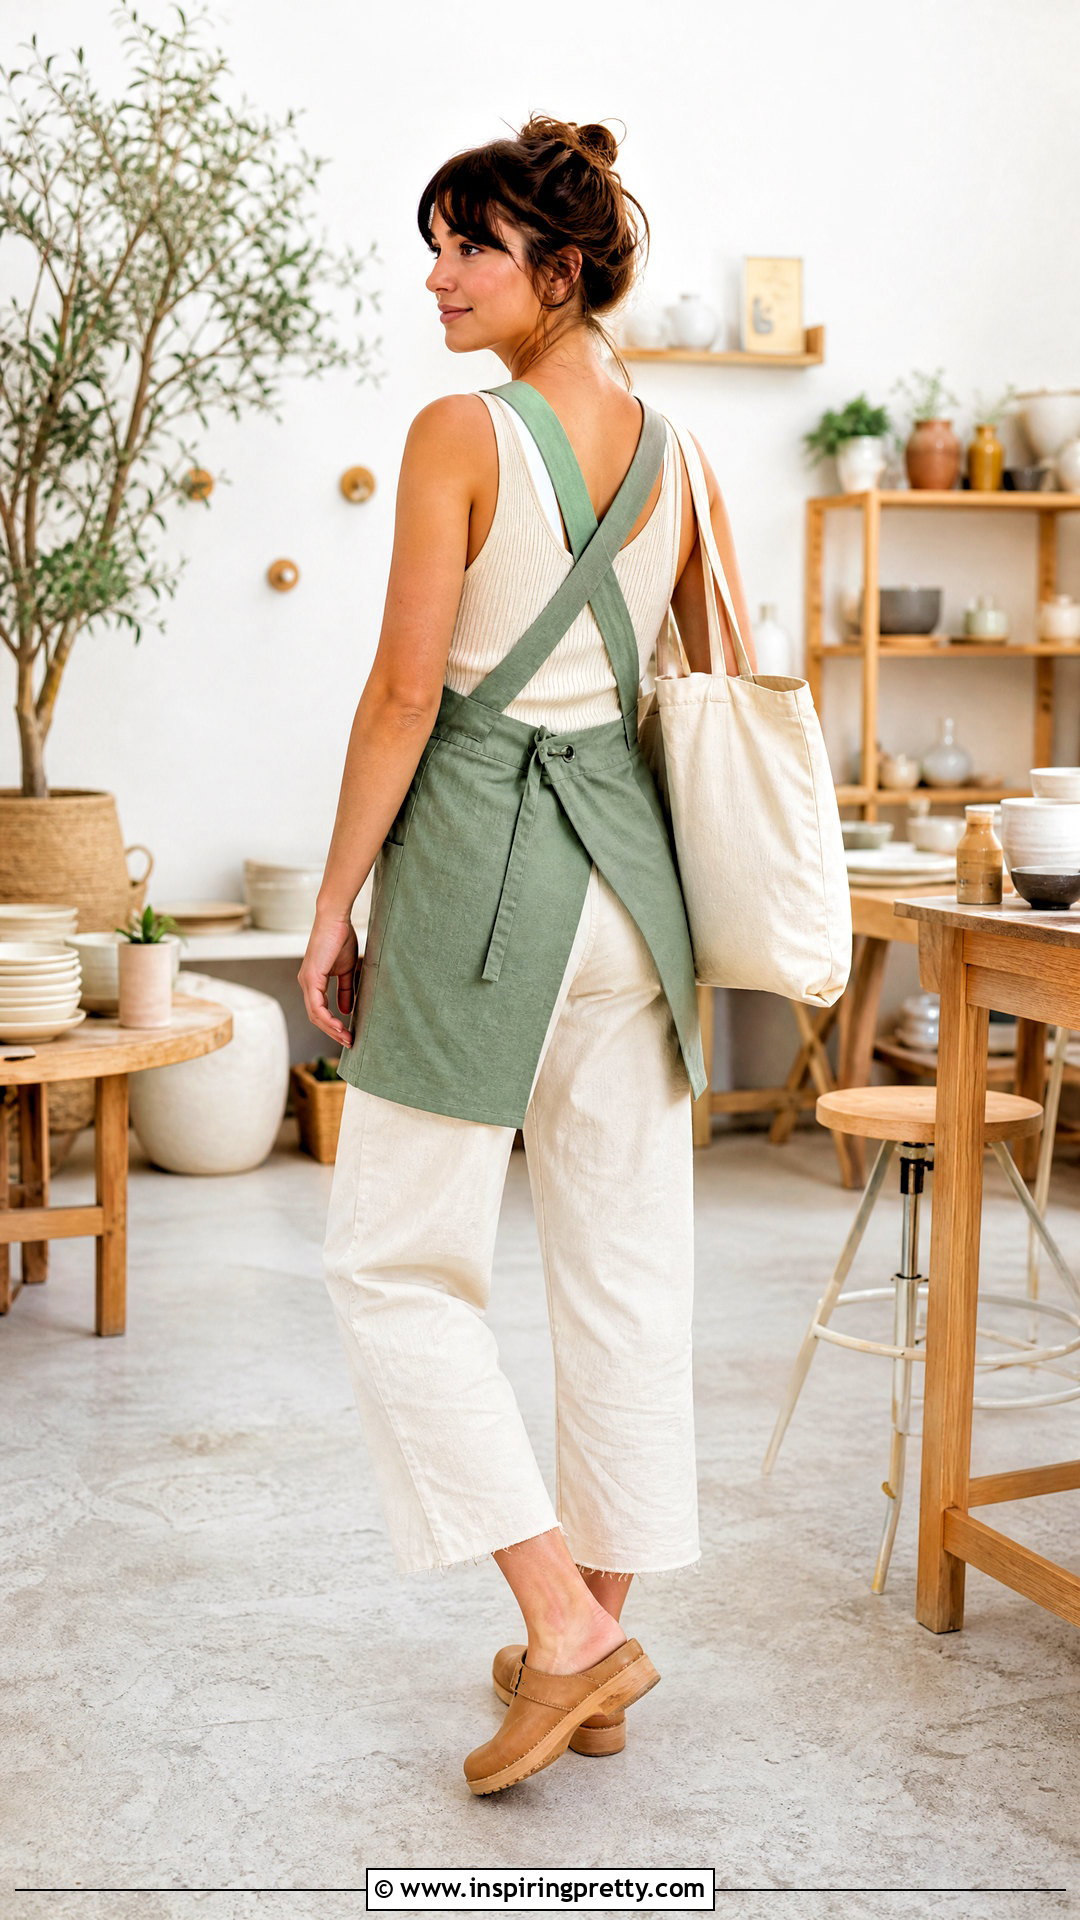
Do you dislike neck straps that pull or feel uncomfortable? A cross-back apron top distributes the garment’s weight across the shoulders and creates an attractive back view. Start with a full front panel that reaches from the upper chest to the hip. Cut two long straps and attach them to the upper corners. Cross the straps behind your body, then secure them at the opposite side seams or thread them through buttonholes for adjustability. Make a quick muslin first because strap placement determines how closely the sides fit. Linen-cotton fabric provides softness with enough body to hold the shape. Wear this apron top with a ribbed tank, relaxed cropped pants, and slip-on clogs for an easy creative-work outfit.
3. Tie-Back Apron Top
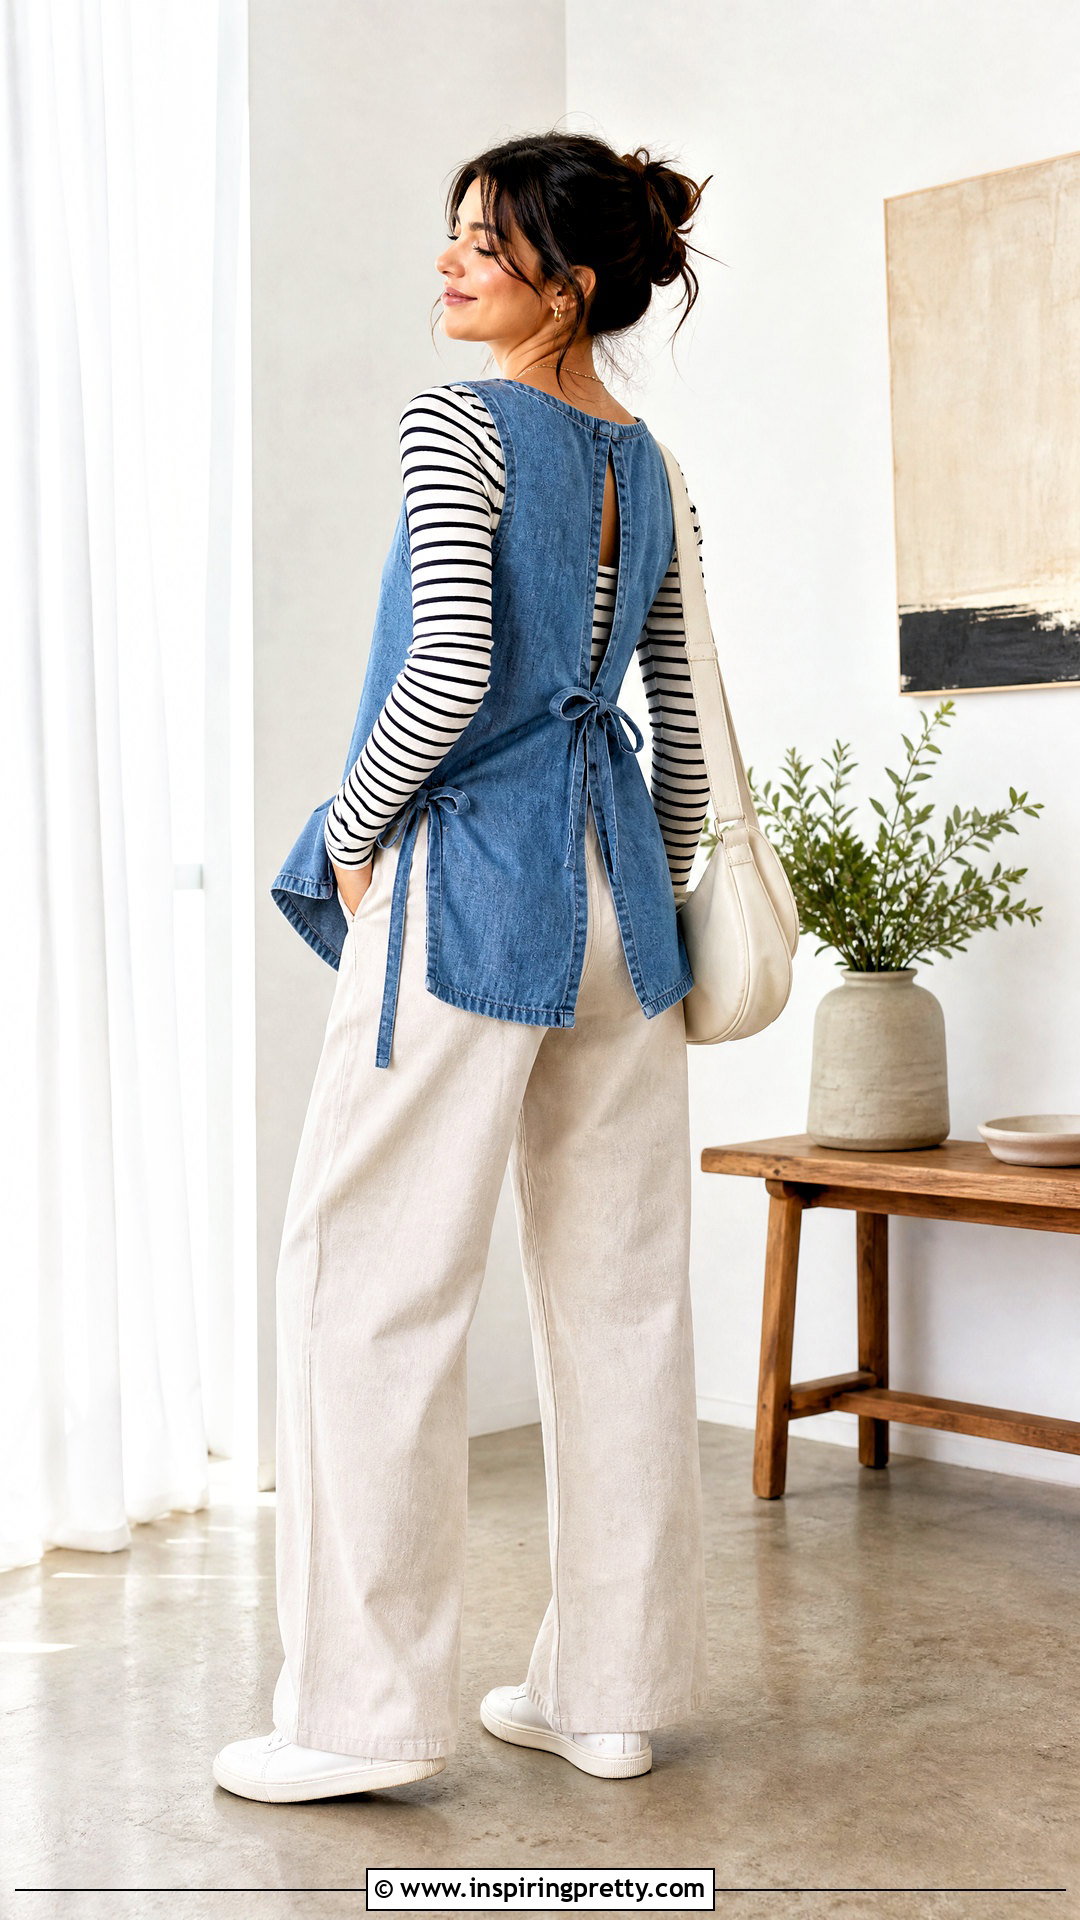
A tie-back apron top gives you flexible sizing without zippers, elastic, or complicated closures. Draft a rectangular or gently shaped front bib, then extend the lower portion to your preferred length. Finish the arm and neckline edges with bias binding before adding two waist ties and two shoulder ties. Each tie should be long enough to form a secure bow without hanging too low. Reinforce every attachment point with a small square of stitching. Lightweight canvas, cotton twill, and chambray are suitable choices for this structured design. Layer the finished top over a striped long-sleeve shirt and pair it with wide-leg pants and low-profile sneakers. The adjustable back makes this tutorial especially useful when sewing a handmade gift.
4. Reversible Apron Top
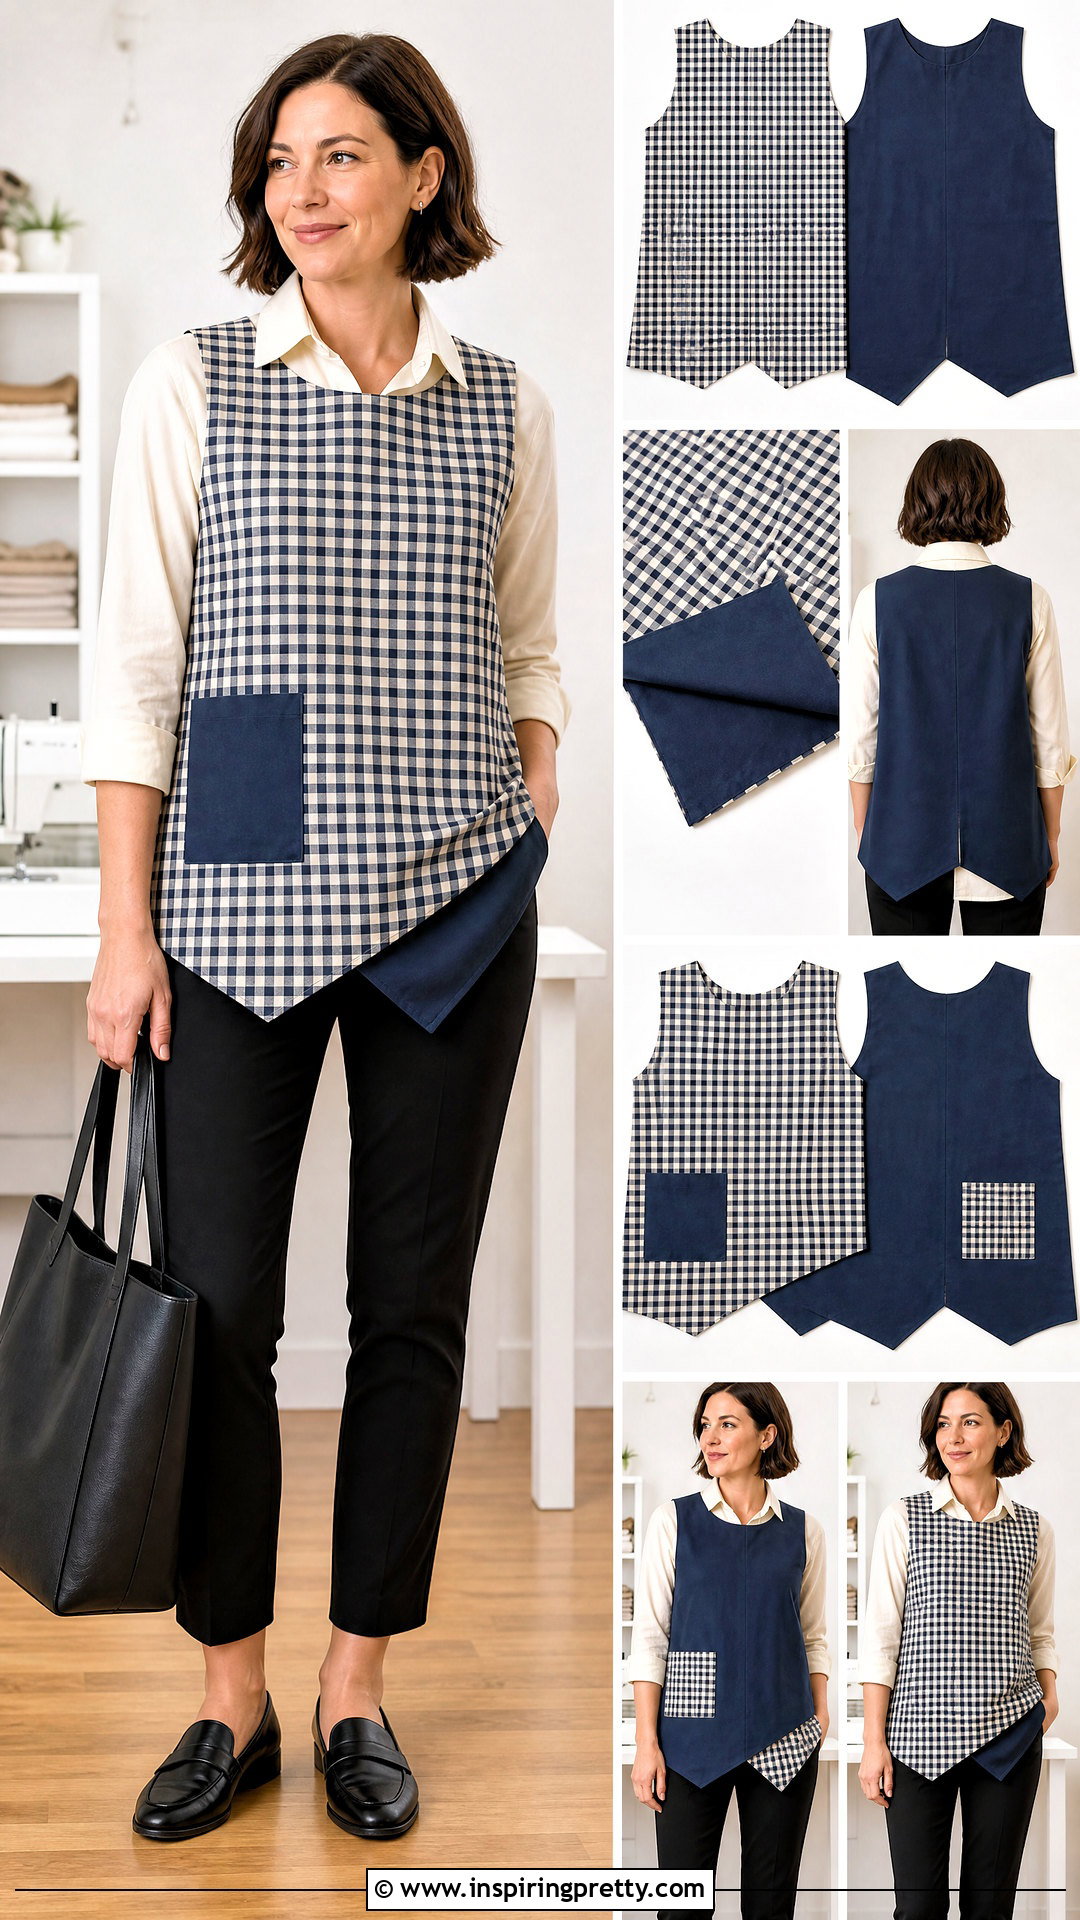
Two coordinated fabrics can turn one simple pattern into a reversible apron top with twice the styling potential. Cut the complete front and straps once from each fabric. Place the layers with right sides together, stitch around the outer edge, and leave a small opening for turning. Clip curved areas, trim bulky corners, turn the piece right side out, and press it carefully. Close the opening while topstitching around the entire top. Choose fabrics with similar weight so neither side pulls or twists. One side might feature a subtle check, while the other uses solid cotton. Wear the checked side over a plain top and jeans, then reverse it for a cleaner look with tailored pants, loafers, and a structured tote.
5. Ruffled Apron Top

Soft ruffles give an apron top a playful finish without requiring advanced patternmaking. Begin with a fitted or rectangular bib and a lightly gathered lower panel. Create the ruffle by cutting a strip approximately one and a half to two times longer than the edge where it will be attached. Hem one long side, gather the other, and distribute the fullness evenly before sewing. Add the ruffle around the neckline, shoulder straps, or lower hem, but avoid using it everywhere at once. A lightweight cotton lawn makes gathering easier and prevents excess bulk. Complete the outfit with a fitted short-sleeve tee, ankle-length jeans, ballet flats, and a simple shoulder bag. Press the ruffle gently so it remains soft and dimensional.
6. Linen Apron Top
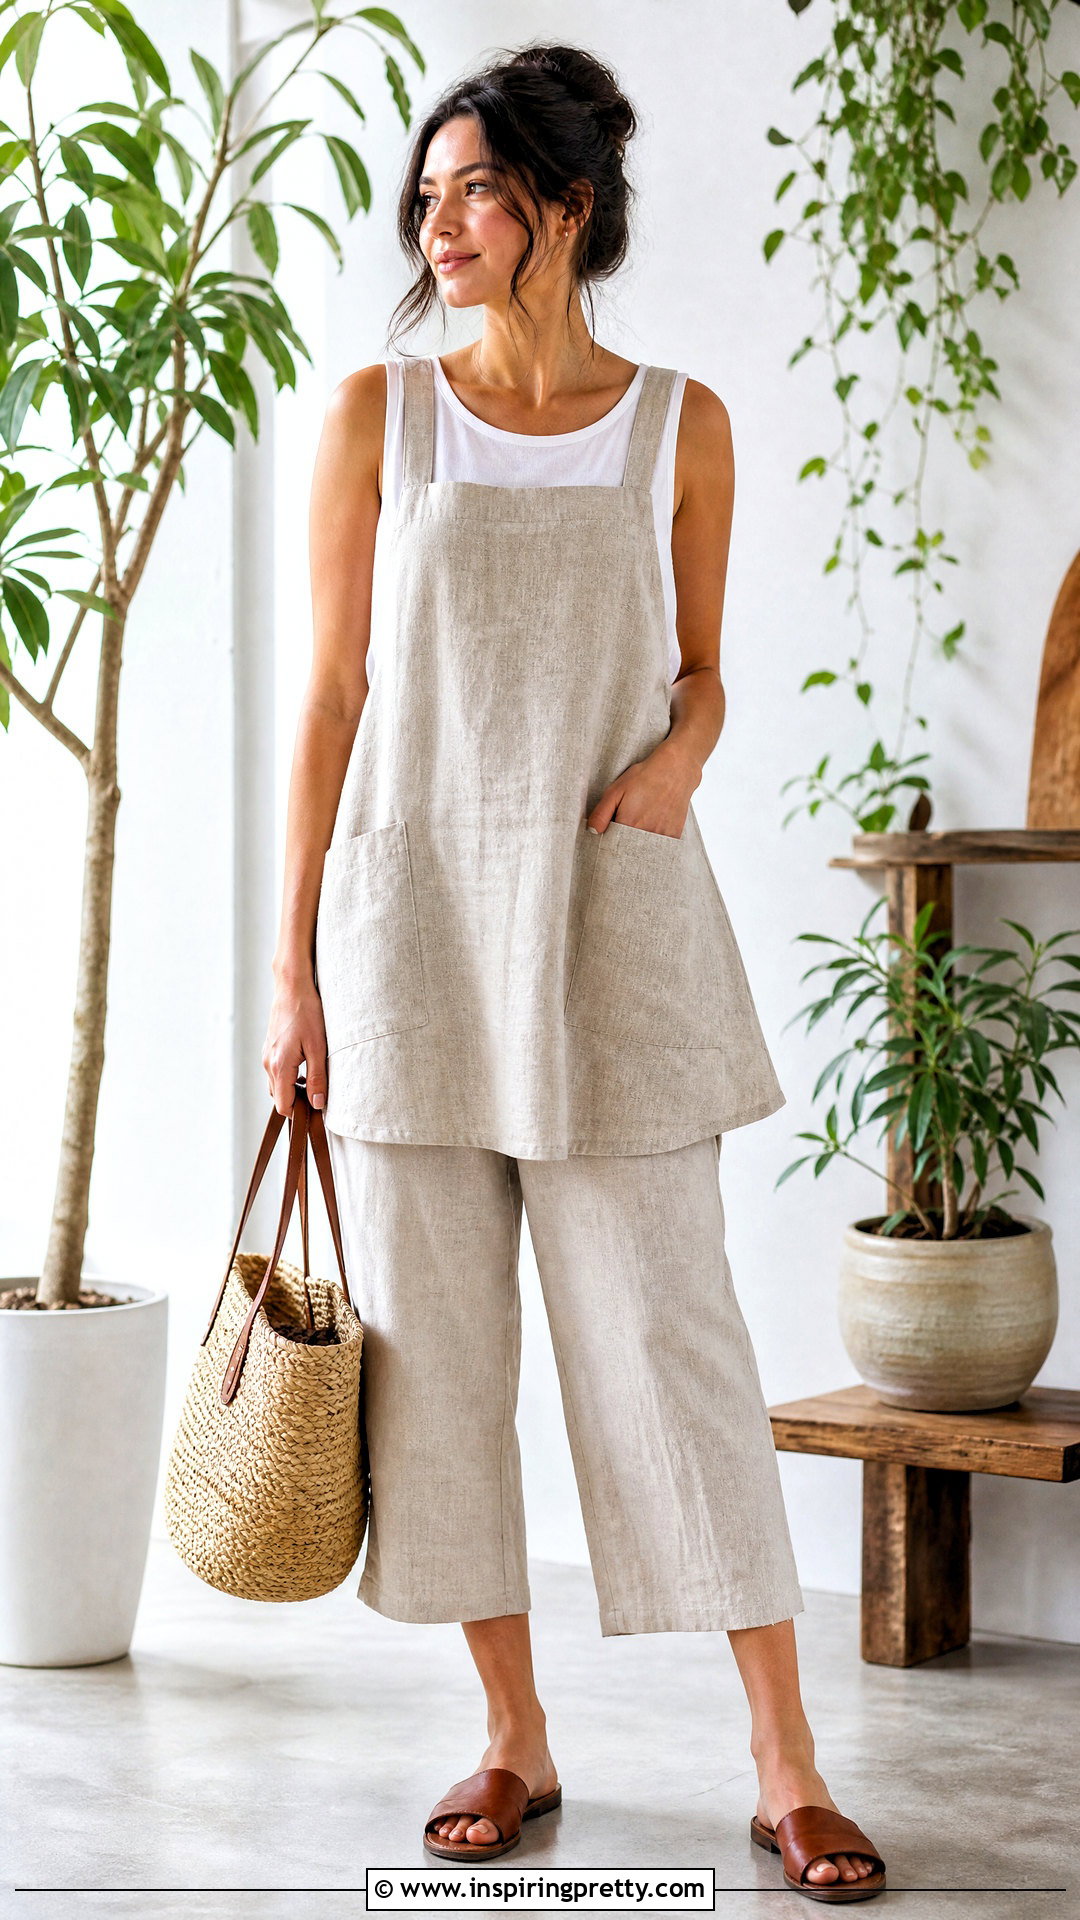
Crisp yet relaxed, a linen apron top works beautifully as a breathable layer for warmer days. Prewash and dry the linen before measuring because natural fibers may shrink. Use a simple long bib shape with wide shoulder straps and open sides. Finish the raw edges with narrow double-fold hems or matching bias binding. Because linen can shift while cutting, use pattern weights and a rotary cutter when possible. Add deep front pockets and reinforce their upper corners with short bar tacks. For a complete outfit, layer the top over a cotton tank and wear it with cropped linen trousers, leather slides, and a woven tote. Natural wrinkles complement the casual design, but careful pressing during construction keeps every seam accurate and professional-looking.
7. Patchwork Apron Top
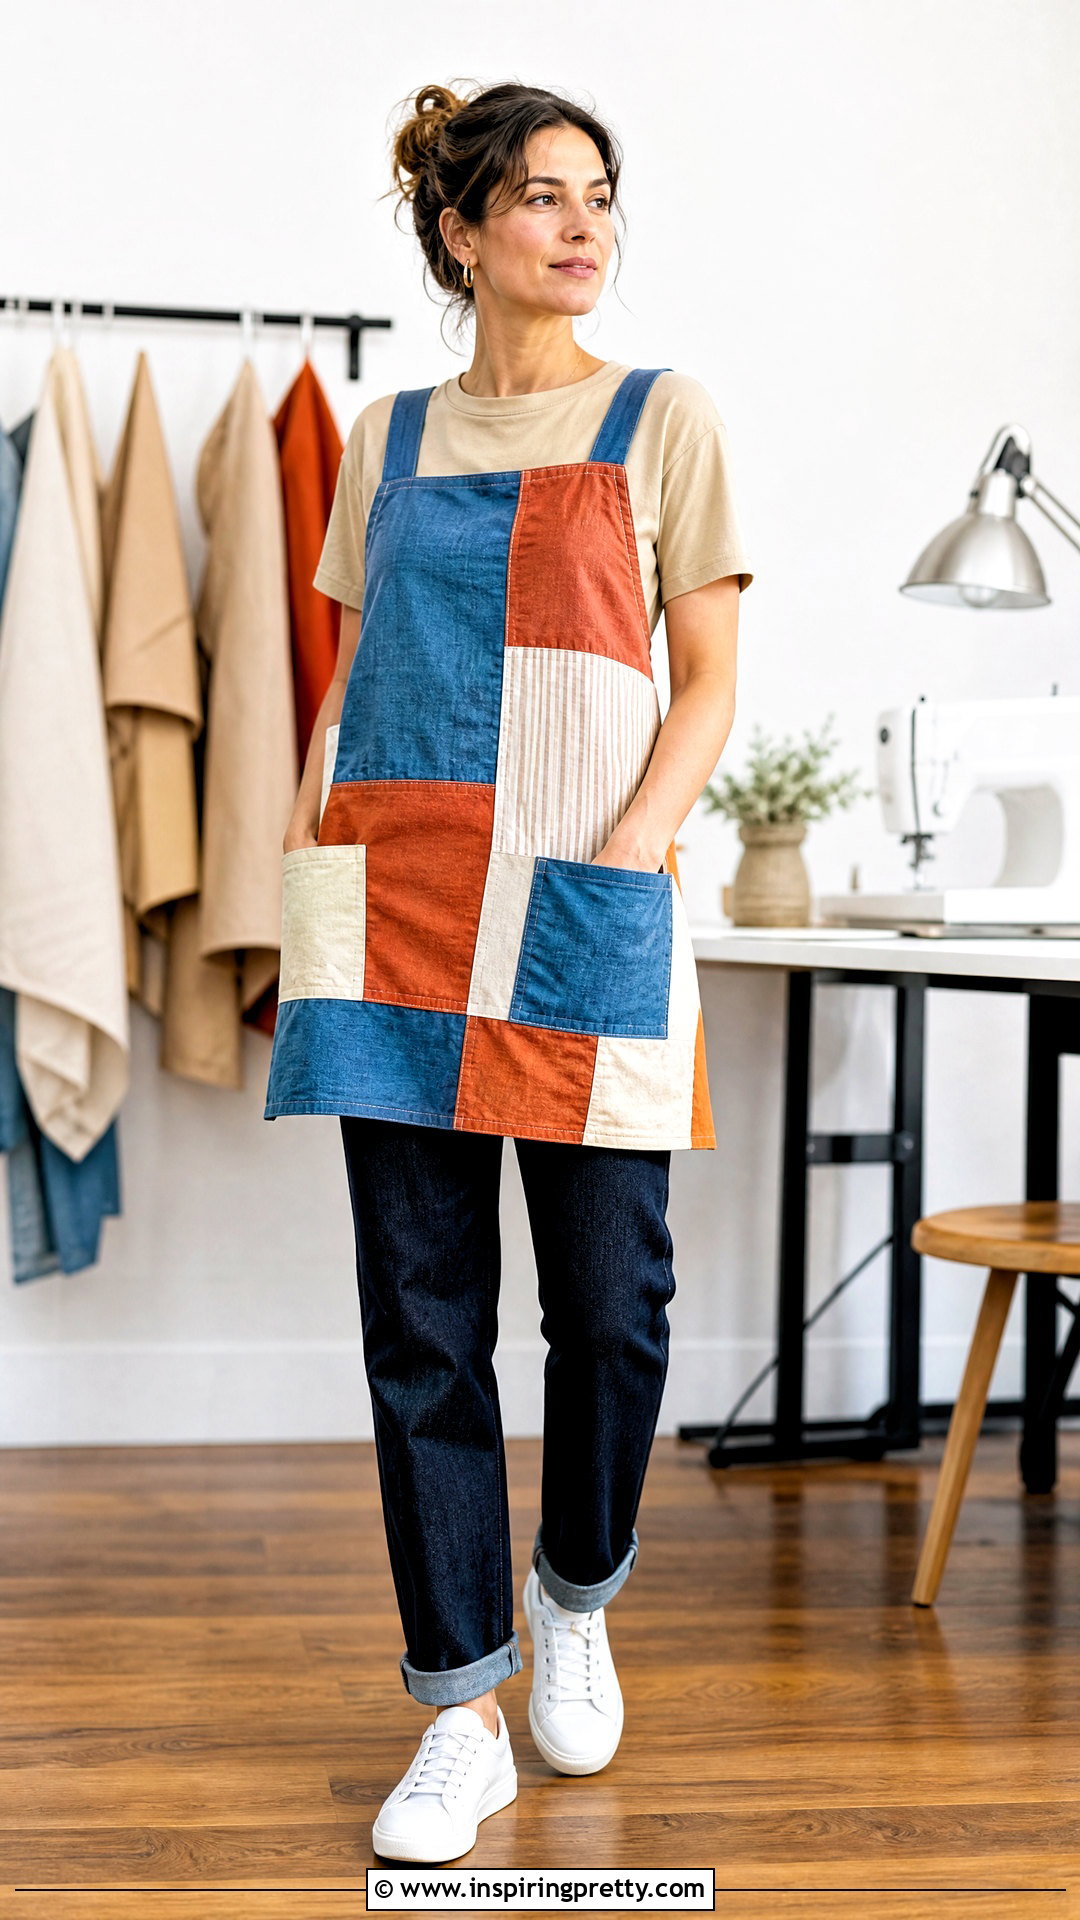
A patchwork apron top transforms cotton remnants into a colorful, useful garment. Arrange fabric squares or rectangles on a flat surface before joining them into panels. Keep the color palette controlled by repeating two or three dominant shades. Sew the pieces with consistent seam allowances, press the seams to one side, and topstitch selected lines for strength. Once the patchwork is complete, cut the main apron top pieces from it as though it were ordinary fabric. Add a lightweight lining to conceal the internal seams and improve comfort. Wear the finished top over a neutral T-shirt with dark straight-leg jeans, simple sneakers, and small hoop earrings. This balanced outfit lets the handcrafted patchwork remain the main visual feature without looking overly busy.
8. Smocked Apron Top
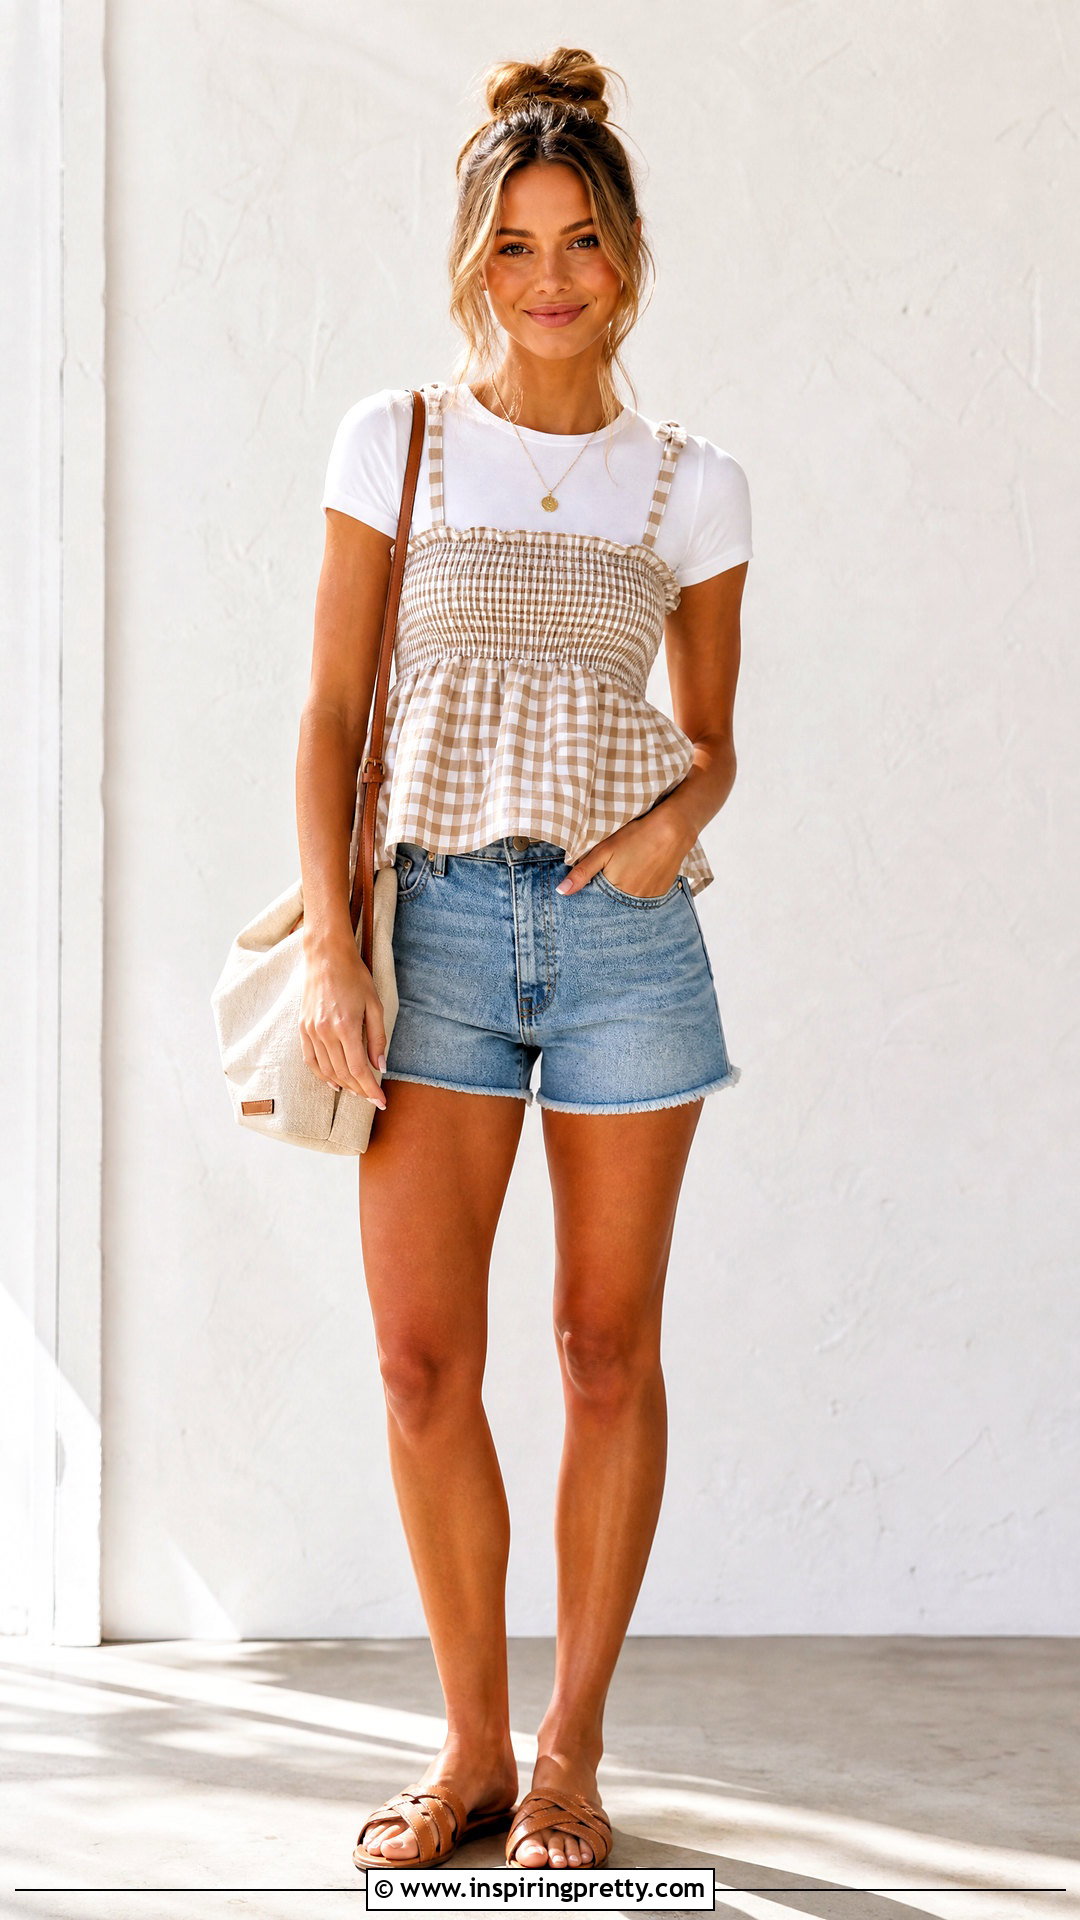
A smocked apron top offers flexible shaping around the chest while keeping the sides comfortable. Cut a wide rectangular bodice panel and finish its upper and lower edges first. Sew several horizontal rows using elastic thread in the bobbin, keeping the rows evenly spaced. Steam the fabric lightly after sewing so the elastic gathers fully. Test the panel around your torso before joining the side seam or adding back ties. Attach a softly gathered lower panel and adjustable shoulder straps to complete the top. Lightweight cotton or gingham works better than heavy fabric for this technique. Pair the finished piece with a plain fitted tee, high-rise shorts, flat sandals, and a canvas crossbody bag for a fresh warm-weather outfit with practical coverage.
9. Button-Back Apron Top
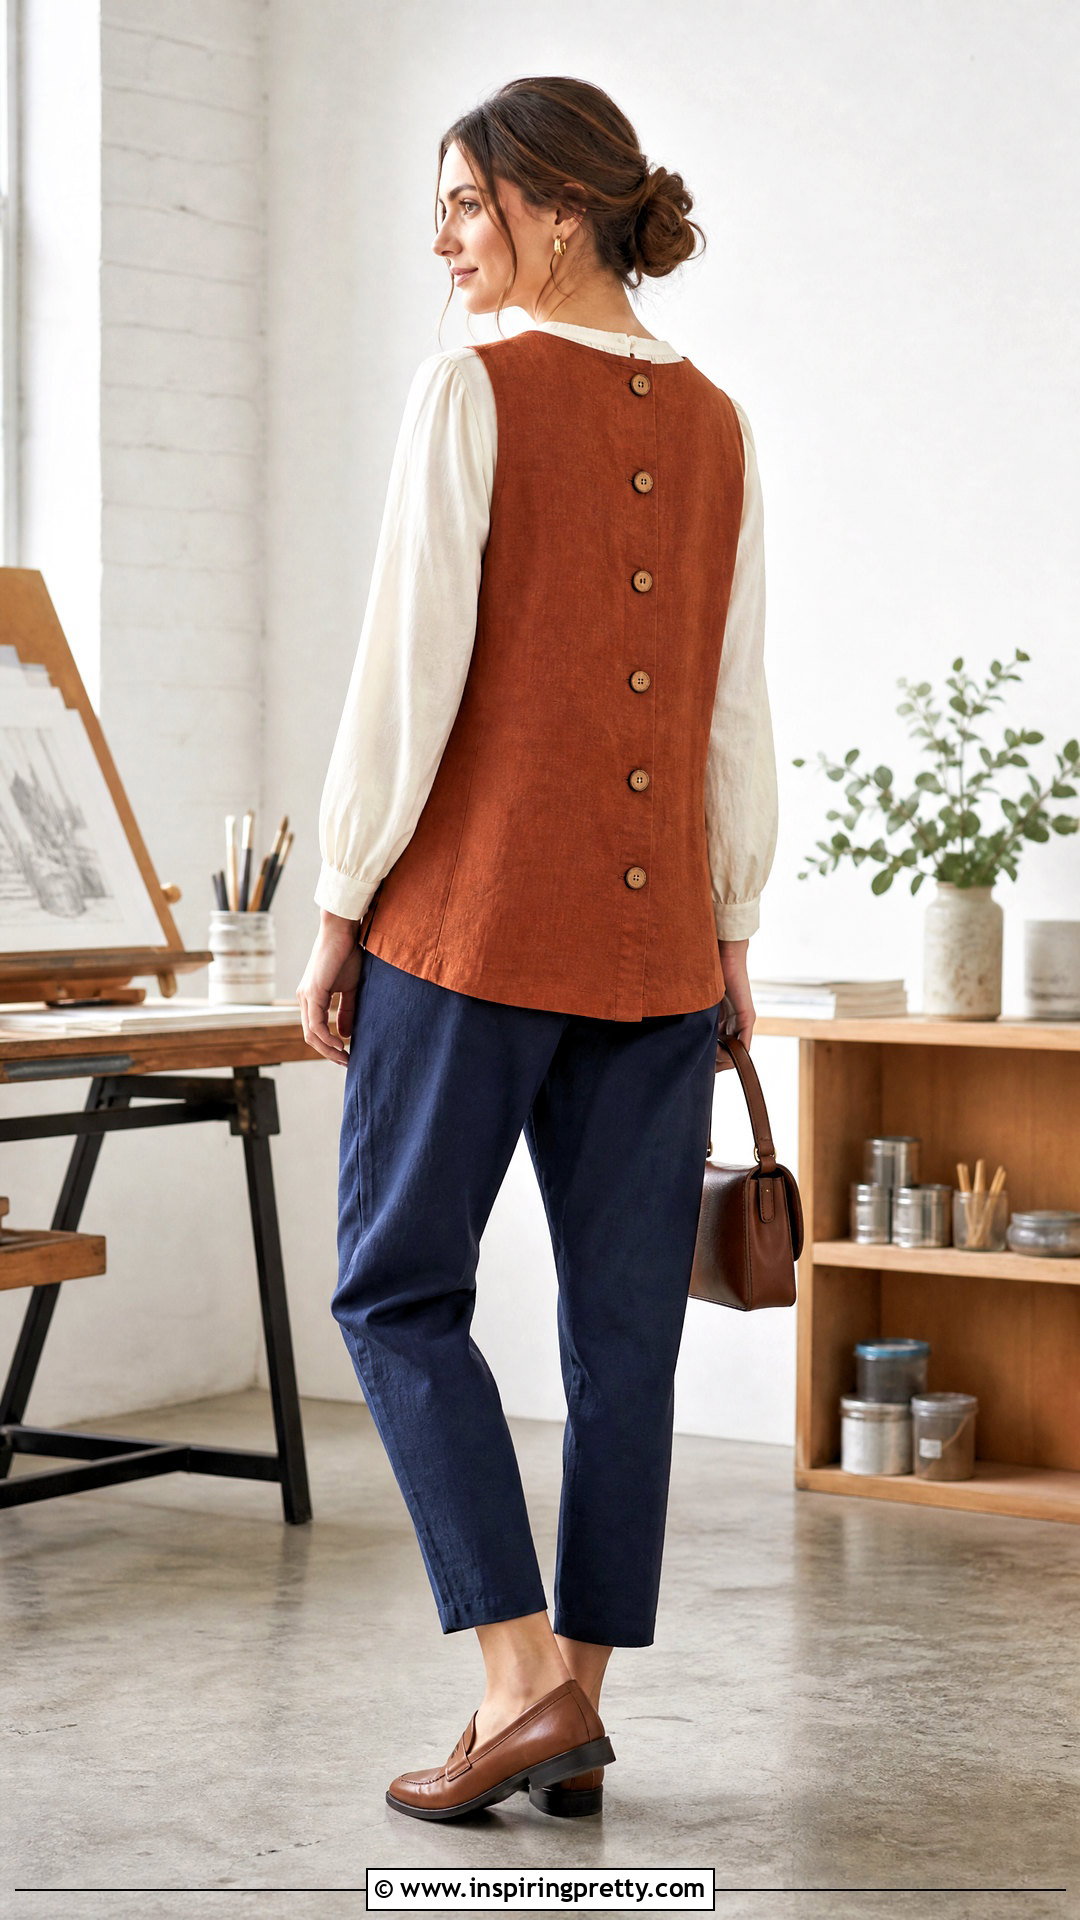
A button-back apron top feels polished while remaining relatively straightforward to construct. Draft the back as two overlapping panels or use long shoulder straps that fasten to buttons at the waist. Interface the button areas so they do not stretch with repeated wear. Mark every button and buttonhole after trying on the nearly finished garment, since small placement changes can improve the fit. Large wooden or corozo-style buttons suit linen and cotton fabrics, while smaller covered buttons create a softer finish. Add a clean facing around the bib and understitch it to stop the lining from rolling outward. Style the top over a lightweight blouse with tapered pants, loafers, and a compact handbag. The visible back closure becomes an intentional part of the complete outfit.
10. Pinafore Apron Top
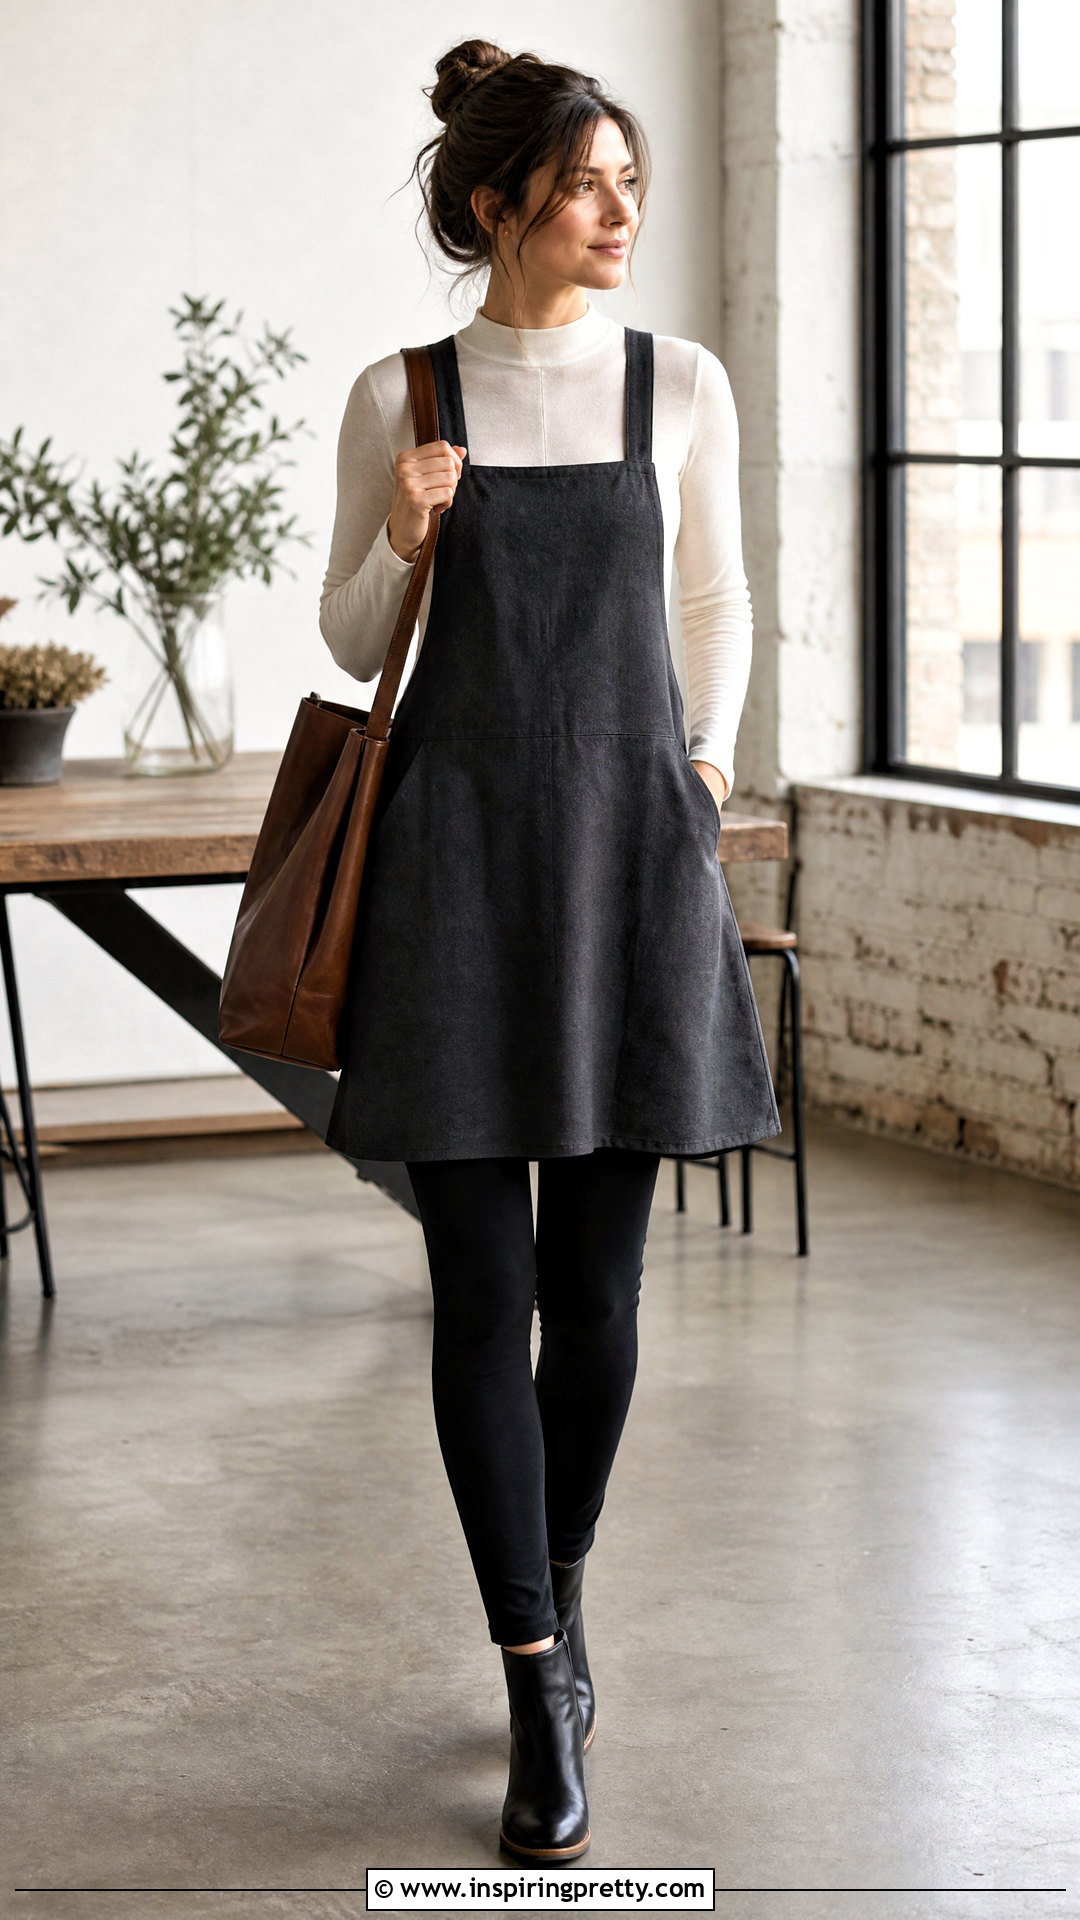
A pinafore apron top combines the coverage of an apron with the easy layering of a sleeveless tunic. Create a broad front panel, two shoulder straps, and optional side panels that end around the waist or hip. A slightly flared lower edge allows comfortable movement. Bind the neckline and arm openings, then add straps wide enough to stay securely on the shoulders. If the top feels too open at the sides, install short fabric ties or adjustable button tabs. Choose sturdy washed cotton, lightweight denim, or linen blend fabric. Layer it over a fitted mock-neck top with leggings or slim pants, ankle boots, and a practical tote. Check the finished length while sitting as well as standing so the pinafore remains comfortable throughout the day.
11. Wrap Apron Top
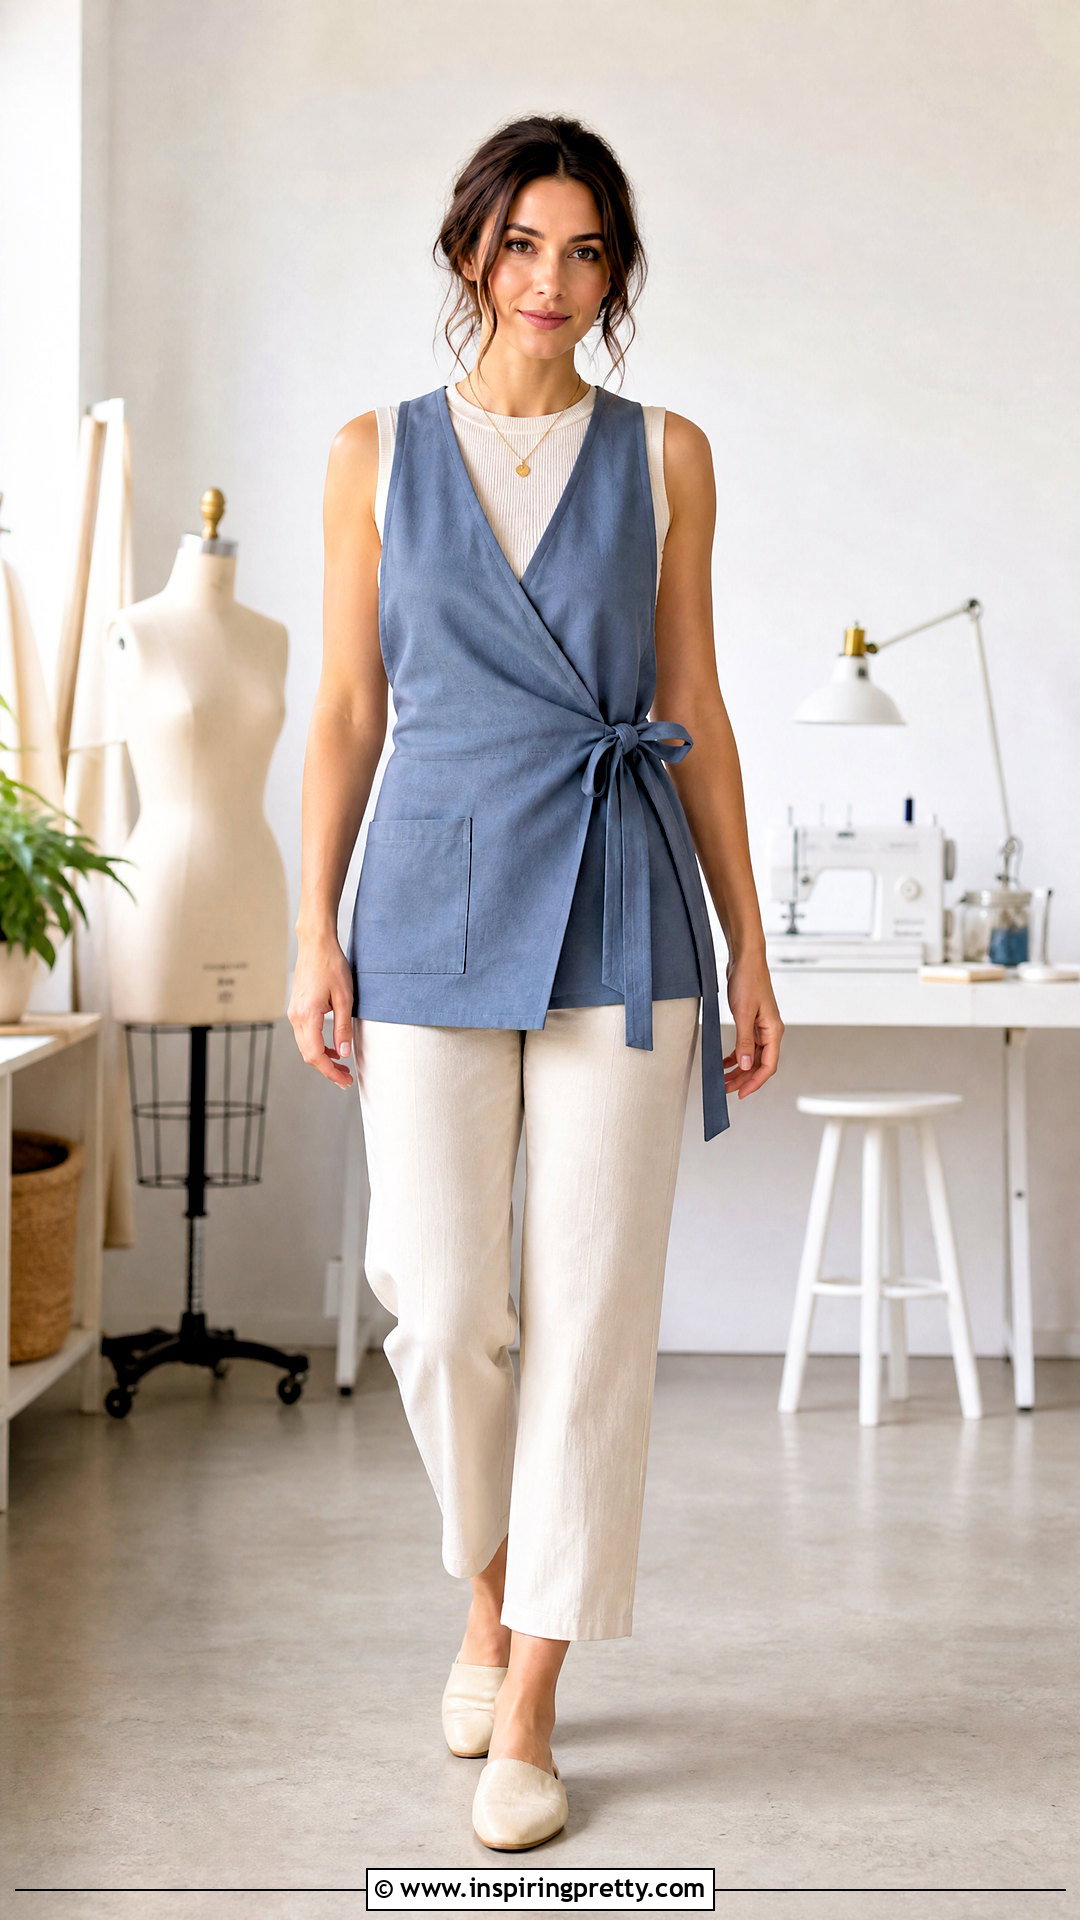
The overlapping front of a wrap apron top creates adjustable coverage and a flattering diagonal line. Draft two mirrored front panels that cross over the torso and extend into long waist ties. Finish the neckline and curved edges with bias tape before overlapping the panels. Baste the pieces together and try on the top to confirm that the front stays covered during movement. A hidden snap can prevent the inner layer from shifting. Soft linen, chambray, or cotton poplin allows the wrap to lie smoothly without becoming bulky. Wear it over a sleeveless fitted top with straight cropped trousers, flat mules, and a simple pendant necklace. Keep the lower layers streamlined because the wrap front already adds dimension and visual movement to the outfit.
12. Peplum Apron Top

A peplum apron top introduces waist definition through a short gathered or flared lower section. Begin with a fitted rectangular bib that ends near the natural waist. Cut the peplum as a long rectangle for gathers or a partial circle for softer fullness. Finish its hem before attaching it to the bodice, especially if you are working with a narrow rolled edge. Add shoulder straps and back ties, then test the waist position before final stitching. Cotton poplin produces a crisp peplum, while linen creates a more relaxed shape. Pair the finished top with high-rise straight jeans, pointed flats, and a small top-handle bag. Keeping the pants smooth through the waist prevents the peplum and lower layer from competing for space.
13. Upcycled Shirt Apron Top
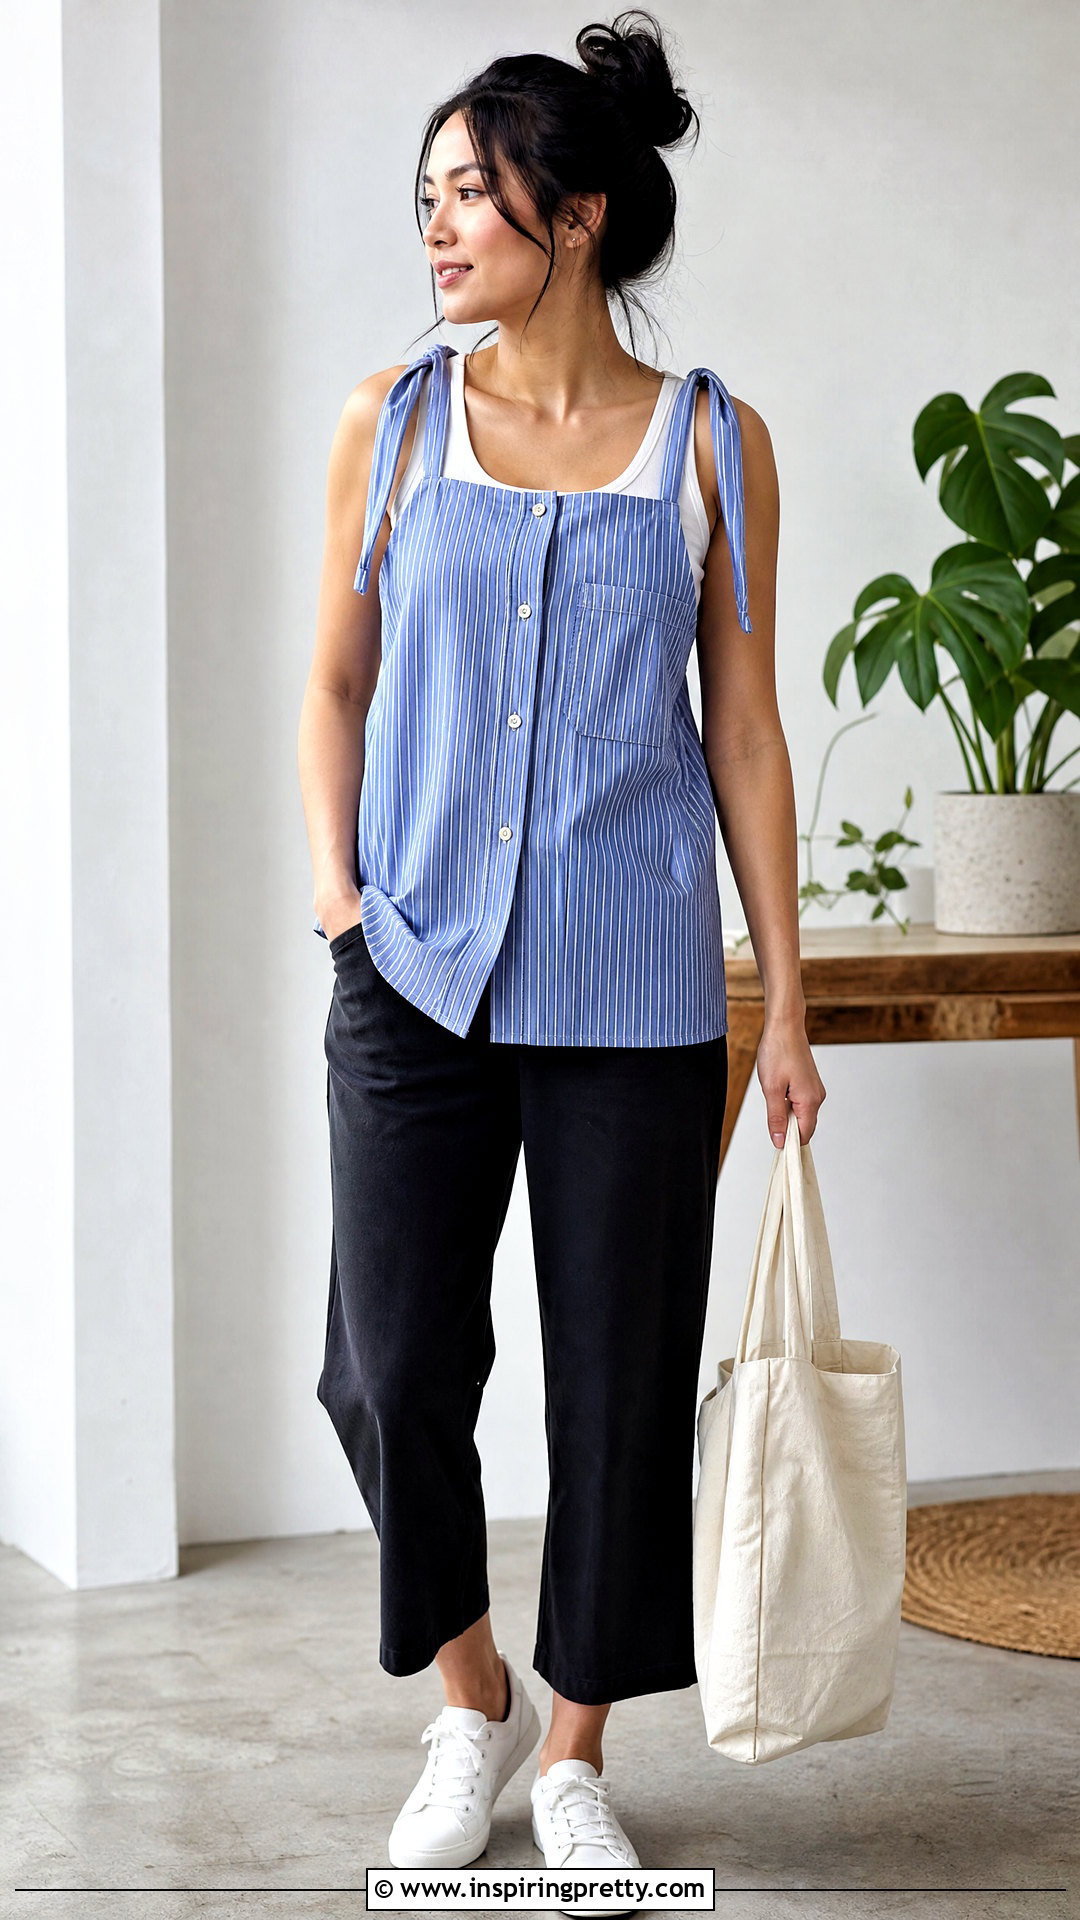
An oversized button-down shirt can become an apron top with much of its original character intact. Start by removing the sleeves and separating the front from the back along the side seams. Use the shirt front as the main apron panel so the buttons remain a functional detail. Shape the upper corners, finish the new edges with bias binding, and turn strips from the sleeves into shoulder and waist ties. The original chest pocket can stay in place, while leftover cuffs can become smaller utility pockets. Layer the completed top over a fitted tank with black cropped pants, white sneakers, and a canvas tote. Before cutting, inspect worn areas carefully and position your pattern pieces away from thin or damaged sections of fabric.
14. Pillowcase Apron Top
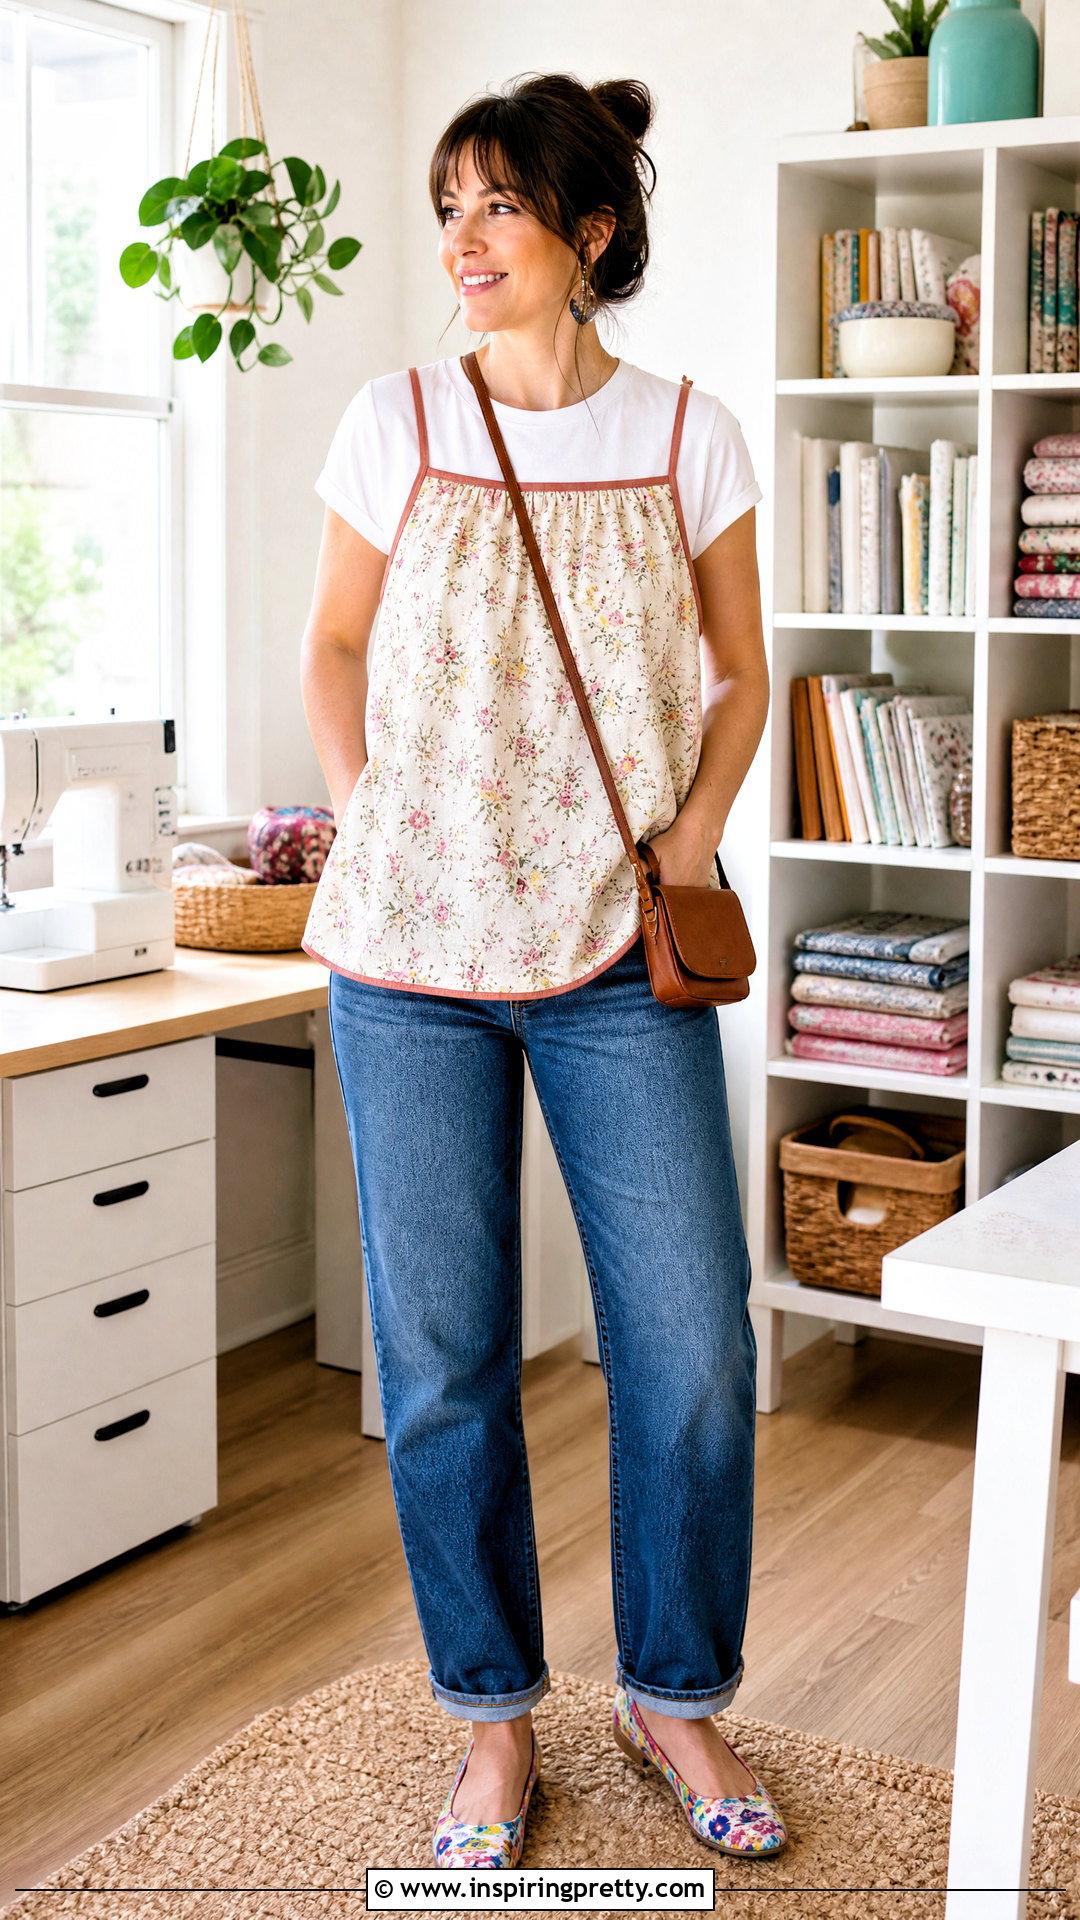
A clean cotton pillowcase offers enough finished fabric for a lightweight apron top, especially in a cropped or child-sized design. Open one long seam so the pillowcase lies flat, then center the apron shape over any printed motif. Use the existing hem as the lower edge whenever possible. Shape a bib at the top, curve the sides gently, and finish them with bias tape that extends into waist ties. Make shoulder straps from leftover fabric or coordinating twill tape. Since pillowcase cotton can be thin, line the bib if it appears transparent or lacks structure. Wear the finished top with a solid short-sleeve tee, relaxed denim, colorful flats, and a compact crossbody bag. The simple outfit highlights the repurposed print without overwhelming it.

15. One-Yard Apron Top

Careful planning makes it possible to create a practical apron top from one yard of wide fabric. Select a pattern with a compact bib, moderately sized lower panel, and narrow ties. Lay every piece on the fabric before cutting, placing straps parallel to the selvage when the layout allows. Piecing two shorter strips together can provide enough length for waist ties. Use contrasting bias tape if the remaining fabric cannot cover every edge. A single large patch pocket requires less material than several separate pockets. Style the completed top over a crew-neck T-shirt with utility pants, slip-on sneakers, and a lightweight tote. Solid cotton, chambray, or a small-scale print helps pieced sections blend naturally and keeps the economical design looking intentional.
16. Apron Top With Pockets

Generous pockets make an apron top more useful for crafting, cooking, gardening, or carrying everyday essentials. Draft one large divided pocket or two symmetrical patch pockets and position them before assembling the final garment. Fold and stitch each upper pocket edge first, then press the remaining seam allowances inward. Pin carefully and topstitch around the sides and bottom. Reinforce the upper corners because these areas receive the most strain. Canvas, denim, and cotton twill support loaded pockets better than delicate fabric. Complete the look with a fitted long-sleeve shirt, relaxed jeans, sturdy clogs, and a simple hair scarf. Keep pocket depth proportional to the top so items remain secure without pulling the entire garment forward during movement.
17. Color-Block Apron Top
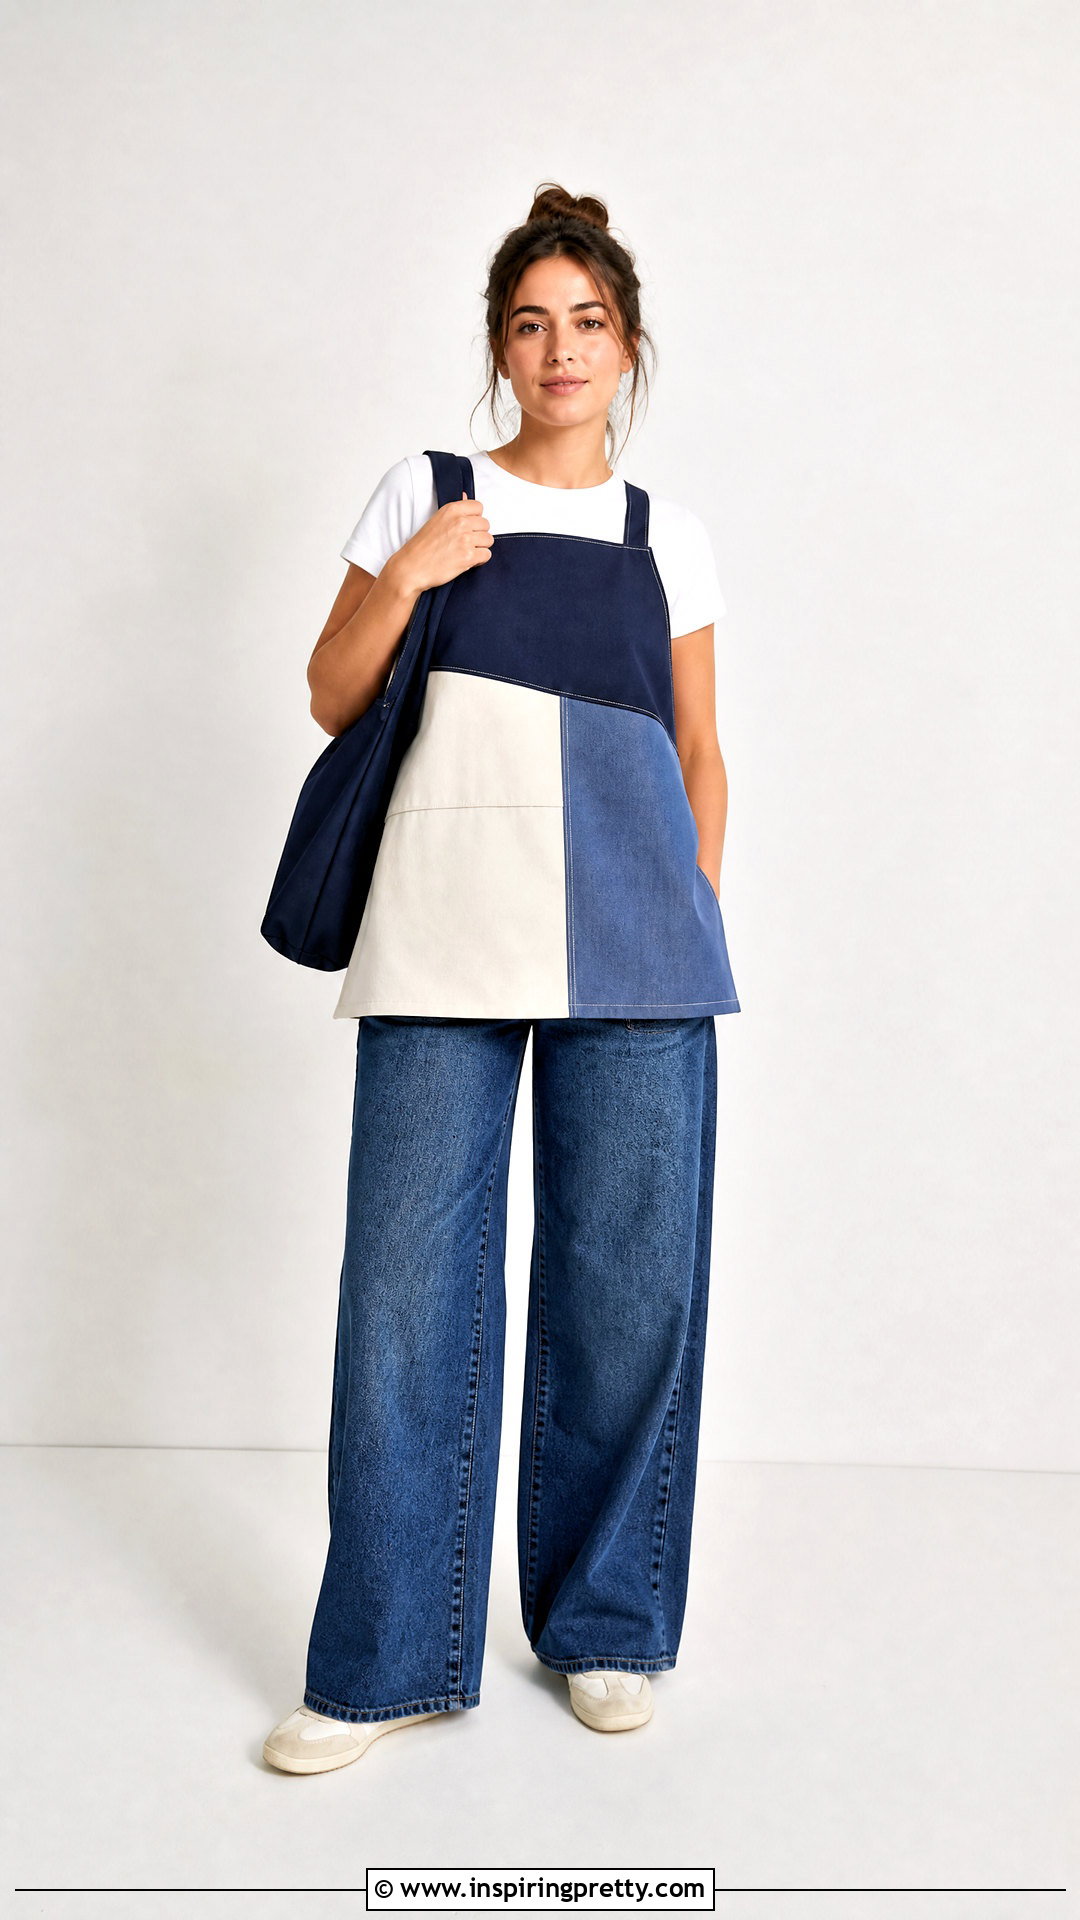
Color blocking can make a basic apron top pattern feel modern and carefully designed. Divide the front pattern into two or three large sections, then add seam allowance along every new cutting line. Cut each section from a different solid fabric and sew the blocks together before assembling the top. Press the connecting seams open or toward the darker fabric, depending on thickness. Topstitching can emphasize the geometric layout and strengthen the joins. Choose colors with similar intensity, such as navy, cream, and muted blue, for a cohesive result. Wear the top over a white tee with wide-leg denim, neutral sneakers, and a navy shoulder bag. Avoid tiny fabric sections, since larger blocks are easier to sew and create a cleaner visual effect.
18. Scalloped Apron Top
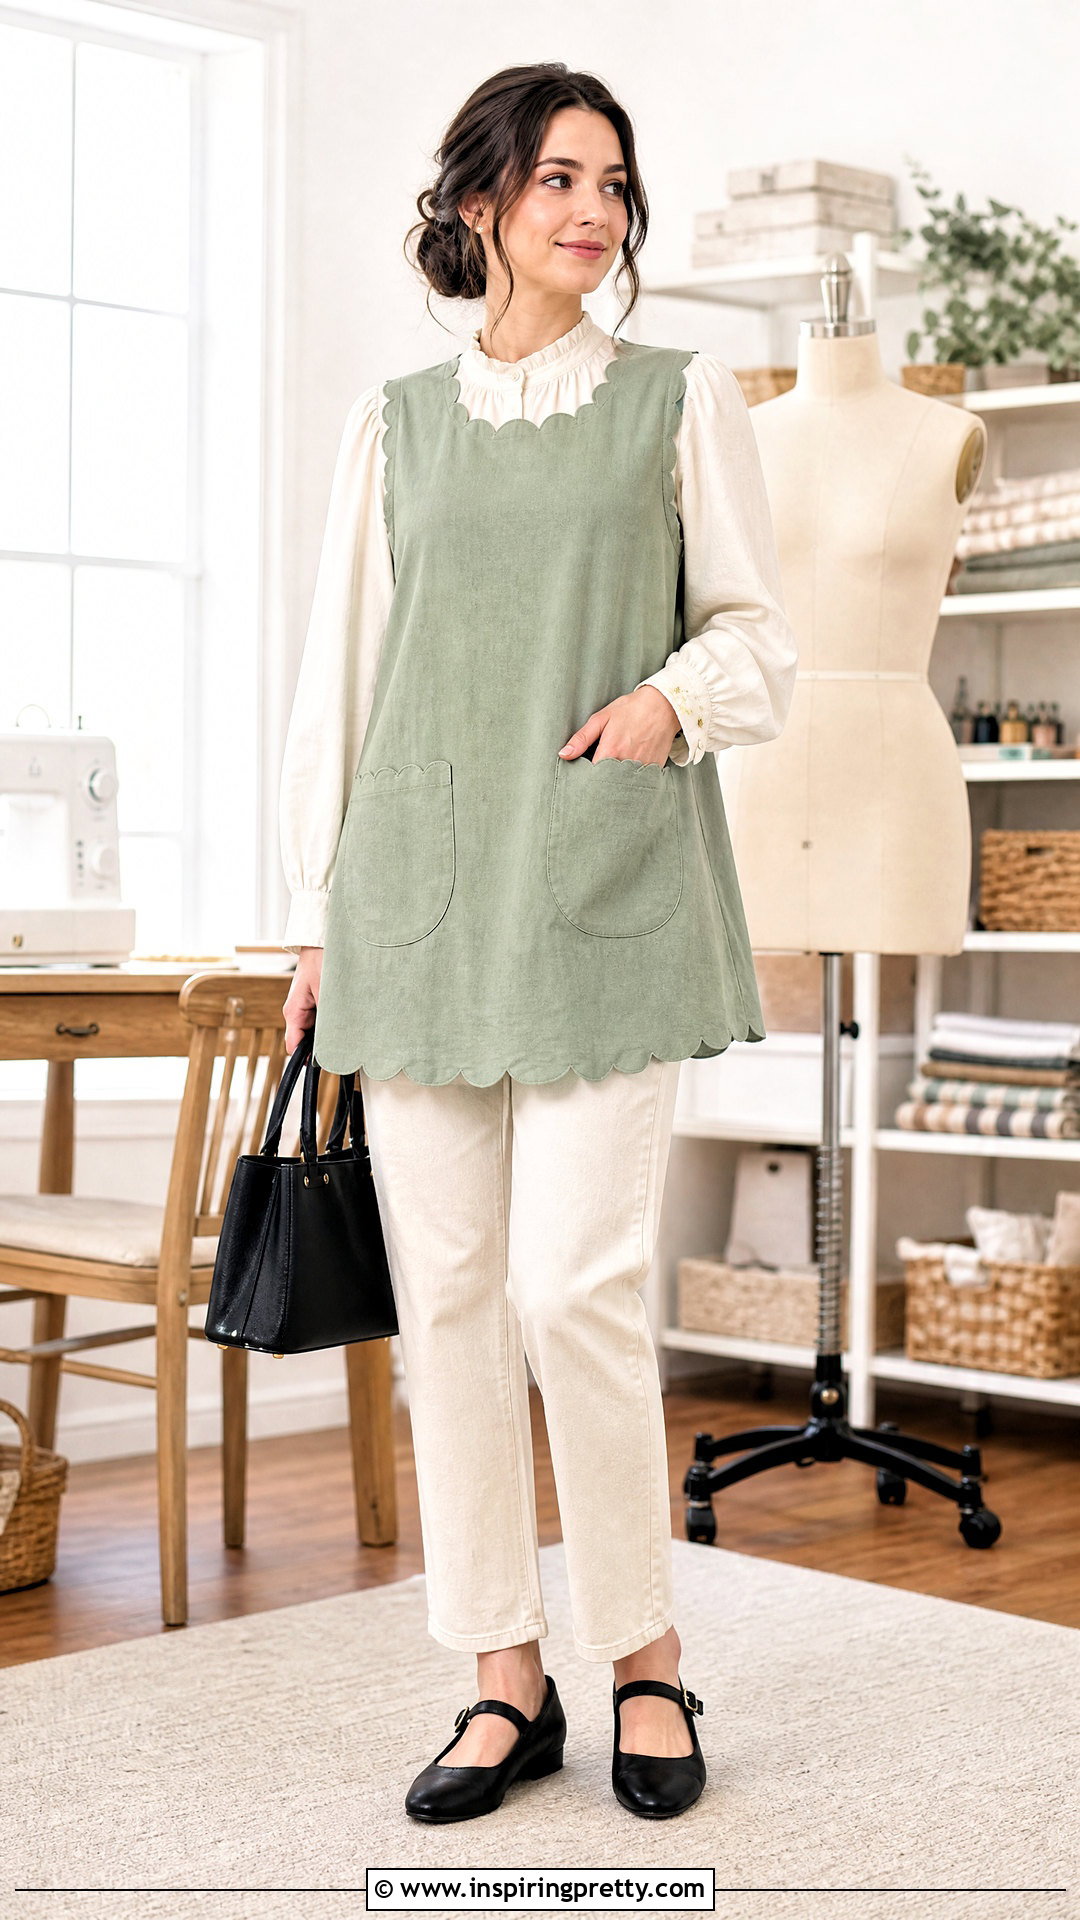
A scalloped edge adds detail to an apron top while preserving its practical shape. Draw evenly sized semicircles along the neckline, pocket opening, or lower hem using a small round template. Cut matching outer and lining pieces, sew them with right sides together, and clip deeply between each curve without cutting through the stitches. Turn the section carefully and press each scallop over a rounded pressing tool. Understitch where possible to keep the lining hidden. Stable cotton is easier to shape than loose or slippery fabric. Pair the completed top with a plain blouse, ankle-length trousers, Mary Jane flats, and a structured mini tote. Limiting the scallops to one area creates a refined finish and keeps the sewing process manageable for confident beginners.
19. Plus-Size Apron Top
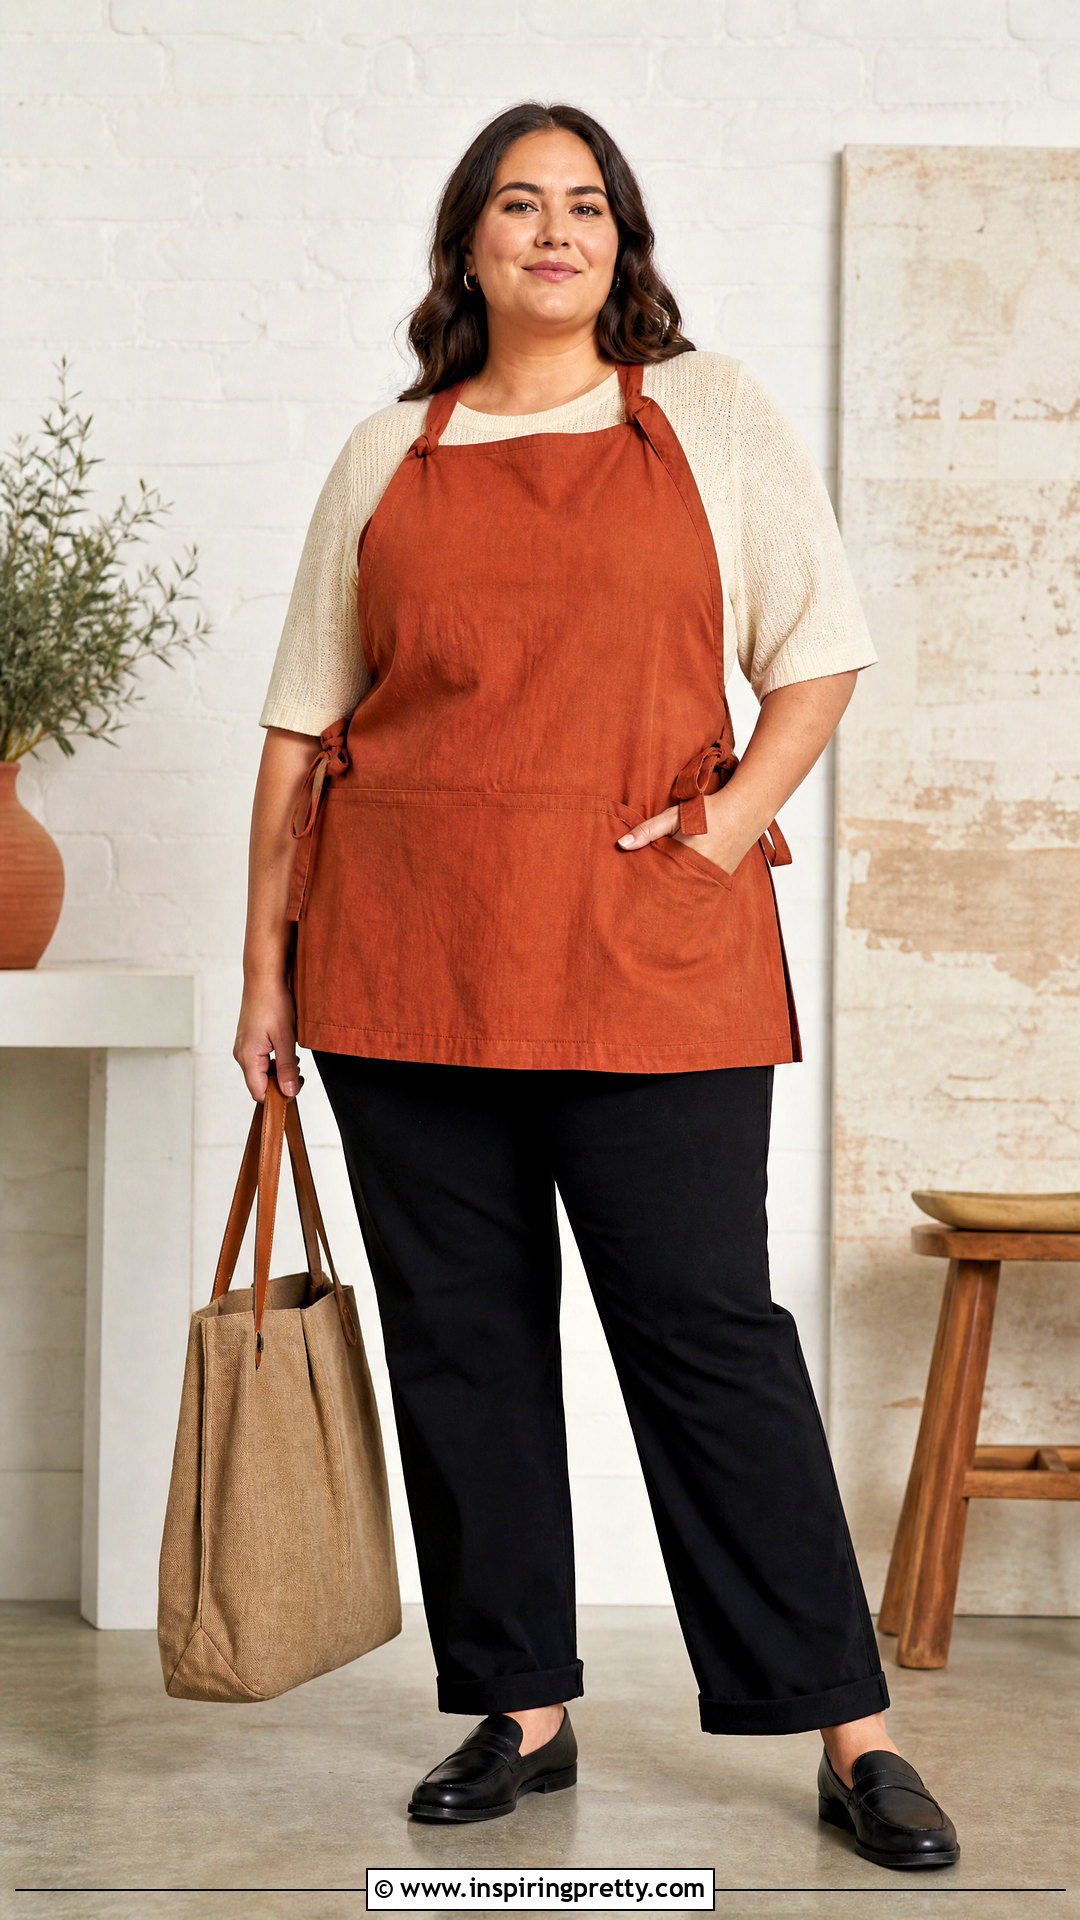
A plus-size apron top should provide comfortable coverage without pulling across the chest or waist. Begin with accurate bust, waist, hip, and desired length measurements instead of enlarging every pattern area equally. Widen the bib where coverage is needed, extend the waist ties, and adjust the strap position so it aligns naturally with the shoulders. A curved side edge can follow the body more comfortably than a sharply cut arm opening. Make a test version from inexpensive cotton before using your final fabric. Wear the finished top over a breathable knit shirt with straight-leg pants, supportive loafers, and a roomy tote. Adjustable cross-back straps and side ties allow the garment to move comfortably while preserving a neat, balanced shape from every angle.
20. Girls Apron Top
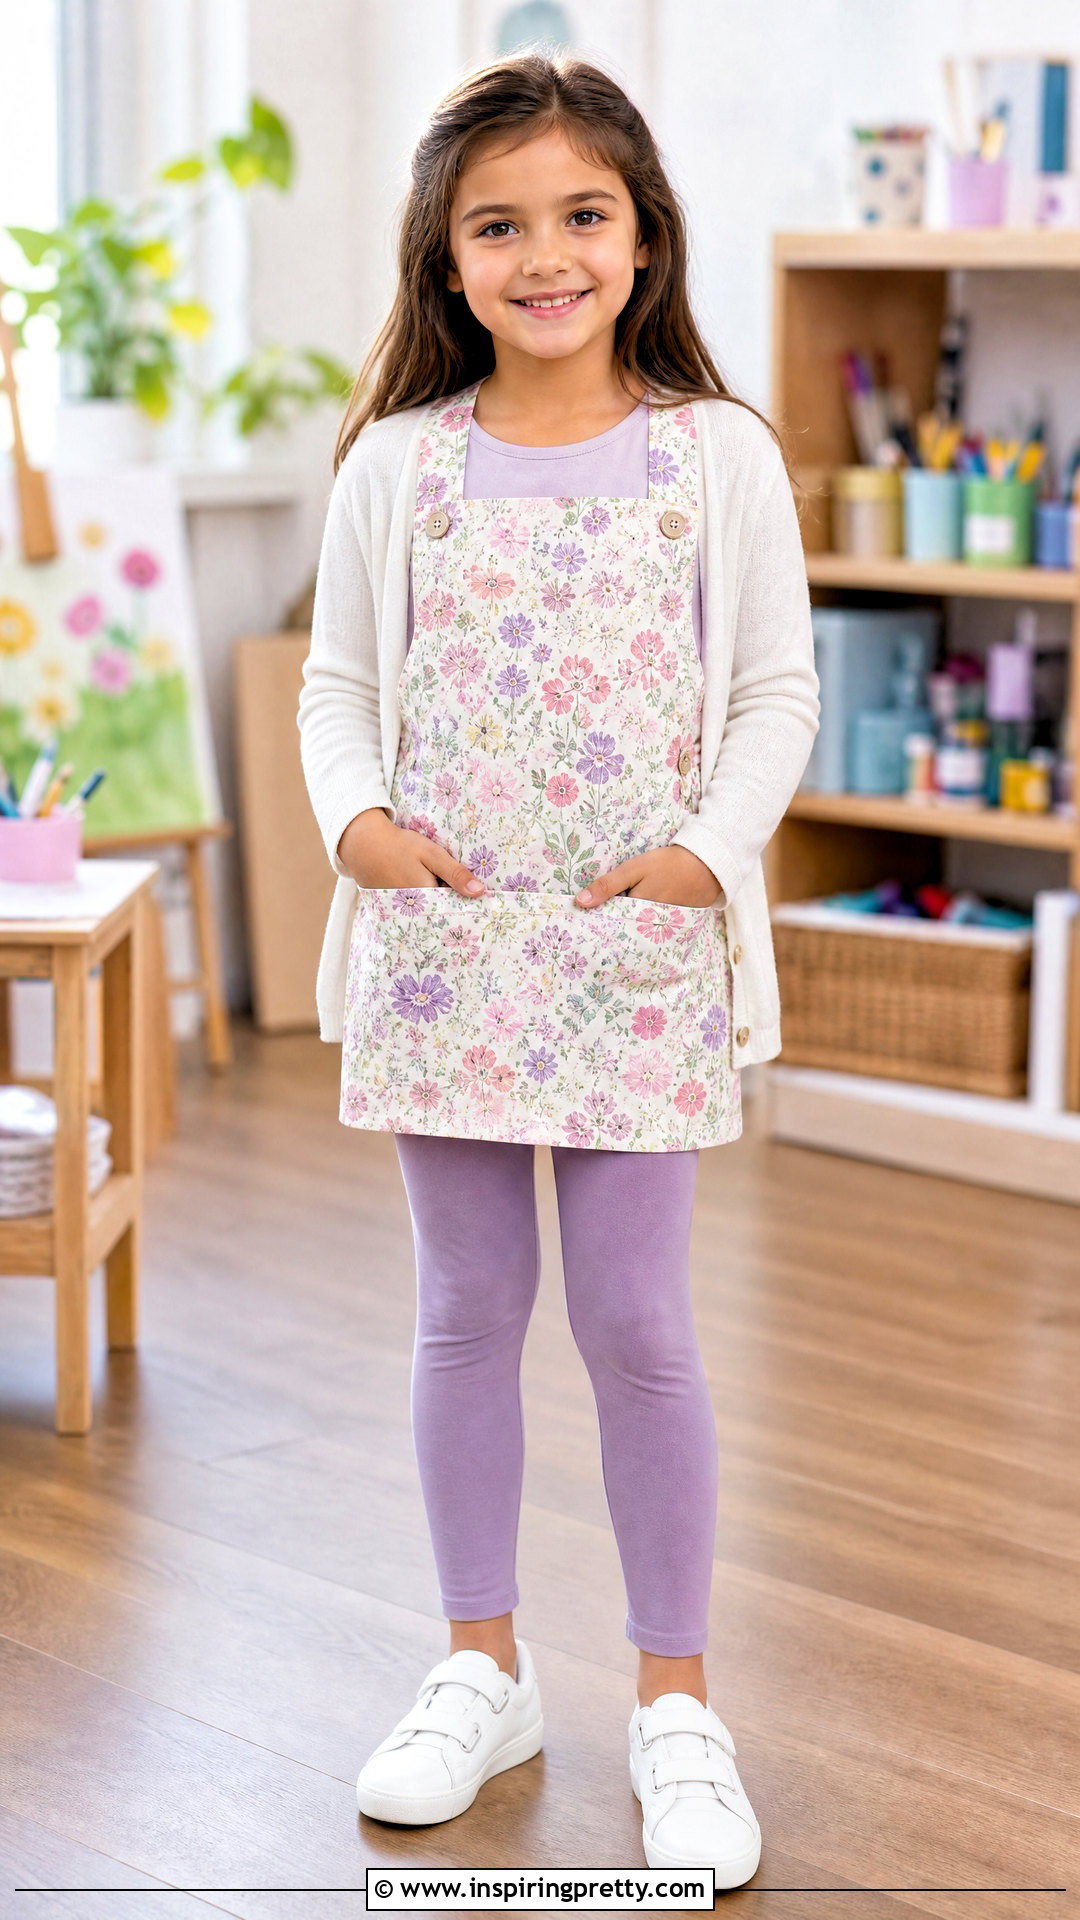
A girls apron top can function as a comfortable play layer over everyday clothes. Choose soft cotton and avoid heavy trims that could make the garment awkward to wear. Draft a simple front panel based on the child’s chest width and desired length, adding room for movement. Use wide cross-back straps with buttons at the waist so the top can be adjusted as the child grows. Fully enclose raw seams or cover them with bias binding for a smooth interior. A front pocket is useful for small art supplies or collected treasures. Complete the outfit with a short-sleeve tee, leggings, secure sneakers, and a lightweight cardigan when needed. Check that straps, ties, and buttons are firmly attached before regular wear.
Conclusion:
These 20 apron top tutorials demonstrate how one adaptable shape can support many sewing techniques, fabrics, fits, and everyday outfits. Beginners can start with a square-neck, tie-back, pillowcase, or one-yard project. More experienced sewists can explore smocking, reversible construction, scalloped edges, patchwork, and wrap fronts. Whatever design you choose, prewash the fabric, confirm your measurements, press each seam, and try on the garment before permanently attaching straps or closures. Thoughtful fabric selection will also determine whether the finished top looks softly draped or sharply structured. Most importantly, customize the length, pockets, coverage, and fastening method so your apron top is comfortable, practical, and genuinely enjoyable to wear.
Related posts:



Leave a Reply