
Learning how to make a knot top gives basic shirts a fresh shape without requiring a completely new wardrobe. A well-placed knot can shorten an oversized tee, define the waist, manage extra fabric, or add dimension to a simple outfit. The best method depends on the shirt’s length, weight, and stretch. Lightweight cotton tees are easy to twist, while crisp button-downs work better with loose knots made from their shirttails. You can also use a soft hair elastic, scarf ring, or belt loop when there is not enough fabric for a traditional knot. Avoid pulling delicate material too tightly, and always adjust the finished top for comfortable movement. Below are 20 wearable approaches that explain exactly how to make a knot top.
1. Front Knot T-Shirt With High-Waisted Jeans
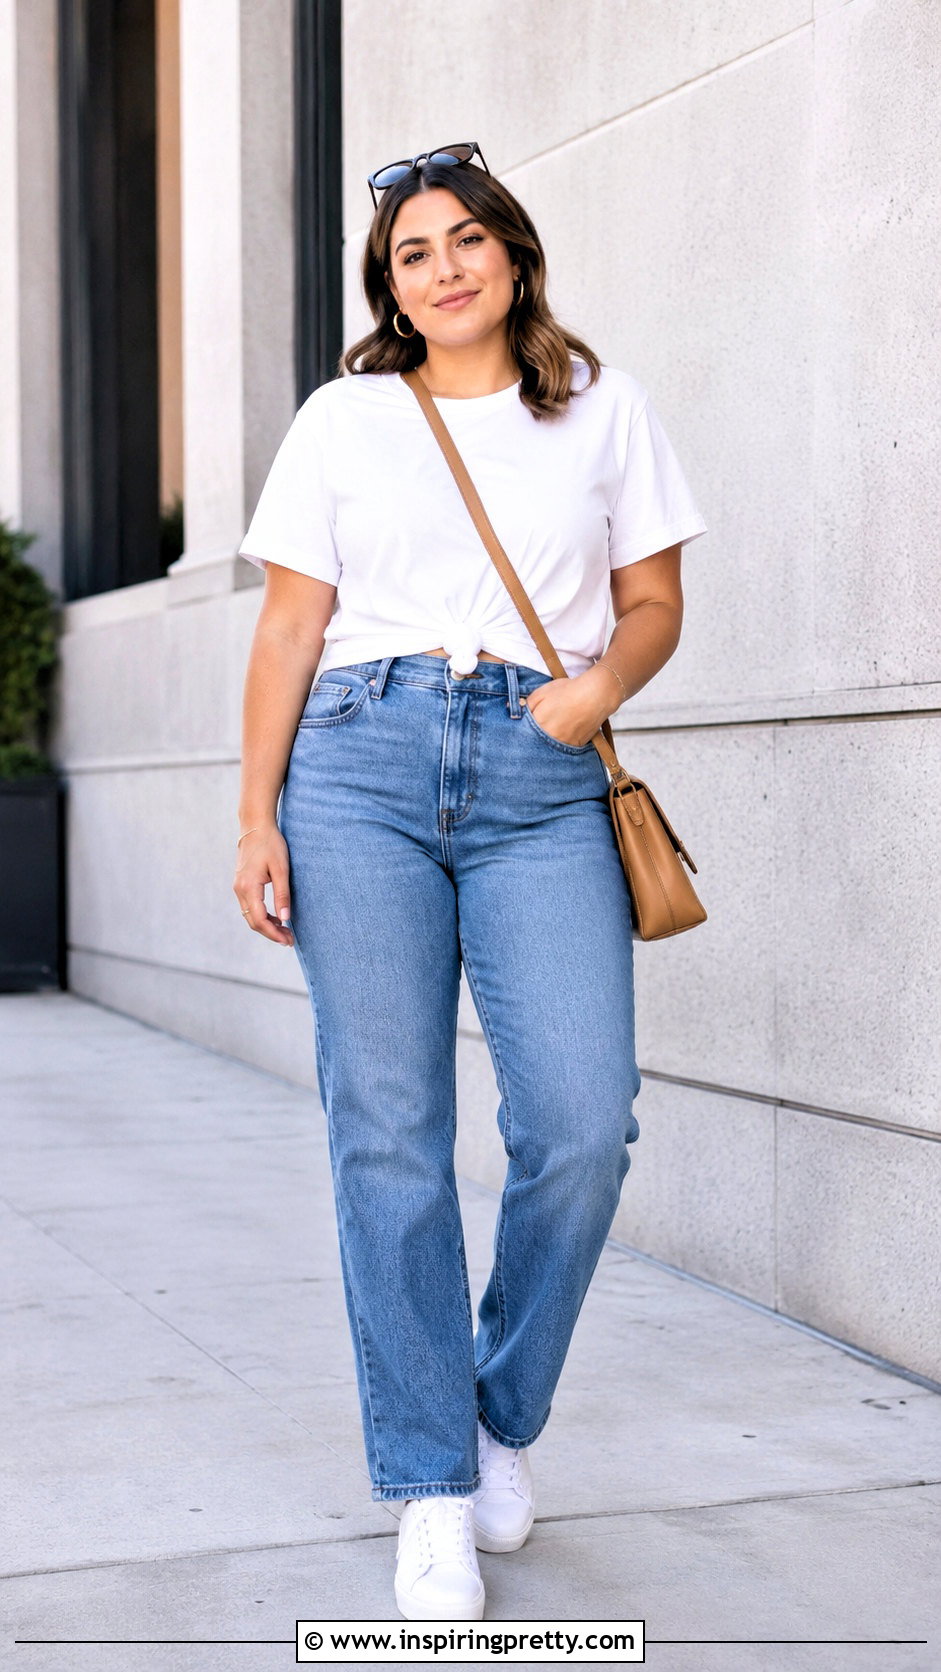
The classic front knot is a practical starting point for an oversized T-shirt. Put on the tee with high-waisted straight-leg jeans, then gather a small section of fabric at the center front. Twist the gathered material into a firm rope. Coil it around its base to form a compact bun, and tuck the loose end through the center. Keep the knot near the waistband for balanced coverage, or move it slightly higher for a cropped result. Smooth the shirt around both sides so the fabric falls evenly. Finish the outfit with white sneakers, a crossbody bag, and small hoop earrings. Twisting the material before securing it gives you greater control over the shape of the knot. ()
2. Side Knot T-Shirt With Denim Shorts
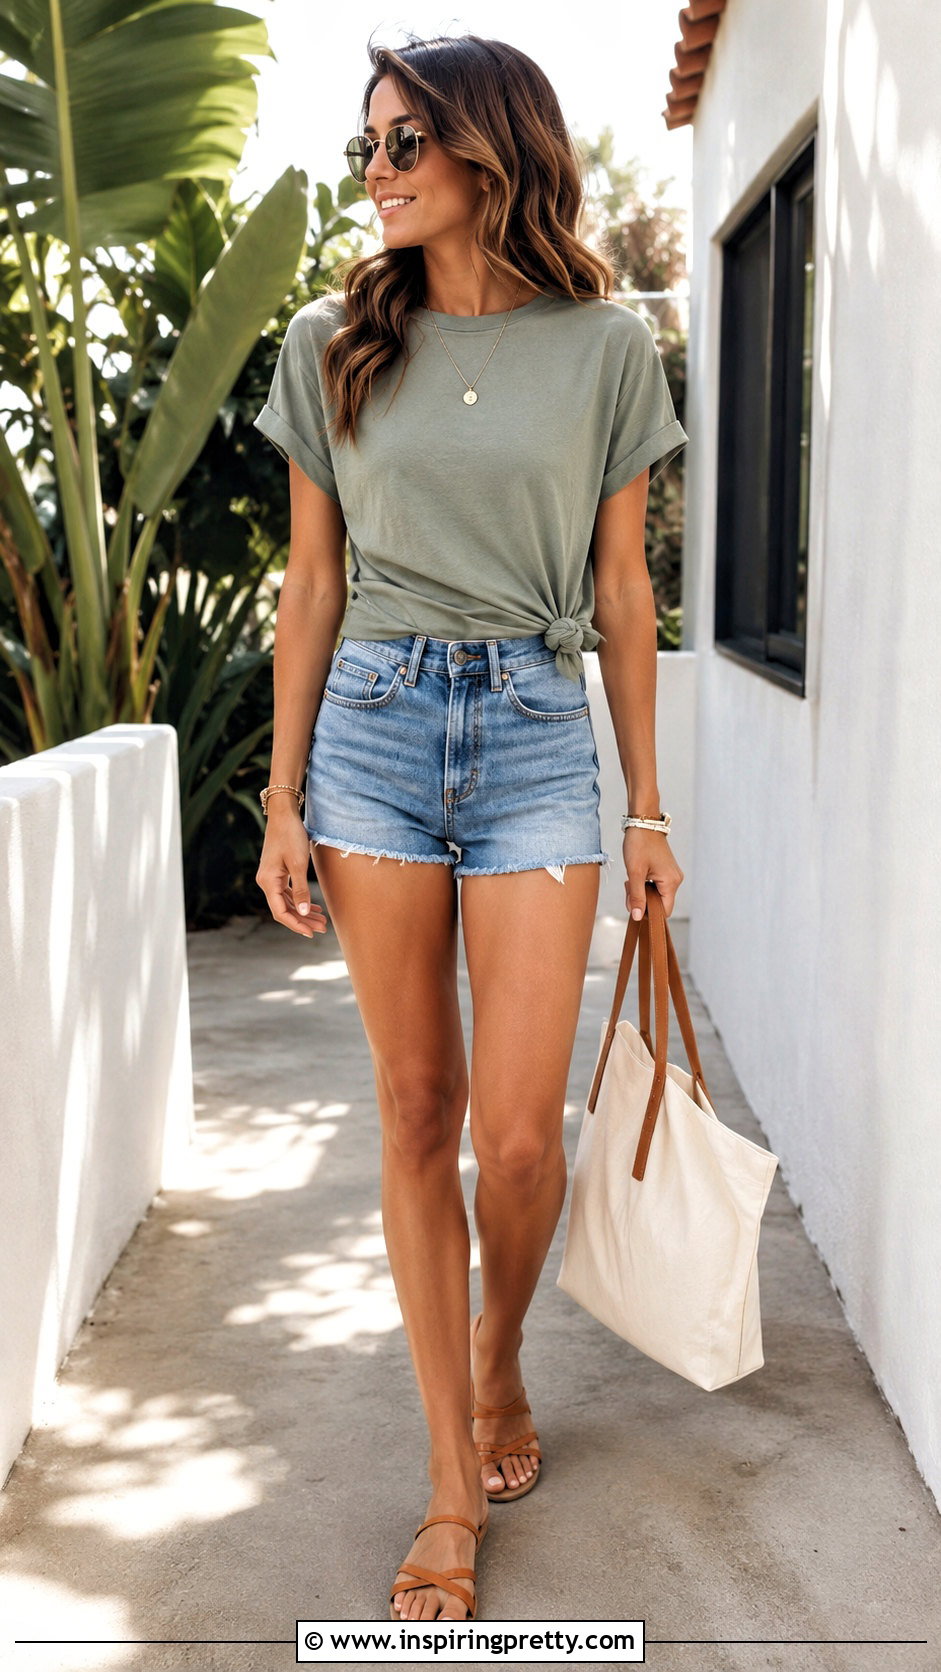
A side knot creates an asymmetrical shape that looks natural with casual summer pieces. Wear a relaxed tee over high-rise denim shorts and pull the extra material toward one hip. Gather a section that is large enough to hold but not so large that the shirt becomes tight across your chest. Twist the fabric into a narrow rope, wrap it around two fingers, and pull the tail through the opening. Position the finished knot just above the shorts’ waistband. You can leave the small tail visible or tuck it underneath for a cleaner appearance. Add flat sandals, a canvas tote, and sunglasses. If the tee has a graphic, place the knot on the side that interferes least with the design.
3. Back Knot T-Shirt With Leggings
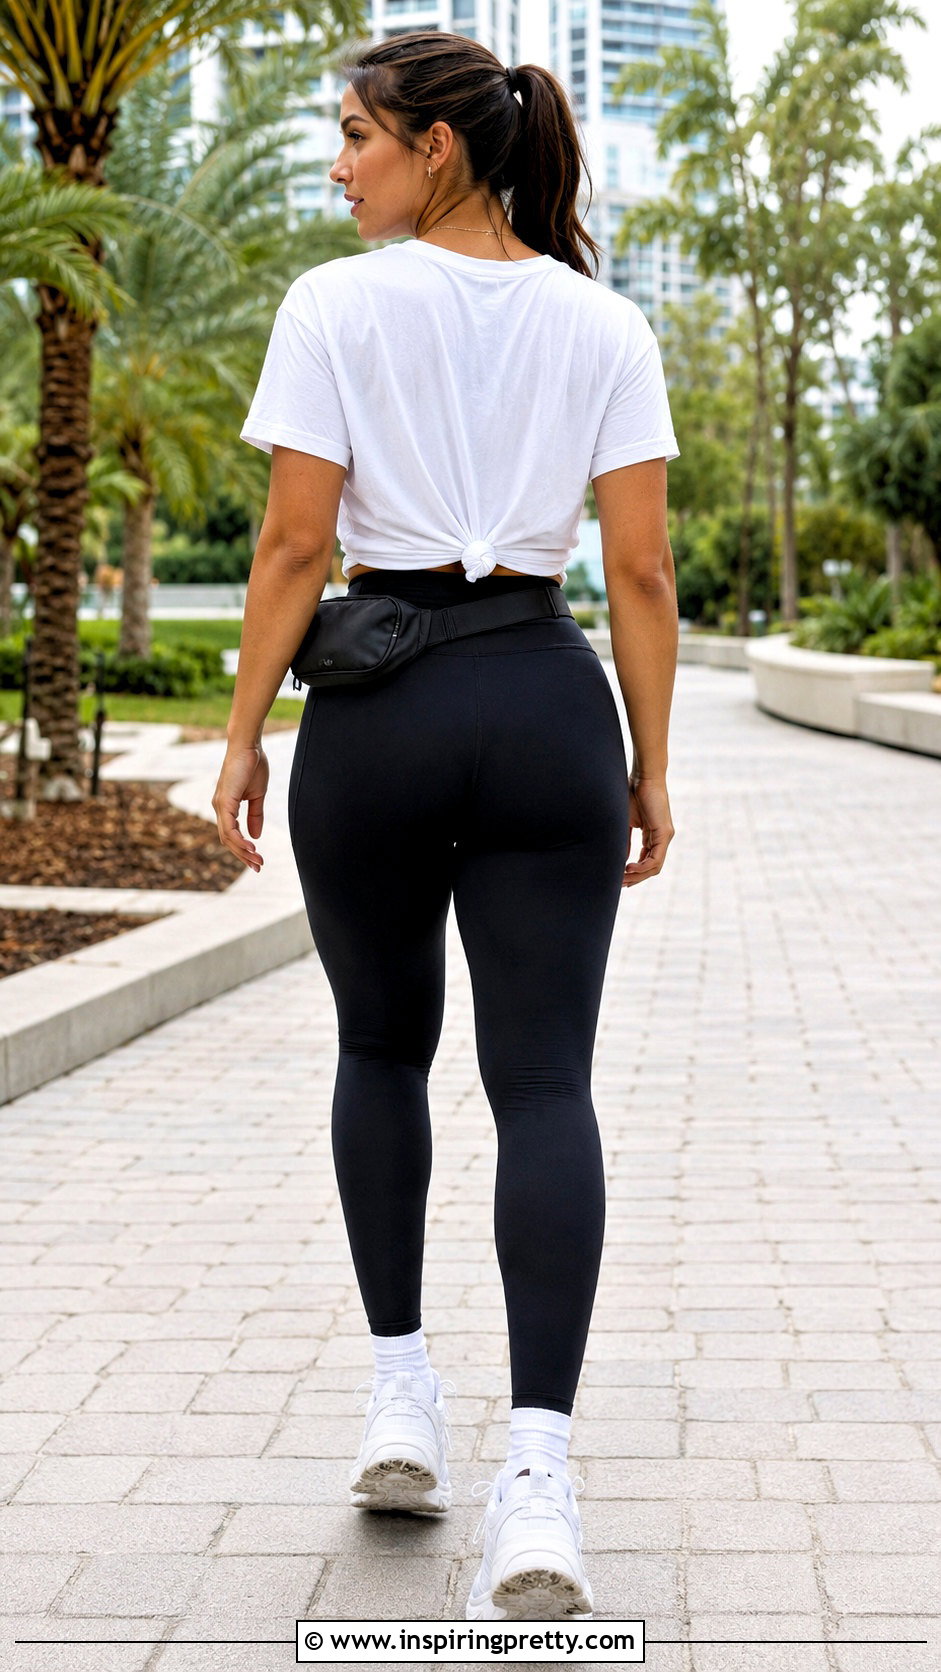
When you want a smooth front, move the knot to the back of the shirt. Pair a roomy T-shirt with high-waisted leggings and supportive sneakers. Reach behind you and gather the excess material at the center of your lower back. Twist it into a spiral, coil the spiral into a small bun, and push the end through the middle. Use a mirror to check that the knot sits centrally and does not pull the side seams backward. Fold the front hem slightly under if you want a more even cropped line. This method works particularly well when the front of the tee features a large print you want to keep visible. Back knots are commonly made by gathering, twisting, wrapping, and securing the excess fabric. ()
4. Hidden Rubber Band Knot Top With Trousers
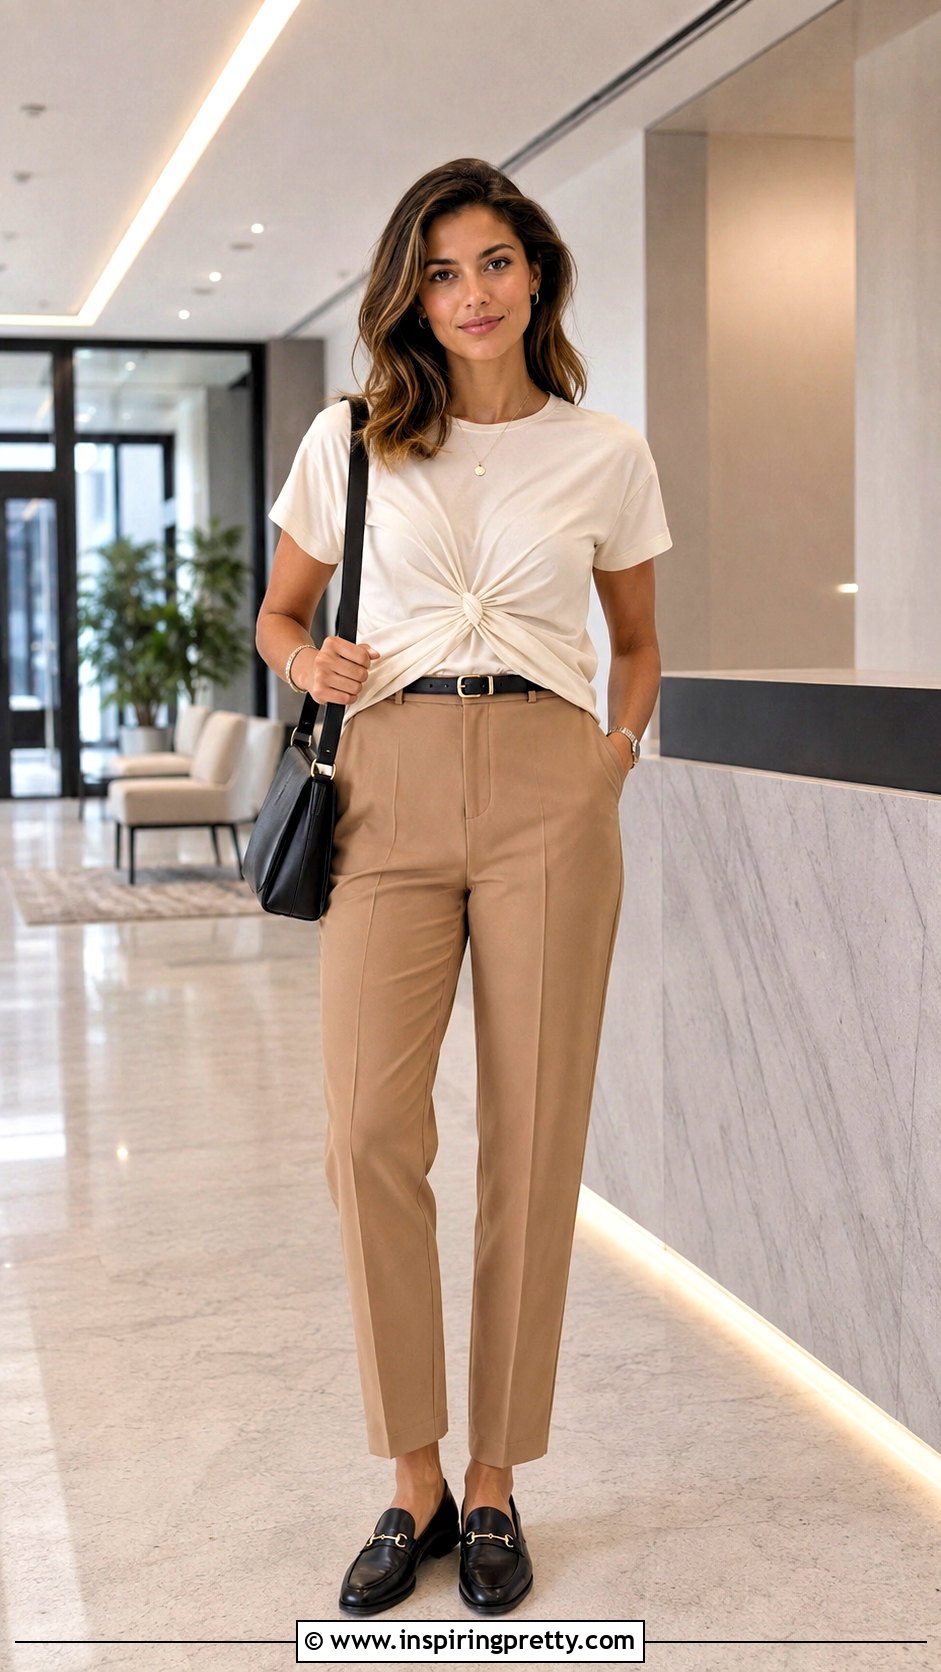
Not every shirt has enough length for a secure hand-tied knot. For a polished alternative, wear a soft tee with high-waisted tailored trousers. Pinch a small section of fabric at the inside front of the shirt. Wrap a snag-free hair elastic around the gathered material two or three times, creating a short fabric tail. Push that tail upward and tuck it beneath the shirt. From the outside, the fabric will have a smooth ruched effect rather than a bulky knot. Adjust the folds until they appear balanced across the waist. Complete the outfit with loafers, a structured shoulder bag, and simple jewelry. Rubber bands or hair elastics are useful for securing shorter or heavier shirts when a regular knot will not hold. ()
5. Two Side Knot T-Shirt With Cargo Pants
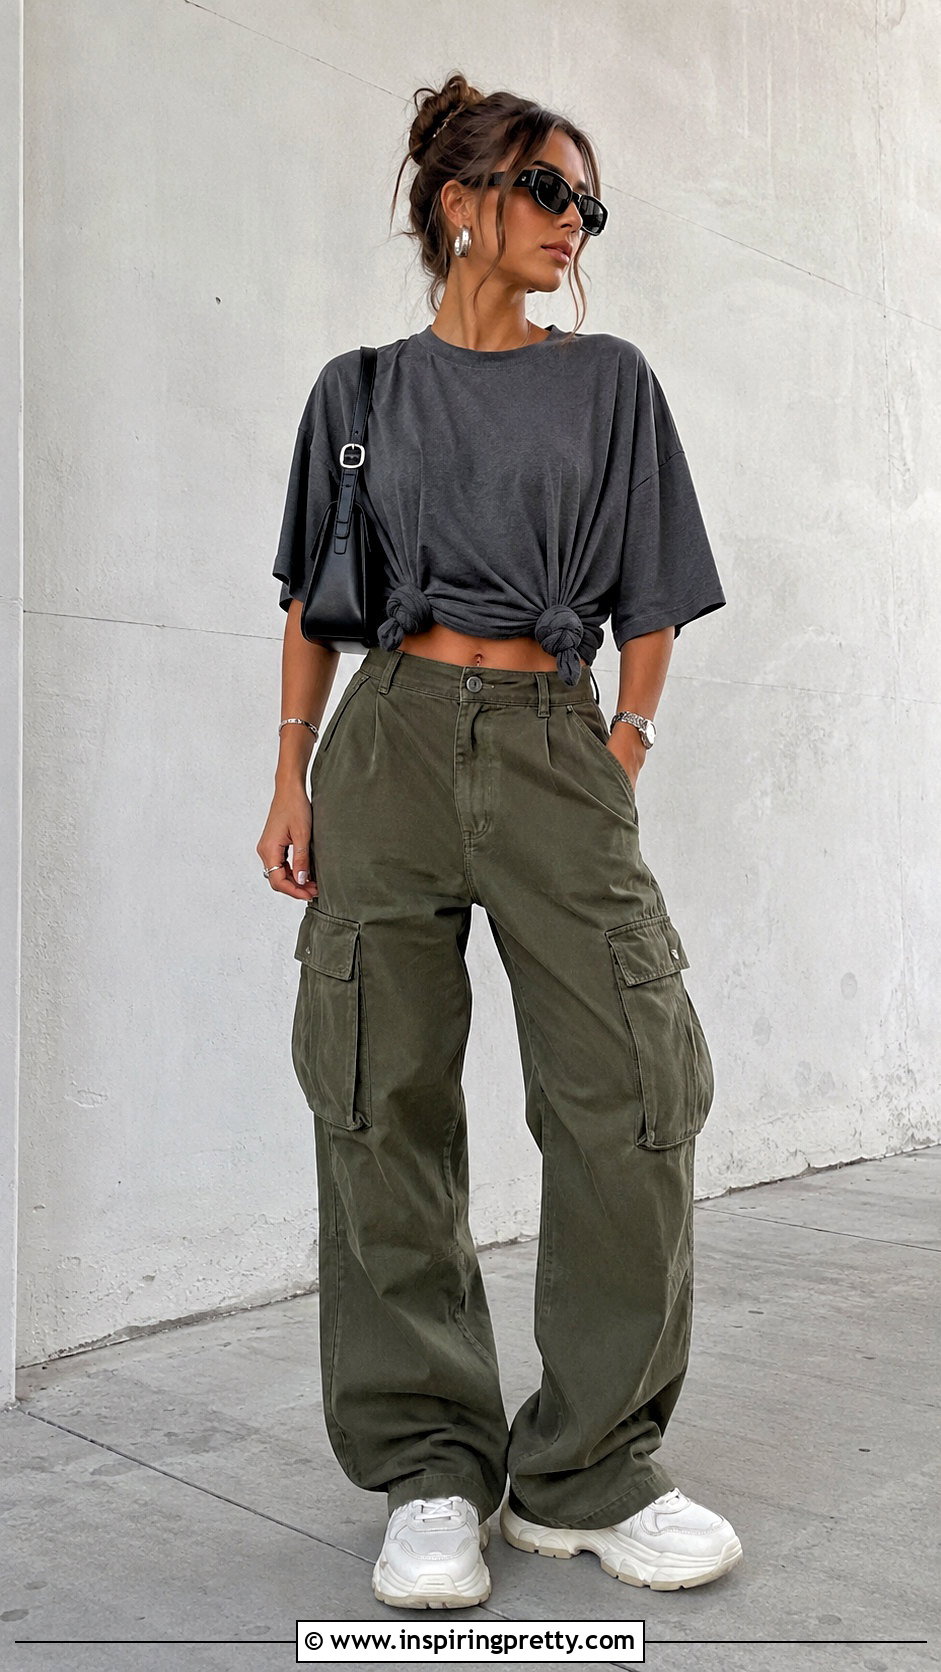
Two small side knots can turn a long, boxy tee into a more fitted cropped top. Start with an oversized T-shirt and high-rise cargo pants. Divide the extra hem fabric evenly between your left and right sides. Twist each section into a short rope, coil it around itself, and tuck the end through the center. Check that both knots sit at approximately the same height. If the shirt is thick, secure each section with a small elastic and hide the tails underneath instead. Let the center front and back hems fall naturally between the knots. Chunky sneakers and a compact shoulder bag complete the relaxed outfit. This method distributes the excess fabric across two points instead of creating one large, heavy knot. ()
6. Bunny Ear Knot Top With A Midi Skirt
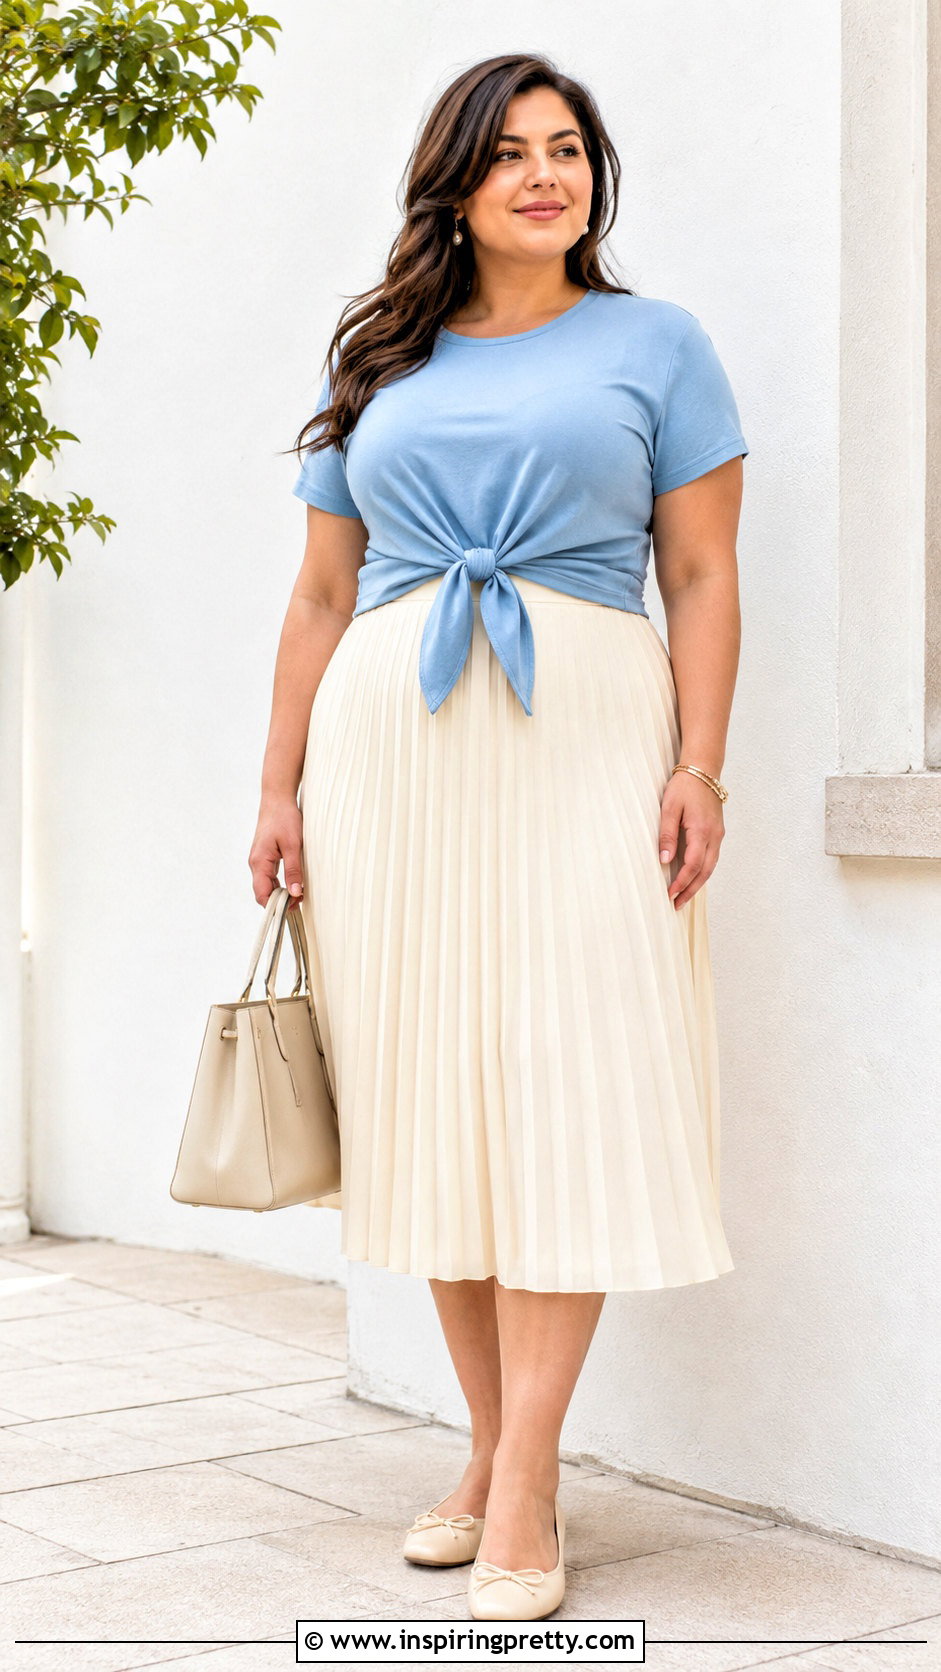
A bunny ear knot creates less bulk than a coiled bun and works well with softer shirts. Tuck a relaxed tee loosely into a high-waisted midi skirt, leaving several inches of fabric free at the front. Gather two narrow sections of the hem and hold one in each hand. Cross the right section over the left, pull it underneath, and tighten gently. Make two loops, cross them, and pull one loop through the opening as if tying a shoelace. Adjust the loops until they are small and even. Pair the outfit with ballet flats or low-profile sneakers and a simple handbag. Keep the knot loose enough to preserve the shirt’s natural drape and reduce concentrated pulling on the material. ()
7. Pretzel Knot T-Shirt With Wide-Leg Jeans
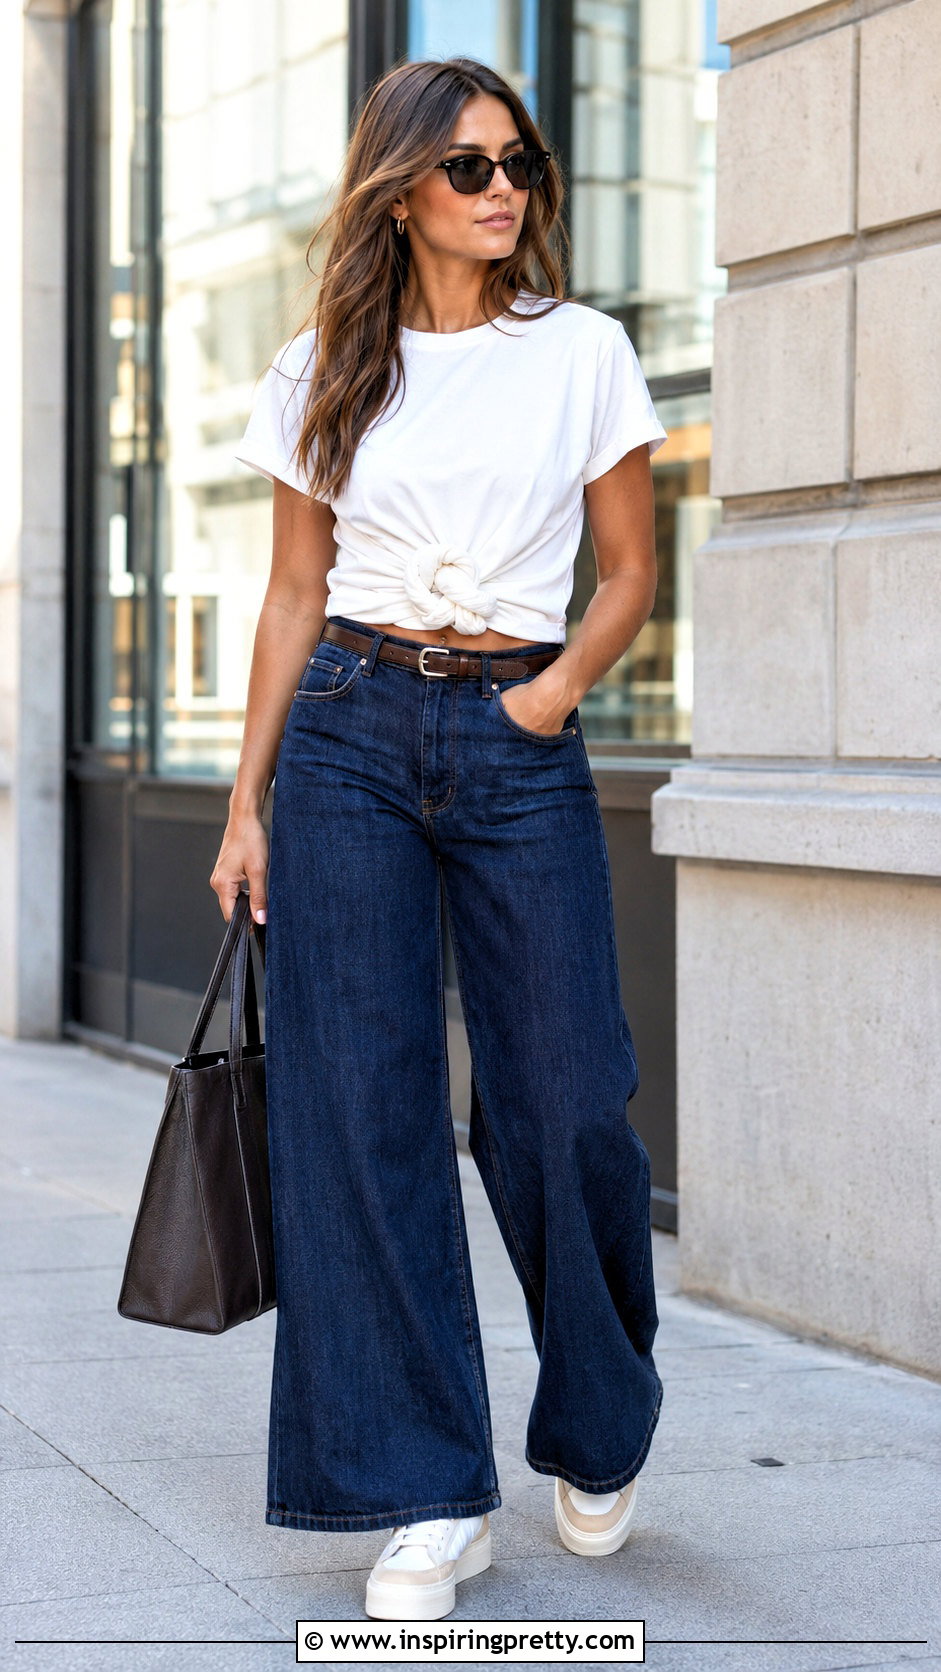
The pretzel knot produces an intertwined finish that adds interest to a plain tee. Wear a lightweight T-shirt with high-waisted wide-leg jeans. Gather two sections at the center front and cross the left section over the right. Pull one section underneath to create the first half of a basic knot. Form a small loop with one tail, wrap the other tail around its base, and push a folded portion through the new opening. Tighten gently until the shape looks compact and layered. Tuck any long ends beneath the hem. Add platform sneakers, a belt, and a structured tote to balance the wide jeans. This technique is easiest with a long, flexible tee because thicker material can make the finished knot feel unnecessarily bulky.
8. Crisscross Knot Top With A Maxi Skirt
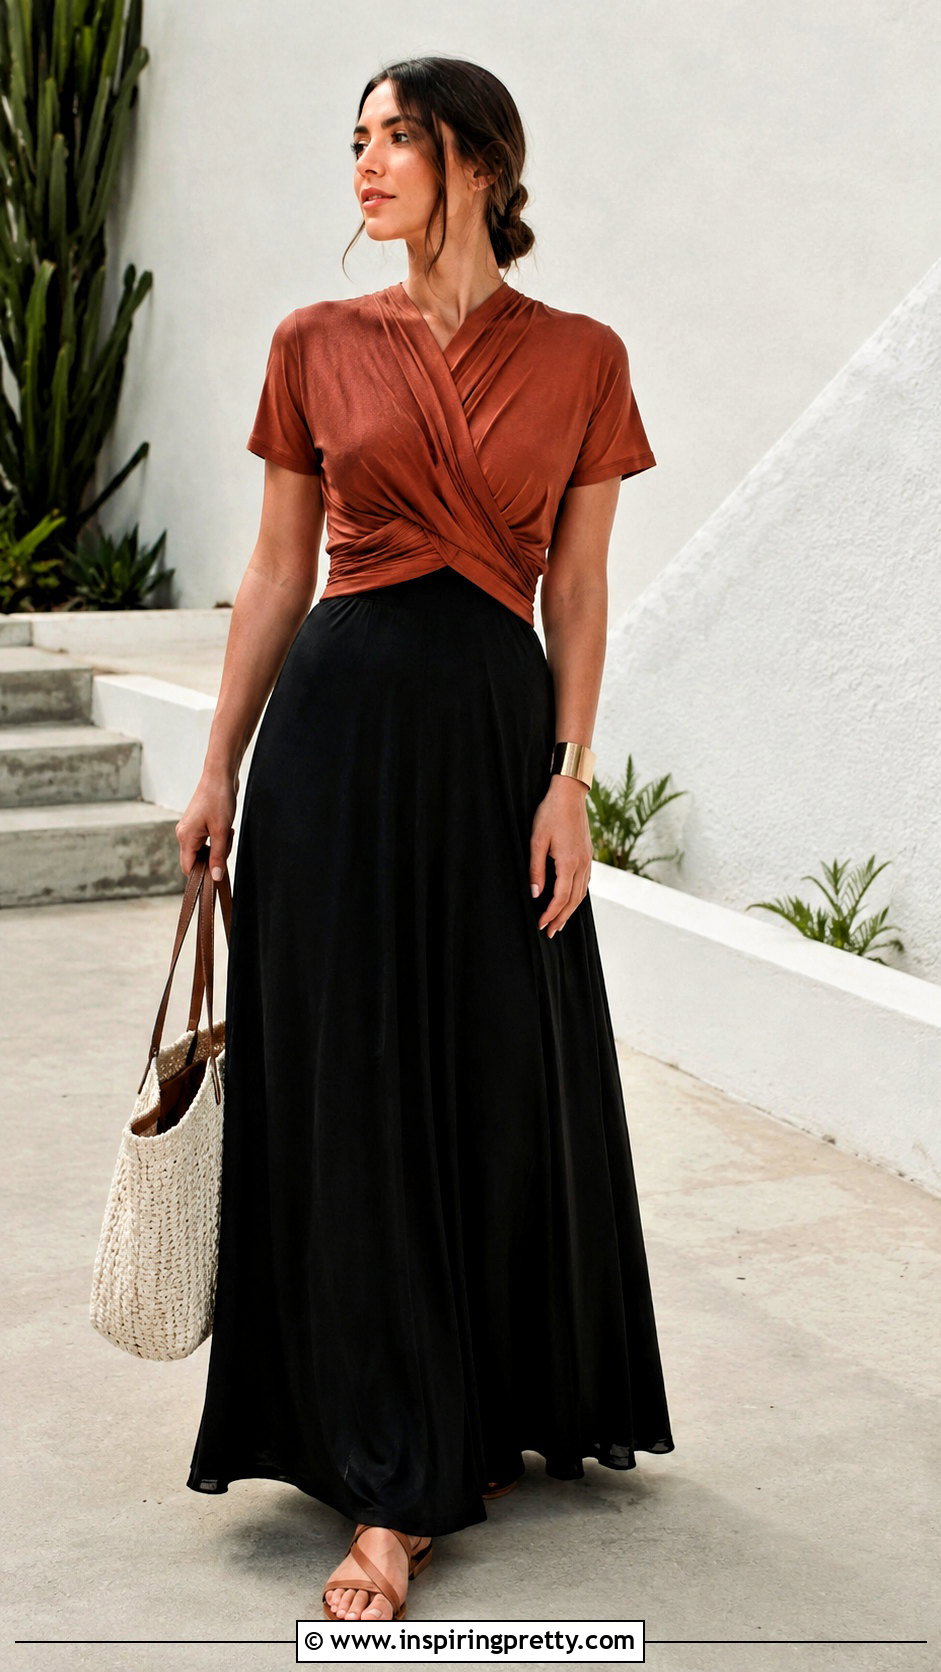
A crisscross tuck gives you the appearance of a knot without actually tying the fabric. Put on an oversized tee with a fitted or softly flowing maxi skirt. Grab the bottom-left and bottom-right edges of the shirt. Cross your arms so each hand holds the opposite side, then pull the two sections across the front of your waist. Tuck each end securely under the shirt or into the skirt’s waistband. Release the remaining fabric and arrange it over the tucked sections. The front should form a subtle overlapping shape with minimal bulk. Finish with flat sandals, a roomy tote, and a cuff bracelet. This method is particularly useful for short tees that do not provide enough material for a traditional knot. ()
9. Rosette Knot Top With Linen Shorts
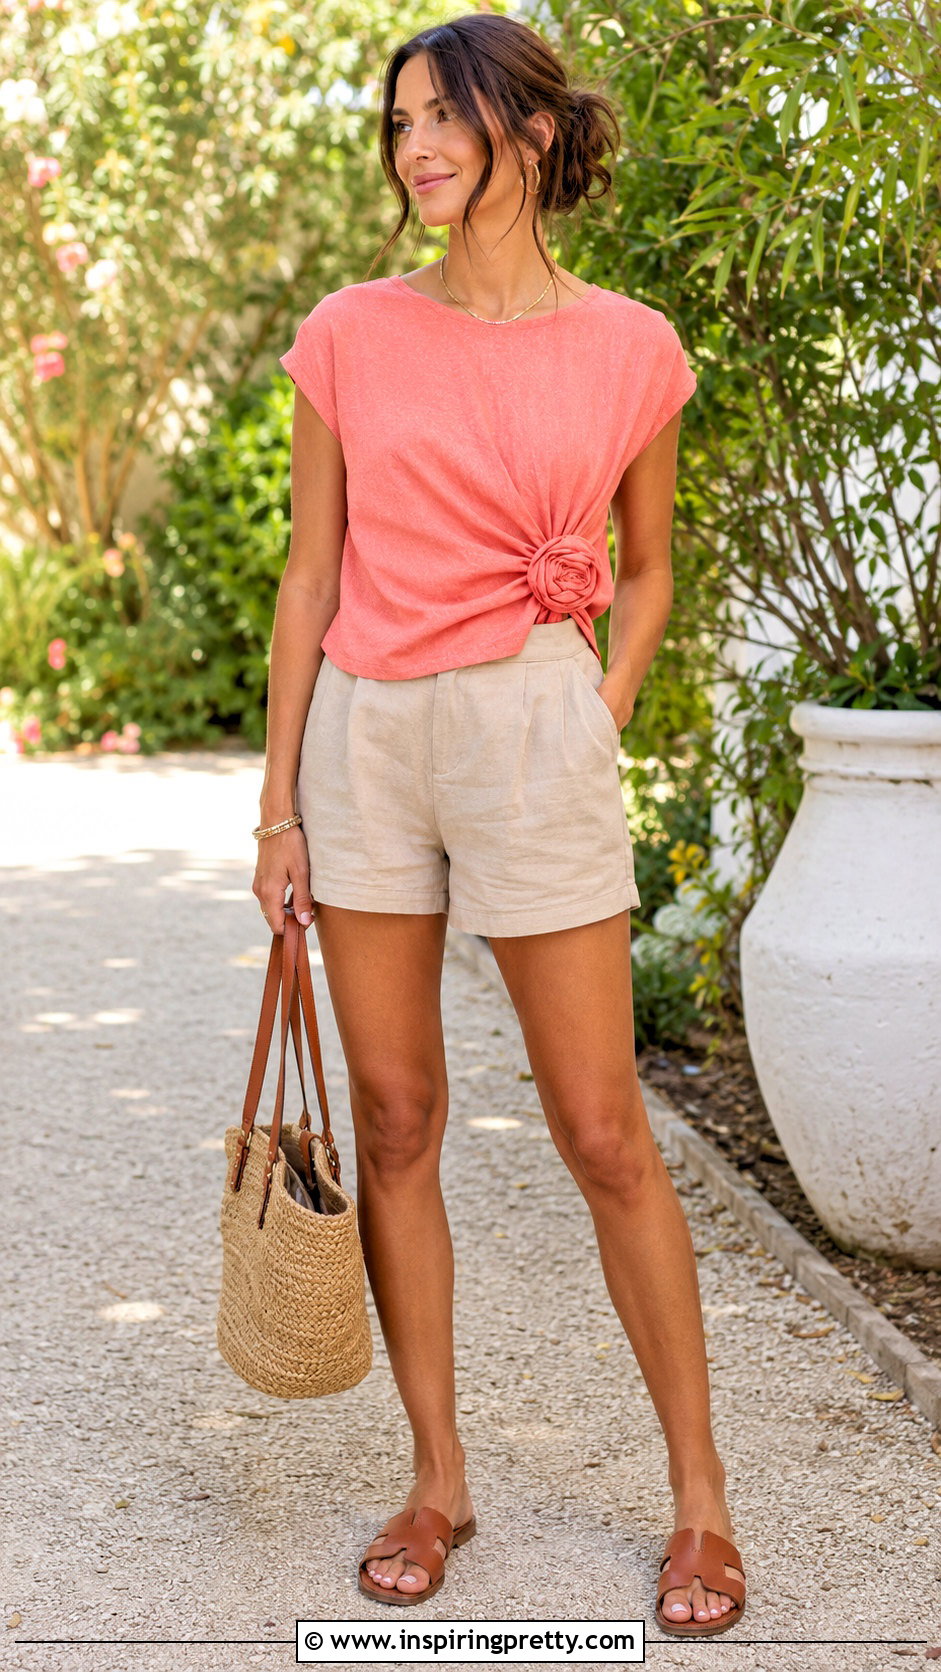
A rosette knot uses soft folds to create a flower-like detail at the waist. Combine a lightweight T-shirt with high-rise linen shorts. Pinch a generous section of fabric slightly to one side of your navel. Twist it loosely, stopping before the material becomes a tight rope. Coil the fabric into a flat circle and secure the center with a small clear elastic. Gently pull the outer folds apart to create a rounded rosette shape. Tuck the final tail underneath while keeping the layered fabric visible. Complete the outfit with leather slides, a woven handbag, and understated earrings. Avoid this method on very thick tees because the rosette may become oversized. A thin, drapey shirt produces a softer result and remains more comfortable around the waist. ()
10. Ruffled Side Knot Top With A Slip Skirt
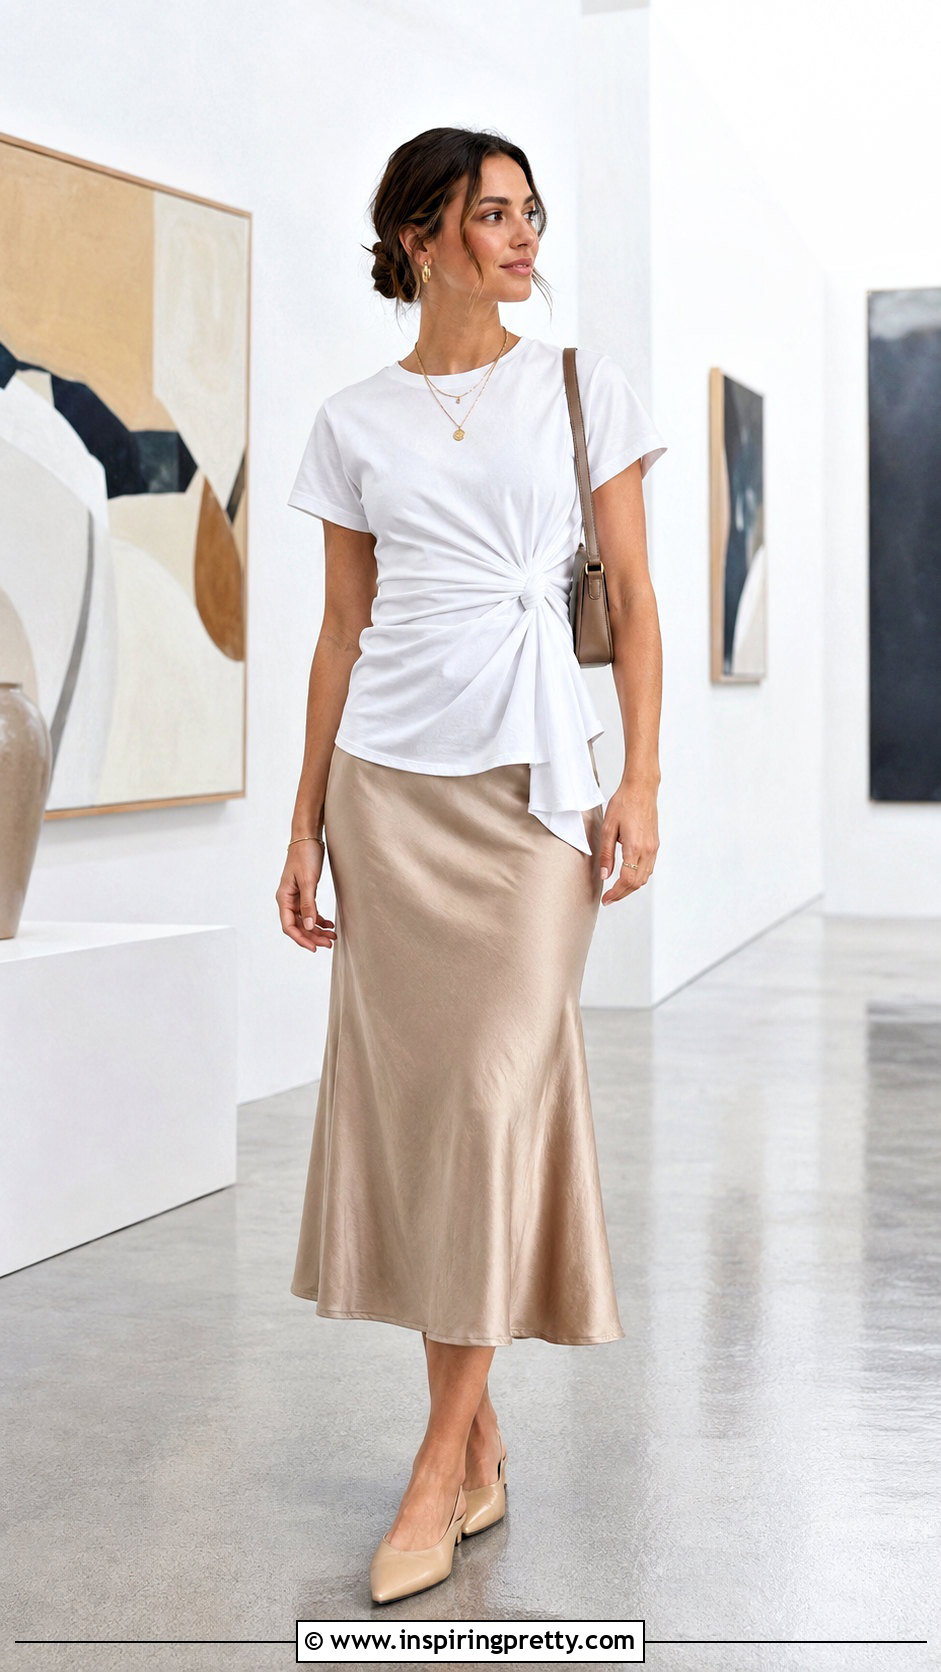
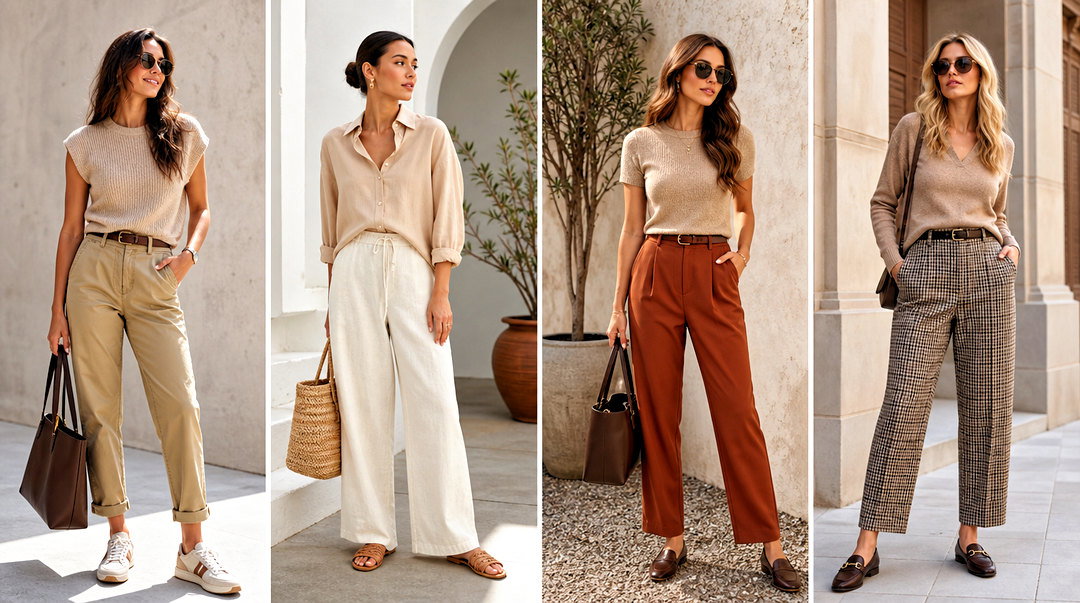
Soft ruching makes a side knot feel more refined when worn with a slip skirt. Put on a long, lightweight tee and a high-waisted satin or matte slip skirt. Gather two narrow sections along one side of the shirt rather than pulling the entire hem into your hand. Cross the sections, pass one through the opening, and tighten them slowly. The surrounding fabric should form gentle horizontal folds. Adjust each fold individually so the shirt drapes instead of bunching sharply. Tuck the knot’s ends beneath the hem if you prefer a streamlined finish. Add low heels or sleek flats, a small shoulder bag, and a lightweight jacket when needed. Keeping the knot close to the natural waist helps the tee and skirt look visually connected.
11. Low Front Knot Button-Down With Trousers
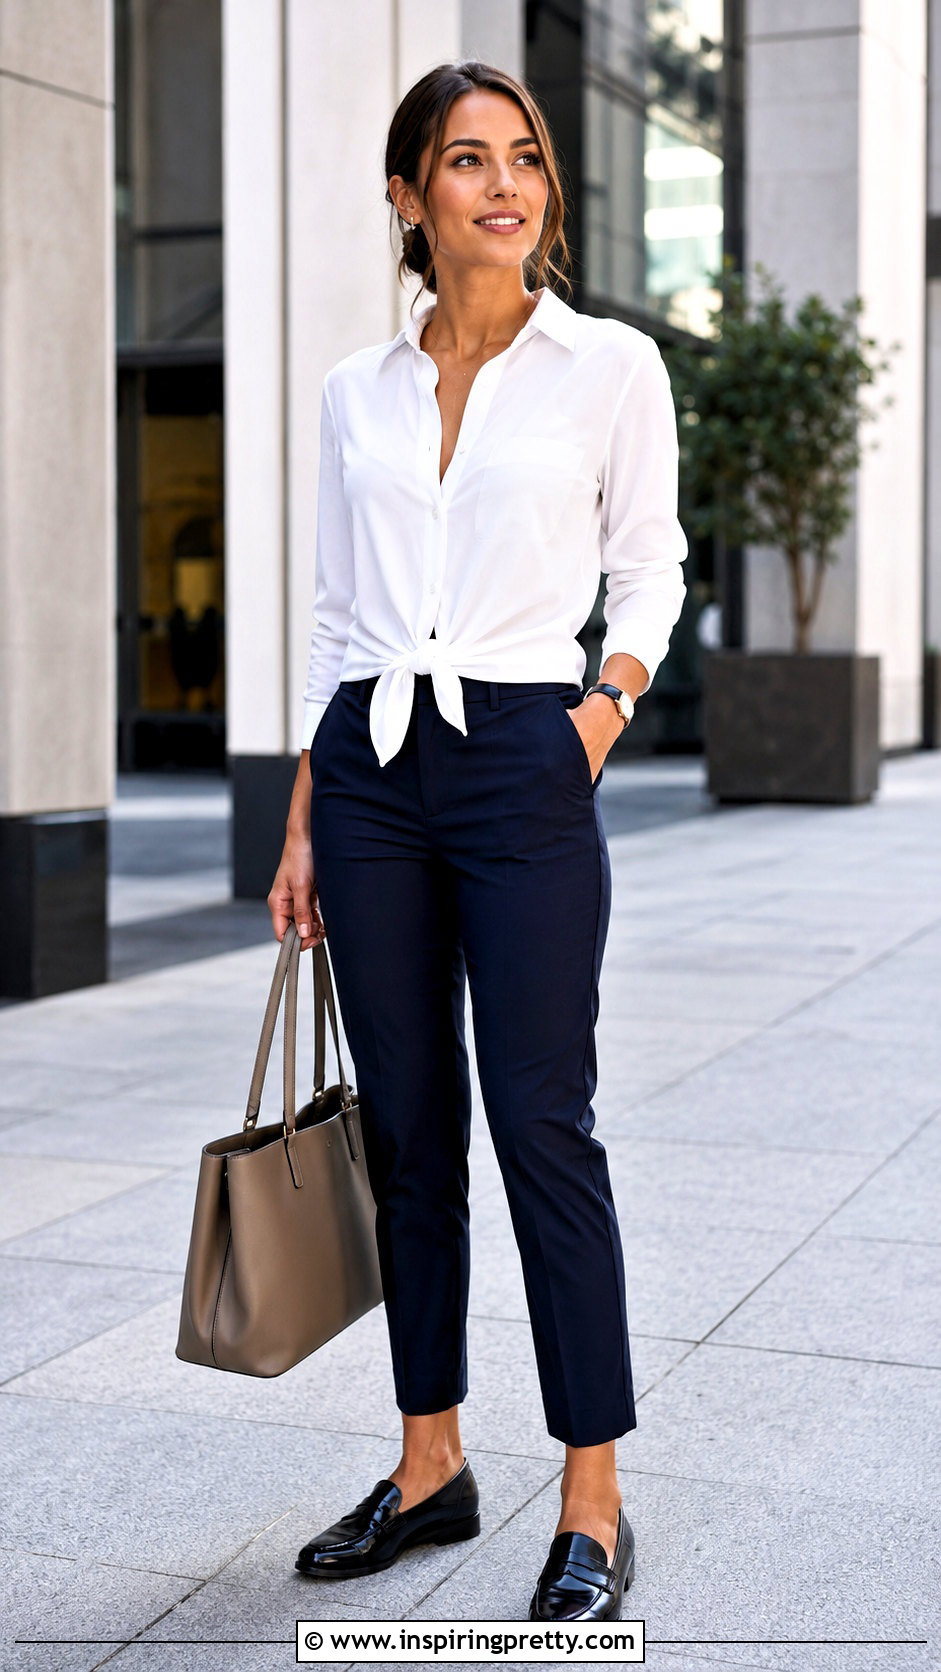
A button-down shirt provides long shirttails that are easy to knot without excessive pulling. Wear the shirt with high-waisted ankle trousers and fasten the buttons until you reach the waistband. Leave the final two or three buttons open. Take one shirttail in each hand, cross them at the lower front, and pull one tail through the opening. Tie a second loose knot if the fabric is slippery. Spread the tails slightly so the knot lies flat rather than projecting outward. You can tuck the ends beneath the shirt for a neater result. Finish with loafers, a structured tote, and a slim watch. Button-down shirts are especially adaptable because their separate front tails offer enough length for a controlled tie-front finish. ()
12. Open Knot Button-Down With A Tank And Jeans
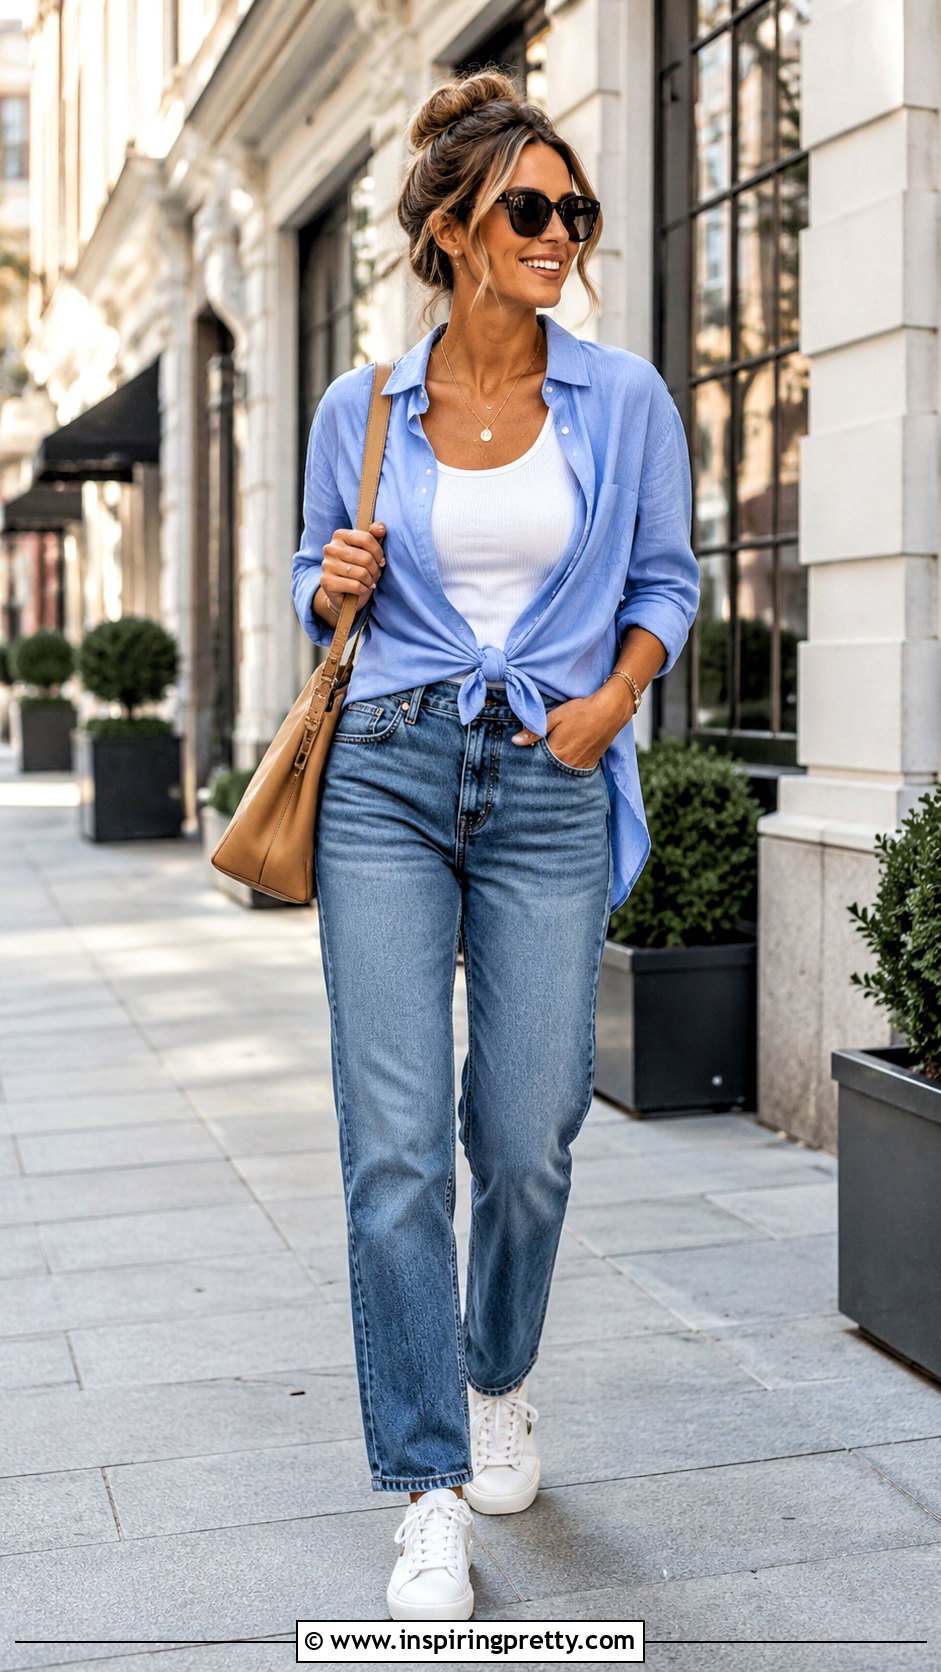
An open button-down can become a lightweight top layer when tied over a fitted tank. Start with a simple camisole or ribbed tank, straight-leg jeans, and an unbuttoned cotton shirt. Bring the two lower shirttails together at your waist. Cross one tail over the other, pass it underneath, and pull gently. Repeat once for a secure square-shaped knot, but avoid tightening it against your body. Arrange the open shirt panels so the tank remains visible and the collar sits evenly. Roll the sleeves once or twice for a casual finish. Add sneakers or flat sandals, a shoulder bag, and sunglasses. This technique is useful for creating adjustable coverage because you can raise or lower the knot without changing the fitted base layer.
13. Wrap Knot Blouse With A Pencil Skirt

A wrap knot gives a long blouse a defined, adjustable waist. Pair a lightweight blouse with a high-waisted pencil skirt and a fitted camisole underneath if the fabric shifts easily. Leave the lowest buttons open, then pull the left shirttail across your waist toward the right side. Bring the right tail across in the opposite direction. Wrap both ends around your sides and return them to the front or one hip. Cross the ends, pull one through, and secure them with a small double knot. Smooth the blouse above the wrap so it blouses slightly without becoming uneven. Complete the look with pointed flats, a structured handbag, and delicate jewelry. Make sure the wrapped fabric remains loose enough for comfortable sitting and movement.
14. Backward Knot Top With Straight-Leg Jeans
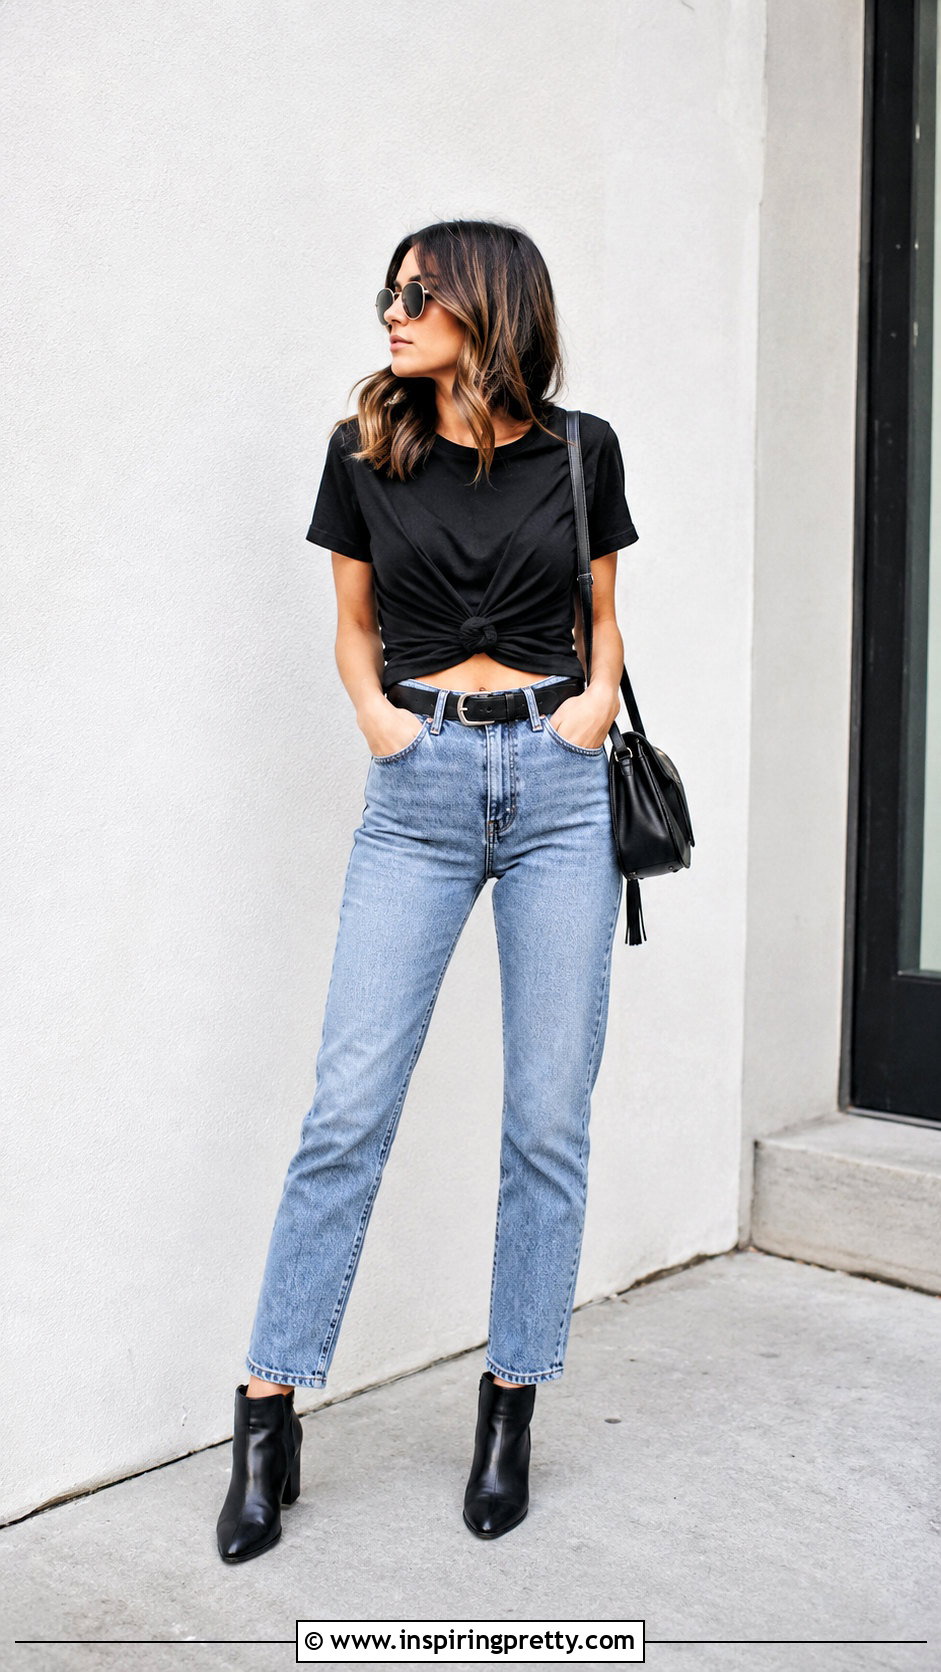
Wearing a flexible T-shirt backward creates an unexpected knot detail while keeping the new front clean. Choose a tee with a plain neckline and no stiff label. Put it on backward with high-waisted straight-leg jeans, then gather the extra fabric at what is now the front of your waist. Twist the material into a rope, coil it into a compact knot, and tuck the tail through the middle. Turn the knot slightly to one side if it feels more comfortable. Check the back neckline to ensure it does not sit too high against your throat. Add ankle boots or sneakers, a belt, and a crossbody bag. This method works best with relaxed crewneck tees that have similar front and back neck shapes. ()
15. Inside Knot T-Shirt With Biker Shorts
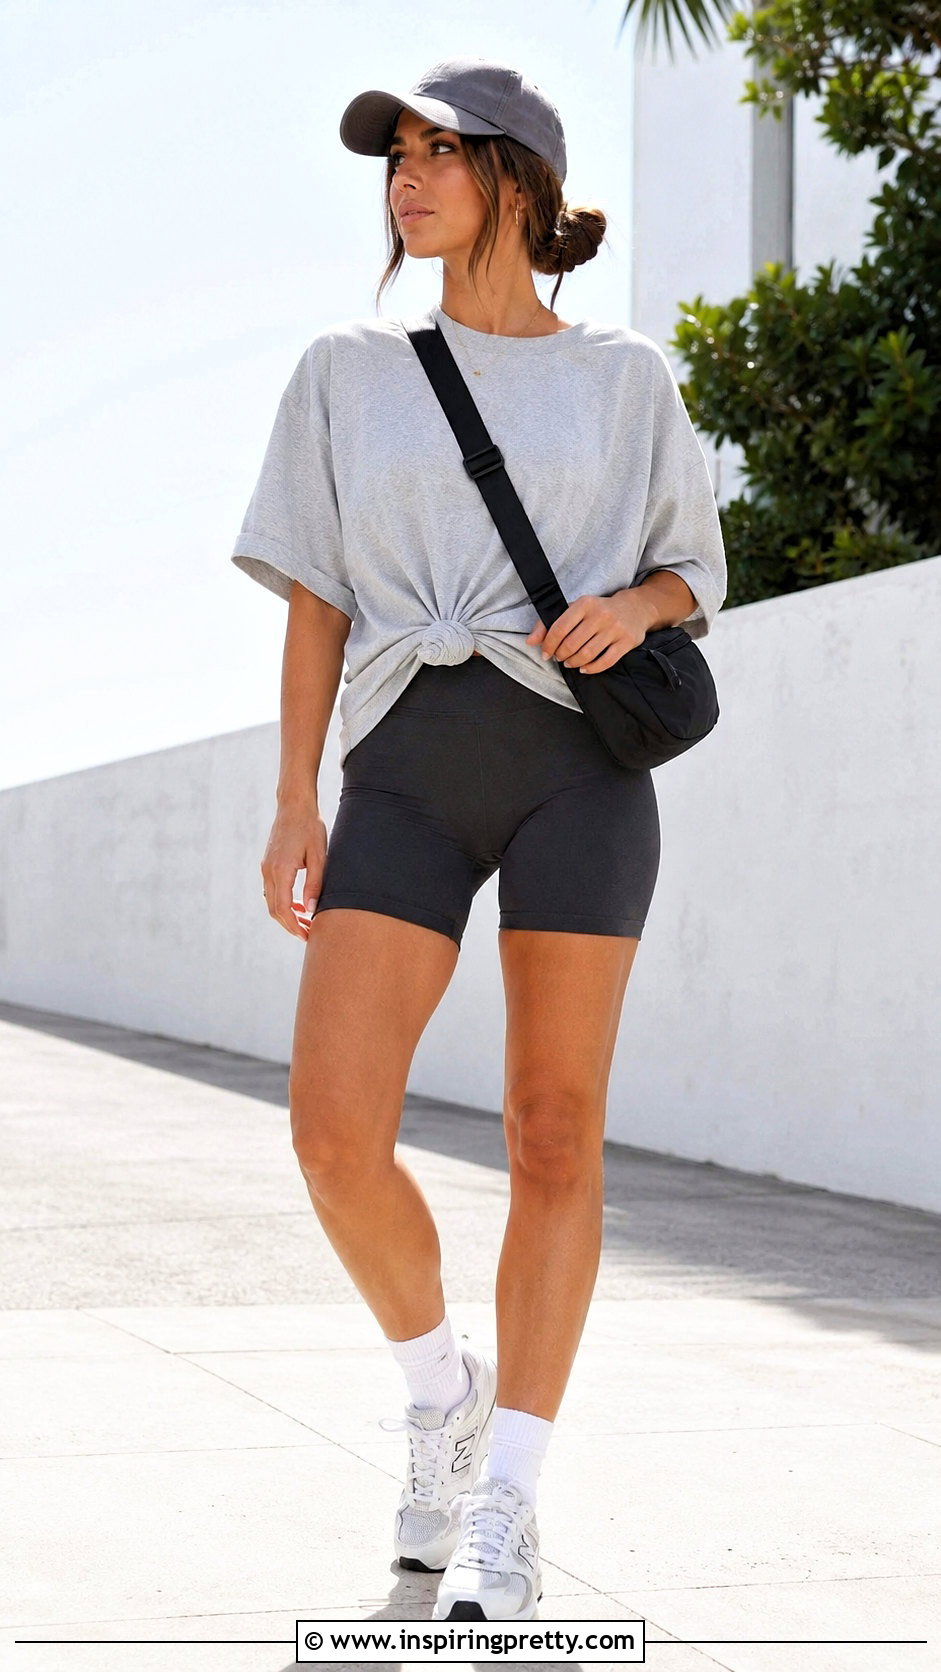
An inside knot creates gathered texture while hiding the fastening completely. Wear an oversized T-shirt over high-waisted biker shorts and turn the bottom portion of the tee upward so you can reach the inside. Pinch a section of fabric near the front or side waist. Wrap a soft elastic around it to make a small ponytail-like bundle. Turn the shirt back down, leaving the secured section inside. Adjust the surrounding fabric until the outside shows smooth, radiating folds. If the hidden bundle feels uncomfortable, move it slightly above the waistband or toward the side. Finish with crew socks, sneakers, a baseball cap, and a crossbody bag. Use a fabric-covered elastic rather than an exposed rubber band on delicate or easily marked material.
16. Scarf Ring Knot Top With Linen Pants
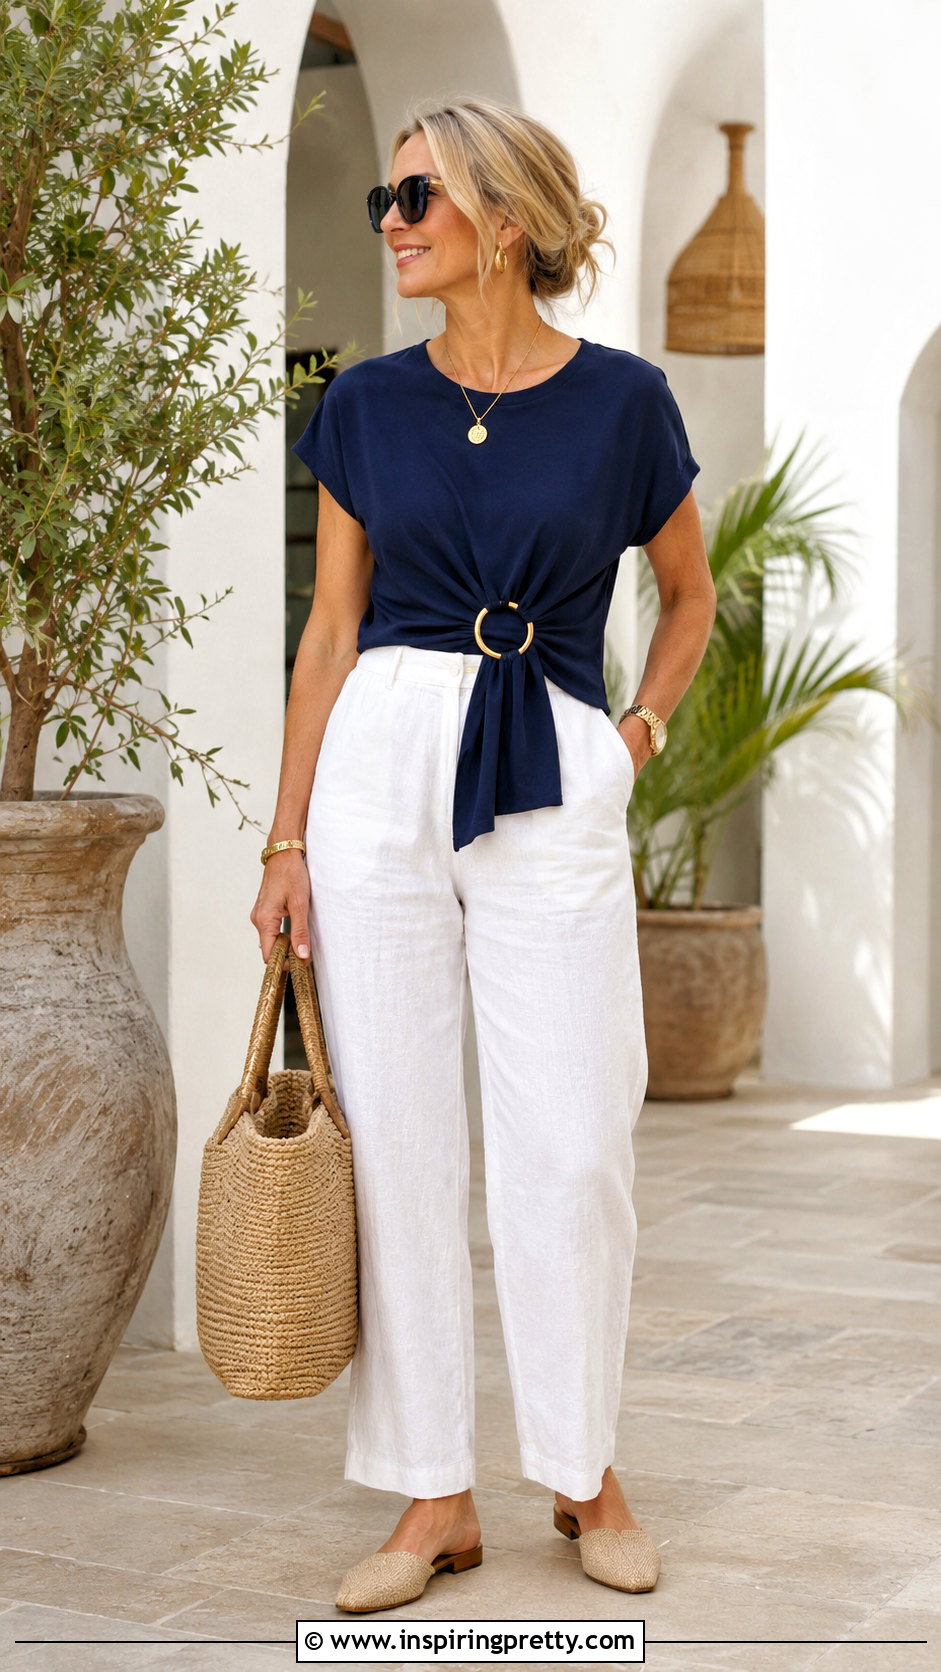
A scarf ring can shape a shirt when the hem is too short to tie comfortably. Pair a relaxed T-shirt with high-waisted linen pants. Gather a small section of fabric at the center or side front and pull it through a lightweight scarf ring. Slide the ring toward your waist, stopping before the shirt feels tight. Divide the fabric tail into two small sections and tuck them around or behind the ring. You can also push the entire tail underneath the shirt for a clean gathered finish. Choose a smooth ring without sharp edges that could catch the fabric. Add flat mules, a woven tote, and minimal jewelry. Matching the ring’s metal to your jewelry helps the practical fastening look like an intentional accessory.
17. Belt Loop Knot T-Shirt With Relaxed Jeans
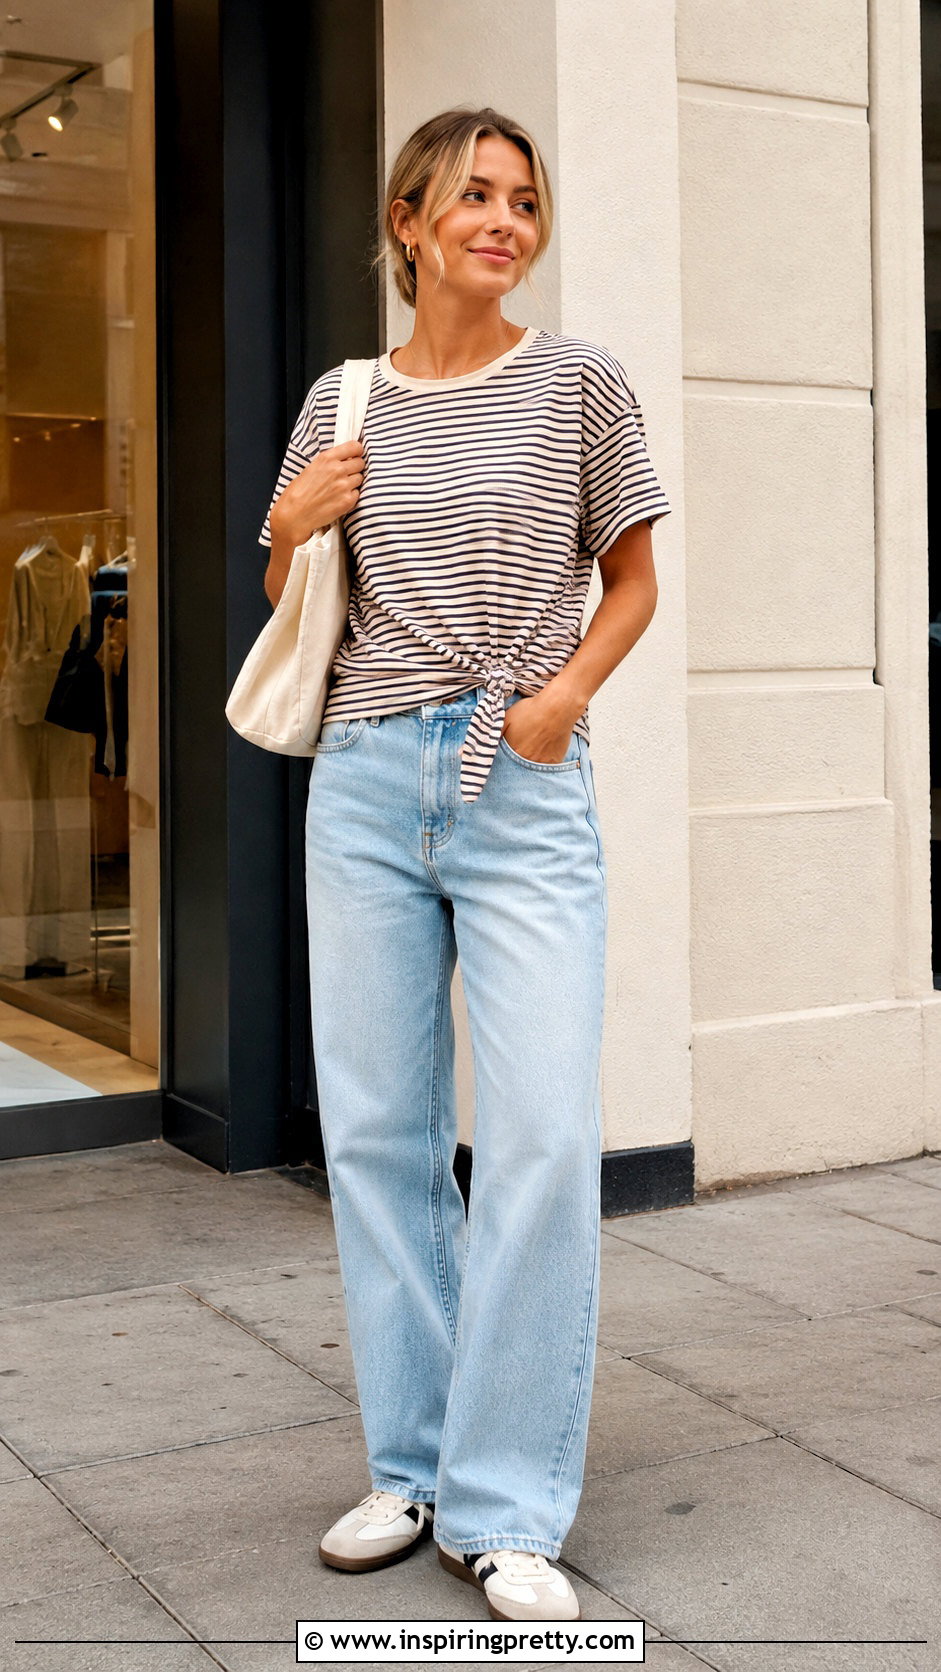
Your jeans’ belt loop can anchor a short shirt that cannot hold a regular knot. Wear a soft tee with mid-rise or high-rise relaxed jeans. Gather a narrow section from the front-left hem and thread it halfway through the nearest belt loop. Do not pull the entire tail through. Take the loose portion, pass it through the fabric loop you just created, and tighten it gently against the waistband. Alternatively, thread two small hem sections through adjacent loops and cross them before tucking the ends. Keep the tension light so you do not strain the belt loop or distort the shirt. Complete the casual outfit with retro sneakers, a canvas shoulder bag, and simple earrings. This technique works best with sturdy, securely sewn belt loops.
18. Cut-And-Tie Knot T-Shirt With A Maxi Skirt
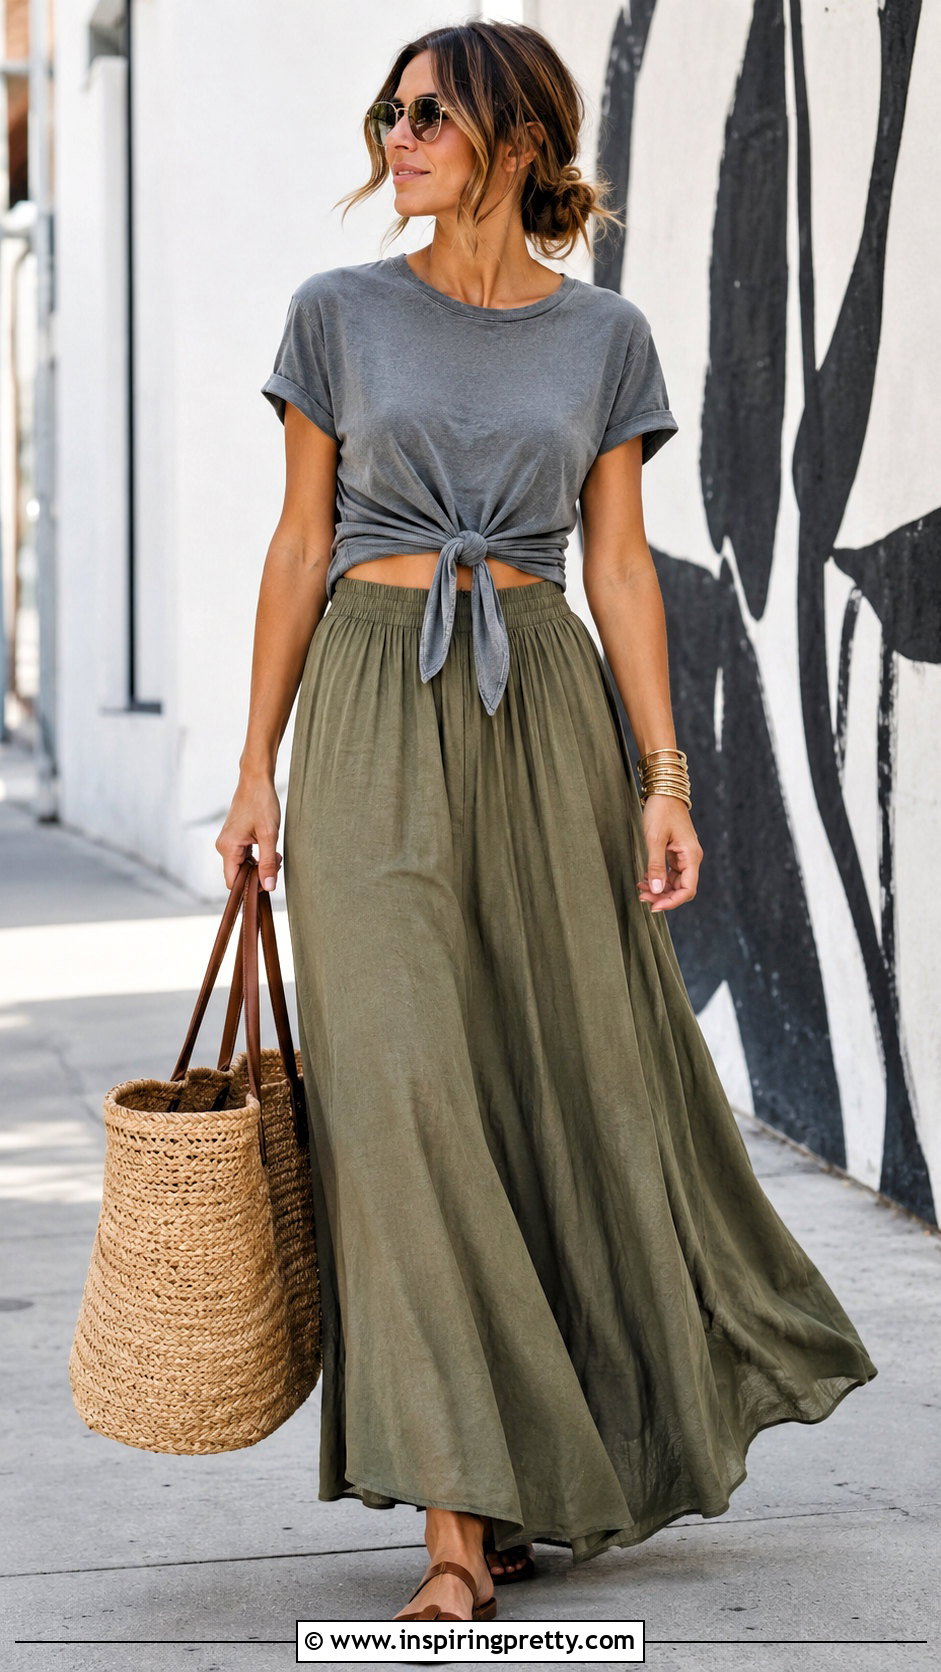
A cut-and-tie front permanently converts an older T-shirt into a knot top. Lay the tee flat and mark the center of the front hem. Cut upward along that center point by approximately three to five inches, adjusting the length to suit the shirt and your preferred coverage. Do not cut while wearing the garment. Put the tee on with a high-waisted maxi skirt, then cross the two newly created front tabs and tie them once or twice. Trim only if the tabs are much longer than needed. The back hem can remain full length or be folded under. Finish with sandals, a tote, and layered bracelets. Test this method on an inexpensive or rarely worn shirt because cutting the hem cannot be reversed.
19. Sewn Tie-Front Knot Top With Tailored Shorts
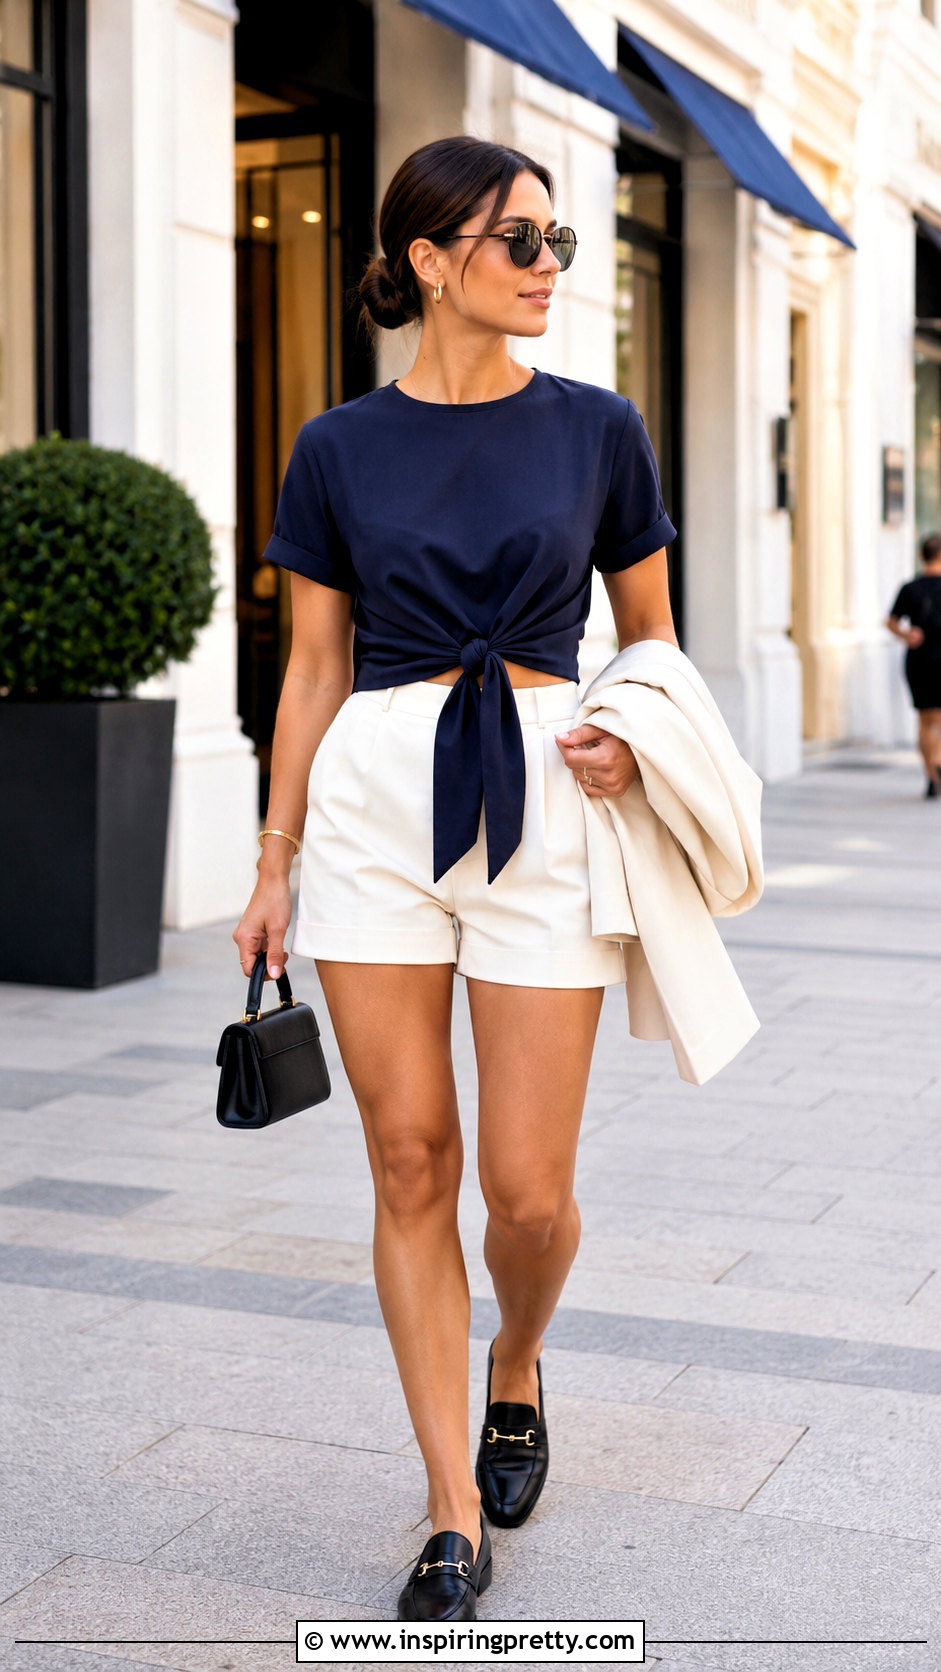
Sewn fabric ties create a durable knot top that does not depend on stretching the original hem. Choose a basic tee, coordinating knit fabric, and high-waisted tailored shorts. Cut two matching fabric strips long enough to cross and knot comfortably. Finish their raw edges with a stretch stitch or narrow hem. Open a small section of the tee’s front hem, insert one tie at each side of the center, and stitch them securely into place. Put on the finished top and tie the extensions into a relaxed front knot. Keep the original shirt fabric smooth behind them. Add loafers, a structured mini bag, and a lightweight blazer. Adding separate tie pieces is a recognized way to transform an ordinary shirt into a reusable knot-front design. ()
20. Knotted T-Shirt Over A Midi Dress
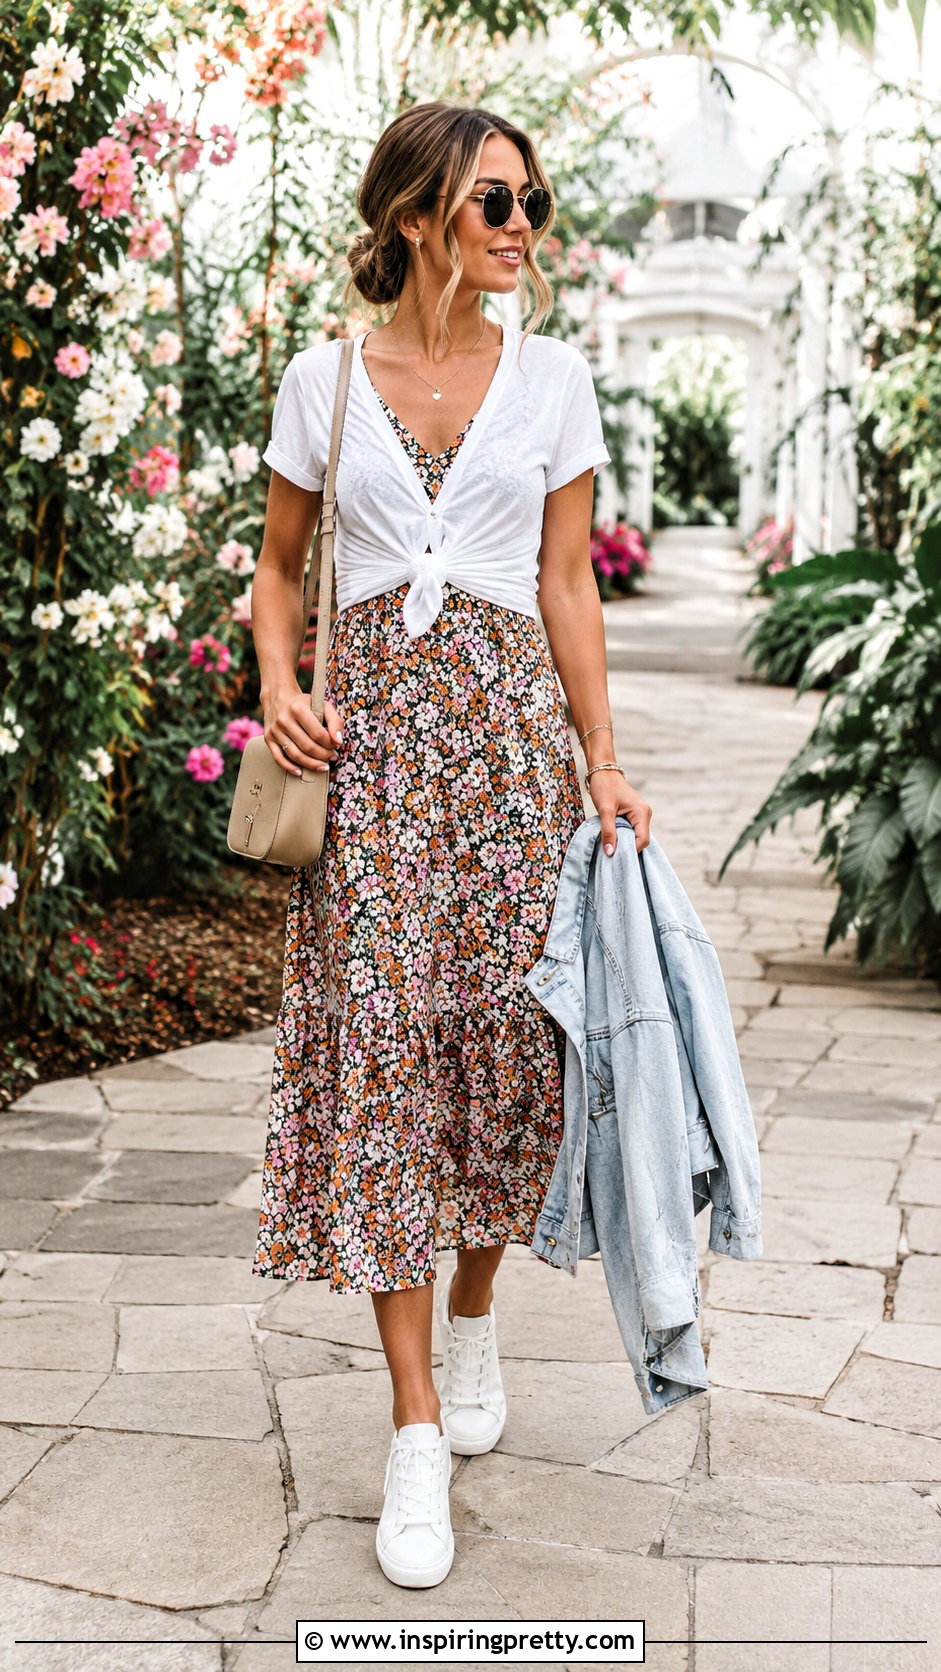
Knotting a T-shirt over a dress creates the look of a top-and-skirt outfit. Start with a fitted or softly draped midi dress and layer a roomy tee over it. Gather the tee’s front hem at your natural waist. Twist the material, form a small bun knot, and tuck the tail through the center. If the knot is bulky, secure the fabric with an elastic from the inside and fold the hem underneath. Arrange the shirt so the dress remains smooth and the waistline appears even around your body. Finish the outfit with clean sneakers, a crossbody bag, and a denim jacket when extra coverage is useful. Choose a tee and dress in complementary colors so the layers look cohesive rather than visually disconnected.
Conclusion:
Once you understand how to make a knot top, you can reshape tees, button-downs, and blouses in ways that suit different outfits and coverage preferences. Traditional front, side, and back knots work best when there is plenty of flexible fabric. Hidden elastics, scarf rings, crisscross tucks, and belt loops provide useful alternatives for shorter shirts. More permanent options include cutting the front hem or sewing on separate ties. Whichever method you choose, begin with light tension and check that you can sit, reach, and move comfortably. Small adjustments often produce a cleaner result than pulling the knot tighter. Use these 20 methods to make familiar tops feel more versatile, intentional, and personalized.
Related posts:


Leave a Reply